
Related Manuals for Chronos 1.4

Summary of Contents for Chronos 1.4
- Page 1 USER MANUAL CHRONOS 1.4 & CHRONOS 2.1-HD Software Version 0.5.1 RE-PDEV-10007 Rev 1.0...
-
Page 2: Preface
Preface Thank you for choosing a Chronos high- speed camera! This camera was designed to be accessible to everyone, and we hope that you will experiment, explore and create. Please share videos, pictures, publications and details about your user cases with our team at any time. We would love to see what you’re creating, and perhaps share it with our audience on social... -
Page 3: Support Contacts
Resources https://krontech.ca/chronos-2-1-resources ORUM The User Forum is a great way to share questions with other Chronos users, as well as get support directly from Kron Technologies staff; use the search function on the forum to find answers to your questions. -
Page 4: Table Of Contents
Table of Contents Preface ..................................2 Support Contacts ............................... 3 Unboxing ..................................8 What’s included ..............................8 First Look ..................................9 Setup ..................................11 ..........................11 ISABLING THE HIPPING ..............................12 NSTALLATION ........................... 12 OWERING P THE AMERA ..........................13 OWERING OWN THE AMERA... - Page 5 Network Interface ..............................29 IP A ........................29 TATIC DDRESS ONFIGURATION IP A DHCP ....................29 YNAMIC DDRESS ONFIGURATION VIA USB ............................. 29 THERNET OVER ..........................29 AVING ETWORK TORAGE Web Control ................................31 ’ ........................31 CCESSING AMERA EBPAGE ’...
- Page 6 CHRONOS 1.4 ..............................61 Annex I – Storage & Shipping ..........................62 Annex J – Mechanical Drawing ..........................63 CHRONOS 1.4 / CHRONOS 2.1-HD ......................63 Annex K – Spectral Response ..........................64 CHRONOS 1.4 ..............................64 CHRONOS 2.1-HD ............................65 Annex L –...
- Page 7 ................................ 66 INDOW ..............................68 ECORD ETTINGS – N ............................. 71 ECORD ORMAL ..........................72 ECORD EGMENTED – G ..........................74 ECORD ATED URST – L ........................76 ECORD OTION / IO S ............................78 RIGGER ETTINGS ..............................80 RIGGER ELAY ..............................
-
Page 8: Unboxing
What’s included The following items are included as standard with all cameras: • Chronos Camera • EN-EL4a Battery • 19V 40W AC Adapter • AC Power Cord (plug depends on region) •... -
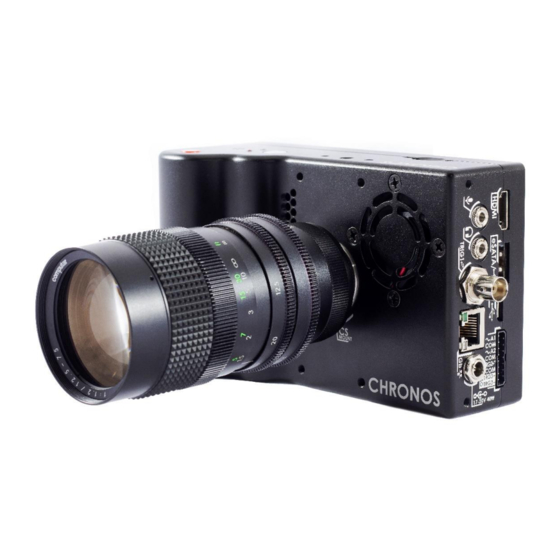
Page 9: First Look
First Look Shutter Button Start or Stop Recording Immediately Video Record Indicator User SD Card Slot Microphone Power Button Power Status Indicator Video Record Indicator Jog Wheel Playback Control UI Navigation Shutter Adjustment Speaker 800x480 LCD Screen With capacitive touchpad C-Mount Lens Adaptor Increases the Focal Distance for a C-Mount Lens... - Page 10 HDMI USB / eSATAp 1080p & 720p Resolutions supported FAT32 and EXT2/3 Storage support Microphone Input Jack Headphone Output Jack IO 1 0-6Volts Adjustable Threshold 30Volts - DC/AC - 50Vpk Max Ethernet 1Gbits/100Mbits/10bits Network Connectivity API Camera Control Webpage Camera Control Power Input 17V to 20V, 40W 2.5mm Barrel Connector...
-
Page 11: Setup
Setup ISABLING THE HIPPING After the camera is unpacked and ready to be fired up, the first thing to be done will be to disable the shipping mode. The shipping mode disables the usage of the power on button, so the camera doesn’t accidentally get activated during transit which would lead to the battery being drained. -
Page 12: Lens Installation
This phenomenon is also called “VIGNETTING” thus, the user ought to be aware of that fact. Please also note that the only lenses that will not cause “VIGNETTING” with the Chronos 2.1-HD are the FUJIAN and SIGMA models in the list above. -
Page 13: Powering Down The Camera
OWERING OWN THE AMERA To turn off the camera, press the power on button for at least 0.5 sec to less than 4 sec**. Like a computer, the camera needs to shut down properly to avoid problems with the operating system. Don't force a hard power down unless the camera is unresponsive and will not power down normally. -
Page 14: Getting Ready
Record Settings page. There are also direct resolution controls at top right. Resolution can be adjusted in increments of 2 pixels vertically, and 16 pixels horizontally on the Chronos 1.4, or 32 pixels on the Chronos 2.1-HD. -
Page 15: Black Calibration
LACK ALIBRATION Black Calibration For best image quality, the camera automatically subtracts a black reference image from all captured frames, correcting for pixel variations that occur on the image sensor. This reference is updated by the Black Calibration. This is unique for each resolution, gain setting, and shutter speed, i.e. -
Page 16: White Balance
White Balance HITE ALANCE White Balance is an adjustment in electronic and film imaging that corrects for the colour balance of the lighting - so that white objects appear white, rather than coloured (for example) yellow when lit by tungsten filament lights, or excessively blue under sunlight. - Page 17 Make sure to select “Custom” in the presets Method: Another way to adjust the White Balance is while in custom mode, a standard “illuminant” matrix can be chosen from the presets list. Method: If one would want to have more flexibility when it comes to adjust the White Balance, then one would be using the “Custom Color...
-
Page 18: Recording
In order to capture all these images, the Chronos cameras will record to what is called a Ring Buffer in the internal high-speed RAM. The ring buffer is a data structure that holds frames of recorded video. -
Page 19: Simultaneous Recording Of Real - Time Footage
Another way to record for longer is to record a lower resolution video. If 4 frames of 800×600 video fit into a Ring Buffer, then 8 frames of 4 Frames of 8 Frames of 800×300 video will fit into 800x600 fit in a 800x300 fit in the same Ring Buffer. -
Page 20: Heat Heet To Our Irst Ecording
HEAT HEET TO IRST ECORDING Set the desired resolution. Perform a Black Cal with On the first boot: the desired Resolution & Defaults to 1280x1024 Frame Rate to ensure Record Settings best image quality Defaults to 1920x1080 Turning the resolution down will get For Maximum sharpness on the you a higher frame rate. -
Page 21: Shutter Button
Triggers can be configured to either stop a recording (after a trigger delay is recorded), start a recording (via BNC cable), or control the camera shutter. The Chronos 1.4 and Chronos 2.1-HD have 3 available external trigger inputs: TRIG2 - IO... -
Page 22: Signal Conditioning
• Make sure IO1 Status shows as Hi when the button is not pressed • Press on the trigger button to verify that the status goes from Hi to Lo • You are ready to go IMPORTANT: For more information on triggering, see our tutorials here: https://www.krontech.ca/chronos-1-4-resources/ https://www.krontech.ca/chronos-2-1-resources/ IGNAL ONDITIONING... -
Page 23: Record End Trigger
ECORD RIGGER When selected, the trigger is setup to terminate the recording. Depending on the state of the Invert flag, either pushing or releasing the button will stop the recording. XPOSURE RIGGER In this mode, an external trigger connected to TRIG1, TRIG2 or TRIG3 controls the start of exposure. -
Page 24: Shutter Gating
HUTTER ATING Shutter gating is about the shutter being directly controlled by TRIG1, TRIG2 or TRIG3. Exposure occurs for as long as the signal is active. Steps to follow to configure the camera properly to use the Shutter Gating: 1. In Record Settings, select the desired resolution and maximum frame. -
Page 25: Shutter Gating Timing Requirements
HUTTER ATING IMING EQUIREMENTS Shutter gating fundamentally places some limitations on the input signal, listed below are the conditions that need to be maintained for perfect integrity of the capture: 1. A minimum exposure of 1us must be maintained; undefined operation may occur with a pulse width below 1us. -
Page 26: Playback
Playback PLAY The Playback and Save are accessed through the play button on the main screen When held down, the Left/Right buttons will play video forward or backward, at the frame rate specified in the Play Rate box. Use the Forward/Backward play button, Slider or Jog Wheel to review the video. -
Page 27: Saving
Saving SAVE Video can be saved in compressed H.264, RAW, CinemaDNG and TIFF formats, to removable storage such as SD cards, USB drives, and external hard drives. Plug an SD card, USB drive or eSATA drive into the camera. The device must contain a partition formatted as FAT32, EXT2 or EXT3. - Page 28 Saving the entire buffer can take a long time, especially at high frame NOTE: rates. If the video is one that you won’t be able to re-create, remove the storage device and plug it into your computer to check that the video has saved properly without dropped frames.
-
Page 29: Network Interface
Network Interface Static IP address configuration area DHCP Setting for dynamically assigned IP Address IP A TATIC DDRESS ONFIGURATION The camera can be configured with a static IP address. To enter a static IP address, enter the Util menu and then navigate the Network tab. A box in the upper-right corner of the display offers fields for the IP, Netmask, and Gateway. - Page 30 In order to use the Network Storage functionality, the SMB v1.0 or NFS share must first be configured on the Host PC. Kron Technologies provides detailed step-by-step instructions on how to configure a Host PC’s network share on the Chronos 1.4 and Chronos 2.1-HD resource pages at https://www.krontech.ca.
-
Page 31: Web Control
AMERA EBPAGE The Chronos can be controlled remotely via a webpage that is served by the camera itself. There are two methods to connect to the camera: 1. Establish a connection to a network via the ethernet port. Then navigate to the Network tab in the Util screen and find the IP address of the camera. -
Page 32: Navigating The Camera
AMERA EBPAGE The Main page of the Chronos control webpage offers similar functionality to the back of camera interface with an alternative layout of configuration and control settings that will adapt to the size of a PC, smartphone, or tablet’s screen size. -
Page 33: Navigating The Camera
AMERA EBPAGE Navigating to the Play & Save page of the Chronos control webpage offers similar functionality to the Play screen on the back of camera interface. Additionally, the Storage Device section of this page offers insight into the remaining storage space on connected external storage device. -
Page 34: Navigating The Camera
AMERA EBPAGE ETTINGS Navigating to the Settings page of the Chronos control webpage allows for the configuration of commonly used settings from the Util, White Balance, and Record Settings -> Trigger Delay screens on the back of camera interface. Additionally, this page allows for the configuration of the webpage’s behavior and theming. -
Page 35: Navigating The Camera
’ : I/O C AVIGATING AMERA EBPAGE ONFIG IMPLE The I/O Config screen is separated into two sections: Simple Configuration and Advanced Configuration. Simple Configuration corresponds closely to the Trigger I/O Settings screen on the back of camera interface, while Advanced Configuration allows for full control over each input, action, and output of the camera’s I/O system. -
Page 36: Navigating The Camera
The BNC Trigger Button >> Toggle Recording preset will configure the camera’s I/O system to start a recording on the first push of the external trigger button, follow by a stop on the subsequent push of the button. ’ : I/O C AVIGATING AMERA EBPAGE... - Page 37 The Combinatorial Block section of the Advanced Configuration allows users to connect the logic of multiple input sources together to produce an output that triggers a recording. Changing parameters will change the arrows depicted in the logic gate legend in real-time to reflect the most current configuration. Under the Advanced Configuration individual preferences for behaviors titled in each box below can be configured.
-
Page 38: Annex A - Hardware
Annex A – Hardware ’ AMERA Shutter Button Start or Stop Recording Power Status Indicator Immediately User SD Card Slot Video Record Indicator Power Button 800x480 LCD Screen With capacitive touchpad Jog Wheel Playback control UI Navigation OWER UTTON • Press to turn on the camera •... -
Page 39: Power Status Indicator
OWER TATUS NDICATOR • Indicates the presence of AC power and the charge status of the battery. Indication Un-Lit No AC Power Connected Charging, less than 80% Solid Yellow charged Alternating Charging, more than 80% Green/Yellow charged Green Battery fully charged HEEL •... -
Page 40: Camera
• This port is also able to supply power using an eSATAp cable. Most 2.5” hard drives and SSDs will work with the Chronos, but most 3.5” drives NOTE: will not. -
Page 41: Bnc
• The BNC connector can be used to synchronize multiple cameras, or to connect the camera to a variety of equipment, including trigger cables. USB OTG • Can be used to connect a camera directly to a computer, and to control it from the computer, using a USB-A to Mini-USB cable. -
Page 42: Camera
’ AMERA OTTOM Battery Compartment Door Slide Latch and pull to open Camera Firmware Micro SD Card Slot Back Focus Ring Tightening Mount Point Screw Insertion Side SD S & C YSTEM • Bootable media for the camera that holds the camera’s operating system. •... -
Page 43: Annex B - Lenses
OUNT DAPTER The Chronos 1.4 & 2.1-HD are CS mount cameras. C mount lenses can be used with the included adapter. Other lens types such as F, EF, and PL can be used with appropriate adapters to convert them to C mount. Common lenses available for the camera are listed below, along with the adapters required to use them. -
Page 44: Lens Selection
Lenses vary in their image circle, which is the amount of the image sensor they can cover: • The Chronos 1.4 uses a 2/3" image sensor (actual sensor dimensions are 8.45mm x 6.76mm) • The Chronos 2.1-HD uses 4/3” image sensor. -
Page 45: Zoom Lenses ( Parfocal Lenses Only )
ENSES PARFOCAL LENSES ONLY 1. Zoom the lens into maximum zoom. 2. Adjust for best focus on an object within the normal focus range, perhaps a few meters away. 3. Zoom the lens all the way out. 4. Loosen the Back-Focus lock screw on the bottom of the camera by about 1 turn using the included 2mm Allen key. -
Page 46: Annex C - Ir Filter
An IR Filter (Infrared Cut-Off Filter) is standard on all cameras. This filter will cut-off wavelengths above 650nm. The Color Chronos 1.4 benefits from the IR Filter because of improved color reproduction. All color pixels (red, green, and blue) have some parasitic sensitivity to IR light, which results in washed-out images, especially in daylight or under incandescent lamps. -
Page 47: Annex D - Trigger Inputs/Outputs
NPUTS UTPUTS The Chronos 1.4 & Chronos 2.1HD have two trigger input/outputs, and one isolated trigger input. Trigger IO is used by the cameras to communicate to other equipment such as lights or external triggers. For example, if you have several cameras set up, you can use a trigger to start or stop all of them at once. -
Page 48: Trigger I N 3
RIGGER • This input is isolated via an optocoupler. • A logic low input is a voltage from -30 to 1V, and a high-level input is a voltage of 3 to 30V. • Voltages between these ranges (1 to 3V) are undefined. •... -
Page 49: Annex E - Troubleshooting
Annex E – Troubleshooting Symptom Possible Problem Solution No Power Insert battery or connect to mains power Remove battery and AC adapter for 10seconds, then Crash Camera won’t power on reconnect and power on. Wrong AC Adapter Ensure that the AC Adapter is providing between 17V Voltage and 20V DC, positive tip. - Page 50 Re-adjust Back-Focus. Please see the “Annex B” for Back-Focus mis-adjusted more details. Lens doesn’t maintain Some lenses, especially lower-end lenses such as the consistent focus while 6-60mm and 2.8-12mm lenses, do not maintain focus zooming. Lens is not parfocal during zoon, so focus needs to be adjusted after zooming.
-
Page 51: Annex F - Specifications
Annex F – Specifications CHRONOS 1.4 Camera Imaging 1280 x 1024 1069FPS Memory 8GB, 16GB, 32GB Record Time 4 Sec (8GB), 8 Sec (16GB), 16 Sec (32GB) Lens Mount CS mount, C mount with included adapter Back-Focus Field adjustable IR Filter 650nm, removable, 15mm x 15mm x 1.1mm... - Page 52 Bit Depth 12-bit Battery Type EN-EL4a Run Time 1.5 hours recording (typical) Charge Time 2 hours (0-80%) Power Input 17-20V 40W 5.5/2.5mm barrel jack, positive tip Network Gigabit Ethernet Trigger Two Trigger inputs/frame probe outputs (BNC & Aux) Adjustable Input Threshold 0 to 6.6Volts Electrically isolated trigger input (Aux Connector) Audio...
- Page 53 Recording Modes Normal Records into the circular buffer. Once a trigger occurs, video can be reviewed and saved. RAM is divided into segments, each recording as Segmented in the Normal mode. Number of segments is use selectable. Recording Modes Gate Burst Frames are captured while trigger is active Continuous Video is saved continuously at up to 60FPS to...
-
Page 54: Chronos 2.1-Hd
CHRONOS 2.1-HD Camera Imaging 1920 x 1080 1000FPS Memory 8GB, 16GB, 32GB Record Time 2.7 Sec (8GB), 5.5 Sec (16GB), 11 Sec (32GB) Lens Mount CS/C mount, Nikon F, Canon EF with adapter Back-Focus Field adjustable IR Filter 650nm, removable, 24mm x 16mm x 1.1mm 5”... - Page 55 Battery Type EN-EL4a Run Time 1.5 hours recording (typical) Charge Time 2 hours (0-80%) Power Input 17-20V 40W 5.5/2.5mm barrel jack, positive tip Network Gigabit Ethernet Trigger Two Trigger inputs/frame probe outputs (BNC & Aux) Adjustable Input Threshold 0 to 6.6Volts Electrically isolated trigger input (Aux Connector) Audio...
- Page 56 Recording Modes Normal Records into the circular buffer. Once a trigger occurs, video can be reviewed and saved. RAM is divided into segments, each recording as Segmented in the Normal mode. Number of segments is use selectable. Recording Modes Gate Burst Frames are captured while trigger is active Continuous Video is saved continuously at up to 60FPS to...
-
Page 57: Annex G - Maintenance & Care
Annex G – Maintenance & Care PTICS • Keep the optical area clean when changing lenses by keeping the body and lens mount caps on when the lens is separated from the camera. • If the lens or sensor/IR filter is dusty, remove the dust using clean, dry compressed air, dusting gas, or a dusting squeeze bulb. -
Page 58: Annex H - Record Rates & Times
– Record Rates & Times ECORD RESET VS ECORD URATION Maximum recording time for a sample of common resolutions at max FPS. CHRONOS 1.4 Record Time (Sec) Record Time (Sec) Record Time (Sec) Resolution Max FPS (8 GB) (16 GB) -
Page 59: Chronos 2.1-Hd
CHRONOS 2.1-HD Record Time (Sec) Record Time (Sec) Record Time (Sec) Resolution Max FPS (8 GB) (16 GB) (32 GB) 1920 x 1080 1000 2.76 5.51 11.02 1920 x 720 1495 2.77 5.53 11.06 1920 x 512 2095 2.78 5.55 11.11... -
Page 60: Record Fps Vs Record Duration
ECORD ECORD URATION Recording time for a sample of resolution at max FPS, half FPS and one-quarter FPS. CHRONOS 1.4 Record Time (Sec) Record Time (Sec) Record Time (Sec) Resolution Max FPS (8 GB) (16 GB) (32 GB) 1280 x 1024 1069 4.08... -
Page 61: Chronos 1.4
ECORD ESOLUTION VS ECORD URATION Recording time for a sample of frame rates as resolution decreased. CHRONOS 1.4 Record Time (Sec) Record Time (Sec) Record Time (Sec) Resolution Max FPS (8 GB) (16 GB) (32 GB) 1280 x 1024 1069 4.08... -
Page 62: Annex I - Storage & Shipping
Annex I – Storage & Shipping • Store the camera in a cool, dry, clean location. • When shipping the camera, it's recommended to put it in a plastic bag with desiccant to avoid problems with condensation during temperature changes. •... -
Page 63: Annex J - Mechanical Drawing
Annex J – Mechanical Drawing CHRONOS 1.4 / CHRONOS 2.1-HD NOTE: The Chronos 1.4 and 2.1-HD have identical enclosure dimensions. Page | 63... -
Page 64: Annex K - Spectral Response
Annex K – Spectral Response CHRONOS 1.4 NOTE: These spectral response curves are in units of quantum efficiency Page | 64... -
Page 65: Chronos 2.1-Hd
CHRONOS 2.1-HD NOTE: These spectral response curves are in units of quantum efficiency Page | 65... -
Page 66: Annex L - Software Functions
This Annex discusses each screen shown on the camera in detail. While the User Interface on the Chronos is designed to be intuitive and to follow common operating modes found in many other cameras, this section provides concise descriptions on the action performed by each button shown on various screens. - Page 67 INDOW ONTINUED Control Function White Bal Shows the White Balance dialog box, which allows setting the color temperature (Color of the recorded footage. Cameras) Enables or disables focus peaking, which highlights sharp edges in a Focus Aid conspicuous color. This can be used when adjusting focus is challenging. The color and sensitivity are adjustable from the Util menu.
-
Page 68: Record Settings
Adjusts the position of the recorded video relative to the top left corner of the image sensor, in multiples of 16 pixels horizontally for the Chronos 1.4, 32 pixels Offset horizontally for the Chronos 2.1-HD, and 2 pixels vertically. - Page 69 Adjusts the ISO setting. A higher gain results in increased sensitivity (less lighting required), but increased image noise. For the best image quality, use the lowest possible gain, and increase light level or lens aperture if more light is required. Gain Chronos 1.4 Chronos 2.1-HD Color ISO Mono ISO Color ISO...
- Page 70 ECORD ETTINGS ONTINUED Control Function Increases the brightness in the scene by automatically modifying White Balance and Color Matrix settings. As starting points, this function uses CIECAM16/D55 Digital Gain and a color temperature of 3200K (Tungsten). A setting of None will not modify existing settings.
-
Page 71: Record Mode - Normal
– N ECORD ORMAL Control Function Record Length Set the duration of the triggered recording, in seconds. The timing of this (Seconds) recording can be changed in the Trigger Delay window. Record Length Set the duration of the triggered recording, in recorded frames. The timing of (frames) this recording can be changed in the Trigger Delay window. -
Page 72: Record Mode - Segmented
ECORD EGMENTED In Segmented mode, multiple video segments are kept in memory. This is different from Normal mode, in which only one continuous video clip can be kept in memory. In Segmented mode, when the recording is started, and with each activation of the trigger, a new segment is stored in memory. - Page 73 By default, the Ring Buffer is enabled. In this mode, the earliest segment will be overwritten with a new one as soon as the record buffer is full. New segments will be created until the recording is stopped via the red shutter button on the top or the camera, or the stop button on the Main screen. This behavior can be changed by checking the Disable Ring Buffer option.
-
Page 74: Record Mode - Gated Burst
– G ECORD ATED URST In Gated Burst mode, multiple videos are kept in memory. New video is recorded only while the trigger input is active. Record mode only affects which frames are stored in memory; it does not affect exposure time. - Page 75 – G ECORD ATED URST ONTINUED Control Function Prerecord Sets the amount of video to save before the trigger becomes active, in seconds. (seconds) Prerecord Sets the amount of video to save before the trigger becomes active, in recorded (frames) frames.
-
Page 76: Record Mode - Live Slow Motion
– L ECORD OTION In Live Slow Motion mode, a short segment of video is recorded, and then played back in a loop. The interface allows you to set the desired loop time, and the choice of playback rate can be either 15, 30, or 60 FPS. - Page 77 – L ECORD OTION ONTINUED Control Function Set the desired playback frame rate. This setting affects the recording time, Playback Rate recording frames, and slowdown factory, even when the recording frame rate is (FPS) not changed. The options are 15, 30, and 60 frames per second. When this Loop Recording Mode is selected, a short segment is recorded and Continuous played back immediately for the duration specified.
-
Page 78: Trigger / Io Settings
/ IO S RIGGER ETTINGS The Trigger I/O screen allows for the configuration of external inputs, and control over how external inputs affect the recording process. This section describes the function of each selection on the Trigger I/O screen. For a detailed dialogue of each triggering mode, please refer to the Triggering section in the main manual. - Page 79 / IO S RIGGER ETTINGS ONTINUED Control Function Sets function of IO to control the start and length of exposure for each frame. Shutter Gating Normal recording is prevented if this mode is selected without a valid signal. Frame Sync Sets function of IO to frame sync output.
-
Page 80: Trigger Delay
RIGGER ELAY The Trigger Delay page lets the user configure when video is captured relative to an external trigger. The delays configured in this screen do not apply to recordings started by the shutter button on the top or the camera and the record button on the display. - Page 81 Set pre-record delay to 0, post-trigger to 0, and pre-trigger to either the Reset to maximum record time for the given Chronos model, or the maximum record Default length as set in Record Modes.
-
Page 82: Black Calibration
Pressing the Black Calibration button updates the reference image. Black Calibration is unique to both resolution and gain. The Chronos will attempt to perform an automatic “quick” black calibration when changing to a resolution that contains no prior black calibration reference frame. -
Page 83: White Balance
HITE ALANCE Set White Balance to correct for lighting temperature or tint. White Balance is only applied when saving in the H.264 and TIFF formats. To use a pre-set White Balance, open the drop-down list in the top right of the screen and select the pre- set closest to your current lighting conditions. - Page 84 HITE ALANCE ONTINUED Control Function White Balance Choose from pre-set and custom White Balances. Sets custom White Balance based on white reference. If the Custom Color Matrix window is open, the White Balance will be set Set Custom according to manually entered values. White Balance White Balance values derived from either of the above methods will be stored as Custom in the drop-down menu.
-
Page 85: Custom Color Matrix Window
USTOM OLOR ATRIX INDOW This window allows manual editing of the values used to process colors. These values are applied only when saving in the H.264 and TIFF formats. Control Function These 9 values are used in the process of converting between color spaces. Custom Color Matrix Edits to them will be visible on the image immediately but will be reset unless the... -
Page 86: Play
The Playback mode allows review, trimming, and saving of recorded frames. The image on the left displays the frames that have been recorded. The colored bar to the right of the slider indicates the region to be saved. When saving more than one region, the colored bars will change colors to denote the regions that have previously been saved. - Page 87 ONTINUED Control Function Playback The scroll bar controls the playback position over the entire recording. The Slider bottom is the beginning of the buffer, while the top is the end. Rotate to control current frame position. Turning the wheel clockwise will Jog Wheel advance playback by one frame per detent.
-
Page 88: Save Settings
ETTINGS The Save Settings pop-up allows for the configuration of the file before it is written to the external storage device. By default, frames are encoded as H.264 MPEG-4 files and saved to the last storage device that was attached to the camera. Bits per pixel, Saved File Framerate and Max Bitrate are only used when saving as H.264. - Page 89 ETTINGS ONTINUED Control Function When enabled, the timestamp overlay will be shown on top of the image in Playback mode, videos saved as H.264 MPEG-4, and images saved as TIFF. Text Overlay (H.264/TIFF) Information about each frame’s position within the recording will be overlaid across the bottom left corner of each frame of encoded video or TIFF image.
-
Page 90: Comparison Of Save Formats
75% the size of Raw 16 bit. tool, such as our pyraw2dng Raw 16 bit python script found here: Raw16 has been kept for legacy support purposes. https://github.com/krontech/chronos- utils/ CinemaDNG has the best image quality • Individual frames saved in one CinemaDNG... -
Page 91: Utilities Screen - Main
TILITIES CREEN The Utilities page, referred to in short as Util, contains general settings and information about the camera. Control Function Enables Focus Peaking, which highlights objects that are in-focus with the color Focus Peaking shown in the dropdown box to the right. This feature can also be enabled or Enable disabled via the Focus Aid checkbox on the main screen. - Page 92 – M TILITIES CREEN ONTINUED Control Function Select for warnings about overwriting video stored in memory. When the Record button is pressed, the warning manifests as a pop-up titled ‘Unsaved Video in RAM’. Selecting OK continues while Cancel prevents new video from being recorded so that the previous recording can be saved via the Play screen.
- Page 93 Live Record @60fps Audio is also recorded in this mode. The Chronos will automatically switch between the built-in microphone and the line input jack if a line input is detected. The resulting file is an MPEG-4 video with bitrates up to 6 Mbps and audio sampled at 48 kHz.
-
Page 94: Storage Tab
TORAGE The Storage page allows for interactions with storage devices that are attached to the camera. This page is also used to backup and restore camera settings and calibration files, as well as to search for software updates over the internet. Control Function Backs up the user’s configuration preferences, such as resolution, focus... - Page 95 TORAGE ONTINUED Control Function Restore Calibration Restore saved settings from a USB flash drive. Data Finish any outstanding writes to the selected storage device and unmount the Eject Disk/ filesystem from the camera’s control. This is equivalent to the “Safely Remove” SD Card option on PCs and protects against the loss of unwritten data.
-
Page 96: Software Updates
OFTWARE PDATES Selecting the Apply Software Update button from the Storage tab in the Util screen will start an update utility that provides a way to search for and install software updates. This screen also allows the User Interface of the camera to be switched between normal use and headless mode. Control Function Update From... - Page 97 2. Press-in and hold both the shutter button and the rotary encoder wheel. 3. Boot the camera by pressing the power button. 4. Release the shutter button and rotary encoder wheel once the Chronos logo is shown. 5. The Software Updates screen will be shown after a few seconds.
- Page 98 OFTWARE PDATES ONTINUED The following section provides a step-by-step demonstration of the camera’s online software update procedure. Prior to starting this procedure, please ensure that the camera is connected to the internet via the ethernet port. Network status can be fount by navigating to the Network tab in the Util screen. WARNING: Always back up configuration and calibration data prior to a software update.
- Page 99 OFTWARE PDATES ONTINUED Step 3. If packages are eligible for upgrade, select Yes to continue. Step 4. The camera will begin to install new packages. Step 5. If the update is successful, the camera will automatically reboot. Page | 99...
-
Page 100: Network Tab
ETWORK The network interface on the Chronos camera can serve as a powerful and flexible way to use the camera. Over the network, the camera can be controlled via its webpage, footage can be saved via Server Message Block (SMB) and Network File System (NFS) mounts, and a Real Time Streaming Protocol (RTSP) feed of the live output can be viewed. -
Page 101: About Tab
BOUT This tab contains information about the camera hardware, software, and current operating conditions. In the event that support from Kron Technologies is required, it is useful to provide a photo of this screen along with the rest of the inquiry if possible. The lower left-hand side of the display shows live information pertaining to the camera’s internal systems. -
Page 102: Factory Tab
ACTORY This tab contains functionality related to the manufacturing and factory calibration of the camera, as well as user settings that are less likely to be changed during normal operation. Control Function Service Enters service mode. Password If used without the direction of Kron Technologies, the warranty is void. Remove User Removes the saved Black Calibration data. - Page 103 ACTORY ONTINUED Control Function Provides an option to change the theme of the Graphical User Interface (GUI) GUI Mode between dark and light modes. Moves the vertical bar of controls on the Main screen to the left-hand side of the UI on Left Side screen.
Need help?
Do you have a question about the 1.4 and is the answer not in the manual?
Questions and answers