Table of Contents
Advertisement
Available languages
Available languages
ENGLISH
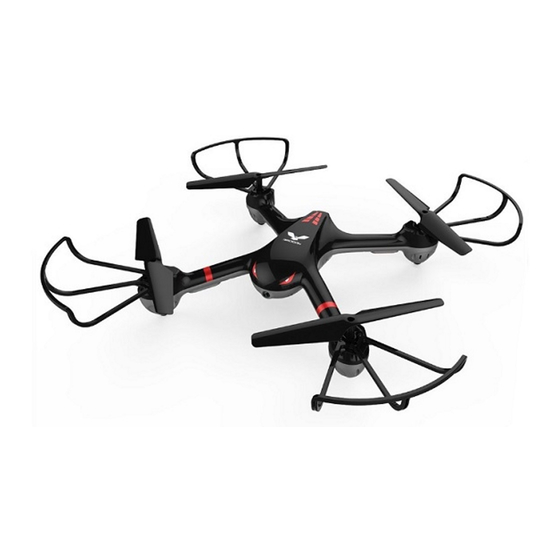
Fuselage Length:310.5mm
Overall height: 60mm
Main Rotor Diameter: 138mm
Introduction
The Quad-rotor design ensures a more stable and powerful performance .
The newly-designed structure makes assembly and maintenance much easier.
Adopting 2.4G auto-connection technology, scores of drone can be flown
at the same time.
Equipped with the newest 6-Axis Gyro control system, this drone is
characterized by stable flights and maneuverability.
Fully charged battery can support 6-8 minutes steady flight.
Product/spare parts included in this packaging
Description
Aircraft
Remote Controller
Manual
QTY (pc)
Description
1
Propeller
1
Protecting Guard Screw
1
Protecting Guard
Gross Weight: about 110g
Battery: Li-polymer 3.7V 550 mAh
Charging Time: about 90 minutes
QTY (pc)
4
4
4
Description
Propeller Screw
Screwdriver
USB charging cable
QTY (pc)
4
1
1
Advertisement
Table of Contents

Summary of Contents for DROCON Cyclone
- Page 1 ENGLISH Fuselage Length:310.5mm Gross Weight: about 110g Overall height: 60mm Battery: Li-polymer 3.7V 550 mAh Main Rotor Diameter: 138mm Charging Time: about 90 minutes Introduction The Quad-rotor design ensures a more stable and powerful performance . The newly-designed structure makes assembly and maintenance much easier. Adopting 2.4G auto-connection technology, scores of drone can be flown at the same time.
- Page 2 Important statement and safety guidelines Thank you for purchasing DROCON product. Please read this manual carefully before use and retain it for future reference. Important statement ● This drone is not a toy, but a hobby-grade drone. It should be assembled and operated properly.
- Page 3 ● Keep away from heat sources The drone is made of metal, fiber, plastic, electronic material and other component. Please keep it away from any heat source to avoid deformation or even damage caused by sun exposure and high temperature. ●...
- Page 4 Function switch Function description Push up the power switch to power on the transmitter; Power switch push down the power switch to turn off the transmitter. There are 2 flight modes for this model: low speed and High/Low speed high speed. switch A single press is light switch;...
- Page 5 The drone Major parts of the drone Light Propeller Protecting Motor Guard How to change new battery for the drone Note: Please connect the power plug as per the indicated positive and negative polarity. How to charge the drone Turn off the aircraft, open the battery door ,unplug the battery cable from the power wire plug and take out the battery.
- Page 6 Preparation for flight The remote control ●Recheck the playground; be sure that it is free from crowd, animals and other barrier. ●Turn on the remote controller and the power indicator light flashes rapidly and sends out connection signal to the drone. ●Slide the throttle control stick up to the top;...
- Page 7 Head of the drone Clockwise Counter Clockwise (Motor 2) (Motor 3) Left Right Counter Clockwise Clockwise Tail of the (Motor 1) (Motor 4) drone The blue lights are at the front of the drone; the orange lights are at the back of the drone. ●...
- Page 8 Operating Remote controller Aircraft Remote controller Aircraft Down Forward Backward 3D Roll Forward flips &rolls Leftward Rightward flips & rolls flips & rolls Backward flips & rolls Warm tips: To flip and roll, please press down the 3D rolling button and push the direction control stick to the edge at the same time.If not, the aircraft will not perform the flip &...
- Page 9 Exit headless mode: When the drone is in headless mode, press the function button at the top left corner for 2 secs, and a “beep beep beep”sound will follow. The lights of the drone will be turned on followed by flashing until the blinking comes to a halt.
- Page 10 When you take off,make sure When you take off,make sure that your front is the aircraft's that your front is the aircraft's front; turn the right control front; push up the right control stick to the right, the aircraft stick, the aircraft will fly forward. will fly rightward.
- Page 11 Protection frame and propeller removal 1.Take out the srews of the 2.Vertically pull out the 3.Release the propellers protection guard by turning proection guard leg from by turning the screw counter clockwise. the interfaces counter clockwise. ● Please make sure that the clockwise and the counter clockwise propellers are installed on the correct motors, because the drone will not fly as per norm if the wrong propellers are installed.
- Page 12 708007 708008 708009 Battery Cover/Battery Motor case and steel tube Anti-vibration pad Compartment/Camera Accessories 708010 708011 708012 Clockwise Motor/ Counter Clockwise iron Shaft/Glue Motor Gear Motor/Motor Gear Hexagonal/Motor Gear 708013 708014 708015 Receiver PCB Front and rear lights Screws Pack Product Manual English - German 708016...
- Page 13 708051 708052 GR306 Gift Box Inner Blister Remote Controller Trouble shooting phenomenon reason solution Gyro of the aircraft is under Set the aircraft to any The lights are flashing quickly. signal detecting condition. flat surface. In the absence of a signal,activate the The drone has not received remote control for the...
- Page 14 For Android system, please visit our website www.mjxrc.net to download the software “DROCON”. For Apple IOS system, please go to the APP store to download the software “DROCON”. (Or download the mobile phone APP by scanning the QR code below.)
- Page 15 Note: a) Changes or modifications not expressly approved by the party responsible for compliance could void the user's authority to operate the equipment. b) This equipment has been tested and found to comply with the limits for a Class B digital device, pursuant to part 15 of the FCC Rules. These limits are designed to provide reasonable protection against harmful interference in a residential installation.
- Page 16 GERMAN BEDIENUNGSANLEITUNG Rumpflänge: 310,5mm Nettogewicht: etwa 100g Gesamthöhe: 60mm Batterie: Li-Polymer 3,7V 550 mAh Hauptrotor-Durchmesser: 138mm Ladezeit: etwa 90 Minuten Einleitung Das Quad-Rotor-Design stellt einen stabileren und leistungsfähigeren Flug sicher. Dieses neue Design der Struktur macht auch die Installation und Wartung viel leichter. Dank der 2.4G Auto-Verbindungs-Technologie können die vier Rotoren der Drohne gleichzeitig bedient werden.
- Page 17 Wichtige Hinweise und Sicherheitsrichtlinien Vielen Dank für Ihren Kauf des DROCON Produkts. Bitte lesen Sie sich diese Bedienungsanleitung sorgfältig durch und bewahren Sie diese gut auf. Wichtige Hinweise ● Diese Drohne ist kein Spielzeug, sondern eine Drohne. Sie sollte ordnungsgemäß zusammenge baut und bedient werden.
- Page 18 ● Vermeiden Sie Hitzequellen Die Drohne besteht aus Metall, Faserstoffen, Plastik, Elektrokomponenten und weiteren Komponenten. Bitte vermeiden Sie Hitzequellen, um Deformationen oder Schäden durch hohe Temperaturen oder das Sonnenlicht zu vermeiden. ● Umweltschutz-Maßnahmen Bitte recyceln Sie die Drohne oder deren Bestandteile je nach lokaler Gesetzgebung, um unsere Umwelt zu schützen.
- Page 19 Funktionstaste Funktionsbeschreibung Betätigen Sie die Power-Taste nach oben, um die Fernbedienung einzuschalten. An/Aus Taste Betätigen Sie die Power-Taste nach unten, um die Fernbedienung auszuschalten. Es gibt 2 Flugmodi für dieses Modell: langsame und H/L Geschwindigkeits schnelle Geschwindigkeit. -Taste Drücken Sie einmal auf die Taste, um das Licht ein- oder auszuschalten.
- Page 20 Die Drohne Wichtige Teile der Drohne Licht Propeller Schutz Motor So laden Sie die Drohne auf Note: Please connect the power plug as per the indicated positive and negative polarity. So laden Sie die Drohne auf Schalten Sie die Drohne aus, öffnen Sie das Batteriefach und ziehen Sie das Batteriekabel vom Stromkabel, um die Batterie zu entnehmen.
- Page 21 Flugvorbereitung Die Fernebedienung ●Überprüfen Sie Ihre Umgebung. Stellen Sie sicher, dass es keine Menschen, Tiere oder andere Hindernisse in der Nähe gibt. ●Schalten Sie die Fernbedienung ein und das Anzeigelicht wird schnell blinken. Die Drohne wird nun mit dem Sender verbunden.
- Page 22 Kopf der Drohne im Uhrzeigersinn Gegen den Uhrzeigersinn (Motor 2) (Motor 3) links Recht im Uhrzeigersinn Gegen den Uhrzeigersinn (Motor 1) (Motor 4) Schwanz der Drohne ● Die blauen Lichter befinden sich an der Vorderseite der Drohne. Die orangefarbenen Lichter befinden sich an der Hinterseite der Drohne.
- Page 23 Operating Fernbedienung Drohne Fernbedienung Drohne oben Unten Vorwärts rückwärts 3D Flip Forward flips &rolls Leftward Rightward flips & rolls flips & rolls Backward flips & rolls Tipps: Für eine Rolle drücken Sie bitte die 3D Taste und bewegen den Steuerungshebel gleichzeitig in eine Richtung.
- Page 24 Ausgang Kopfloser Modus: Wenn sich die Drohne im Kopflosmodus befindet, drücken Sie auf diese Taste in der oberen linken Ecke für 2 Sekunden und ein dreifacher Piepton wird zu hören sein. Die Lichter der Drohne schalten sich ein, blinken und blinken dann nicht mehr. Das heißt, dass der Kopflosmodus deaktiviert wurde. Modell-Kalibrierung im Kopflosmodus:...
- Page 25 Beim Starten stellen Sie sicher, dass die Nase der Drohne von Ihnen wegzeigt. Bewegen Sie den rechten Steuerungshebel und die Drohne wird vorwärts fliegen. Die jeweilige Richtung entsprecht Ihrer Ausrichtung nach vorne. Wenn Sie also beispielsweise den rechten Steuerungshebel nach rechts bewegen, wird die Drohne nach rechts fliegen und so weiter.
- Page 26 Entfernung des Schutzrahmens und der Propeller 1. Lösen Sie die Schrauben des 2. Ziehen Sie den Schutz 3. Lösen Sie die Propeller, Schutzes, indem Sie diese senkrecht von den indem Sie die Schrauben gegen den Uhrzeigersinn Schnittstellen heraus. gegen den Uhrzeigersinn aufschrauben.
- Page 27 708007 708008 708009 Battery Cover/Battery Motor case and steel tube Anti-vibration pad Compartment/Camera Accessories 708010 708011 708012 Clockwise Motor/ Counter Clockwise iron Shaft/Glue Motor Gear Motor/Motor Gear Hexagonal/Motor Gear 708013 708014 708015 Receiver PCB Front and rear lights Screws Pack Product Manual English - German 708016...
- Page 28 708051 708052 GR306 Gift Box Inner Blister Remote Controller Trouble shooting Phänomen Grund Lösung Positionieren Sie die Die Gyro der Drohne befindet Drohne auf einer ebenen Die Lichter blinken schnell. sich in der Signalerkennung. Oberfläche. Bei einem fehlenden Signal aktivieren Sie Die Drohne hat kein Signal die Fernbedienung, von der Fernbedienung...
- Page 29 APP Fernbedienung Software Download Für Android Systeme besuchen Sie bitte unsere Webseite www.mjxrc.net, um die „DROCON“ Software herunterzuladen. Für iOS Systeme laden Sie die App „DROCON“ bitte im App Store herunter oder scannen Sie folgenden QR Code. QR Code (IOS system) QR Code(Android system) Wenn eine Speicherkarte in dem Kartensteckplatz eingesteckt wurde, können die von der Kamera...
- Page 30 Note: a) Changes or modifications not expressly approved by the party responsible for compliance could void the user's authority to operate the equipment. b) This equipment has been tested and found to comply with the limits for a Class B digital device, pursuant to part 15 of the FCC Rules. These limits are designed to provide reasonable protection against harmful interference in a residential installation.
- Page 31 CYCLONE English Instruction Manual Deutsch Bedienungsanleitung V1.0 2017.06...
Need help?
Do you have a question about the Cyclone and is the answer not in the manual?
Questions and answers