Table of Contents
Advertisement
Quick Links
Advertisement
Table of Contents

Related Manuals for Josef prusa PRUSA RESEARCH MINI


Summary of Contents for Josef prusa PRUSA RESEARCH MINI
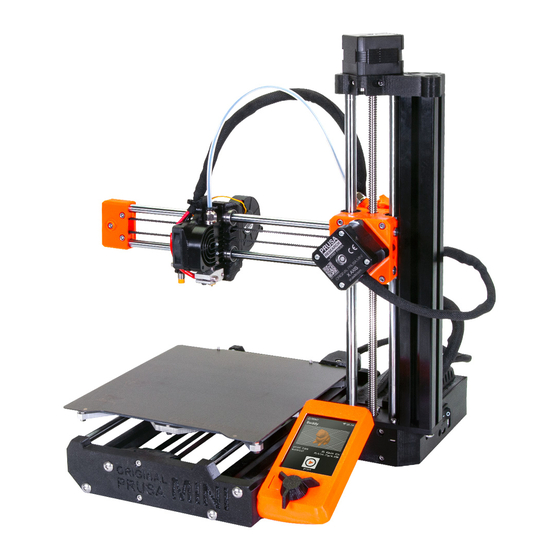
- Page 1 3D PRINTING HANDBOOK USER MANUAL FOR ORIGINAL PRUSA MINI...
- Page 2 Original Instructions: Basic Info Please always refer to the www.prusa3d.com/drivers/ for an updated version of this 3D printing handbook (PDF download). Failure to read the handbook may lead to personal injury, inferior results, or damage to the 3D printer. Always ensure that anyone who operates the 3D printer knows and understands the contents of the Manual/Handbook.
- Page 3 3D printing technology significantly increased among the public. All 3D printers by Josef Prusa are open-source and based on the RepRap philosophy - you can use your 3D printer to produce parts for building another 3D printer.
- Page 4 1 Introduction 2 Glossary 3 Package contents - Accessories (bundled / optional) 4 Handling / Transporting the printer 5 Quick-Start Info 5.1 Disconnecting the power supply 5.2 How to contact tech support 5.3 Unpacking, assembly and first start 6 Your first print 6.1 Basic controls 6.2 Updating the firmware 6.3 Preparing flexible steel sheets...
- Page 5 10.9 Filament sensor (optional accessory) 10.9.1 Running out of filament 10.9.2 False sensor readings and debugging 10.10 Nozzle cleaning 10.11 Replacing / changing the nozzle 10.12 Flashing unsigned firmware 11 FAQ - common issues and how to solve them 11.1 Skewed X-axis 11.2 Printer can’t read the USB drive 11.3 Loose X- and/or Y-axis belts 11.4 Filament stuck in the PTFE tube...
- Page 6 Information about functionality, correct usage and maintenance of this device can be found in this handbook and online at help.prusa3d.com. The device must be disconnected from the power supply (power adapter), before performing any kind of service. Consult the handbook before performing maintenance on the device.
- Page 7 Product details Title: Original Prusa MINI Manufacturer: Prusa Research a.s., Partyzánská 188/7A, Prague, 170 00, Czech Republic Contact e-mail: info@prusa3d.com EEE group: 3 (IT and/or telecommunication equipment), Device use: indoor only Power supply: AC/DC switching adaptor, input 100-240 VAC, 50 / 60 Hz, 2.0 A / Max output 24 V, 6.67 A, 160 W MAX Fuse: min.
- Page 8 Please be very cautious during any interaction with the printer. This printer is an electrical device with moving and high-temperature parts. The device is for indoor use only. Do not expose the printer to rain or snow. Always keep the printer in a dry environment at a minimum distance of 30 cm from other objects. Make sure none of the vents/fan outlets are blocked.
- Page 9 1 Introduction Thank you for purchasing the Original Prusa MINI 3D printer from Josef Prusa! Your purchase supports us in the further development of the MINI and other devices. Original Prusa MINI is our compact, smart and affordable 3D printer, which was designed as a 3D printing workhorse and a great starter printer.
- Page 10 2 Glossary Spring steel sheet - comes in two variants, smooth and textured. This is where the printed object appears. Please read the maintenance instructions carefully to ensure optimal conditions for 3D printing. Heatbed - located directly under the spring steel sheet. Heatbed ensures good adhesion of the printed object.
- Page 11 Print head - Lightweight print head consisting of the hotend (printing nozzle), M.I.N.D.A. probe and two fans. The heaviest parts of the extruder were moved onto the Z-axis tower to improve print quality. 12. Nozzle - 0.4mm nozzle, can be replaced with e.g. 0.25mm or 0.6mm E3D-compatible nozzles to achieve various effects.
- Page 12 5 Quick-Start Info Original Prusa MINI 3D Printer Place in a safe, dry and Do not place near running horizontally stable location (e.g. water or outside workbench) Do not pull the power plug Place the power brick where from the printer directly. It has nobody can trip over the power a locking mechanism - pull the cord...
- Page 13 5.1 Disconnecting the power supply The power supply plug that goes in your printer has a locking mechanism - do not pull it with force! Do not pull the cable! First, unlock the mechanism by pulling the cover of the plug away from the printer. Once the mechanism is unlocked, you can pull the plug out of the printer.
- Page 14 6 Your first print Preparing the printer for the first print takes about 30-50 minutes including assembly. Please pay attention to the following steps to ensure the machine will operate as intended. In this chapter, you will learn how to: Control the printer Update the firmware Prepare the print surface for the first print...
- Page 15 6.2 Updating the firmware The printer is shipped with latest firmware available at the time of manufacturing. However, we recommend to check www.prusa3d.com/drivers for the latest firmware version to ensure optimal printing experience. To flash firmware downloaded from our website, please follow these steps: Download the correct firmware file from www.prusa3d.com/drivers (ZIP archive) and...
- Page 16 Heatbed and powder-coated steel sheet surface To achieve the best adhesion of the printed object, it is important to keep the surface clean. Please see the information in the chapter 10 Regular Maintenance for more information about print surface preparation, recommended cleaning products and warranty info.
- Page 17 Loading filament Cut the end of the filament strand to create a sharp tip. Insert the filament into the extruder PTFE tube (right side of the device), or into the short PTFE tube of the filament sensor (optional accessory). Choose LCD Menu - Filament - Load filament and press the button to confirm. The preheat menu will be automatically displayed.
- Page 18 6.7 First Layer Calibration This process will calibrate the distance between the tip of the nozzle and the probe. You can launch the calibration at any time from LCD Menu - Calibration - First layer cal. Make sure the steel sheet is clean and there’s no grease on it, even fingerprints can cause an issue.
- Page 19 • The top of the extruded plastic is slightly squished • The corners of the zig-zag line are sharp and do not lift from the sheet • The lines are straight and stay on the sheet firmly • The ending box has an even surface, there are no waves or gaps Below, you can see a close up of a print displaying quality issues caused by an incorrect nozzle height.
- Page 20 The nozzle will preheat to 170 °C independently on the selected filament - this is to prevent oozing of the filament during the initial phase, which is Mesh Bed Leveling. Once MBL is done, the printer will preheat the nozzle to the correct printing temperature and start with the initial purging line at the edge of the print bed.
- Page 21 7 Advanced features 7.1 Menu structure • Print • Preheat • • PETG • • FLEX • Cooldown • Filament • Load filament • • PETG • • FLEX • Unload filament • Change filament • Purge filament • Calibration •...
- Page 22 • Save Crash Dump • Sound Mode • Sound Volume • Info • System info • Version info 7.2 Mesh Bed Leveling explained Mesh bed leveling can be found in LCD Menu - Calibration. This procedure is performed before every print.
- Page 23 Starting with firmware v4.0.5, you can connect your Original Prusa MINI to the local area network (LAN) and access basic information about the printer through web-based interface called PrusaConnect. The printer has DHCP turned on by default. Go to LCD Menu - Settings - LAN Settings and check whether the IP address has been assigned correctly.
- Page 24 8.1 Obtaining a printable model The easiest way to get started with 3D printing is to find models on the internet - they are usually in .3mf, .stl or .obj formats. Fortunately, 3D printing has many fans, so there are sites from which you can download a large variety of ready-made 3D models for free.
- Page 25 The easiest place to start is Tinkercad (www.tinkercad.com) - it’s an online editor that runs in your browser’s window, so no installation is required. It’s free, easy to navigate, and you will find plenty of tutorials online. TinkerCad is mostly focused on creating less-detailed and larger (e.g. mechanical) parts, ideal for FFF/FDM printing - your MINI can take care of them easily.
- Page 26 PrusaSlicer interface The Add button loads models into PrusaSlicer Delete and Delete All buttons remove the model(s) from PrusaSlicer Opens the detailed settings of print, filament, and printer Move, scale, rotate, Place on Face and cut tools Slice and generate .gcode button Quality / Speed setting of a print Material selection Printer selection...
- Page 27 is to select the largest flat surface of the object as the base - the bigger the base, the better the adhesion. Select a perfectly flat side of the model for the best result. 8.6 Using supports Support material is a 3D-printed supporting structure (similar to a scaffolding) used to print complex objects correctly - you can remove the support material after the print job is finished.
- Page 28 Areas above supports usually have a less-than-ideal surface quality. Before you decide to use supports, try to move/rotate the object to find an orientation that will require less or even no supports. 8.7 Print speed vs Print quality Printing a small object takes a few minutes, but printing larger models are more time consuming - there are prints that will take dozens of hours to finish.
- Page 29 Print quality vs print time The speed can also be changed while printing. Go to LCD Menu - Tune - Speed. By turning the control knob clockwise you can increase the print speed up to 150 %. Turning the knob counterclockwise decreases the print speed - the minimum speed is 50%.
- Page 30 A special case is when you want to print objects larger than the heatbed. The first option is to resize the object to a printable size. Select the Scale tool from the left menu (or press the S key). Then use the 3D gizmo to change the scale of the object.
- Page 31 8.11 Print multi-colored objects There is a simple way to create layer-based multi-colored 3D prints directly in PrusaSlicer - see the instructions below. Multicolored object printed using color change feature in PrusaSlicer Color change in PrusaSlicer Switch to the layer preview using the button in the lower-left corner Using the slider on the right side, select a layer where the color change should occur Click on the orange plus icon A preview is instantly displayed.
- Page 32 8.12 Slicing, exporting One of the most important parts of the slicing process is the inspection of the sliced object in the Preview window. Use the slider on the right side of the window to go through all the layers of the sliced object.
- Page 33 Advantages Disadvantages • • Easy to print Brittle • • Detailed prints of small models Low-temperature resistance (60 °C) • • Trouble-free printing of large objects Difficult to post-process • • Hard, low flexibility Not suitable for outdoor use • Almost odorless •...
- Page 34 Typical use • mechanical components • holders and cases • watertight prints (pots) Tips and tricks Unlike PLA or ABS, PETG tends to ooze a bit and may leave strings of plastic on your print. You can fight this by increasing retraction and playing with hotend temperature. But if you use our presets in PrusaSlicer, we already did that for you and the amount of stringing is minimal.
- Page 35 Nozzle temperature: 245 - 265 °C Bed temperature: 90 - 100 °C. (a larger object requires a higher temperature) Heatbed: Make sure the surface is clean, as described in 10.1 Flexible steel sheet surface preparation chapter 9.4 Flex Flex is a very strong and elastic material. In many cases, classic hard plastics may not be suitable for printing a specific model.
- Page 36 Smooth PEI sheet Isopropyl alcohol 90%+ Use Windex when printing (IPA) - best degreaser with PETG Windex - degreasing effect Use glue stick when printing is worse compared to IPA FLEX Warm water + few drops IPA + PETG will cause the with dish soap (in case print to adhere very strongly to IPA/Windex don’t remove...
- Page 37 10.2 Spring steel sheet with TEXTURED double-sided PEI • • Scratch-proof surface, damage-resistant PLA prints with a small contact area may • need a brim Transfers texture onto the first layers of • your prints PLA prints with a huge footprint (across the •...
- Page 38 applies to certain materials that would not stick to PEI under normal circumstances. Check the material guide for material-specific instructions. Before applying anything onto the bed, consider using the Brim option in PrusaSlicer which increases the surface area of the first layer. 10.5 Bearings After a couple hundred hours of printing, the smooth rods should be cleaned with a paper towel.
- Page 39 10.8 PTFE tubes The MINI has four PTFE tubes that may need a basic level of attention from time to time. PTFE tubes are used to lead filament strand from the spool, through the extruder, all the way to the nozzle. Over time, filament debris can accumulate in the PTFE tubes over time.
- Page 40 10.9.1 Running out of filament In case you have the optional filament sensor, running out of filament will no longer cause a print failure. If you run out of filament, the printer will automatically pause the print, unload the remaining few centimeters in the heatbreak, and move the X-carriage away from the print. You will be prompted to replace the spool and insert a new filament strand.
- Page 41 Open idler - you can see the strand of loaded filament inside 10.10 Nozzle cleaning Do not touch the nozzle during these procedures - it’s very hot and it may cause burns! To make cleaning easier, move the print head all the way up in the LCD menu - Settings - Move axis - Move Z axis.
- Page 42 If the filament loads successfully, you can resume printing. 10.11 Replacing / changing the nozzle If you are replacing the Olsson Ruby nozzle, please visit this website for instructions, otherwise, you might damage it - support.3dverkstan.se/article/66-the-olsson-ruby-instructions-for-use CAUTION: Heated parts can cause severe burns! Be extra careful around the hotend thermistor leads.
- Page 43 The nozzle is hot during this whole process and can cause burns! Be careful around the hotend thermistor leads, you can break them easily! You can bend the heatbreak easily - do not use excessive force! Run First layer calibration after changing the nozzle! 10.12 Flashing unsigned firmware We take safety very seriously.
- Page 44 Unbroken (left) and broken appendix (right), the correct location of the jumper (lower photo) 11 FAQ - common issues and how to solve them 11.1 Skewed X-axis If Mesh Bed Leveling fails, there are two possible causes of this: a faulty M.I.N.D.A. sensor, or a skewed X-axis.
- Page 45 11.2 Printer can’t read the USB drive If the printer can’t read the USB drive, first try restarting the printer. In case you see an error say “Error mounting USB drive”, your USB drive probably has an incompatible filesystem (e.g. exFAT). There are two common situations after inserting the USB drive: •...
- Page 46 11.8 Downgrading the firmware In some cases, you might need to downgrade the firmware to an older version. To do this, place an older firmware file onto a FAT32-formatted USB drive. Insert the drive into the printer, press the restart button and once the screen shows the Original Prusa MINI logo, press the knob once. This will activate the firmware flashing screen.
- Page 47 Print and share! Do not forget to tag your prints with #prusamini while sharing so we can find, pin and showcase them with our http://www.prusa3d.com/original-prusa-i3-prints/ Happy Printing :)
Need help?
Do you have a question about the PRUSA RESEARCH MINI and is the answer not in the manual?
Questions and answers