Advertisement
Quick Links
Advertisement

Related Manuals for Sub-Zero 600-2 Series


Summary of Contents for Sub-Zero 600-2 Series
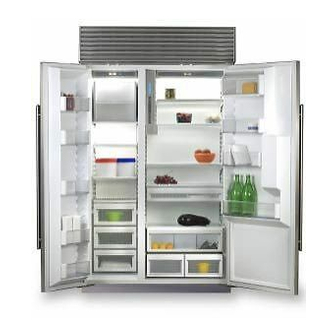
- Page 1 subzero.com 800.222.7820 Service Manual Component Access & Removal...
-
Page 2: Component Access And Removal
Built-In Series Built-In Series Component Access / Removal (600- (600- COMPONENT ACCESS AND REMOVAL This section explains how to adjust, access and remove components. If different models have similar procedures, they are grouped together under the appropriate heading. The models covered in the procedures are listed between brackets after the heading. - Page 3 Built-In Series Built-In Series Component Access / Removal (600- (600- EXTERIOR COSMETIC / MECHANICAL (ALL MODELS) Bottom Mount Standard Louvered Grille (601R-2, 601RG-2, 601F-2) The bottom mount standard louvered grille consists of a lower and upper grille section. Upper Grille Lower Grill Section Removal - To remove lower grille Screw section...
- Page 4 Built-In Series Built-In Series Component Access / Removal (600- (600- Top Mount Standard & Stainless Steel Louvered Grille (All models except 601’s) To remove a top mount louvered grille assembly (See Figure 7-3): 1. Open door(s). 2. Extract grille screws which pass up through top mainframe extrusion into bottom extrusion of grille assembly.
- Page 5 Built-In Series Built-In Series Component Access / Removal (600- (600- Kickplate (All Models) Extract screws at bottom left and right corners of kick- plate and pull kickplate forward (See Figure 7-6). Screw K i c k p l a t e Figure 7-6.
- Page 6 Built-In Series Built-In Series Component Access / Removal (600- (600- Light and Fan Switch (601R-2, 601RG-2, 601F-2) Upper Grill Section Light / fan switches are mounted in upper grille section. To remove a switch, the lower and upper grille sections must be removed first, then (See Figure 7-9): 1.
- Page 7 Built-In Series Built-In Series Component Access / Removal (600- (600- Water Valve (611-2, 611G-2, 632-2, 642-2, 650-2, 650G-2, 661-2) NOTE: For 601F-2 water valve removal instructions see: “LOWER COMPRESSOR AREA MECHANICAL (Models 601R-2, 601RG-2, 601F-2)”, later in this sec- Bracket tion.
- Page 8 Built-In Series Built-In Series Component Access / Removal (600- (600- Tubular Stainless Steel Door Handle Assembly (All Stainless Steel Models) Handle A screw inserted through the handle standoff into the Mount handle secures the handle to the standoff. The standoff Screw Threaded then slides over a threaded insert that is attached to the...
- Page 9 Built-In Series Built-In Series Component Access / Removal (600- (600- Dispenser Control Panel (685-2, 695-2) The dispenser control panel is held in place over the Extract bezel and in front of the dispenser assembly by plastic plastic rivets WATER rivets passing up through its bottom flange and into the dispenser assembly.
- Page 10 Built-In Series Built-In Series Component Access / Removal (600- (600- Glasswell Liner/Sump (685-2, 695-2) Extract plastic The glasswell liner sets into a groove in the sump. rivets These two components are then installed as an assem- bly, with the top of the liner fitting up into a groove at the bottom of the dispenser assembly, and two plastic rivets hold the liner to the dispenser assembly.
- Page 11 Built-In Series Built-In Series Component Access / Removal (600- (600- Door Closer Assembly (All Models Except 611-2 & 650-2) NOTE: Door closer assembly removal and door closer disconnection procedures are different. If disconnecting Pry down a door closer in order to remove a door, see Door Removal instructions instead of these instructions.
- Page 12 Built-In Series Built-In Series Component Access / Removal (600- (600- Door Assembly (601RG-2, 611G-2, 650G-2, 685-2 Refrigerator, 695-2 Refrigerator) REFRIGERATOR DOORS: Pry down • ON GLASS DOOR MODELS HAVE HEATER WIRES THAT PASS THROUGH TOP HINGE. Remove • ON MODELS 685-2 / 695-2 HAVE DISPENSER E-Ring WIRES THAT PASS THROUGH TOP HINGE.
- Page 13 Built-In Series Built-In Series Component Access / Removal (600- (600- Freezer Drawer Assembly (611-2/611G-2,650-2/650G-2 Prior to Serial #2354455) Prior to Serial #2354455 To remove freezer drawer assembly (See Figure 7-29): 1. Open drawer fully. 2. Pull upper basket to front of drawer. 3.
- Page 14 Built-In Series Built-In Series Component Access / Removal (600- (600- Mainframe Extrusion (All Models) Mainframe Mainframe Angle Mainframe extrusion is held to the sides of a unit with low-profile 6-lobe drive screws, and at the top with l l e G r i Phillips-head screws.
- Page 15 Built-In Series Built-In Series Component Access / Removal (600- (600- REFRIGERATOR INTERIOR COSMETIC / MECHANICAL (ALL MODELS) Door Shelf & Dairy Compartment Assembly Removal and Adjustment (All Models) Removal and adjustment of door shelves and dairy compartment assemblies is achieved by sliding the grooves in the end caps over the molded retaining ribs of the door liner.
- Page 16 Built-In Series Built-In Series Component Access / Removal (600- (600- Upper Light Diffuser (All Models) Retainer Clip Pegs The side frames of the light diffuser have four inverted “T” shaped slots (two each side) which slide up over pegs protruding from the side walls. For safety purpos- es, retaining clips by the rear slots secure the light dif- fuser to the rear studs.
- Page 17 Built-In Series Built-In Series Component Access / Removal (600- (600- Humidity Drawer Carriage Assembly (All Models) Channels on each side of the carriage assembly rest on top of the two crisper slide assemblies. At the top rear and front sides of each channel are notches that fit over tabs on the crisper slide assemblies.
- Page 18 Built-In Series Built-In Series Component Access / Removal (600- (600- Control Board (All Models except 685-2, 695-2) NOTE: Model 685-2, 695-2 control board access and removal is covered later in this section. The control board is held in position by two sets of tabs Control Panel Assy behind the left side of the control panel assembly.
- Page 19 Built-In Series Built-In Series Component Access / Removal (600- (600- Control Panel Assembly / Upper Front Panel Assembly (All Models) NOTE: Model 685-2, 695-2 vertical control panel access and removal is covered later in this section. Horizontal control panel assemblies and upper front panel assemblies are secured to the ceiling of a com- Back row of screws...
- Page 20 Built-In Series Built-In Series Component Access / Removal (600- (600- Control Board Removal (685-2, 695-2) The control board is held in position by two sets of tabs behind the control panel assembly. The two forward tabs position the LCD in the control panel window, while the other two tabs secure the middle of the control board.
- Page 21 Built-In Series Built-In Series Component Access / Removal (600- (600- Water Reservoir Tank (685-2, 695-2) Compression The water reservoir is concealed behind the water fitting reservoir tank cover, and is held to the mullion wall with screws fitting into spacers.. NOTE: Before removing the water reservoir tank, turn the water supply to the unit off and drain the water from...
- Page 22 Built-In Series Built-In Series Component Access / Removal (600- (600- Evaporator Fan Shroud Assembly (All Models) Evaporator fan shroud assemblies are secured to the ceiling of the compartment with screws. Lighting wire harness To remove an evaporator fan shroud assembly, the light diffuser and evaporator cover must be removed first, then (See Figure 7-48):...
- Page 23 Built-In Series Built-In Series Component Access / Removal (600- (600- Refrigerator Compartment Thermistor (All Models) Compartment The refrigerator compartment thermistor is located Thermistor behind the evaporator cover, and attached to the wall with a screw just above the evaporator. To remove a compartment thermistor, the light diffuser and evaporator cover must be removed first, then (See Figure 7-51):...
- Page 24 Built-In Series Built-In Series Component Access / Removal (600- (600- FREEZER INTERIOR COSMETIC / MECHANICAL (MODEL 601F-2) Door Shelf Assembly Removal / Adjustment (601F-2) Removal and adjustment of door shelf assemblies is achieved by sliding the grooves in the end caps over the molded retaining ribs of the door liner.
- Page 25 Built-In Series Built-In Series Component Access / Removal (600- (600- Ice Bucket (601F-2) Lift ice bucket up out of freezer basket (not shown). Freezer Basket Assembly (601F-2) To remove freezer basket assembly (See Figure 7-56): 1. Pull basket open until it stops. 2.
- Page 26 Built-In Series Built-In Series Component Access / Removal (600- (600- Drain Trough Enclosure (601F-2) The drain trough enclosure is secured to the back wall of the compartment with screws and plastic supports, just below the freezer glass shelf. NOTE: It is not necessary to remove the freezer glass shelf, icemaker or compartment thermistor in order to remove the drain trough enclosure.
- Page 27 Built-In Series Built-In Series Component Access / Removal (600- (600- Freezer Drain Tube Heater (601F-2) Drain Tube Heater The braided wire drain tube heater is connected to the wire harness behind the drain trough enclosure. To remove the heater, drain trough enclosure must be disconnected from back wall, then (See Figure 7-62): Drain Trough Heater...
- Page 28 Built-In Series Built-In Series Component Access / Removal (600- (600- Control Panel Assembly (601F-2) The control panel assembly is secured to the ceiling of the compartment by two rows of screws. The front row of screws (which are hidden) pass through spacers and fit into keyhole slots in the panel assembly.
- Page 29 Built-In Series Built-In Series Component Access / Removal (600- (600- Freezer Evaporator Thermistor (601F-2) Evaporator The freezer evaporator thermistor is attached to the left Thermistor evaporator bracket. To remove the freezer evaporator thermistor, the light diffuser, freezer glass shelf and evaporator cover must be removed first, then (See Figure 7-68): 1.
- Page 30 Built-In Series Built-In Series Component Access / Removal (600- (600- FREEZER INTERIOR COSMETIC / MECHANICAL (MODELS 611-2, 611G-2, 650-2, 650G-2) Ice Bucket (611-2, 611G-2, 650-2, 650G-2) Remove ice bucket by lifting out of left rear corner of upper freezer basket (not shown). Freezer Light Bulb (611-2, 611G-2, 650-2, 650G-2) There is no light diffuser in the freezer of these models.
- Page 31 Built-In Series Built-In Series Component Access / Removal (600- (600- Freezer Cabinet Slide Assembly (611-2/611G-2,650-2/650G-2 Prior to Serial #2354455) Prior to Serial #2354455 The freezer cabinet slides are attached to the side wall with screws. To remove a cabinet slide assembly, extract the mount- ing screws and pull it from the side wall (See Figure 7- 74).
- Page 32 Built-In Series Built-In Series Component Access / Removal (600- (600- Icemaker Assembly (611-2, 611G-2, 650-2, 650G-2) The icemaker assembly is attached to the left hand wall of the freezer compartment with screws. To remove the icemaker assembly (See Figures 7-78): 1.
- Page 33 Built-In Series Built-In Series Component Access / Removal (600- (600- Freezer Drawer Closer Assembly (611-2/611G-2,650-2/650G-2 Start w/Serial #2354455) Starting w/Serial #2354455 The drawer closer assembly is attached to the left side wall with screws. To access and remove a drawer closer assembly, first remove the drawer front assembly and the lower freez- er basket.
- Page 34 Built-In Series Built-In Series Component Access / Removal (600- (600- Freezer Air Duct (611-2, 611G-2, 650-2, 650G-2) The freezer air duct is located at the top rear of the freezer compartment, directly behind evaporator cover. To remove the air duct (See Figures 7-83): 1.
- Page 35 Built-In Series Built-In Series Component Access / Removal (600- (600- Freezer Evaporator Thermistor (611-2, 611G-2, 650-2, 650G-2) The freezer evaporator thermistor is attached with a screw to the left evaporator bracket. To remove the evaporator thermistor, the freezer air duct, evaporator cover and evaporator fan assembly must be removed first, then (See Figures 7-86): 1.
- Page 36 Built-In Series Built-In Series Component Access / Removal (600- (600- FREEZER INTERIOR COSMETIC / MECHANICAL (MODELS 632-2, 642-2, 661-2) Freezer Door Shelf Assembly Removal and Adjustment (632-2, 642-2, 661-2) Removal and adjustment of door shelf assemblies is achieved by sliding the grooves in the end caps over the molded retaining ribs of the door liner.
- Page 37 Built-In Series Built-In Series Component Access / Removal (600- (600- Freezer Upper Front Panel Assembly Upper (632-2, 642-2, 661-2) Front Panel The upper front panel assembly is secured to the ceil- ing of a compartment by two rows of screws. The front row of screws (which are hidden) pass through spacers and fit into keyhole slots in the panel assembly.
- Page 38 Built-In Series Built-In Series Component Access / Removal (600- (600- Icemaker Assembly (632-2, 642-2, 661-2) Connecting rod h e l The icemaker assembly attached to the evaporator c t / S cover with two screws at top and one at bottom. To remove the icemaker assembly, remove the freezer shelves and ice bucket first.
- Page 39 Built-In Series Built-In Series Component Access / Removal (600- (600- Freezer Lower Light Diffuser (632-2, 642-2, 661-2) The lower light diffuser is a flexible plastic material and is held in place with diffuser retainers at top and bottom. To remove the lower light diffuser, remove the top freez- er basket first, then (See Figures 7-98): 1.
- Page 40 Built-In Series Built-In Series Component Access / Removal (600- (600- Defrost Terminator (632-2, 642-2, 661-2) The defrost terminator is clipped onto the evaporator outlet, after the accumulator. To remove the defrost terminator, remove the freezer shelves, ice bucket and duct/shelf assembly first, then (See Figures 7-101): 1.
- Page 41 Built-In Series Built-In Series Component Access / Removal (600- (600- Defrost Heater (632-2, 642-2, 661-2) The defrost heater is inserted into channels in the evap- orator fins. C-shaped heater clips hook from one evap- orator tube to another, over heater, to hold it in place. To remove the defrost heater, remove the freezer shelves, ice bucket, duct/shelf assembly and evaporator cover first, then...
- Page 42 Built-In Series Built-In Series Component Access / Removal (600- (600- FREEZER INTERIOR COSMETIC / MECHANICAL (MODELS 685-2 - prior to serial #2271174, 695-2 - prior to serial #2269189) NOTE: Also see “FREEZER INTERIOR COSMETIC / MECHANICAL (MODELS 685-2 - starting with serial #2271174, 695-2 - starting with serial #2269189), later in this section.
- Page 43 Built-In Series Built-In Series Component Access / Removal (600- (600- Ice Bucket Assembly (685-2, 695-2) The ice bucket has a flange at the top of each side that rides on the slides that are part of the ice bucket main- frame assembly.
- Page 44 Built-In Series Built-In Series Component Access / Removal (600- (600- Freezer Evaporator Front Cover Assembly (685-2, 695-2) The freezer evaporator front cover assembly is held in Evap Front/ Light Assy place by two screws at top, and two screws through the bottom flange into the lower evaporator cover assembly.
- Page 45 Built-In Series Built-In Series Component Access / Removal (600- (600- Freezer Evaporator Fan Assembly (685-2, 695-2) The rear flange of the freezer evaporator fan assembly fits into a slot in the rear evaporator bracket. The front is secured by screws through the front flange into the front evaporator bracket.
- Page 46 Built-In Series Built-In Series Component Access / Removal (600- (600- Freezer Compartment Thermistor (685-2, 695-2) compartment The freezer compartment thermistor is attached to the thermistor mullion wall by the icemaker, with a screw. To remove the freezer compartment thermistor, the juice can rack and ice bucket must be removed first, then (See Figure 7-119): 1.
- Page 47 Built-In Series Built-In Series Component Access / Removal (600- (600- Freezer Drain Tube Heater (685-2, 695-2) To access and remove the drain tube heater, the juice can rack, upper front panel, evaporator front cover, rear duct, lower evaporator cover assembly and ice bucket carriage assembly will need to be removed first, then (See Figure 7-122).
- Page 48 Built-In Series Built-In Series Component Access / Removal (600- (600- FREEZER INTERIOR COSMETIC / MECHANICAL (MODELS 685-2 - starting with serial #2271174, 695-2 - starting with serial #2269189) NOTE: Also see “FREEZER INTERIOR COSMETIC / MECHANICAL (MODELS 685-2 - prior to serial #2271174, 695-2 - prior to serial #2269189), earlier this section.
- Page 49 Built-In Series Built-In Series Component Access / Removal (600- (600- Ice Bucket Assembly (685-2, 695-2) The ice bucket has a flange at the top of each side that rides on the slides that are part of the ice bucket main- frame assembly.
- Page 50 Built-In Series Built-In Series Component Access / Removal (600- (600- Ice Auger Motor Assembly (685-2, 695-2) The ice auger motor assembly consists of the ice auger motor and two icemaker switches. It is attached to the rear wall with screws, directly behind the ice bucket assembly.
- Page 51 Built-In Series Built-In Series Component Access / Removal (600- (600- Freezer Lower Evaporator Cover/Light Assembly (685-2, 695-2) The lower evaporator cover/light assembly has two holes at the rear which fit over pegs in the rear wall. Screws toward the front sides of the cover secure the assembly to the side walls.
- Page 52 Built-In Series Built-In Series Component Access / Removal (600- (600- Icemaker Fill Tube Heater (685-2, 695-2) To remove the icemaker fill tube heater, the juice can Fill Tube rack, evaporator front cover/light assembly, and ice & bucket mainframe assembly will need to be removed Heater first, then (See Figure 7-136):...
- Page 53 Built-In Series Built-In Series Component Access / Removal (600- (600- Freezer Compartment Thermistor (685-2 only) NOTE: The model 695-2 freezer compartment thermis- tor is attached to the mullion wall. See “Freezer Compartment Thermistor (695-2)” earlier in this section. The 685-2 freezer compartment thermistor is behind the evaporator cover assembly, inside the air duct.
- Page 54 Built-In Series Built-In Series Component Access / Removal (600- (600- Evaporator Defrost Heater (685-2, 695-2) The defrost heater sits under the evaporator, fitting into a slot at bottom of the evaporator back bracket, with a heater clip holding the other end of the heater. To remove the defrost heater, the juice can rack, evapo- rator front cover/light assembly, lower evaporator cover/light assembly, freezer fan cover, and evaporator...
- Page 55 Built-In Series Built-In Series Component Access / Removal (600- (600- LOWER COMPRESSOR AREA MECHANICAL (MODELS 601R-2, 601RG-2, 601F-2) Water Valve (601F-2) NOTE: Models 611-2, 611G-2, 632-2, 642-2, 650-2, 650G-2, 661-2 water valve removal instructions are Water Valve covered in “EXTERIOR COSMETIC / MECHANICAL (ALL MODELS EXCEPT 601’S)”...
- Page 56 Built-In Series Built-In Series Component Access / Removal (600- (600- UPPER COMPRESSOR AREA MECHANICAL (ALL MODELS EXCEPT 601’S) Condenser Fan (All Models except 601’s) The condenser fan is mounted to the condenser fan Screws (3) shroud with three fan mounting brackets that are hooked into grommeted holes in the fan shroud.
- Page 57 Built-In Series Built-In Series Component Access / Removal (600- (600- SEALED SYSTEM (MODELS 601R-2, 601RG-2, 601F-2) Filter-Drier (601R-2, 601RG-2, 601F-2) The filter-drier is attached to the condenser outlet and Cut here secured to the condenser with a cable tie. After capturing the refrigerant from sealed system, (See Figure 7-149): 1.
- Page 58 Built-In Series Built-In Series Component Access / Removal (600- (600- Drain Pan Condensate Heater Loop Heater (601R-2, 601RG-2) Loop The drain pan condensate heater loop is located in the compressor area, and sits in the drain pan. Compressor NOTE: When replacing a condensate heater loop, the filter-drier must also be replaced.
- Page 59 Built-In Series Built-In Series Component Access / Removal (600- (600- Evaporator (601R-2, 601RG-2, 601F-2) The evaporator is attached to the rear wall with screws, behind the evaporator cover. Cut Here NOTE: When replacing an evaporator, the filter-drier must also be replaced. NOTE: When removing a 601F-2 evaporator, the evap- orator thermistor, defrost terminator and defrost heater...
- Page 60 Built-In Series Built-In Series Component Access / Removal (600- (600- Heat Exchanger (601R-2, 601RG-2, 601F-2) NOTE: When replacing a heat exchanger, the filter- drier must also be replaced. Cut Here NOTE: It is not necessary to pull the unit from its installation in order to replace a heat exchanger.
- Page 61 Built-In Series Built-In Series Component Access / Removal (600- (600- SEALED SYSTEM (ALL MODELS EXCEPT 601’S) Filter-Drier (All Models except 601’s) The filter-drier is attached to to a drier bracket in the Cut here compressor area by a cable tie. After capturing the refrigerant from sealed system, (See Figure 7-158):...
- Page 62 Built-In Series Built-In Series Component Access / Removal (600- (600- Condenser (All Models except 601’s) NOTE: When replacing the condenser, both filter-driers must also be replaced. NOTE: It is necessary to pull the unit from its installa- tion and remove the unit shroud in order to replace a condenser.
- Page 63 Built-In Series Built-In Series Component Access / Removal (600- (600- Heat Exchanger (All Models except 601’s) NOTE: When replacing a heat exchanger, the filter- Cut Here drier must also be replaced. NOTE: It is necessary to pull a model 611-2, 611G-2, 650-2 and 650G-2 from its its installation in order to replace a freezer heat exchanger.
Need help?
Do you have a question about the 600-2 Series and is the answer not in the manual?
Questions and answers