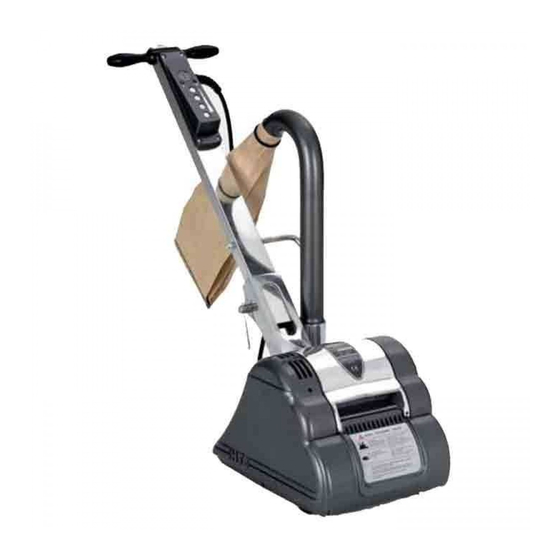
HireTech HT8 Owner's Manual & Operating Instructions
Ex multi-speed drum floor sander
Hide thumbs
Also See for HT8:
- Owner's manual & operating instructions (26 pages) ,
- Owner's manual & operating instructions (18 pages) ,
- Owner's manual & operating instructions (8 pages)
Summary of Contents for HireTech HT8
- Page 1 HT8 EX MULTI-SPEED DRUM FLOOR SANDER From Serial Number 13087 (240/240 Volt) & 05054 (110/120 Volt) OWNERS MANUAL & OPERATING INSTRUCTIONS 2018/09 © Hiretech Part # 024960...
-
Page 2: Table Of Contents
Hiretech Limited Warranty. WARNING: Risk of potential injury. Hiretech reserves the right to make changes or improvements to it’s products without prior notice. Moving Parts - to reduce the risk of injury, unplug the machine before replacing abrasives or carrying out any For the latest product news and updates, spare parts, downloads form of adjustment or servicing. -
Page 3: Specification
9. Never operate the machine without the drum guard in place start protection and overload or if the drum guard is damaged. protection. 10. Always store and transport the HT8 EX with a sanding belt in Motor Continuous heavy duty AC/ place at all times to protect the drum rubber. -
Page 4: Set Up
Ensure the sanding belt is centred on the sanding drum switching ON. Take care not to trap fingers around the main frame and dust If the HT8 is switched ON and the motor is running always shoe. raise the drum off the floor before selecting or changing the 6. -
Page 5: Floor Sanding Technique
6. Now walk slowly forward and at the same time release the pressure on the handles to gently lower the HT8 so that the FLOOR SANDING TECHNIQUE sanding drum comes into contact with the floor. -
Page 6: Abrasive & Speed Application Chart
Between Coats of Finish (varnish) new coat of finish. If the floor is badly marked and scratched and has to be sanded back to new wood use the HT8-1.2 Floor Sander Use the HTF-2 Floor Sander to sand between coats of floor finish, and HT7-2 Disc Floor Sander. -
Page 7: Floor Sanding Technique
© Hiretech... -
Page 8: Service & Routine Maintenance
300hrs. Visual Inspection If the HT8 is part of a hire or rental fleet it is recommend that Check that the drum guard Ref.35 is in good condition and the run time is reset to 100hrs at all times to provide for more functioning correctly. - Page 9 12mm (1/2”) or less in length. Brushes MUST slide Store and transport the HT8 EX with a sanding belt in place at all freely in the brush holders.
- Page 10 CAUTION: there are no serviceable components in the (pigtail) retaining Screws Ref.105 and lock Washers Ref.100. HT8 Multi-Speed Control Unit. Under no circumstances vii. Remove the four brushes. Remove the two ‘jacking’ screws. must any parts be serviced or tampered with. If the unit fails viii.
- Page 11 Carefully lever the outer cable insulation. two components apart taking care not to damage the Tube 5. For the HT8 fitted with a Multi-Speed Control and HT8’s fitted Handle Ref.16. with a low volt circuit breaker type switch use a trailing test 5.
- Page 12 OFF and the speed button one (1) is illuminated. You must now press and hold the ON/OFF (I/O) button for 1.5secs to turn the machine ON. If this function fails to operate do not use the machine. Report/repair fault and retest. © Hiretech...
-
Page 13: Fault Finding
FAULT FINDING © Hiretech... -
Page 14: Parts Diagram
PARTS DIAGRAM HT8-1.2 Expandable Drum Multi-Speed © Hiretech... -
Page 15: Parts Diagram
PARTS DIAGRAM HT8-1.2 Expandable Drum Multi-Speed © Hiretech... -
Page 16: Parts List
Nut Lock 160809 Bracket Exhaust 024520 Switch Multi-Speed 163403 Gasket Exhaust 024615 Screw 07037 Disposable Paper Dust Bag HT8 Pack 2 024525 Controller Switch Multi-Speed 240V 07039 Disposable Paper Dust Bag HT8 024530 Controller Switch Multi-Speed 110V 163790 Tube Exhaust 163870... -
Page 17: Circuit Diagram
024501 Test Lead (AUS) 903260 Belt Drum 3/4in (19mm) Wide 024502 Test Lead (NA) 903273 Belt Fan 1/2in (13mm) Wide 163865 Service Tool - Locking Drum 024890 Spacer Bearing CIRCUIT DIAGRAM HT8-1.2 Floor Sander Multi-Speed MULTI-SPEED CABLE ROUTING © Hiretech... - Page 18 © Hiretech...


Need help?
Do you have a question about the HT8 and is the answer not in the manual?
Questions and answers