Advertisement
Advertisement
Table of Contents

Related Manuals for Electrorad Aeroflow Series


Summary of Contents for Electrorad Aeroflow Series
- Page 1 User friendly guide...
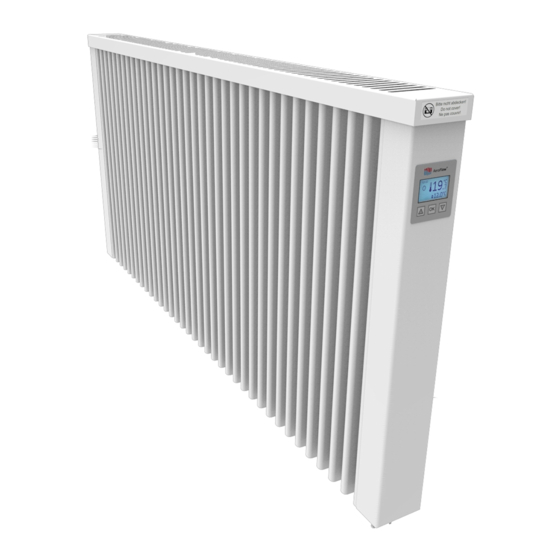
- Page 2 Aeroflow Radiators Aeroflow German made electric radiators are extremely high quality electric radiators with the longest warranty available of 30 years. Internally, the electrical elements are encased within non porous fireclay heat plates. When the element heats, it transfer the heat to the fireclay and then in turn to the radiant surface of the radiator.
- Page 3 Understanding your radiator The inside of your radiator has fireclay plates that are heated up by the electrical element. The hot plates transmit the heat to the metal body, making the room warm by radiant heat. Radiant heat is like the sun shining on you, it makes you feel lovely and warm.
-
Page 4: Getting Started
Getting started Firstly you need to think about how you want to operate your radiators. There are 3 ways to use them. App Control. Timed mode. Manual mode. Download the app so that you can control In timed mode, you can set your radiator to In this mode, you can simply use the your heating from your phone or tablet come on and off at whatever time you... -
Page 5: Manual Mode
Manual Mode Using the Aeroflow radiator in manual mode is very easy. The big numbers on the screen show your current room temperature and the little numbers show your set point, which is the temperature you want your room to be. The Radiator will heat up until your set point is achieved and then it will click off. When the temperature in the room drops, the radiator will click back on again to compensate for the heat lost. - Page 6 Using your radiator on timed settings Using your radiator in timed mode, means that you should never in theory, have to touch the radiator again. You can set the radiator 24 hours a day, 7 days a week to exactly what temperature you want it to be.
- Page 7 Programing your timings Before you begin, it is a good idea to think about what temperatures you want your room be at what times. You have 6 different time periods but your first one must start at 00:00 and your last one must finish at 00:00 in order for the radiator to understand the full sequence of each day.
-
Page 8: Using The App
Using the App Open the box that contains the Aeroflow gateway hub. Thread the antenna into the back of the gateway hub. Plug the other end of the Ethernet cable into your internet router. Connect the uk plug connection to the power box and insert the usb cable, connecting the other end to the Gateway Hub The back of your gateway hub looks like this. - Page 9 Make sure that your device is connected to the same router that you have plugged the gateway hub into, make sure your 4g is off and you have the Wi-Fi connection symbol on your phone. Open the app and you will be presented with the following screen: Now press the inset button on the back of the router using a paperclip or such like to put the gateway hub into pairing mode.
- Page 10 You will be asked for a password, the password is ’aeroflow’ all lower case, then press accept. Now click add zone and call this whatever you like, living room, kitchen, ‘Melanie’s bedroom’, depending on what room the radiator you are about to pair up will be in, by clicking into the empty name box.
- Page 11 Your phone may or may not then present you with the following message; press accept to fully synchronise your devise and the radiator. This is just to make sure your device and the radiator are on the same time as to not cause confusion when trying to set programes.
- Page 12 To set a program. You can set each individual radiator on its own programmed time settings, multiple radiators together, or all on the same programme by using the tabs along the top of the screen when you are on the heating page of the app. You can have 6 different time changes per radiator per day and you must always start from midnight and end at midnight to complete the days cycle.
- Page 13 Make sure time zone 1 is highlighted in grey and the start time should be set as default to 00:00am. Leave that as it as as you need to complete an instruction for every hour of the day for the cylcle to be complete. Now Click on end time.
- Page 14 Again click the + button to move on to time zone 4. This will be when you are home from work and you probably want to be nice and warm. Your start time should have defaulted to 5.30pm, your end time will probably want to be around bed time, lets say this is 11pm, change the end time to 11am and click on the instruction box to select your desired comfort temperature, eg 20 degrees.
- Page 15 To set multiple rooms Open the Aeroflow app, click ‘heating’, click ‘programs’ at the bottom of the screen, make sure that the ‘multiple’ tab is highlighted in grey and click on your chosen radiators from the list of radiators you have paired up on your devise, eg, Melanie’s Bedroom &...
- Page 16 You will see that time frame 1 is highlighted in grey. The start time should default to 00:00am, leave this as it is and click in the end time box. This is to set the temperature from midnight to the next time change which is likely to be when you wake up in the morning.
-
Page 17: Factory Reset
Factory Re-set Aeroflow Radiator Aeroflow Gateway Hub Press the OK button to illuminate the Press and hold the inset button on the screen first if needs be. back of the Aeroflow Gateway hub using a paper clip or such like, for around 10 Press the OK menu seconds. -
Page 18: Troubleshooting
Trouble Shooting Problem Possible Resolution I can’t pair my radiator to the app. Shut the app down then re-open it and try again. Have you screwed the antenna into the gateway? Is there a green light on the gateway hub to show it has a working internet connection? Is the mobile device on the same WI-FI network? Mobile phones and tablets must be on the same WI-FI network that the router is connected to - not on its own 4g - check the WI-FI symbol is shown on your mobile device. - Page 19 The radiator is reading the wrong You are advised to calibrate all radiators after they have been installed for 24 hours. Using a separate temperature thermometer, measure the temperature within half a meter of the sensor probe (the bottom of the end panel on the control end of the radiator, where the flex comes out.) Once you have confirmed the exact temperature of the room at that level, you can calibrate the temperature that the radiator is reading in the ‘sensor probe offset’...
- Page 20 My radiator is not achieving my set Is your radiator sized correctly? If the radiator is not powerful enough to heat the space it is in, then you will need a point bigger or second radiator. We would suggest 100 watts per square meter on average insulation, 80 watts per square meter on very good insulation and 120watts per square meter in conservatories or properties with poor insulation.
- Page 21 The radiator is not working Turn the electricity supply off at the mains. Check the fuse in the fused spur or plug. If the radiator is hard wired into a fused spur, disconnect the radiator from the electric and attach a plug with a 13 amp fuse and try it in a different socket on a different ring main.
Need help?
Do you have a question about the Aeroflow Series and is the answer not in the manual?
Questions and answers