Lumel RE72 User Manual & Quick Start
Controller 48 x 96 mm
Hide thumbs
Also See for RE72:
- User manual (96 pages) ,
- User manual & quick start (33 pages) ,
- Quick start manual (33 pages)
Table of Contents
Advertisement
Available languages
Available languages
Quick Links
Advertisement
Table of Contents

Related Manuals for Lumel RE72


Summary of Contents for Lumel RE72
- Page 1 REGULATOR 48 x 96 mm CONTROLLER 48 x 96 mm RE72 INSTRUKCJA OBSŁUGI SZYBKI START USER’S MANUAL QUICK START Pełna wersja instrukcji dostępna na Zeskanuj mnie Zeskanuj kod Scan the code Full version of user’s manual available at www.lumel.com.pl...
- Page 2 1. WYMAGANIA PODSTAWOWE, BEZPIECZEŃSTWO UŻYTKOWANIA W zakresie bezpieczeństwa użytkowania regulator odpowiada wymaganiom normy PN-EN 61010-1. Uwagi dotyczące bezpieczeństwa: montażu i instalacji połączeń elektrycznych powinna dokonać osoba z uprawnieniami do montażu urządzeń elektrycznych, przed załączeniem regulatora należy sprawdzić poprawność połączeń, przed zdjęciem obudowy regulatora należy wyłączyć jego zasilanie i odłączyć...
-
Page 3: Podłączenia Elektryczne
Wymiary regulatora przedstawiono na rys. 2. Rys. 2. Wymiary regulatora 2.2. Podłączenia elektryczne Patrz str. 26 , rys. 3-11. -
Page 4: Rozpoczęcie Pracy
Na wyświetlaczu może być komunikat znakowy informujący o nieprawidłowościach (tablica 18 - patrz pełna wersja instrukcji obsługi, dostępna na www.lumel.com.pl). Fabrycznie ustawiony jest algorytm regulacji PID z zakresem proporcjonalności 30 C, stałą czasową całkowania 300 sekund, stałą... - Page 5 4. OBSłUGA Obsługa regulatora jest przedstawiona na rys. 13 podgląd pozycji zaworu (otwieranie/ zamykanie) podgląd sygnału sterującego (otwieranie/ zamykanie)
- Page 6 W celu zmiany nastawy parametru należy postępować wg punktu 6.3. (patrz pełna wersja instrukcji obsługi, dostępna na www.lumel.com. pl). W celu wyjścia z wybranego poziomu należy przechodzić pomię- dzy parametrami aż pojawi się symbol [. . .] i wcisnąć przycisk Aby wyjść...
- Page 7 . . . Rys. 14. Matryca programowania Wyjście z menu...
- Page 8 filt bNi1 . . . i2.Hi bNi2 Przej- Funkcja Funkcja Wsk. Stała ście do wejścia 1 wejścia 2 górnego poziomu czasowa binar- progu binarnego filtra wyżej nego . . . Przej- Maks odch. Okres Okres Okres Okres ście do reg.
- Page 9 4.3. Zmiana nastawy Zmianę nastawy parametru rozpoczyna się po naciśnięciu przycisku podczas wyświetlania nazwy parametru. Przyciskami dokonuje się wyboru nastawy, a przyciskiem ceptuje. Anulowanie zmiany następuje po naciśnięciu przycisku lub automatycznie po upływie 30 sekund od ostatniego naciśnięcia przy- cisku. Sposób zmiany nastawy pokazano na rys. 15. anulowanie zmian akceptacja...
-
Page 10: Dane Techniczne
5. DANE TECHNICZNE Wejście główne Sygnały wejściowe oraz zakresy pomiarowe Tablica 1 Typ czujnika Norma Zakres Pt100 PN- EN -200...850 °C -328...1562 °F 60751+A2:1997 Pt1000 -200...850 °C -328...1562 °F pt10 Fe-CuNi (J) -100...1200 °C -148...2192 °F Cu-CuNi (T) -100...400 °C -148...752 °F NiCr-NiAl (K) -100...1372 °C... - Page 11 Błąd podstawowy pomiaru wartości rzeczywistej 0,3% ± 1 cyfra Czas pomiaru: 0,5 s Rezystancja wejściowa: 100 Ω Zakres nastaw parametrów regulatora: tablica 1 (patrz pełna wersja instrukcji obsługi, dostępna na www.lumel.com.pl) Wejście binarne beznapięciowe - rezystancja zwarcia ≤ 10 kΩ - rezystancja rozwarcia ≥...
- Page 12 Znamionowe warunki użytkowania: - napięcie zasilania: 85…253 V a.c./d.c.; 20…40 V a.c./d.c. - częstotliwość napięcia zasilania: 40…440 Hz - temperatura otoczenia: 0…23…50 °C - temperatura przechowywania: -20…+70 °C - wilgotność względna powietrza < 85 % (bez kondensacji pary wodnej) - czas wstępnego nagrzewania: 30 min - położenie pracy: dowolne - rezystancja przewodów łączących rezystor termometryczny lub termoelement z regulatorem <...
- Page 13 18. KOD WYKONAŃ Tablica 2 RE82 X X X X X X X Wyjście 1: przekaźnikowe napięciowe 0/5 V ciągłe prądowe 0/4 .. 20 mA ciągłe napięciowe 0 .. 10 V Wyjście 2: przekaźnikowe napięciowe 0/5 V ciągłe prądowe 0/4 .. 20 mA ciągłe napięciowe 0 ..
-
Page 14: Basic Requirements, Operational Safety
1. BASIC REQUIREMENTS, OPERATIONAL SAFETY In the safety service scope, the controller meets to requirements of the EN 61010-1 standard. Observations Concerning the Operational Safety: All operations concerning transport, installation, and commissioning as well as maintenance, must be carried out by qualified, skilled personnel, and national regulations for the prevention of accidents must be observed. -
Page 15: Electrical Connections
Fig.1 Controller fixing in the panel Controller overall dimensions are presented on the fig. 2. Fig. 2. Controller dimensions. 2.2. Electrical Connections See page 26, fig. 3-11. -
Page 16: Starting To Work
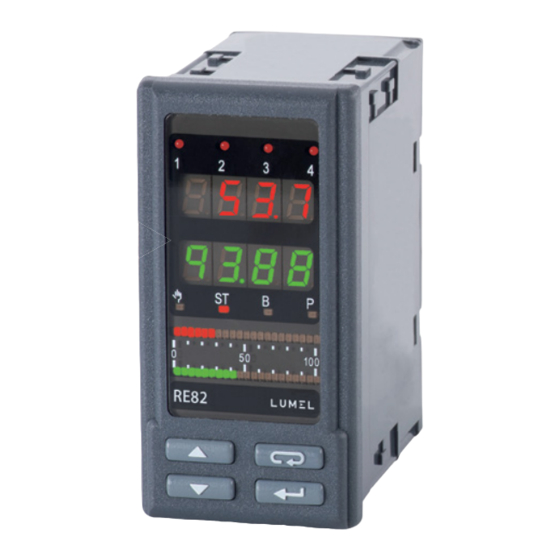
A character message informing about abnormalities may appear on the display (table 18- see full version of service manual, available at www.lumel.com.pl). The PID control algorithm with the proportional range 30ºC, a 300 seconds’ integration time constant, a 60 seconds’ differentiation time constant and a 20 seconds’... - Page 17 4. SERVICE The controller service is presented on the fig. 13 Monitoring of valve position (opening/ closing) Monitoring of control signal (opening/ closing)
- Page 18 In order to change the parameter setting, one must proceed acc. to the section 6.3. (see full version of service manual, available at www.lumel.com.pl). In order to exit from the selected level, one must transit between parameters until the symbol [. . .] appears and press push-button.
-
Page 19: Programming Matrix
. . . Exit from menu Fig. 14. Programming matrix... - Page 20 filt i2.Hi . . . bNi1 bNi2 Transit Binary Binary Indic. Time of higher of higer input 1 input 2 constant thre- level function function eshold of filter . . . Max sys. Transit deviation Pulse Pulse Pulse Pulse of higher when calc.
-
Page 21: Setting Change
4.3. Setting Change The change of the parameter setting begins after pressing the push-button during the display of the parameter name. The setting se- lection is carried out through push-buttons, and ac- cepted by the push-button. The change cancellation follows after pressing of push-button or automatically after 30 sec since the last push-button pressure. -
Page 22: Technical Data
5. TECHNICAL DATA Main input Input signals and measuring ranges Table 1 Sensor type Standard Range Pt100 -200...850 °C -328...1562 °F 60751+A2:1997 Pt1000 -200...850 °C -328...1562 °F pt10 Fe-CuNi (J) -100...1200 °C -148...2192 °F Cu-CuNi (T) -100...400 °C -148...752 °F NiCr-NiAl (K) -100...1372 °C -148...2501.6 °F... - Page 23 Measurement time: 0.5 s Input resistance: 100 Ω Setting range of controller parameters: See table 1 (see full version of service manual, available at www.lumel.com.pl) Binary input voltageless - shorting resistance ≤ 10 kΩ - opening out resistance ≥ 100 kΩ...
- Page 24 Signaling: turning outputs 1, 2, 3, 4 on; mode of manual control; auto-tuning proces; turning binary inputs 1, 2 on Rated operating conditions: - supply voltage: 85…253 V a.c./d.c.; 20…40 V a.c./d.c. - frequency: 40…440 Hz - ambient temperature: 0…23…50 °C - storage temperature: -20…+70 °C - relative air humidity <...
-
Page 25: Controller Version Codes
6. CONTROLLER VERSION CODES Table 2 RE82 X X X X X X X Output 1: relay voltage 0/5 V continuous current 0/4 .. 20 mA continuous voltage 0 .. 10 V Output 2: relay voltage 0/5 V continuous current 0/4 .. 20 mA continuous voltage 0 .. - Page 26 SCHEMATY PODłąCZEŃ ELECTRICAL CONNECTIONS Regulator ma dwie listwy rozłączne z zaciskami śrubowymi. Listwy umożliwiają przyłączenie sygnałów przewodem o przekroju do 2,5 mm The controller has two separable terminal strips with screw terminals. Strips enable to connect all signals by a wire of 2.5 mm cross-section.
- Page 27 Pt1000 Pt100 Pt100 Pt1000 Pt1000 Pt100 Pt100 Pt100 Pt100 zwora / Jumper Jumper zwora / zwora Jumper zwora Jumper jumper jumper termorezystor Pt1000 termorezystor Pt100 termorezystor Pt100 w układzie 2-przewodowym w układzie 3-przewodowym RTD Pt1000 RTD Pt100 in 3-wire RTD Pt100 in two-wire system system 0/4...20 mA...
- Page 28 23 29 31 odbiornik/ load Load Load odbiornik/ load 24 30 32 OU2 OU1 wyjście 1,2 - napięcie 0/5 V wyjście 1, 2, 3, 4 - przekaźnik Output 1, 2 – voltage 0/5 V Output 1, 2, 3 , 4 – relay 0...10 V 0/4...20mA wyjście 1,2 - ciągłe prądowe...
- Page 29 B (-) RS-485 A (+) Rys. 11. Zasilanie przetworników 24V Rys. 10. Interfejs RS-485 Fig. 11. Supply of 24V transducers Fig. 10. RS-485 Interface 2.3. Zalecenia instalacyjne W celu uzyskania pełnej odporności regulatora na zakłócenia elektro- magnetyczne powinno się przestrzegać następujących zasad: - nie zasilać...
- Page 30 of the same length, cross-section and resistance, and led in a shield as above, - all shields should be one-side earthed or connected to the protection wire, the nearest possible to the controller, - apply the general principle, that wires leading different signals should be led at the maximal distance between them ( no less than 30 cm), and the crossing of these groups of wires made at right angle (90º).
- Page 32 LUMEL S.A. ul. Sulechowska 1, 65-022 Zielona Góra, Poland tel.: +48 68 45 75 100, fax +48 68 45 75 508 www.lumel.com.pl Informacja techniczna: tel.: (68) 45 75 306, 45 75 180, 45 75 260 e-mail: sprzedaz@lumel.com.pl Realizacja zamówień: tel.: (68) 45 75 207, 45 75 209, 45 75 218, 45 75 341 fax.: (68) 32 55 650...
Need help?
Do you have a question about the RE72 and is the answer not in the manual?
Questions and answers