
Related Manuals for Apollo Enclosures ELITE Series

Summary of Contents for Apollo Enclosures ELITE Series
- Page 1 ELITE Line of Environmental TV Enclosures MODELS: AE4239 AE5046 AE5550 AE6560 AE7570 AE8680 (With TV Swing Brackets) Mastering the Outdoor TV Viewing Experience from the Inside…Out! www.apolloenc.com...
-
Page 2: Table Of Contents
Table of Contents Table of Contents …………………………………………………………………………………………. Introduction ………………………………………………………………………………………………… Product Description……………………………………………………………………………………….. Enclosure Model Specifications………………………………………………………………………… Weatherproof Mount Options……………………………………………………………………………. Safety ………………………………………………………………………………………………………... Getting Started …….…………………………………………………………………..…………………... Parts List............................Selecting the best viewing location …………………………………………………………....Installing the Apollo Mount to your Outside Location ……………………………………………….. Unpacking Your Apollo Enclosure …………………………………………………………………….. Assembly Instructions……………………………………………………………………………………. -
Page 3: Introduction
Introduction Congratulations on the purchase of your Apollo environmental TV enclosure. Apollo Enclosures (Apollo) developed environmental LED/LCD enclosures as a platform to provide an affordable solution to safely enjoy TV entertainment outdoors in both residential and commercial applications worldwide. With optimized internal capacity, configurability and flexibility; the Apollo environmental enclosure is the ideal solution for protecting your LED/LCD TV for outdoor entertainment applications of today and tomorrow, providing both quality and endurance for years to come. -
Page 4: Product Description
Product Description Overview The features for all Apollo models are identical in functionality with the only difference being the sizes of LED/LCD televisions that will safely fit inside each model. There is a full complement of weatherproof mounts for a complete environmental solution. -
Page 5: Enclosure Model Specifications
Apollo Enclosure Specifications – 43”, 50”, 55” Model Specifications Model AE4239 Model AE5046 Model AE5550 Fits Sizes 39” – 43” LED/LCD TVs 46” – 50” LED/LCD TVs 50” – 55” LED/LCD TVs Max TV Dimension the 38”W x 23” H x 2.7” D 45”... -
Page 6: Safety
Safety Complies with Apollo Enclosures are certified to UL/CSA safety standards. UL/CSA 60950-1 UL/CSA 60950-22 Voltage: 110/220V 60 HZ E212615 E2126 Amp: 15A Maximum NOTE: Please read entire instruction guide before you start installation and assembly of the Apollo enclosure. -
Page 7: Getting Started
Getting Started 1. Parts List QUANTITY Description Apollo Front Cover with Anti-Reflective Glass Apollo Back Panel TV Swing Brackets Cable Cover Assembly Assembly Hardware Kit 1” Extension Cord 2. Selecting the Best Viewing Location a. For best viewing enjoyment, we recommend that you install your enclosure in a shaded area, under a canopy, trees or facing away from the sun during your optimum viewing time of day. -
Page 8: Assembly Instructions
Assembly Instructions 1. Adjusting TV Swing Brackets for Depth of TV IMPORTANT! Verify that your TV conforms to the maximum dimensions that the enclosure can accommodate (see specifications on Page 5). a. For the TV to fit properly in the enclosure, please adjust the brackets as shown below, according to the depth of your TV For TVs with depth of 2.4”... -
Page 9: Attaching Tv Swing Brackets To Back Of Tv
2. Attaching TV Swing Brackets to Back of TV Select the notch on the TV Swing Bracket based on the size of the TV (see chart below Brackets with 43” to 65” Enclosures Brackets with 65” to 86” Enclosures Center Line Notch Indicator For “Lower VESA”... - Page 10 (approx.. 8”). If your TV VESA pattern width is 200mm, an adapter kit will be required. Please contact Apollo Enclosures at 888-414-5919 and one will be sent at No Charge. a. Select the notch on the TV Swing Bracket based on the size of the TV (see Page 9) b.
-
Page 11: Attaching Mounting Brackets To Inside Of Back Panel
Attaching Internal TV Swing Mounting Brackets to Inside of Back Panel 300mm 400mm FOR ENCLOSURE MODELS: 43”, 50”, 55” & 65” 1. The TV swing brackets are factory installed at the 400mm width (approx. 16”). If your TV VESA pattern measures 300mm (approx..12”), relocate to the alternate position by removing 10-24 lock nuts and retightening in the 300mm position. -
Page 12: Attaching Mounting Brackets To Rear Of Back Panel
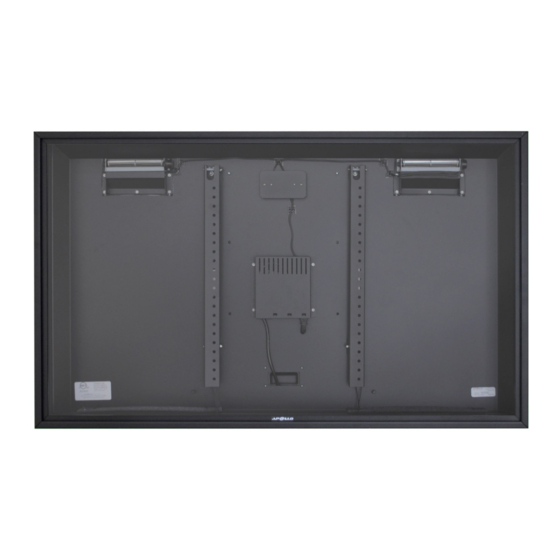
4. Attaching Mount Brackets to Rear of Back Panel IMPORTANT! BE SURE THE O-RING RUBBER WASHER IS PLACED BETWEEN THE BACK OF THE ENCLOSURE AND THE STAINLESS-STEEL WASHER TO PREVENT WATER INTRUSION. a. Use the four (4) holes for models 43”, 50”, 55” & 65” and (6) holes for models 75” & 86” with threaded inserts in the back panel to attach the two (2) vertical mount brackets, included with the wall mount. -
Page 13: Attaching The Back Panel To The Mount
5. Attaching the Back Panel to the Mount NOTE: Be sure your mount is completely installed to your outside location and all cables are run before proceeding. a. Attach back panel to wall mount, lock the mount in the desired tilt or non-tilt position and tighten tilt adjustment screws before hanging TV. -
Page 14: Attaching
IMPORTANT: Test operation of your TV before attaching front cover. 7. Attach front cover a. Hold the cover at a slight tilt and carefully align from left to right so front cover is centered over the flange of the rear cover. (See pictures below). Once aligned, drop down cover so flange fits securely into channel. -
Page 15: Maintenance & Care
Cleaning the Glass – § Apollo enclosures are equipped with a double sided anti-reflective safety glass to ensure the best possible viewing experience. To properly clean the glass, we recommend the use of a soft cotton or microfiber cloth. Do not use paper towel, tissues or rags as it may damage the coating on the glass and leave lint behind. -
Page 16: Troubleshooting
You can find more information about Apollo Enclosures at our website, from product specification sheets to Frequently Asked Questions (FAQs), it is all there. Visit us at: www.apolloenc.com Limited Warranty Apollo enclosures and accessories are warrantied for one (1) year in-factory parts and labor from the date of original purchase. Please go to our website at www.apolloenc.com for full details on warranty and return policies.
Need help?
Do you have a question about the ELITE Series and is the answer not in the manual?
Questions and answers