
Related Manuals for Slayer Espresso Single Group


Summary of Contents for Slayer Espresso Single Group
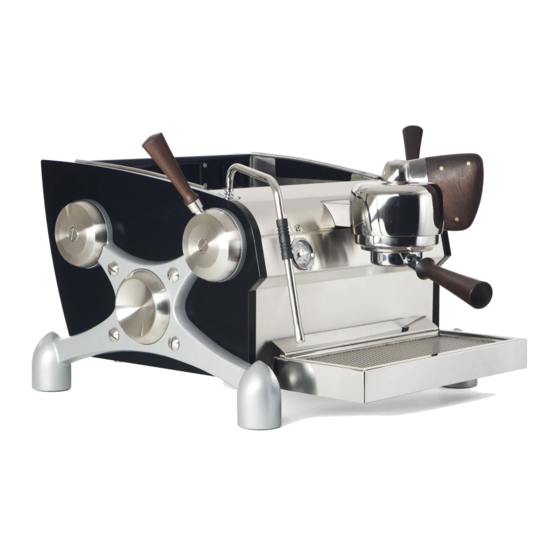
- Page 1 Espresso Single Group USER MANUAL VERSION 6.2 JANUARY 2020 SLAY E R E S PRESSO S I N GLE G ROU P US E R MA NUA L V6 . 2 | JA NUA RY 6 , 2020...
-
Page 2: Table Of Contents
Table of Contents SL AY E R E S P R E SSO V 3 Preparing Espresso TA B L E O F CO N TE NTS Steaming Milk CO PY R I GH T I NFO RM ATI O N Dispensing Hot Water R E SO U RCE S Adjust Flow Rates... -
Page 3: Ay E R E S P R E Sso V
Information contained herein is subject to change without notice. Every precaution has been taken in the preparation of this manual; nevertheless, Slayer assumes no responsibility for errors or omissions or any damages resulting from the use of this information. -
Page 4: Resources
For quick installation, see the QUICK START GUIDE that was included with your machine upon delivery located in the clear packing envelope. For additional details or installation assistance, contact your authorized Slayer reseller or the appropriate party listed below. N OT E FRO M O U R C U STO M ER SUCC ESS DI R EC TO R,... -
Page 5: Warranty Information
Warranty coverage does not include parts that are subject to normal wear Slayer disclaims all representations and warranties, whether expressed or and tear, as determined by Slayer. These include, but are not limited to, implied, including warranties of title, non-infringement, merchantability, shower screens, portafilter gaskets, expansion or anti-suction valves, and and fitness for a particular purpose. -
Page 6: Safety Advisory
• The mains water pressure connection should be between a minimum functionality – as it is described in the “Using Slayer” section on pg. 17 of of 300 kPa (3 bar) and a maximum of 500 kPa (5 bar) this guide – may be a safety hazard, resulting in property damage, physical injury, or even death, and will immediately void the warranty. -
Page 7: Water Treatment Requirements
TDS levels to determine what produces your preferred taste. consider are calcium carbonate and chloride: All Slayer espresso machines need to be connected to a carbon water Calcium Carbonate: a dissolved mineral that determines the “hardness” filter to remove chlorine, sediments, odor, and undesirable tastes. This or “softness”... -
Page 8: Recommended Tools & Accessories
• Pick or awl • Pliers • 9/16 inch socket wrench • Adjustable wrench • Slayer Espresso Machine Cleaner • Steam wand cleaner • Non-abrasive surface cleaner • Slayer Lubricant • Teflon tape SLAY E R E S PRESSO S I N GLE G ROU P US E R MA NUA L V6 . 2 | JA NUA RY 6 , 2020... - Page 9 Installing Your Machine Only qualified service personnel should install Slayer espresso machines. For a list of certified Slayer technicians near you please contact our support department. Incorrect installation may result in injury and/or damage to the equipment. Please read the “Safety Advisory” on pg. 7 before beginning installation.
-
Page 10: Step 1: Prepare Site
Read the Water Treatment Advisory on pages 6-7 for information about avoiding and addressing water-related issues. Your Slayer espresso machine weighs approximately 160 kg (350 lb.) when filled with water and needs to be installed on a structure that is capable of supporting its weight. -
Page 11: Step 2: Unpack Equipment
STEP 2: UNPACK EQUIPMENT Your Slayer espresso machine will arrive in a lidded wooden crate, bolted (approximately two [2] screws) from the base of the pump, then to a pallet at the base. Unpack with the following steps. detach it from the pallet. -
Page 12: Step 3: Connect Drain Hose
STEP 3: CONNECT DRAIN HOSE PA RTS A N D TO O LS: • Drain hose (included) • Hose clamp (included) • Flat-head screwdriver P RO CE D U R E : Use the hose clamp to fasten the drain hose to the drain outlet, as shown. -
Page 13: Step 7: Fill Tanks
Before beginning “Step 7: Calibrate Brew Pump Pressure”, read represents brew pump pressure relative to maximum capacity. Using “Navigating the Menu” on page 17. After machine testing at the Slayer the pad of your thumb, press the arrows to adjust the value in one- studio, pump power is adjusted to near-minimum capacity (10%) in percent (1%) increments between “0”... -
Page 14: Step 8: Turn On Heating Elements
Read “Navigating the Menu” on page 16 for the Menu” on page 16. help completing this step, then complete the steps under “Using Slayer > Per previous steps, ensure that the steam actuator is pulled forward, Access Advanced Settings >... -
Page 15: Factory Settings
FACTORY SETTINGS B R E W TA N K TEM PERATU R E: 93°C (200°F) STE A M P R E SSU R E: 1.5 BAR FLOW RAT E : 40 GRAMS PER 30 SECON DS P U M P P R E SSU R E : 9 BAR SLAY E R E S PRESSO S I N GLE G ROU P US E R MA NUA L V6 . - Page 16 — produces coffee with distinct characteristics that espresso prepared from dark-roasted coffee will more closely resemble contribute to discernible differences in beverage flavor. Slayer Espresso is the characteristics of caramel, dark chocolate and nutty flavors. In some...
-
Page 17: U Si Ng S Lay Er
18—21 grams of ground coffee per espresso serving. Recommended when espresso tastes bitter. Begin with 18 grams, then adjust dose weight as necessary, noting these To adjust the brew temperature, see instructions under Using Slayer > rules: Adjust Brew Temperature on pg. 24. - Page 18 No one knows your coffee better than your roaster and in some cases you are still the best maestro for conducting great cup experiences. As a baseline Slayer recommends using a scale or graduated shot glasses to measure 25—40 grams or 1.0—1.5 fluid ounces of espresso per serving.
-
Page 19: Preparing Espresso
The following guidelines represent a good starting point when first using 3. Grind and dose 18—19 grams of coffee into the portafilter. Slayer. Coffee is a complex food item that differs from variety to variety, 4. Tamp coffee to approximately 30 pounds of pressure, briefly flush farm to farm, and even seed to seed. - Page 20 When the espresso is too acidic and lacks balance it’s time for a properly Follow “Slayer Shot” steps 1-5 above, but allow the espresso to brewed “Slayer Shot”. Due to the extended contact time you will first continue extracting in the Pre-Brew position. Start with 2—3 grams,...
-
Page 21: Steaming Milk
PRO CE D URE Remove portafilter from grouphead and set aside. Slayer produces powerful steam by combining high pressure with 2. Briefly move the brew actuator to the Pre-Brew position, then to the restricted steam tip holes. Various steam tip options (numbered 0—5) -
Page 22: Adjust Brew Tank Temperature
5. To confirm your new setting and continue menu navigation, press At the Slayer studio, the steam tank pressure is set at 1.5 bar. If the steam the round touch sensor. To confirm your new setting and exit menu... -
Page 23: Using Pre-Brew Timers
The pre-brew timer allows the barista to minimize brew actuator movement while still making use of the pre-brew function. To prepare espresso with the pre-brew timer, see instructions under “Using Slayer > Using Pre-Brew Timer” below. Adjust the pre-brew timer with the following steps: Using the pad of your thumb, press the round touch sensor near the center of the screen to activate the menu. - Page 24 “Restore / Save Settings” instructions under “Using Slayer > Advanced Settings” on page 25. 2. Press the round touch sensor to enter the “Temperature” setting. “Up”...
- Page 25 Use the arrows to toggle between “NO” and “YES”, then use the round touch sensor to confirm desired action. Slayer’s clock and calendar are displayed when the machine idles and • “NO” will be confirmed by returning to the “Restore / Save referenced for the “Power Saver”...
- Page 26 (2) per day for weekends (Saturday and Sunday). This allows you to program Slayer to be ready for use in the morning, after work, and so b. Use the arrows to adjust value, pause on desired value, then on.
- Page 27 SL AY E R IN FO Your Slayer espresso machine’s serial number and software version may be viewed on the “Slayer Info” page. After completing the steps above to access the “Advanced Setting” sub-menu, view the “Slayer Info” page with the following steps: Swipe from left to right until the “Slayer Info”...
-
Page 28: Cleaning & Preventative Maintenance
Please observe the following preventative maintenance schedule. CAUTION: Slayer and its parts may be very hot. Please read the Important Safety Information section prior to using Slayer and take the necessary steps to protect yourself and others.g DA ILY E V E RY 1 —2 MO NTHS... -
Page 29: Daily
Use a soft, clean towel to wipe the surfaces of the machine. Do not use abrasive cleaners. Small amounts of window cleaner may be used on the stainless steel components. If your Slayer has wood panels, please refer to Recommended as part of every backflush cycle, or as needed. - Page 30 BACKFLUSHING WITH ESPRESSO BACKFLUSHING WITH WATER MACHINE CLEANER ONLY Recommended once daily for commercial settings; once weekly for homes. Recommended once daily for commercial settings; optional for homes. Do not perform when Teflon-coated dispersion screens are installed. (See May be performed when Teflon-coated dispersion screens are installed. “Cleaning Guidelines for Teflon-Coated Dispersion Screens”...
- Page 31 7. Swipe from left to right until the “Group Cleaning” setting comes into view. 8. Press the round touch sensor to activate cleaning program. A timer will appear, count down from “5”, and the program will begin. As the program runs, another timer will appear to indicate its progress, counting down from “150”.
-
Page 32: Every 1-2 Months
Every 1—2 Months REPLACING SHOWER SCREEN • Pick or awl • Cleaning brush or towel The dispersion screen may become bent or damaged and should be replaced periodically. Ideally, the screen will sit firmly against the metal PRO CE D URE backing. -
Page 33: Every 6 Months
Every 6 Months BEFORE MAINTENANCE If the brew actuator becomes loose, tighten with the following steps: PROCEDURE PARTS AN D TO O LS: • Flat-head screwdriver Before starting the 6-month maintenance procedure, make the following • Allen key preparations: PRO CE D URE : Turn off steam tank heating element. -
Page 34: Every 12-18 Months
4. Pull steam actuator forward, into the “on” position, to drain steam. 6. Rub Slayer lubricant on the pin and return the pin to the valve. 5. Lift to remove cup tray assembly. 7. Reattach the actuator hub and shoulder bolt, tightening with a flat- 6. - Page 35 5. Install a new expansion valve, tightening with a wrench. 5. Rub Slayer lubricant on the inside face of the actuator hub, the nylon 6. Reconnect the silicone tube. ramp inside of the actuator hub, and all corresponding contact points For additional assistance with this procedure, refer to parts on the x-frame.
- Page 36 7. If the Teflon bushing appears dark or flattened, discard it and install a 5. Reconnect wire to probe. new bushing and o-ring, applying Slayer lubricant. For additional assistance with this procedure, refer to parts 8. Reattach wand, tightening with a wrench.
- Page 37 REPLACING BREW ACTUATOR and brew actuator bearing. BEARING c. Place spacer (from step 5) inside the top of the brew actuator. d. Install locking nut (from step 5) and tighten with a 1/4” allen key. e. Install lock screw (from step 4) and tighten with a flat-head PA RTS &...
-
Page 38: Wood Care
Wood Care Keep all wood components dry and away from harsh elements. Use a soft, dry towel to wipe the wood clean. For tougher messes, use a slightly damp towel, then promptly dry the wood. Do not use chemicals or cleaning agents. - Page 39 Only qualified service personnel should repair Slayer Espresso machines. Incorrect repair may result in injury and/ or damage to the equipment. Please consult your distributor for a qualified Slayer service technician.
-
Page 40: Brew Group Head Components
BREW GROUP HEAD COMPONENTS SLAY E R E S PRESSO S I N GLE G ROU P US E R MA NUA L V6 . 2 | JA NUA RY 6 , 2020... - Page 41 O-Ring, FKM, 70 A, Group Cap 20000-56010 Bayonet Ring 46000-50080 Diffuser Screw, Stainless 46000-50073 Nano Coated Shower Screen - Custom Slayer 46000-56091 Gasket for Group Head, 6.1mm 44000-36000 Spacer for Inverted Mag Switch 44000-36140 Screw and Washer for Inverted Magnet 44000-56000 Screw, Socket Head Cap, M8 Thread, 55mm Length, 1.25mm Pitch, Stainless...
-
Page 42: Brew Tank Components
BREW TANK COMPONENTS SLAY E R E S PRESSO S I N GLE G ROU P US E R MA NUA L V6 . 2 | JA NUA RY 6 , 2020... - Page 43 BREW TANK COMPONENTS I T E M N O. PART NU M BER DESC R IPT IO N 40004-32630 Brew Gauge Tube Single Group 40004-32560 Brew Tank Fill Tube, Single Group 99004-50201 Needle Valve Assembly, Single Group 10004-50200 Needle/Solenoid Mount Body, Single Group 99003-16090 Needle Assembly - Needle Only 30000-20194...
-
Page 44: Steam & Hot Water Components
STEAM & HOT WATER COMPONENTS SLAY E R E S PRESSO S I N GLE G ROU P US E R MA NUA L V6 . 2 | JA NUA RY 6 , 2020... - Page 45 Steam Valve Nut, Stainless 40004-50330 Steam Wand, #1 Tip, Single Group, Slayer Espresso SLAY E R E S PRESSO S I N GLE G ROU P US E R MA NUA L V6 . 2 | JA NUA RY 6 , 2020...
-
Page 46: Steam Tank Components
STEAM TANK COMPONENTS SLAY E R E S PRESSO S I N GLE G ROU P US E R MA NUA L V6 . 2 | JA NUA RY 6 , 2020... - Page 47 42000-34702 Fitting, Easy-Align, Compression Tube, Elbow for 1/4" Tube OD x 1/4 - M Pipe, Brass 30004-50170 Water Level Probe Slayer Espresso, 115mm 42000-34680 Fitting, Easy-Align, Compression Tube, Elbow for 5/16" Tube OD x 1/4 - M Pipe, Brass 30000-20194 Valve, 2-Way, Flange Mount, 2.5mm, 24v...
-
Page 48: Pump Components
PUMP COMPONENTS SLAY E R E S PRESSO S I N GLE G ROU P US E R MA NUA L V6 . 2 | JA NUA RY 6 , 2020... - Page 49 PUMP COMPONENTS I T E M N O. PART NU M BER DESC R IPT IO N 42004-34520 Fitting, Easy-Align, Compression Tube, Right Angle Tee for 1/4" Tube OD x 1/8 - M Pipe, Brass 42000-10110 Check Valve, 1/8 NPT Male x 1/8 NPT Female 42000-10140 Adapter, HEX, 1/4 MNPT X 1/8 FNPT, Brass 42004-34510...
-
Page 50: Actuator & X Components
ACTUATOR & X COMPONENTS SLAY E R E S PRESSO S I N GLE G ROU P US E R MA NUA L V6 . 2 | JA NUA RY 6 , 2020... - Page 51 Lock Washer, Element Mount 44000-36080 Hex Nut, Element Mount 44000-36060 Screw, Hub Mount 46000-50180 Rubber Foot, Slayer Espresso 1/2/3 Group 20004-16140 X-Casting, Single Group - Stock Silver 46000-53160 Shoulder Bolt Shim, Thick, Red 44000-36040 18-8 SS Truss Head Slotted Machine Screw 3/8"-16 Thread, 1-1/2" Length, Polished Head...
-
Page 52: Electronics Components
ELECTRONICS COMPONENTS SLAY E R E S PRESSO S I N GLE G ROU P US E R MA NUA L V6 . 2 | JA NUA RY 6 , 2020... - Page 53 ELECTRONICS COMPONENTS I T E M N O. PART NU M BER DESC R IPT IO N 99004-60110 Display Assembly, Single Group 44004-36080 Screw, Flat-Head Hex Drive, 6-32, 1/4", Stainless 44000-17000 Loop Clamp, Nylon, 1in ID x 1/2in W (Black) 44004-36050 Nut, Nylock, 8-32 30000-20270...
-
Page 54: Drain Components
DRAIN COMPONENTS SLAY E R E S PRESSO S I N GLE G ROU P US E R MA NUA L V6 . 2 | JA NUA RY 6 , 2020... - Page 55 42000-34550 Fiting, 1/4" Tube OD x 1/8" NPTF - F, Brass 40005-32060 Hot Water to Mix Valve Tube, Slayer Steam 42000-34500 Fitting, 1/4" Tube OD x 1/8" NPTF - M, SLAY E R E S PRESSO S I N GLE G ROU P US E R MA NUA L V6 . 2 | JA NUA RY 6 , 2020...
-
Page 56: Panels & Chassis
PANELS & CHASSIS SLAY E R E S PRESSO S I N GLE G ROU P US E R MA NUA L V6 . 2 | JA NUA RY 6 , 2020... - Page 57 PANELS & CHASSIS I T E M N O. PART NU M BER DESCRI PTIO N 10004-16020-45.RC Side Panel, Upper, Single Group - "STOCK BLACK" 13004-10180 Front Panel, Mount, Single Group 13004-10080 Front Panel, Upper, Single Group 13004-10050 Cup Tray, Lower, Single Group 13004-10060 Cup Tray Cover Single Group 44004-50550...
-
Page 58: Portafilters
PORTAFILTERS SLAY E R E S PRESSO S I N GLE G ROU P US E R MA NUA L V6 . 2 | JA NUA RY 6 , 2020... - Page 59 Spouted Portafilter, Body Only 46000-56130 Portafilter Double Spout, Spout Only 46000-56131 Portafilter Single Spout, Spout Only 24015-10011 Portafilter Handle, Soft Touch with Slayer Logo 47000-61008 Portafilter Handle, European Ash 46000-56030 Gasket for Portafilter Handle 46000-56041 Portafilter Body, Naked, Metal Only 46000-56160 Portafilter Locking Spring, 1.20 mm, Stainless...
Need help?
Do you have a question about the Espresso Single Group and is the answer not in the manual?
Questions and answers