Table of Contents
Advertisement
SHARP SERVICE MANUAL
PARTS IDENTIFICATION AND SPECIFIC INFORMATION...................................................
CAUTIONS FOR USE............................................................................................................
HOW TO CLEAN THE COOKER...........................................................................................
WIRING DIAGRAM AND CIRCUIT DIAGRAM.......................................................................
COMPONENT REPLACEMENT PROCEDURE.....................................................................
METHOD OF OPERATION.....................................................................................................
ADJUSTMENT OF SWITCH LEVER AND CONTACTS.........................................................
INSPECTION AFTER REPAIRING.........................................................................................
TESTING OPERATING CONDITION......................................................................................
PROBLEMS AND SOLUTIONS..............................................................................................
SERVICE PARTS LIST ..........................................................................................................
AUTOMATIC RICE COOKER
MODELS
In the interests of user-safety (Required by safety
regulation in some countries) the set should be
restore to its original condition and only parts identical
to those specified should be used.
TABLE OF CONTENTS
SHARP CORPORATION
KSH-Q11
KSH-Q18
KSH-CANDY 11
KSH-CANDY 18
Page
2
3
3
4
5 - 8
9
10 - 11
12
12
13
14 - 23
Advertisement
Table of Contents

Related Manuals for Sharp KSH-Q11


Summary of Contents for Sharp KSH-Q11
-
Page 1: Table Of Contents
SHARP SERVICE MANUAL AUTOMATIC RICE COOKER KSH-Q11 MODELS KSH-Q18 KSH-CANDY 11 KSH-CANDY 18 In the interests of user-safety (Required by safety regulation in some countries) the set should be restore to its original condition and only parts identical to those specified should be used. -
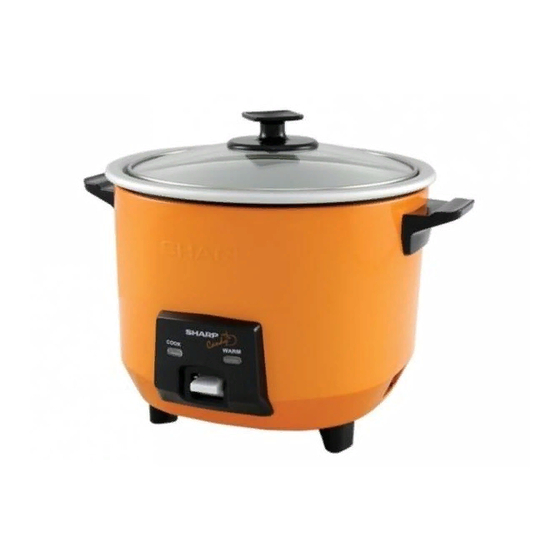
Page 2: Parts Identification And Specific Information
PARTS IDENTIFICATION Model : KSH-Q11 KSH-Q18 (The upper lid is stainless) Lid knob Glass lid Model: KSH-CANDY 11 KSH-CANDY 18 Inner pot Handle Outer pot Panel Cook switch Power cord plug Warm lamp indicator Cook lamp indicator SPECIFIC INFORMATION Model... -
Page 3: Cautions For Use
CAUTIONS FOR USE 1. Keep clean the brim and bottom of inner pot, heater plate at all times to avoid sticking cooked rice, uncooked rice grains, dust and dirt. Cooking performance may be made worse by such sticking rice grain and the like. 2. -
Page 4: Wiring Diagram And Circuit Diagram
WIRING DIAGRAM CIRCUIT DIAGRAM Cooking Warming Temp. fuse COM. Micro switch 220V~... -
Page 5: Component Replacement Procedure
REMOVE OF HANDLE 1. Remove the inner pot from the outer pot. Screw 2. Remove 2 screws holding handles from the outer pot. (Model KSH-Q11, KSH-CANDY 11) 3. Remove 4 screws holding handles from the outer pot. (Model KSH-Q18, KSH-CANDY 18) Handle 4. - Page 6 REMOVE OF MICRO SWITCH 1. Remove the bottom lid in accordance with “REMOVE OF BOTTOM LID”. 2. Disconnect 2 terminals from the micro SW. 3. Remove the screw holding the micro SW. from the SW. angle. 4. Now the micro SW. is free. Micro SW.
- Page 7 REMOVE OF THERMOSTAT ASSEMBLY 1. Remove the bottom lid in accordance with “REMOVE OF BOTTOM LID”. 2. Fix the thermostat rod, pull the stop ring by using the pliers and straightening 2 claws of thermostat. Stop ring 3. Remove the thermostat from the thermo plate. Fig 5. Thermostat rod 4.
- Page 8 REMOVE OF NEON LAMP ASSEMBLY 1. Remove the bottom lid in accordance with “REMOVE OF BOTTOM LID”. 2. Remove the closed terminal holding for the neon lamp lead wires. 3. Cut the cord band and disconnect terminal from the micro SW. Micro switch 4.
-
Page 9: Method Of Operation
METHOD OF OPERATION Different degree of temperature at various parts of the cooker during its operation. HEATER PLATE INNER POT 100 C THERMOSTAT RICE TEMPERATURE THERMOSTAT CUTS OFF TIME 30 MINUTES After being switch “ON” the operation will be started by generating heat from the heater plate and spread through the bottom of inner pot. -
Page 10: Adjustment Of Switch Lever And Contacts
ADJUSTMENT OF SWITCH LEVER AND CONTACTS 1. Turn over the outer pot with inner pot inside, disclose its bottom lid. Push cook switch, adjust switch lever and switch angle. Bottom lid Outer pot Cook switch Inner pot Fig. 11 A. Thermostat rod must not be drew up by switch lever. It should be moving left and right easily. Micro switch Switch lever View B... - Page 11 2. As soon as inner pot is lifted up from outer pot, switch lever must be spring up and micro switch is pressed completely. This rice cooker is so designed that the cook switch will not be put in “COOK” position whenever the inner pot is taken off or not set into the cooker before use.
-
Page 12: Inspection After Repairing
INSPECTION AFTER REPAIRING 1. Cook switch should be at the center of panel. 2. Ensure that there is no any contaminants, deposits, stains exist on heater plate, thermostat and outside bottom of inner pot. 3. Firmly put inner pot inside the cooker, move inner pot right and left to ensure it can be closely contact with outer pot. -
Page 13: Problems And Solutions
PROBLEMS AND SOLUTIONS Problems Possible causes Solution Check . Incompletely cooked 1. Adjust or replace. Boil about 800 cc. of 1. Inner pot improperly rice. water. Check the state contacted with heater of bubbles at the bottom plate. of inner pot. 2. -
Page 14: Service Parts List
SERVICE PARTS LIST Model : KSH-Q11 PARTS CODE REF. NO DESCRIPTION Q’TY PRICE (FEC) PRINTING & PACKAGING MATERIAL 11A103 INSTRUCTION BOOK 11A101 SET PACKING CASE 11A102 CARTON BOX 21A5062 MEASURING CUP 11A104 BOTTOM PAD 11A105 UPPER PAD MECHANICAL PARTS 11A301BLASY UPPER LID ASS’Y... - Page 15 PARTS CODE REF. NO DESCRIPTION Q’TY PRICE (FEC) ELECTRIC PARTS 1B4934ASY POWER CORD ASS’Y 1A2014 HEATER PLATE ASS’Y 1A2021ASY THERMOSTAT ASS’Y 11A402ASY NEON LAMP ASS’Y 1A2394 TEMP. FUSE ASS’Y 11A401 WARM HEATER ASS’Y 2A410 MICRO SWITCH...
- Page 16 Model : KSH-CANDY 11 PARTS CODE REF. NO DESCRIPTION Q’TY PRICE (FEC) PRINTING & PACKAGING MATERIAL 11A113 INSTRUCTION BOOK 11A110GA SET PACKING CASE GA = Green Apple 11A110SK SET PACKING CASE SK = Sunkizt Orange 11A112GA CARTON BOX GA = Green Apple 11A112SK CARTON BOX SK = Sunkizt Orange...
- Page 17 Model : KSH-Q18 PARTS CODE REF. NO DESCRIPTION Q’TY PRICE (FEC) PRINTING & PACKAGING MATERIAL 11A103 INSTRUCTION BOOK 11B101 SET PACKING CASE 11B102 CARTON BOX 21A5062 MEASURING CUP 11B104 BOTTOM PAD 11B105 UPPER PAD MECHANICAL PARTS 11B301BLASY UPPER LID ASS’Y Blue 11B301GRASY UPPER LID ASS’Y...
- Page 18 PARTS CODE REF. NO DESCRIPTION Q’TY PRICE (FEC) ELECTRIC PARTS 1B4934ASY POWER CORD ASS’Y 1B2012 HEATER PLATE ASS’Y 1A2021ASY THERMOSTAT ASS’Y 11B402ASY NEON LAMP ASS’Y 1C2392 TEMP. FUSE ASS’Y 1B4201 WARM HEATER ASS’Y 2A410 MICRO SWITCH...
- Page 19 Model : KSH-CANDY 18 PARTS CODE REF. NO DESCRIPTION Q’TY PRICE (FEC) PRINTING & PACKAGING MATERIAL 11A113 INSTRUCTION BOOK 11B110GA SET PACKING CASE GA = Green Apple 11B110SK SET PACKING CASE SK = Sunkizt Orange 11B112GA CARTON BOX GA = Green Apple 11B112SK CARTON BOX SK = Sunkizt Orange...
- Page 20 2-1-2 2-1-1 2-1-3 2-1-4 2-11 2-10 KSH-Q11...
- Page 21 2-1-2 2-1-1 2-1-3 2-1-4 2-11 2-10 KSH-CANDY 11...
- Page 22 2-1-2 2-1-1 2-1-3 2-1-4 2-11 2-10 KSH-Q18...
- Page 23 2-1-2 2-1-1 2-1-3 2-1-4 2-11 2-10 KSH-CANDY 18...