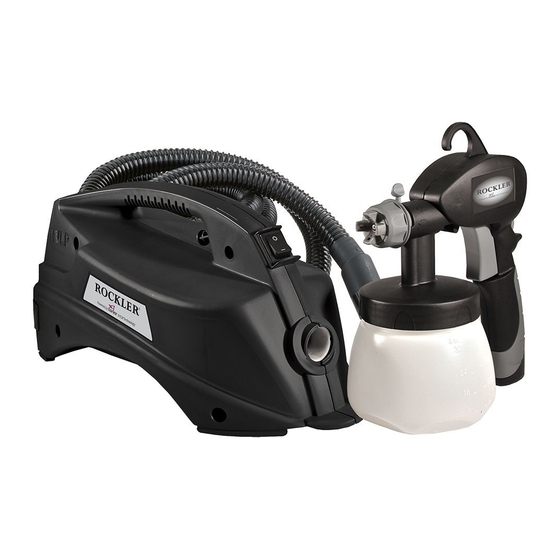
Summary of Contents for Rockler HVLP
-
Page 1: Table Of Contents
Owner’s Manual Read this manual for complete instructions Finishing Sprayer Contents Important Safety Information Questions? Controls and Functions Material Preparation Call Technical Service at: Assembly 1-888-783-2612 Controls Proper Spraying Technique Cleanup Maintenance Troubleshooting Parts List Warranty Double- insulated • Form No. 0529633B 0317... -
Page 2: Important Safety Information
Important Safety Information Read all safety information before WARNING - To reduce the risk operating the equipment. Save these of fire or explosion: instructions. 1. Do not spray flammable or combustible Indicates a hazardous situation which, materials near an open flame, pilot lights if not avoided, could result in death or or sources of ignition such as hot objects, serious injury. - Page 3 11. Hose may become hot and cause skin burn. In a double-insulated product, two systems of insulation are provided instead of grounding. No 12. Use only Rockler HVLP hose. grounding means is provided on a double-insulated product, nor should a means for grounding be added to the product.
-
Page 4: Controls And Functions
Controls and Functions Air hose Spray Gun Spray direction lever Material flow dial Air cap Trigger 2.5 mm needle kit* Turbine Material handle container Turbine ON/OFF switch Needle and fluid tip tool Filter housing Material Flow Dial The material flow dial determines the amount of spray material that is sprayed from the spray gun. -
Page 5: Material Preparation
Material Preparation Note: Material to be sprayed may need to be strained to remove any impurities in the paint which may clog the system. Impurities in the paint will give poor performance and a poor finish. Thinning the material Thinning the spray material results in faster spraying, a better finish and less material usage. -
Page 6: Assembly
Assembly Before you begin NEVER point the spray gun at any part of the body. To Assemble IMPORTANT: Make sure the power cord is unplugged. 1. Insert the foam seal and pickup tube into the intake opening. 2. Align the suction tube - A. -
Page 7: Controls
Controls Material Flow Control The material flow dial controls the amount of spray material that is sprayed from the spray gun. Set the material volume by turning the dial on the back of the spray gun. Tip: Spraying with the dial set too high will result in a spray pattern that runs and sags (too much material). - Page 8 Controls (continued) Title Spray Direction Lever Large Surface Projects Generally, high material flow and air power are The spray pattern shape is adjusted by turning the needed for spraying large surface areas, such as walls spray direction lever to either the vertical, horizontal and decks (use 2.5 mm needle) or diagonal positions.
-
Page 9: Proper Spraying Technique
Proper Spraying Technique Title • Overlap each spray pass by at least 50% This The project or area you are spraying will ensure full coverage. STOP must be properly masked in order to • When spraying, start moving the gun then pull prevent overspray from landing on any the trigger. -
Page 10: Cleanup
Cleanup Quick-Cleanup O = OFF Note: For basic, quick-cleaning between color changes, fill the material container with cleaning solution and spray cleaning solution through the gun into a waste container. Before you begin When cleaning, use the appropriate cleaning solution (warm, soapy water for chalk-type paint, milk paint, and latex materials;... - Page 11 Cleanup (continued) Cleaning the Gun To Clean the Spray Gun 1. Make sure power cord is unplugged. Remove the air hose from the rear of the spray gun. 2. Remove the container, pickup tube and seal. Empty the container of any leftover material. Clean all parts with a cleaning brush and the appropriate cleaning solution.
-
Page 12: Maintenance
Maintenance Cleaning the Filter IMPORTANT: Before every use, you should inspect the air filter in the turbine to see if it is dirty. If it is dirty, follow these steps to replace it. IMPORTANT: Never operate your unit without the air filter. Dirt could be sucked in and interfere with the function of the unit. -
Page 13: Troubleshooting
Troubleshooting PROBLEM CAUSE SOLUTION Problem A: Little or no 1. Needle clogged. 1. Clean. material flow 2. Pickup tube clogged. 2. Clean. 3. Material flow setting too low. 3. Increase material flow setting. 4. Pickup tube loose. 4. Remove and replace as tightly as possible. -
Page 14: Parts List
Parts List Part No. Description Qty. ------- Turbine (includes item 2) 0V0377 Filter 0L2249 Air hose Replacement parts available by calling customer service 1-888-783-2612 This unit contains no servicable electrical parts. Do not attempt to service yourself. Store indoors with the cord wrapped around the turbine handle. - Page 15 Parts List Part No. Description Qty. 2369177 Spray gun assembly (includes items 1-9) 0V0001 Air cap ring 0V0002 Air cap 0V0003 Spray direction lever -------- Fluid tip (1.5mm) -------- Needle (1.5mm) 0HVMAC7US Material container (32 oz.) 0L0682 Seal 0HVACC31 Pickup tube 0V0018 Fluid tip and needle tool 2353925...
-
Page 16: Warranty
Limited Warranty HVLP paint spray equipment This product, manufactured by Wagner Spray Tech Corporation (Wagner), is warranted against defects in material and work-manship for one year following date of purchase if operated in accordance with Wagner’s printed recommendations and instructions. This warranty does not cover damage resulting from improper use, accidents, user’s negligence or normal wear.

Need help?
Do you have a question about the HVLP and is the answer not in the manual?
Questions and answers