Table of Contents
Advertisement
Advertisement
Table of Contents

Related Manuals for Ilife Shinebot W400s


Summary of Contents for Ilife Shinebot W400s
- Page 1 Floor Washing Robot User Guide For more details, please visit www.iliferobot.com...
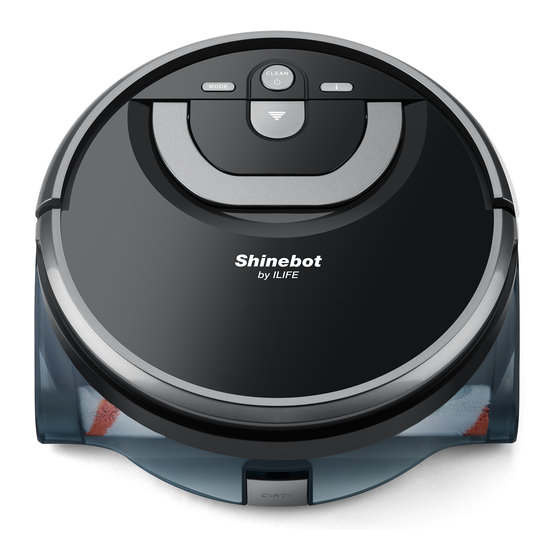
- Page 3 Thank you for choosing Shinebot W400s Floor Washing Robot! You’ve joined millions of people to get cleaning done robotically. This user manual helps you to keep your robot performing at its best. Please take a few moments to read through it.
-
Page 4: Table Of Contents
Contents 1. Important Safety Instructions ............1 2. Important Tips ....................3 2.1 How to start ....................3 2.2 How to perform the best ................3 3. In the Box ......................5 4. Product Anatomy ..................6 4.1 Main body ......................6 4.2 Display panel ....................6 4.3 Major components ..................7 4.4 Remote control ....................9 4.5 Charging dock ....................9 5. - Page 5 Contents 7. Maintenance ....................16 7.1 Clean the dirty water tank ...............16 7.2 Clean the main brush .................17 7.3 Clean the filter ....................18 7.4 Clean the water tank openings ...............18 7.5 Clean the nose wheel .................19 8. Troubleshooting ..................20 9. Product specifications ................21...
-
Page 6: Important Safety Instructions
Important Safety Instructions When using electrical appliance, basic precautions should always be followed, including the following: Read all instructions before using this appliance. WARNING - To reduce the risk of fire, electric shock, or injury. Do not leave appliance when plugged in. Unplug from outlet when not in use and before servicing. - Page 7 Important Safety Instructions CAUTION- To reduce the risk of injury from moving parts, unplug before servicing. Do not allow robot to clean anything that is burning or smoking, such as cigarettes, matches, or hot ashes. Do not use without water tank in place. Always insert batteries correctly with regard to polarity (+ and - ) marked on the battery and the product.
-
Page 8: Important Tips
Important Tips Shinebot contains electronic parts. DO NOT immerse the robot’s main body in water. How to start Turn on/off To turn the robot on, press for 1s. To turn it off, press for 3s. Release the button after a sound alert. The robot will automatically enter sleep mode if no command is received within 3 minutes. - Page 9 Important Tips The robot works on a variety of hard floor surfaces, such as porcelain tiles, vinyl flooring, and laminated floors. The robot performs well on tile floor with small gaps. Tile Tile The robot does not work properly on tile floors with gaps wider than 10mm. >10mm Tile Tile...
-
Page 10: In The Box
In the Box Robot main body Charging dock Adapter (include a main brush) Main brush Cleaning tool Hard floor cleanser Remote control User guide AAA battery ( X2 ) For more details, please visit www.iliferobot.com... -
Page 11: Product Anatomy
Product Anatomy Main body Water tank release button Handle Bumper Dirty water outlet Side wheel Display panel Cleaning modes Voice alert Start/Stop clean Area mode Spot mode Water tank alert Path mode Edge mode Battery level For more details, please visit www.iliferobot.com... -
Page 12: Major Components
Product Anatomy Host machine Integrated water tank Dirty water level detector Main brush Main brush soft cap Main brush gearwheel Clean water inlet Fan-coil inlet For more details, please visit www.iliferobot.com... - Page 13 Product Anatomy Side wheel Sprinkler nozzles Drop sensor Charging pins Nose wheel Side wheel Drop sensors Rear wheel Lock button Suction passage Fan-coil outlet Scraper Clean water outlet Minimum water level Clean water inlet cap For more details, please visit www.iliferobot.com...
-
Page 14: Remote Control
Product Anatomy Remote control Spot mode Path mode Left / Right Down Up/Down/Left/Right Direction can only be Edge mode changed when the robot is on standby. Long press Starting point to activate the robot Area mode and move it forward. The robot will follow the direction that the remote control points at and start... -
Page 15: Installation
Installation Install the charging dock Shinebot W400 is not a self-charging robot. Please take it to the dock manually for recharging after each use. Step 1 Turn the charging dock Plug in the power cord. Secure wires around the upside down. cable channel. -
Page 16: Install The Main Brush
Installation Install the main brush It's recommended to properly dampen the main brush before installation for better cleaning performance. Insert the recessed end of the main brush into the gearwheel. Press down on the capped end into the other end of the main body. Add water and cleanser Press down on the water tank release button, pull the handle up to detach the tank. -
Page 17: Install The Water Tank
Installation Instructions Cleanser to water dilution ratio is 1:100. Add a bottle cap of cleanser in the clean water tank before each cleaning. Attention: Using excessive cleanser ≈ 6ml can damage the Shinebot, which (Bottle cap capacity:6ml) should be avoided. The Shinebot Hard Floor Cleanser The Shinebot This concentrated cleanser is available... -
Page 18: Start Cleaning
Start Cleaning Place the robot Take the robot out of the charging dock to the cleaning starting spot, and place the robot at least 1.6 ft away from the wall. Select cleaning mode The robot has 4 cleaning modes. Choose the mode you need by pressing the MODE button on the display panel or corresponding buttons on the remote control. - Page 19 Start Cleaning Area mode The robot cleans only the area ahead of its starting point within 270 sq.ft. This mode is intended to avoid the areas you don’t want cleaned. 16.4 ft Path mode For large space cleaning. The robot cleans in a methodical path from the starting spot.
- Page 20 Start Cleaning Spot mode The robot automatically increases suction power and water flow to clean stubborn stains. It cleans at a square spiral route from the starting point, and it will take the same route back to the starting spot after two rounds of cleaning.
-
Page 21: Clean The Dirty Water Tank
Maintenance To keep the robot running at peak performance, you are advised to perform the following maintenance regularly: Component Maintain Replace Water tank After each use Main brush Once per week 3-5 months Filter Once per week 3-5 months Suction passage Once per week Fan-coil outlet Once per week... -
Page 22: Clean The Main Brush
Maintenance Clean the main brush Remove the integrated water tank and take out the main brush, then rinse with clean water. Detach the integrated Remove the main brush water tank. from the robot body. Remove all the debris on Rinse the main brush with the main brush. -
Page 23: Clean The Filter
Maintenance Clean the filter Remove the filter from the water tank and rinse with water. Filter Remove the filter. Rinse it with water. Clean the water tank openings After removing the filter, press the water tank lock button to open the fan-coil outlet. -
Page 24: Clean The Nose Wheel
Maintenance To keep the tanks tightly sealed, clean the inlet and outlet, and the caps of both tanks regularly. Caps Inlet Outlet Caps Clean the nose wheel Turn the robot upside down and check if the castors can rotate smoothly. Remove the nose wheel by pulling it out vertically. -
Page 25: Troubleshooting
Troubleshooting Voice Alerts Alert Light signal Possible cause Solution Please check Water tank isn't Ensure the water tank and install installed or is installed properly. water tank : Red properly installed. : Red : Orange Please check • Fill with clean water Water tank is clean water •... -
Page 26: Product Specifications
Product Specifications Specification Description Battery Li-ion Input: AC 100-240V~50/60HZ Adaptor Output: DC 19V 0.6A Clean water tank capacity 0.85L Dirty water tank capacity 0.9L Charging time < 300 mins Working time ≥ 80 mins Main body size 282 x 292 x 118 mm Charging dock size 289 x 315 x 49 mm Main body + Charging dock size... - Page 28 ILIFE Customer Service Customer Service Number: 1-800-631-9676 (Toll free for USA & Canada) Mon-Fri: 9:00 a.m. - 5:00 p.m. CST Email: support@iliferobot.com...
Need help?
Do you have a question about the Shinebot W400s and is the answer not in the manual?
Questions and answers
het waterreservoir komt geen water uit de W 400 shine bot hoe krijg ik deze open om bij de uitlaat te komen
The document does not provide specific instructions on how to open the water reservoir of the Ilife Shinebot W400s to access the outlet. However, it mentions maintaining both tanks regularly and refers to caps, inlets, and outlets. You may need to locate the caps on the water reservoir and remove them to access the outlet.
This answer is automatically generated