
Related Manuals for viZaar VUMAN E3

Summary of Contents for viZaar VUMAN E3
- Page 1 SHORT GUIDE OPERATING INSTRUCTIONS REVISION SHORT-GUIDE ENGLISH Document-No.: BA01-025_4-0...
- Page 2 SAVE THE MANUAL FOR LATER REFERRAL You can find the e-manual on your device and on the USB-sick in the scope of delivery. Of course you can also contact our marke- ting team marketing@vizaar.com for the latest version of the manual. COMPANY INFORMATION HEAD QUARTERS: viZaar industrial imaging AG Hechinger Straße 152...
-
Page 3: Table Of Contents
1.3.4 In use 1.3.5 Maintaince / cleaning / repair 1.3.6 Disposal SPECIFICATIONS - TECHNICAL DATA VUMAN E3/E3+ -Specifications* Videoprobe specifications STRUCTURE - START- UP Equipment and accessories Removal from the transport case Setup First steps - basic functions MAINTENANCE - CARE - RAPAIR... -
Page 4: Safety Instructions
SAFETY INSTRUCTIONS PRIOR TO FIRST USE Before using the VUMAN E3, the operator must read The device must not be connected to electrical mains and understand these operating instructions comple- power if you have not understood these instructions tely in order to avoid damage to the product or the... -
Page 5: Safety Instructions
SAFETY INSTRUCTIONS SAFETY INSTRUCTIONS Explanation of symbols and signal words: DANGER signifies a danger which, if not avoided, will lead to death or severe injuries. WARNING signifies a situation which, if not avoided, can cause death or severe injuries. CAUTION signifies a situation which, if not avoided, might result in minor or moderate injury. -
Page 6: Storage
SAFETY INSTRUCTIONS 1.3.1 STORAGE CAUTION Risk of falling due to uneven surfaces: Possible injury and damage to the device • never store or place the case and/or the device on uneven ground ATTENTION Physical impact on probe or device: Risk of damaging probe, device and/or single components •... -
Page 7: Transportation
SAFETY INSTRUCTIONS 1.3.2 TRANSPORTATION ATTENTION Denting of the probe or base unit: Possible damage of the device or components • always transport the device and accessories in the transport case designed by the manufacturer ATTENTION Tensile load of probe or cable Possible damage of the device or components •... -
Page 8: In Use
SAFETY INSTRUCTIONS ATTENTION Penetration of liquids (in test environment): Possible damage to the probe • check the probe externally for damage before using it ATTENTION The water separator is full: Possible damage to the probe muscles due to corrosion • empty the water separator when the system reminds you to ATTENTION Application and device have different operating temperatures:... - Page 9 SAFETY INSTRUCTIONS WARNING Rotating components in the application: Risk of physical damage and destruction of the probe • only operate the device in plant components and areas that are shut down COUTION Light at probe head: Possible damage to the eye/retina, risk of dazzling and temporary or permanent loss of sight •...
-
Page 10: Maintaince / Cleaning / Repair
WARNING Repair and modification: Risk of physical damage to the user and damage to the device • modifications and repairs are only permitted by our viZaar repair service • Please contact our customer service ATTENTION Technical problems or malfunction of the videoscope Risk of damage to the device •... -
Page 11: Specifications - Technical Data
Carbon fibre design with all around elastomer bumper; Construction power cable 2.5 meter (8.2 ft) * Changes in the specifications can occur and will be edited without giving notice. Please contact the manufacturer for further information. **only in some VUMAN E3/E3+ versions... -
Page 12: Videoprobe Specifications
Operation: -10°C to +40°C (+14°F to +104°F) Environmental specifications Storage: -25°C to +55°C (-13°F to +131°F) Max. operating range in air -10°C to +75°C (+14°F to +167°F) Destruction of the video head at +84°C (+183°F) * VUMAN E3/E3+ is only compatible with VUMAN V3 probes... - Page 13 Operation: -10°C to +40°C (+14°F to +104°F) Environmental specifications Storage: -25°C to +55°C (-13°F to +131°F) Max. operating range in air -10°C to +75°C (+14°F to +167°F) Destruction of the video head at +84°C (+183°F) * VUMAN E3/E3+ is only compatible with VUMAN V3 probes...
-
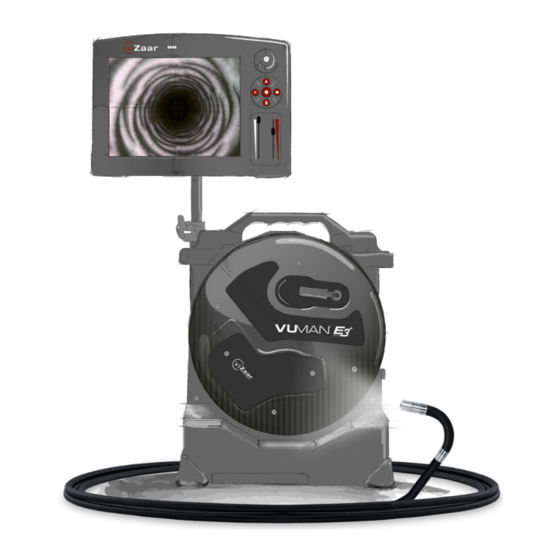
Page 14: Structure - Start-Up
STRUCTURE - START-UP EQUIPMENT AND ACCESSORIES VUMAN E3 / E3+ base unit ® Control unit (VUSCREEN) Cable case Power cord D / UK / US Umbilical cable for VUSCREEN control unit Ground connector Transport case Accessory case External air-hose-adapter (X-WAY only) Mounting adapter for control unit. - Page 15 STRUCTURE - START-UP 8.4 MM RF Centering device tool kit* for 8.4 mm RF non articulation probes. 5 weight optimized centering discs: 60 mm, 44 mm, 34 mm, 24 mm, 17 mm. Mounting on camera head, incl. mounting tool. Centering device tool kit for 8.4 mm RF X-WAY probes: Mounting clip for centering disc Centering device tool kit for 8.4 mm RF X-WAY probes.
- Page 16 STRUCTURE - START-UP 6.4 MM RF Centering device tool kit for 6.4 mm RF non articulation probes 3 optimized centering discs: 44 mm, 19 mm, 10 mm Mounting on camera head, incl. hexagon wrench. Centering device kit for 6.4 mm probe: 1.1.
-
Page 17: Removal From The Transport Case
STRUCTURE - START-UP OTHER* LCD display protective foil. *optional accessories, not included REMOVAL FROM THE TRANSPORT CASE Check the transportcase for possible transport damage before opening it. Dimensions (H) 640 x (B) 645 x (T) 455 mm Weight (empty) 8,7 kg Pull-out handle for ease of transprtation Pull in handle Wheels... - Page 18 To remove the device from the box, lift carefully on both sides of the reel. Memorize the location of each accessory part during removal to help later with repacking. 3.2.1 VUMAN E3 BASE UNIT Reel handle Handle for carrying Battery compartment Extendable bar to fix and eleva- te the VUSCREEN (lift &...
- Page 19 STRUCTURE - START-UP 3.2.2 CONNECTIONS BASE UNIT Mains switch Audio-IN/OUT TV-Out* Connector VUSCREEN-UNIT 12V DC out Video / S-Video in HDMI out USB 3.0 interface Reset button Service connector Mains connection Connector air-hose-adapter Ground connector 3.2.3 LABELS AND INFORMATION Label base unit Label V3 Compatible / Full V3 Compatible Label probe Label V3 VUMAN probe...
- Page 20 STRUCTURE - START-UP 3.2.4 CABLE CASE Umbilical cable for VUSCREEN Ground connector cable Power cord D / UK / US 3.2.5 ACCESSORY CASE Centering device kit (depending on model) Mounting clip for pushing aid Mounting adapter for LCD control pendant External air supply adapter Force deflection ball for optional pushing optical adapters (optional)
- Page 21 STRUCTURE - START-UP 3.2.6 VUSCREEN CONTROL UNIT Joystick for 360° probe articulation control Press to lock / release the probe articulation Direct access key pad 1. Toggle between operation menu and setup. Capture single image Lock / unlock the probe Freeze / unfreeze image Start / stop video recording Illumination slide bar:...
-
Page 22: Setup
STRUCTURE - START-UP SETUP 1. Release control unit (lift latch) 3. Connect the umbilical cable to the VUSCREEN control unit. 2. Connect the umbilical cable to the base unit. 3.3.1 POSSIBLE OPTIONS TO USE THE VUSCREEN UNIT ON THE WORKBENCH ON THE SYSTEM Return the control unit back into the bracket with the Put the panel down onto a clean workbench. - Page 23 STRUCTURE - START-UP USING THE SHOULDER STRAP MOUNTED TO PAN-TILT BAR Mount the four stop pins into the mounting of the Attach the mounting adapter to the bar. A left turn on control unit and attach the shoulder strap. the wing screw will release the pan-tilt bar. Connect the control unit by sliding the connector shaft into the bar as D.
- Page 24 STRUCTURE - START-UP 3.3.2 VIDEOPROBE STORAGE 1. Take off the safety belt Store the video probe correctly! Please check the correct position of the probe before closing the trans- port case. The probe can become trapped between the two halves of the transport case and be damaged.
- Page 25 STRUCTURE - START-UP 3.3.3 HARDWARE SETUP Following the safety instructions is the responsibility 2. Connect the power cable to the user. Connect the system to a low-impedance neutral conductor to route stray currents and electrical charging to the ground. Please refer to l 1.3.3 safety instructions: putting into service, page 7 To ensure safe operating with the VUMAN...
-
Page 26: First Steps - Basic Functions
4. Point the probe at a white piece of paper and per- form a white balance check by pressing the white balance button . Confirm the process by pressing . If not successful, please adjust white balance again. *Different users are only available for VUMAN E3+... - Page 27 STRUCTURE - START-UP 3.4.1 ARTICULATION Before inserting the probe for the first time make sure By default, articulation type „Absolute Articulation“ is that the articulation of the probe and the icon ARTICU- activated. LATION work proberly. 2. Remove the joystick and the probe head will return to its standard position.
- Page 28 STRUCTURE - START-UP 3.4.2 SAVING IMAGES 3.4.4 MEMORY LIMIT The internal memory of the VUMAN® E3 / E3+ allows Save images via direct access button pad: for several hours of high resolution video-recording or f several thousand high quality screen shots. However, if you reach the memory limit the system will give you a short message: In that case, please connect an external drive and...
- Page 29 STRUCTURE - START-UP 3.4.5 SYSTEM SHUTDOWN Please use the following steps to ensure a safe shut- down of the system Always shut down the system as shown in the operating instructions. 1. Touch the OFF symbol on the screen (the OFF sym- Non-observance of the instruction may bol in located on the left bottom of every menu).
-
Page 30: Maintenance - Care - Rapair
3. Use a flat-head screwdriver (3 to 4.5 mm blade months (every 30 operating hours). This process does width) to open the water container by turning the not require a viZaar representant. screw counter-clockwise (max. two turns). The conden- ®... -
Page 31: Maintenance
MAINTENANCE 4.2.1 MAINTENANCE BY THE MANUFACTURER Even when your device is running error-free, the viZaar® service can noticeably improve the functional safety during maintenance and prevent possible defects in advance. Checking the watertightness of probe, bending neck and camera Care / exchange of the camera optic‘s sealings, optical quality check and camera check Checking the probe‘s cross-section for dangerous squeezes, documentation of the destroyed probe... -
Page 32: Shipping / Customer Service / Repair Service
MAINTENANCE - CARE - REPAIR SHIPPING / CUSTOMER SERVICE / REPAIR SERVICE 4.3.1 SHIPPING The system can be shipped inside its case without repacking through a courier service, or it can be trans- ported personally. The case must be secured (e.g. with straps) against unintentional opening. - Page 33 SOUTH-EAST ASIA viZaar South-East Asia Sdn. Bhd. 2A Lrg Desa Utama Jln Masjid Kayu 4.3.3 REPAIR SERVICE Ara PJU 6 In case of a repair, please contact our viZaar repair 47400 Petaling Jaya Selangor / Malaysia ® service: +603 7688 4603...
-
Page 34: Alternative Boot
Alternative boot can also be started by pressing and holding the main switch. l 3.2.2 CONNECTIONS BASE UNIT, page 19 SOFTWARE UPDATE If you wish to update your VUMAN E3 / E3+ system, please contact your vizaar representant to get further After connecting the device, your system help. -
Page 35: Tips - Questions -Answers
TIPS - QUESTIONS - ANSWERS TIPS FOR YOUR INSPECTIONS WITH THE VUMAN E3 / E3+ ® 5.1.1 AFTER THE INITIAL START-UP 5.1.2 GENERAL TIPS After the initial start-up of your VUMAN system, you In this chapter, we provide you with a few general tips, may notice following points: wich can help you to achieve good inspection results economically and quick. - Page 36 TIPS - QUESTIONS - ANSWERS The insertion point must be deburred; The further you insert a probe, the big- sharp edges damage the braiding of the ger the danger that it might get stuck. An insertion tube. endoscopic probe can be more easily in- serted than extracted, as far as straight, narrow and steeples pipelines are not being inspected.
- Page 37 TIPS - QUESTIONS - ANSWERS PROBLEMS AND SYSTEM WARNINGS THE SYSTEM DOES NOT START THE PROBE DOES NOT ARTICU- LATE PROPERLY Check if the main power cable is connected correctly at both ends and power is available. Check if the micro compressor is turned Optional battery operation: Check if the battery pack is fully Check if the micro compressor icon is...
- Page 38 TIPS - QUESTIONS - ANSWERS ILLUMINATION AND PROBE THE IMAGE IS FLIPPED, WORK WELL BUT THE IMAGE IS MIRRORED OR ROTATED MISSING Check if the video IN / OUT is set to INT Press RESET to reset all image manipu- lations Check if the probe connectors are clean and properly connected to the...
- Page 39 TIPS - QUESTIONS - ANSWERS THE SYSTEM DOES NOT BOOT THE SOFTWARE VERSION ON THE RIGHT BOTTOM OF THE SCREEN If your system does not boot, perform IS CHANGING COLORS / BLIN- the alternative boot. KING Orange: The system is restoring system files. With the next start of your system, the THE SYSTEM DISPLAYS AN ERROR color will change back to white...
-
Page 40: Eu Declaration Of Conformity
2014/30/EC Electromagnetic Compability Directive EN 61000-6-2:2006-03+Ber.1 2011-06 Declarations of conformity are held by the EN 61000-4-2:2009-12 manufacturer: EN 61000-4-3:2011-04 viZaar industrial imaging AG Hechinger Straße 152 EN 61000-4-4:2013-04 72461 Albstadt-Tailfingen Germany EN 61000-4-5:2015-03 +49 7432 98375-0... - Page 41 QUALITY STANDARDS QUALITY IS OUR FOCUS! To provide you with the most innovative and reliable products and services at the highest level, we are constantly working on progress in all our business areas. This is an ongoing process of our employees and processes, which is certified by experts.
Need help?
Do you have a question about the VUMAN E3 and is the answer not in the manual?
Questions and answers