Advertisement
Before
any use re
ad carefully
you wi
th all the
necessary
require
ments.
Or
iginal inst
The pictu
ure is just fo
or your refe
y the user
y informati
Opera
O
tructions
erence.
manual wh
hich has be
on for pro
oper use,
Gasolin
G
ne Till
tor's M
Manu
DT36V
een purpos
ely drawn
incompl
iance with
h basic saf
er
ual
up to prov
vide
fety
Advertisement
Table of Contents

Summary of Contents for Ducar DT36V
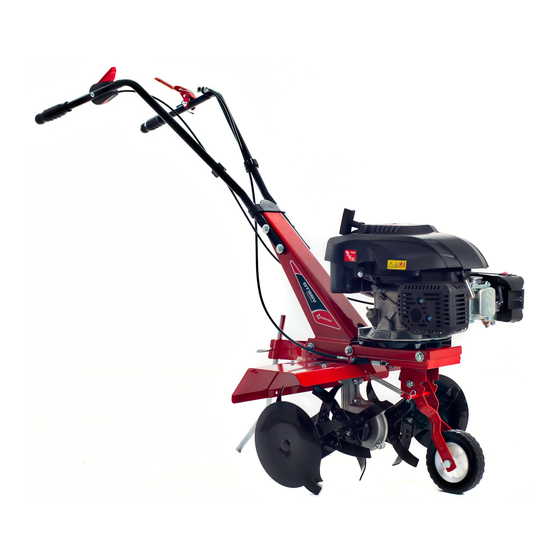
- Page 1 Gasolin ne Till Opera tor's M Manu ual DT36V iginal inst tructions The pictu ure is just fo or your refe erence. Before any use re ad carefully y the user manual wh hich has be een purpos ely drawn up to prov vide you wi th all the necessary y ...
- Page 3 eword Thank y you for pur rchasing ou ur compan ny’s tiller. This ma anual cont ains inform mation on o operation a and mainten nance of th he tiller, wh hich is base on the m most recen nt product i information n available at the tim...
- Page 4 Recor rd the follo owing inform mation bell low for serv vice or warr ranty assis stance. Date of Purch hase: Mode el Numb Item Number Numbe SAVE E THIS M MANUA AL FOR FUTUR EREFE RENCE This m manual con ntains impo ortant infor rmation reg...
-
Page 5: Table Of Contents
Contents 1. Safety Instruction .................... 1 2. Pack Contents ..................... 7 3. Component Identification................... 8 4. Assembly ...................... 10 5. Pre‐operation Check .................. 11 6. Engine Start ...................... 3 7. Tiller Operation .................... 14 8. Stopping ...................... 176 9. Maintenance .................... 17 10. Transporting and Storage ................ 20 11. Troubleshooting .................... 20 12. Specifications .................... 22 ... -
Page 6: Safety Instruction
1. Safety Instruction 1.1 Warning symbols For the safety of yourself and others, please pay special attention to these precautions. This tiller is designed to give safe and dependable service if operated according to the instructions. Read and understand the owner's Manual before operating the tiller. Failure to do so could result in personal injury or equipment damage. Exhaust gas contains poisonous carbon monoxide. Never run the tiller in enclosed areas. Be sure to provide adequate ventilation. When installing, ventilated protection is to be observed. The rotating parts are sharp and running at high speed. Accidental contact can cause serious injury. Keep your hands and feet away from the parts while engine is running. Stop the engine and disengage the tines clutch before inspection or maintenance of the tines. Disconnect the spark plug cap to prevent any possibility of accidental starting. Wear heavy gloves to protect your hands from the tines when clearing the tines or when inspecting or replacing the tines. Read instruction manual and safety instructions before starting up and pay attention! Wear ear protection! Wear safety goggles! 1 ... - Page 7 Wear work gloves! Wear robust footwear when using the device! Open fires forbidden! Attention! Do not touch rotating parts. There is serious risk of injury! Do not remove or modify protection and safety devices! Attention! Hot components ‐ Do not touch Risk of catapulted parts if the engine is running. Be sure to keep a safe distance. Keep bystanders away from the device! 1.2 Safety WARNING Training Read the instructions carefully. Be familiar with the controls and the proper use of the equipment; Never allow children or people unfamiliar with these instructions to use the machine. Local regulations can restrict the age of the operator. 2 ...
- Page 8 Never work while people, especially children, or pets are nearby; Keep in mind that the operator or user is responsible for accidents or hazards occurring to other people or their property DANGER Preparation While working, always wear substantial footwear and long trousers. Do not operate the equipment when barefoot or wearing open sandals; Thoroughly inspect the area where the equipment is to be used and remove all objects which can be thrown up by the machine; WARNING ‐ Petrol is highly flammable: ─ Store fuel in containers specifically designed for this purpose; ─ Refuel outdoors only and do not smoke while refueling; ─ Add fuel before starting the engine. Never remove the cap of the fuel tank or add petrol while the engine is running or when the engine is hot; ─ If petrol is spilled, do not attempt to start the engine but move the machine away from the area of spillage and avoid creating any source of ignition until petrol vapors have dissipated; ─ Replace all fuel tank and container caps securely; Replace faulty silencers; Before using, always visually inspect to see that the tools are not worn out or damaged. Replace worn out or damaged elements and bolts in set to preserve balance. DANGER Operation Do not operate the engine in a confined space where dangerous carbon monoxide fumes can collect; Work only in daylight or in good artificial light; Always be sure of your footing on slopes; Walk, never run with the machine; For wheeled rotary machines, work across the slopes, never up and down; Exercise extreme caution when changing direction on slopes; Do not work on excessively steep slopes; Use extreme caution when reversing or pulling the machine towards you; Do not change the engine governor settings or over‐speed the engine; Start the engine carefully according to manufacturer instructions and with feet well away from the tool(s); Do not put your hands or feet near or under rotating parts; Never pick up or carry a machine while the engine is running; m) Stop the engine: ...
- Page 9 Reduce the throttle setting during engine shut down and, if the engine is provided with a shut‐off valve, turn the fuel off at the conclusion of working; WARNING Maintenance and storage Keep all nuts, bolts and screws tight to ensure the equipment is in safe working condition; Never store the equipment with petrol in the tank inside a building where fumes can reach an open flame or spark; Allow the engine to cool before storing in any enclosure; To reduce the fire hazard, keep the engine, silencer, battery compartment and petrol storage area free of vegetative material and excessive grease; Replace worn or damaged parts for safety; If the fuel tank has to be drained, this shall be done outdoors. 1.3 Operator Responsibility · Keep the tiller in good operating condition. Operating a tiller in poor or questionable condition could result in serious injury. · Be sure all safety devices are in working order and warning labels are in place. These items are installed for your safety. · Be sure the safety covers (Fan cover, recoil starter cover ) are in place. · Know how to stop the engine and tines quickly in case of emergency. Understand the use of all controls. · Keep a firm hold on the handlebars, they may tend to lift during clutch engagement. · Don’t allow anyone without proper training to operate this tiller to avoid injury. · Wear sturdy, full‐coverage footwear. Operating this tiller on barefoot or with open toe shoes or sandals increase your risk of injury. · Dress sensibly. Loose clothing may be caught by moving parts, increasing your risk of injury. · Be alert, operating this tiller when you are tired, ill or under the influence of alcohol or drugs may result in serious injury. ...
- Page 10 1.5 Thrown Object Hazard · Objects hit by the rotating tines can be thrown from the tiller with great force and may cause severe injury. · Before tilling, clear the tilling area of sticks, large stones, wire, glass, etc. · Till only in daylight. · Pieces thrown from worn or damaged tines can cause serious injury. Always inspect the tines before using the tiller. 1.6 Fire and Burn Hazard Gasoline is extremely flammable and gasoline vapor is explosive. Take extreme care when handling gasoline. Keep gasoline out of reach of children. · Refuel in a well‐ventilated area with the engine stopped. · Allow the engine to cool down before refueling. Fuel vapor or spilled fuel may be ignited. · The engine and exhaust system become very hot during operation and remain hot for a while after stopping. Touch the hot engine components can cause burn injuries and can ignite some materials. · Avoid touching a hot engine or exhaust system. · Allow the engine to cool down before performing maintenance or storing the tiller indoors. 1.7 Carbon Monoxide Poisoning Hazard Exhaust contains poisonous carbon monoxide, a colorless and odorless gas. Breathing exhaust can cause loss of consciousness, even lead to death. · If you run the engine in an area that is confined or even partially enclosed, the air you breathe could contain a dangerous amount of exhaust gas .To keep exhaust gas from building‐up, provide adequate ventilation. 1.8 Operation on Slope ·...
- Page 11 Adjust rotating depth according to the condition of the ground. Hoe hard ground in progressive stages. · Do not work on soggy ground; lumps of earth can be caught by the hoeing assembly and thrown out. If foreign bodies, e.g. stones, are encountered by the hoeing device, stop the machine, switch it off and check it for damage. · Do not work on any surfaces below which gas or power lines, or similar, are located. · Do not work close to trees otherwise the machine may cut through the roots. 6 ...
-
Page 12: Pack Contents
2. Pack Contents Thank you for purchasing the Ducar® 4 Stroke Petrol Engine Powered Tiller. When you open your packaging, first remove all items and check there are no parts damaged or missing. If you find anything wrong, do not operate the product until the parts have been replaced or the fault has been rectified. Failure to do so could result in serious injury. IMPORTANT INFORMATION NOTE: This product is a 4 stroke engine powered Tiller. The engine MUST be filled with recommend SAE 10W/30 BEFORE starting. Fresh unleaded fuel must be used in this unit. DO NOT use Ethanol based fuels. DO NOT mix oil with fuel. NOTE: Inexperienced or first time users pay particular attention to the operation of the Tiller, including details of starting and stopping the tiller and correct use. Contents of carton 1 x Tiller main body 1 x handle bar 2 x mud fender 1 x drag bar 1 x drag bar hairpin 2 x blade assembly 1 x handle bar adjuster 1 x handle bar mounting cover 2 x cable clips 6 x mud fender assembly (M8x16 bolt+Φ8 washer+ M8 nut) 4 x mud fender support M6x16 bolt and M6 nut 1 x M5x20 bolt 2 x ST4.8x16 bolt 2 xΦ8x40 wheel locking pin 2 x wheel hairpin 1 x locking pin for connecting bar 1 x hairpin for connecting bar 7 ... -
Page 13: Component Identification
Compo onent Id dentifica ation 1 Tooling Clutc ch 2 Handle 3 Lock clutch lever 4 Clutch cable e 5 Engine spee ed adjustmen t 6 Engine spee ed adjustmen t cable 7 Drag bar 8 ... -
Page 14: Assembly
4. Assembly WARNING Stop the engine and unplug the spark plug before any repairs or maintenance operations. WARNING DO NOT attempt to start this mower without the mower first being FULLY assembled. WARNING DO NOT attempt to start this mower without first adding SAE 10W/30 engine oil to the engine. efore assembling, please take all parts out from the package and place them on the ground, carefully check if all the components are in readiness and not broken. 4.1. Lift front wheel Pull the front wheel downward so that the front wheel can rotate freely, then lift the front wheel bracket to a proper position ... -
Page 15: Pre-Operation Check
5. Pre‐operation Check Please attention to check all the components are good and controls are functional before each use. 5.1. Engine oil CAUTION: Running the engine with low oil level will cause serious engine damage. Wipe the dipstick up. Put the dipstick into the oil filler neck, and screw it in. If the level is low, fill the recommended oil to the middle of the oil dipstick. Use high‐detergent, premium quality 4‐stroke engine oil, certified to meet or exceed U.S. automobile manufacturer’s requirement for API Service Classification SG, SF. CAUTION: Using non‐detergent oil or 2‐stroke engine oil could shorten the engine’s service life. SAE 10w‐30 is recommended for general, all temperature use. Other viscosities shown in the following chart might be used when the average temperature in your area is within the indicated range. 5.2. Air filter Check air filter for dirt or obstruction of elements 5.3. Fuel Use automotive gasoline (Unleaded or low‐leaded is preferred to minimize combustion chamber deposits.) 12 ... - Page 16 Never use an oil/gasoline mixture or dirty gasoline. Avoid dirt, dust or water from getting into the fuel tank. CAUTION: Do not fill over the red level line. WARNING · Gasoline is extremely flammable and is explosive under certain conditions. · Refuel in a well‐ventilated area with the engine stopped. Do not smoke or allow flames or sparks in the area where the engine is refueled or the gasoline is stored. · Do not overfill the fuel tank (there should be no fuel in the filler neck). After refueling make sure the tank cap is closed properly and securely. · Be careful not to spill fuel when refueling. Spilled fuel or fuel vapor may be ignited. If any fuel is spilled, make sure the area is dry before starting the engine. · Avoid repeated or prolonged contact with skin or breathing of vapor. Fuel tank capacity: Refer to chapter 12 specifications 5.4. Tools and attachments To install a tool or attachment to the tiller, follow the instructions furnished with the tool or attachment. Ask your dealer for advice if you encounter with any problem or difficulty in installing a tool or attachment. CAUTION: Be sure the clutch is disengaged and the shift lever is in the neutral position to prevent sudden uncontrolled movement when the engine starts. The clutch is engaged by pulling in the clutch lever and disengaged by releasing the lever. 13 ...
-
Page 17: Engine Start
6. Engine Start 6.1 Turn the engine switch to “ON”. 6.2 Pull the starter grip lightly until resistance is felt then pull rapidly. CAUTION: Do not allow the starter grip to snap back against the engine. Return it gently to prevent damage to the starter. 6.3 As the engine warms up, gradually open the choke. 14 ... -
Page 18: Tiller Operation
7. Tiller Operation 7.1 Tiller height adjustment CAUTION: Before adjusting the handle bar, place the tiller on firm level ground to prevent the handle from collapsing accidentally. To adjust the tiller height, loosen the adjuster, select the appropriate hole and tighten the adjuster. 7.2 Tilling depth adjustment Install the hitch attachment in the hitch box with a hitch pin. The tilling depth adjustment can be made as follows: Remove the hitch bar locking pin, sliding the drag bar up or down as necessary. 7.3 Clutch operation The clutch engages and disengages the power from the engine to the transmission. When the clutch lever is squeezed the clutch is engaged and power is transmitted. Squeeze the lever, the tool will be rotated. When the lever is released, the clutch is disengaged and power is not transmitted, release the clutch lever, the tool will be stopped. CAUTION: Reduce engine rpm before operating main clutch. 15 ... - Page 19 7.4 Front wheel Move the tiller on road by the front wheel, lift the handlebars up and ground the front wheel. When the tiller is used in the field, move the wheel up. (1) pull the front wheel downward (2) lift the front wheel up to proper position 7.5 Handling Tips Adjust the handlebar height to a comfortable position (usually waist height is recommended) If the machine jerk forward while tilling, press down the handlebars; if the machine will not move forward, move the handlebars from side to side. Turn: The proper method of negotiating a turn is to lower the handlebars to make the gravity of tiller backward centre toward the rear and then make the turn. This will permit a turn with relative ease. CAUTION: · Do not use the tiller with a rotor with diameter over 260mm. · Operating the tiller on grades could cause the tiller to tip over. · Allowing any one to operate this tiller without proper instruction may result in injury. · Wear sturdy, full coverage footwear. Operating this tiller on bare feet, or with open toe shoes or sandals increases your risk of injury. · Do not use the tiller in the night. · Be sure to transport the tiller from one place to another by two people, if a carrier is not available. · When the rotor is clogged with mud, pebble etc, immediately stop the engine and clean the rotor in a safe place. Be sure to wear heavy gloves when cleaning the rotor. · To prevent damage, check the tiller for any signs of damage or other faults each time when the tiller is used after it has been operated. 16 ...
-
Page 20: Stopping
8. Stopping In an emergency Turn the engine switch/chock lever to “STOP” position. In normal use Release the clutch lever to DISENGAGED position and let chock lever to "STOP" position. (1) Disengage the clutch (2) Turn the chock lever to "STOP" position 17 ... -
Page 21: Maintenance
9. Maintenance The purpose of the maintenance schedule is to keep the tiller in the best working condition, inspect or service as scheduled in the table below. WARNING Turn off the engine before performing any maintenance. If the engine must be run, make sure the area is good‐ventilated. The exhaust contains poisonous carbon monoxide gas. CAUTION: Use only genuine parts or their equivalents. The use of replacement parts which are not of equivalent quality may damage the engine. Maintenance Schedule REGULAR SERVICE Every Every First month PERIOD Every year Daily 3 months 6 months or 300 Hrs or 20 Hrs or 50 Hrs or 100 Hrs ITEM O Check level Engine oil O ... - Page 22 9.1 Changing engine oil Drain the oil while the engine is still warm to assure rapid and complete drainage Remove the oil filler cap and drain the oil. Refill with the recommended oil and check its level. Oil capacity: refer to chapter 12 specifications Wash your hands with soap and water after touching used oil. NOTE: Please dispose used motor oil in a manner that is compatible with the environment. We suggest you put it in a sealed container to your local service for reclamation. Do not throw it to the trash can or pour it on the ground. 9.2 Air Filter Service A dirty air cleaner will block air flow into the carburetor. To prevent carburetor malfunction, service the air cleaner regularly. Service more frequently when operating the engine in extremely dusty areas. WARNING Never use gasoline or low flash point solvents to clean the air cleaner element. A fire or explosion could result in. CAUTION: Never run the engine without air cleaner, or rapid engine wear will be the result. Remove the wing nut and the air cleaner cover. Remove the elements and separate them. Carefully check elements for holes and tears, and replace it if damaged. Foam element: clean in warm soapy water, risen and allow to dry thoroughly or clean in high flash‐point solvent and allow to dry. Dip the element in clean engine oil and squeeze out all the excess. The engine will smoke during initial start –up if too much oil is left in the foam. Paper element: Tap the element lightly several times on a hard surface to remove excess dirt or blow compressed air through the filter from the inside out. Never try to brush the dirt off, for so doing will force dirt into the fibers. 9.3 Fuel Strainer Cup Cleaning WARNING Gasoline is highly flammable and explosive under certain conditions. Do not smoke or allow flames of sparks in the area. Remove the fuel strainer cup and the O‐ring. Wash the removed parts in solvent, dry them thoroughly and reinstall them securely. 19 ...
- Page 23 9.4 Spark plug service Recommended spark plug: BPR5ES (NGK) F7RTC (LG) To ensure proper engine operation, the spark plug must be properly gapped and free of deposits. Remove the spark plug cap. WARNING If the engine has been running the muffler will be very hot. Be careful not to touch the muffler. Visually inspect the spark plug. Discard it if the insulator is cracked or chipped. Measure the plug gap with a feeler gauge. The gap should be 0.7‐0.8mm (0.028‐0.031 in), Correct as necessary by bending the side electrode. Attach the plug washer, thread the plug in by hand to prevent cross‐threading. When mounting a new spark plug, you should screw 1/2 more thread with the wrench after the washer is compressed. If you are mounting an old one, you should only screw 1/8‐1/4 more thread. CAUTION: The spark plug must be securely tightened. An improperly tightened plug can become very hot and possibly damage the engine. Never use a spark plug with an improper heat range. 20 ...
-
Page 24: Transporting And Storage
Transporting and Storage WARNING When transporting the tiller, turn the fuel valve OFF and keep the tiller level to prevent fuel spillage. Fuel vapor or spilled fuel may be ignited. Before storing the unit for an extended period, follow below steps. Be sure the storage area is free of excessive humidity and dust. Drain the fuel. WARNING Gasoline is highly flammable and explosive under certain conditions. Do not smoke or allow flames or sparks in the area. With the fuel valve turned OFF, remove and empty the fuel strainer cup. Turn the fuel valve ON and drain the gasoline in the fuel tank into a suitable container. Replace the fuel strainer cup and tighten securely. Drain the carburetor by loosening the drain knob. Drain the gasoline into a suitable container. Pull the starter grip until resistance is felt. Continue pulling until the notch on the starter puller aligns with the hole on the recoil starter. At this point, the intake and exhaust valves are closed and this will help to protect the engine from internal corrosion. Change engine oil. Cover tiller with plastic sheet. Do not place the tiller with the handlebars on the ground. It will cause the oil entering the cylinder or the fuel spillage. Troubleshooting 11.1 Engine failure and troubleshooting Failure Possible Causes Solution No enough fuel Check fuel level in the fuel tank Fuel valve is OFF Open the fuel valve Can not be Engine switch is OFF... - Page 25 No spark from the spark Remove and clean the spark plug plug WARNING If any fuel is spilled, make sure the surface is dry before testing the spark plug or starting the engine. Fuel vapor or spilled fuel may ignite. 11.2 Gearbox failure and troubleshooting Failure Possible Causes Solution Engine speed is low Open throttle, increase engine speed Belt too long Replace Clutch not work Spring failure Replace Bearing inside gearbox failure Replace...
-
Page 26: Specifications
Specifications ITEM CONTENT Model DT36V Dimension (L*W*H) 705*375*660 N.W(kg) Transmission system Worm and gear TILLER Clutch type Belt tensioned clutch Tilling scope(mm) Tilling depth(mm) Left handlebar(m/s2) Vibration Right handlebar(m/s2) Uncertainty K Workstation sound pressure level (dB(A)) Guaranteed sound power level (dB(A))
Need help?
Do you have a question about the DT36V and is the answer not in the manual?
Questions and answers