
Related Manuals for Samsung AM JXVAF Series


Summary of Contents for Samsung AM JXVAF Series
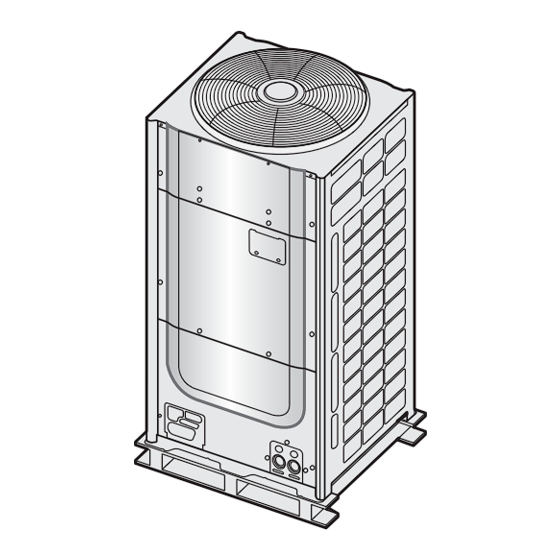
- Page 1 DVM S AM✴✴✴JXVAF✴ Series AM✴✴✴JXVAJ✴ Series Air Conditioner installation manual imagine the possibilities Thank you for purchasing this Samsung product.
-
Page 2: Table Of Contents
Contents Safety precautions ..................... . . 3 Preparing for installation . -
Page 3: Safety Precautions
❋ Generally, system air conditioners should not be relocated after installation. But when it has to be relocated for inevitable reasons, please contact Samsung’s qualified dealers for system air conditioners. Hazards or unsafe practices that may result in severe personal injury or death. - Page 4 Safety precautions Check the following before installation and service work. Before welding, remove dangerous and inflammable things that may cause an explosion and fire around the work. Before welding, remove the refrigerant from inside the pipe or the product. - If you perform welding while refrigerant is in the pipe, it may increase the pressure of the refrigerant and cause the pipe to burst.
- Page 5 CAUTION SIGNS Do not install the drain pipe directly to the bottom part of the outdoor unit and built a proper drainage so that water drains out smoothly. If not, pipe may freeze or bursts during winter time and cause damage to the product or water leakage.
-
Page 6: Preparing For Installation
Safety precautions Changes in DVM S (inverter) compare to conventional models that has to noted when installing For optimal distribution of the refrigerant, you must use Y-joint as branch joint for connecting outdoor units. (To not use T-joint) You cannot operate normally if you do not complete the trial operation through outdoor unit key mode. You must use KEY MODE to run trial operation. - Page 7 Outdoor unit combination Make sure to use an indoor unit that is compatible with DVM S. Indoor units can be connected within the range indicated in following table. If the total capacity of the connected indoor units exceeds the indicated maximum capacity, cooling and heating capacity of the indoor unit may decrease.
- Page 8 Preparing for installation Model name for combination AM180JXVAFH/AZ AM200JXVAFH/AZ AM220JXVAFH1AZ AM240JXVAFH1AZ AM260JXVAFH1AZ Number of individual outdoor units AM080JXVAFH AM100JXVAFH AM120JXVAFH Combined outdoor unit AM140JXVAFH AM160JXVAFH AM180JXVAFH AM200JXVAFH Cooling (kW) 50.4 56.0 61.6 67.2 73.6 Cooling (Btu/h) 172 000 191 100 210 100 229 200 251 100...
- Page 9 Model name for combination AM380JXVAFH1AZ AM400JXVAFH1AZ AM420JXVAFH1AZ AM440JXVAFH1AZ AM460JXVAFH1AZ Number of individual outdoor units AM080JXVAFH AM100JXVAFH AM120JXVAFH Combined outdoor unit AM140JXVAFH AM160JXVAFH AM180JXVAFH AM200JXVAFH Cooling (kW) 106.0 112.0 117.6 123.2 129.6 Cooling (Btu/h) 363 100 382 200 401 200 420 300 442 200 Rated capacity Heating (kW)
- Page 10 Preparing for installation Model name for combination AM580JXVAFH1AZ AM600JXVAFH1AZ AM620JXVAFH1AZ AM640JXVAFH1AZ Number of individual outdoor units AM080JXVAFH AM100JXVAFH AM120JXVAFH Combined outdoor unit AM140JXVAFH AM160JXVAFH AM180JXVAFH AM200JXVAFH Cooling (kW) 162.4 168.0 173.6 179.2 Cooling (Btu/h) 554 200 573 300 592 300 611 400 Rated capacity Heating (kW)
- Page 11 Model name for combination AM740JXVAFH1AZ AM760JXVAFH1AZ AM780JXVAFH1AZ AM800JXVAFH1AZ Number of individual outdoor units AM080JXVAFH AM100JXVAFH AM120JXVAFH AM140JXVAFH Combined outdoor unit AM160JXVAFH AM180JXVAFH AM200JXVAFH Cooling (kW) 208.0 213.0 218.4 224.0 Cooling (Btu/h) 709 800 726 800 745 300 764 400 Rated capacity Heating (kW) 234.0 239.4...
- Page 12 Preparing for installation Model name for combination AM180JXVAFH/AZ AM200JXVAFH/AZ AM220JXVAFH/AZ AM240JXVAFH/AZ AM260JXVAFH/AZ Number of individual outdoor units AM080JXVAFH AM100JXVAFH AM120JXVAFH AM140JXVAFH AM160JXVAFH Combined outdoor unit AM180JXVAFH AM200JXVAFH AM220JXVAFH AM240JXVAFH AM260JXVAFH Cooling (kW) 50.4 56.0 61.6 67.2 72.8 Cooling (Btu/h) 172 000 191 100 210 200 229 300...
- Page 13 Model name for combination AM380JXVAFH2AZ AM400JXVAFH2AZ AM420JXVAFH2AZ AM440JXVAFH2AZ AM460JXVAFH2AZ Number of individual outdoor units AM080JXVAFH AM100JXVAFH AM120JXVAFH AM140JXVAFH AM160JXVAFH Combined outdoor unit AM180JXVAFH AM200JXVAFH AM220JXVAFH AM240JXVAFH AM260JXVAFH Cooling (kW) 106.4 112.8 117.8 123.2 128.8 Cooling (Btu/h) 363 000 384 900 401 900 420 400 439 500...
- Page 14 Preparing for installation Model name for combination AM580JXVAFH2AZ AM600JXVAFH2AZ AM620JXVAFH2AZ AM640JXVAFH2AZ Number of individual outdoor units AM080JXVAFH AM100JXVAFH AM120JXVAFH AM140JXVAFH AM160JXVAFH Combined outdoor unit AM180JXVAFH AM200JXVAFH AM220JXVAFH AM240JXVAFH AM260JXVAFH Cooling (kW) 162.4 168.0 173.6 179.2 Cooling (Btu/h) 554 100 573 200 592 300 611 400 Rated capacity...
- Page 15 Model name for combination AM740JXVAFH2AZ AM760JXVAFH2AZ AM780JXVAFH2AZ AM800JXVAFH2AZ Number of individual outdoor units AM080JXVAFH AM100JXVAFH AM120JXVAFH AM140JXVAFH AM160JXVAFH Combined outdoor unit AM180JXVAFH AM200JXVAFH AM220JXVAFH AM240JXVAFH AM260JXVAFH Cooling (kW) 207.2 212.8 218.4 224.0 Cooling (Btu/h) 707 000 726 100 745 200 764 300 Rated capacity Heating (kW)
- Page 16 Preparing for installation Model name for combination AM180JXVAJH/AZ AM200JXVAJH/AZ AM220JXVAJH/AZ AM240JXVAJH1AZ AM260JXVAJH1AZ Number of individual outdoor units AM080JXVAJH AM100JXVAJH AM120JXVAJH AM140JXVAJH Combined outdoor unit AM160JXVAJH AM180JXVAJH AM200JXVAJH AM220JXVAJH Cooling (kW) 50.4 56.0 61.6 67.2 73.6 Cooling (Btu/h) 172 000 191 100 210 100 229 200 251 100...
- Page 17 Model name for combination AM380JXVAJH1AZ AM400JXVAJH1AZ AM420JXVAJH1AZ AM440JXVAJH1AZ AM460JXVAJH1AZ Number of individual outdoor units AM080JXVAJH AM100JXVAJH AM120JXVAJH AM140JXVAJH Combined outdoor unit AM160JXVAJH AM180JXVAJH AM200JXVAJH AM220JXAVJH Cooling (kW) 106.6 112.0 117.6 123.2 128.8 Cooling (Btu/h) 363 700 382 200 401 300 420 400 439 400 Rated capacity...
- Page 18 Preparing for installation Model name for combination AM580JXVAJH1AZ AM600JXVAJH1AZ AM620JXVAJH1AZ AM640JXVAJH1AZ Number of individual outdoor units AM080JXVAJH AM100JXVAJH AM120JXVAJH AM140JXVAJH Combined outdoor unit AM160JXVAJH AM180JXVAJH AM200JXVAJH AM220JXVAJH Cooling (kW) 163.2 168.2 173.6 179.2 Cooling (Btu/h) 556 900 573 900 592 400 611 500 Rated capacity Heating (kW)
- Page 19 Model name for combination AM740JXVAJH1AZ AM760JXVAJH1AZ AM780JXVAJH1AZ AM800JXVAJH1AZ Number of individual outdoor units AM080JXVAJH AM100JXVAJH AM120JXVAJH AM140JXVAJH Combined outdoor unit AM160JXVAJH AM180JXVAJH AM200JXVAJH AM220JXVAJH Cooling (kW) 207.2 212.8 218.4 224.8 Cooling (Btu/h) 707 000 726 100 745 200 767 100 Rated capacity Heating (kW) 233.1...
- Page 20 Preparing for installation Moving the outdoor unit Select the moving path in advance. Be sure that moving path can support weight of the outdoor unit. Do not slant the product more than 30˚ when carrying it. (Do not lay the product down in sideways.) Surface of the heat exchanger is sharp.
-
Page 21: Selecting Installation Location
7. Check the condition of the product periodically. - Check the installation site every 3 months and perform anti-corrosion treatment such as R-Pro supplied by SAMSUNG (Code : MOK-220SA) or commercial water repellent grease and wax, etc., based on the product condition. - Page 22 Selecting installation location Please contact your local SAMSUNG representative for further details. Outdoor unit Outdoor unit Sea breeze Outdoor unit Protection wall Outdoor unit Sea breeze Sea breeze Outdoor unit Protection wall should be constructed with a solid material that can block the sea breeze and the height and width of the wall should be 1.5 times larger than the size of...
-
Page 23: Space Requirement For Installation
Space requirement for installation Space requirement was decided based on following conditions; Cooling mode, outdoor temperature of 35°C (95°F). Larger space is required if the outdoor temperature is higher than 35°C (95°F) or if the place is heated easily by quantity of solar radiation. - Page 24 Space requirement for installation Module installation Over 300 (12) Height of the wall is Over 100 (4) Over 400 Over 400 Front side unlimited Over 100 (4) Front (16) (16) side Over 100 (4) <Case 1> <Case 2> Over 100 (4) Over 100 (4) Over 100 (4) Over 100 (4) Front side...
-
Page 25: Accessories
Accessories Accessories You must keep following accessories until the installation is finished. Hand over the installation manual to the customer after finishing the installation. Installation manual (1) Optional accessories Following optional accessories are needed for connecting pipes between the indoor and outdoor units. Specification Classification Model Name... -
Page 26: Base Construction And Installation Of The Outdoor Unit
Base construction and installation of the outdoor unit Make sure to remove the wooden pallet before installing the outdoor unit. If you do not remove the wooden pallet, there is risk of fire during welding the pipes. If the outdoor unit is installed with wooden pallet on, and WARNING it was used for long period time, wooden palette may break and cause electrical hazard or high pressure may damage the pipes. - Page 27 Outdoor unit installation Base ground H beam or anti-vibration frame Over 200mm (8inch) Outdoor unit base mount and anchor bolt position Unit: mm (inch) Outdoor unit - Anti-vibration frame (4-Ø 12) Anti-vibration - Base ground (4-Ø 18) Unit: mm (inch) Classification Small type Large A type...
- Page 28 Base construction and installation of the outdoor unit Examples of draining work Construct the drainage ditch with reinforced concretes and make sure that water-proofing work is done. For smooth draining of defrost water, make sure to apply 1/50 slope. Construct a drainage around the outdoor unit to prevent the defrost water (from the outdoor unit) from stagnating, overflowing or freezing near the installation space.
- Page 29 Cautions regarding on connecting the anchor bolt Tighten the rubber washer to prevent the bolt connection part of the outdoor unit from corroding. CAUTION Rubber washer Anchor specification Diameter of Anchor length Sleeve length Fastening Size Insert depth drill bit (a) torque Ø...
- Page 30 Base construction and installation of the outdoor unit Caution for installing discharge duct Static pressure of the discharge duct should be within the standard specification 78.45 Pa (0.315 W.G) when CAUTION installing the duct. If you remove the fan guard to install the discharge duct, make sure to install a safety net on the duct outlet. Foreign substance may enter into the product and there could be a risk of personal injury.
-
Page 31: Installing The Wind/Snow Prevention Duct
Installing the wind/snow prevention duct Installing the outdoor unit around the obstacles It is necessary to install a wind/snow prevention duct(field supply) to direct exhaust from the fan horizontally, when it is difficult to provide a minimum space of 2m (6.56ft) between the air outlet and a nearby obstacle. Upper floor Discharged air Discharged air... - Page 32 Installing the wind/snow prevention duct Installing the outdoor unit in windy region In windy regions such as near sea shores, protection wall or wind protection duct must be installed for normal operation of the outdoor unit. (Refer to the illustration of the snow prevention duct, for installing the wind protection duct.) Install the wind prevention duct with the consideration of major wind direction.
-
Page 33: Refrigerant Pipe Installation
Refrigerant pipe installation When installing, make sure there is no leakage. When collecting the refrigerant, stop the compressor first before removing the connection pipe. If the refrigerant pipe is not properly connected and the compressor works WARNING with the service valve open, the pipe inhales the air and it makes the pressure inside of the refrigerant cycle abnormally high which may lead to explosion and injury. - Page 34 Refrigerant pipe installation Selecting refrigerant pipe First branch joint Increase the main pipe size Install the refrigerant pipe according to main pipe size of each outdoor unit capacity. When the pipe length (including elbow) between an outdoor unit and the farthest indoor unit exceeds 90m (295.28ft), you must increase the size of the pipe (main pipe) by one grade which connects between the outdoor unit to the first branch joint.
- Page 35 Size of the pipe connected to the outdoor unit (A) Select the size of the pipe according to the below table. Main pipe length within 90 m (295 ft) Size Up (Main pipe length over 90 m (295 ft)) Outdoor unit capacity Liquid pipe Gas pipe Liquid pipe Gas pipe...
- Page 36 Refrigerant pipe installation Size of the pipe between branch joints (B) Select the pipe size according to the sum of indoor unit capacity which will be connected after the branch. ❋ However, if the size of the pipe between branch joints (B) is bigger than the size of the pipe connected to the outdoor unit (A), apply the pipe size (A).
- Page 37 33.6 kW 40.0 kW 61.6 kW (114.6 MBH) (136.5 MBH) (210.2 MBH) Size of the pipe between the branch joint and the indoor unit Make a selection according to outdoor unit capacity. Pipe size (O.D. [mm (inch)]) Indoor unit capacity [kW (MBH)] Liquid pipe Gas pipe 6.0 kW (20.5 MBH) and below...
- Page 38 Refrigerant pipe installation Branch joint (E) Select a branch joint according to the sum of indoor unit capacity which will be connected after the branch. ❋ However, if the size of the pipe between branch joints (E) is bigger than the size of the pipe connected to the outdoor unit (D), apply the pipe size (D).
- Page 39 Basic type - additional refrigerant 56.0 kW (191.1 MBH) Ø12.70 (5 m) (Ø1/2" (16.4 ft)) 14.0 kW (47.8 MBH) Ø12.70 (5 m) (Ø1/2" (16.4 ft)) Ø6.35 (5 m) (Ø1/4" (16.4 ft)) 7.1 kW (24.1 MBH) Ø12.70 (5 m) (Ø1/2" (16.4 ft)) Ø6.35 (10 m) (Ø1/4" (32.8 ft)) Ø9.52 (10 m) (Ø3/8"...
- Page 40 Refrigerant pipe installation Branch joint Basic amount of refrigerant within the outdoor unit - Amount of additional refrigerant has to be calculated based on the sum of all liquid pipe length. Classification AM080✴✴✴ AM100✴✴✴ AM120✴✴✴ AM140✴✴✴ AM160✴✴✴ AM180✴✴✴ Basic type [kg (lb)] 5.5 (12.1) 5.5 (12.1) 6.5 (14.3)
- Page 41 Capacity (MBH) 1000 12 15 18 19 20 24 27 28 30 32 36 38 42 48 54 60 72 76 96 110 170 Model Concealed Floor Standing 0.12 0.22 0.22 0.32 0.32 (0.26) (0.49) (0.49) (0.71) (0.71) (AM✴✴✴✴NF(G)DCH/✴✴) Floor Standing 0.69 1.85 (1.52)
- Page 42 Refrigerant pipe installation Example of refrigerant calculation for HP models Unit amount of Amount of Total amount Length [m (ft)] refrigerant [kg/m additional of additional Size of liquid pipe Classification (lb/ft)] refrigerant [kg (lb)] refrigerant [kg (lb)] [mm (inch)] ① ②...
- Page 43 Keeping refrigerant pipe To prevent foreign materials or water from entering the pipe, storing method and sealing method (especially during installation)is very important. Apply correct sealing method depending on the environment. Exposure place Exposure time Sealing type Longer than one month Pipe pinch Outdoor Shorter than one month...
- Page 44 Refrigerant pipe installation Cutting or flaring the pipes 1. Make sure that you prepared the required tools. Pipe cutter, Deburring tool, flaring tool and pipe holder, etc. 2. If you want to shorten the pipe, cut it with a pipe cutter ensuring that the cut edge remains at 90° with the side of the pipe.
- Page 45 5. Check that you flared the pipe correctly. Refer to below illustrations for correct and incorrect examples of flared pipe. Correct Inclined Damaged Surface Cracked Uneven Thickness If foreign matters or burrs are not removed after cutting pipe, refrigerant gas may leak. If foreign matters enter inside the pipe, important interior parts of the unit may get damaged or product CAUTION efficiency will be reduced.
- Page 46 Refrigerant pipe installation Pipe installation for an outdoor unit 1. Direction of the pipe Refrigerant pipe can be withdrawn from the front, left and right side. Take necessary method to install the pipes according to the condition of the installation site. Front side connection Left side connection Right side connection...
- Page 47 2. Connecting refrigerant pipe for outdoor unit Classification Front side connection Right/left (and bottom) side connection First, remove the piping cover from the outdoor Separate the knock-out hole at the bottom side unit. of the unit and install the pipe. Separate the knock-out hole that you are going After installing and insulating the pipe, close up to use.
- Page 48 Refrigerant pipe installation 3. Pipe installation between the outdoor units You will need branch joints, which is an optional accessory, for connecting in between outdoor units in order to combine outdoor units in module. ❋ For optimal distribution of the refrigerant, you must use Y-joint as branch joint for connecting outdoor units. (Do not use T-joint) When you install the outdoor units in module, there is no restriction of installation order among outdoor units.
- Page 49 Caution Correct installation Incorrect installation 200 (8)~ 300mm (12inch) 1m (3.28ft) less Install a vertical trap in Over 2m (6.56ft) following cases as shown in the figure : 200 (8)~ 300mm Case1. Pipe length Over 2m (6.56ft) (12inch) between outdoor unit branches exceeds 2m (6.56ft).
- Page 50 Refrigerant pipe installation Allowable length of the refrigerant pipe and the installation examples Classification Single Installation Module installation Outdoor unit Outdoor unit Branch joint Branch joint Installing only with Y-joint Indoor unit Indoor unit Outdoor unit Outdoor unit Branch joint Distribution header Distribution header Installing with...
- Page 51 Classification Example Remarks Outdoor unit ~ 110/110m (361'/361') Note 2) H1 ≤ 110/110m(361’/361’) Indoor unit 50m(164’) or less H2 ≤ 50m(164’) Maximum However, if only wall-mount type indoor units with a built-in EEV are allowable connected, the height is 15 m or less. height If a combination of wall-mount type indoor units with a built-in EEV and other Indoor unit ~...
- Page 52 Refrigerant pipe installation Installing the branch joints Branch joints must be installed ‘horizontally’ or ‘vertically’ . Horizontal installation Vertical installation For A~J type branch joints : Connect the branch joint to the connection pipe with the provided reducer. For K~Z type branch joints : Cut the connection part of the branch joint or the provided socket, according to the NOTE diameter of the connection pipe, before connecting them.
- Page 53 Installing the distribution header 1. Select the reducer that fits the diameter of the pipe. Socket Provided item Pipe * Socket Pipe* Pipe* Pipe* To indoor unit To indoor unit To outdoor unit To outdoor unit Socket Socket <Gas side> <Liquid side>...
- Page 54 Refrigerant pipe installation 3. Install the distribution header horizontally. Install the distribution header horizontally so that its ports does not face down. Socket Distribution header Horizon line Below ±10° Pipe (Separately purchased item) Horizon line Horizon line Below ±15° < Liquid side > Horizon line Below ±15°...
- Page 55 ❋ Use the attached reducer according to the selected pipe size. To other outdoor unit Pipe To other outdoor joint or outdoor unit Reducer Reducer Pipe To other outdoor joint or Y-joint of the main pipe <Liquid side> ❋ Use the attached reducer according to the selected pipe size. To other outdoor unit Pipe To other outdoor joint or outdoor unit...
-
Page 56: Electrical Wiring Work
Electrical wiring work Specification of the circuit breaker and power cable Standard single (Heat Pump) Model AM080JXVAFH 28.0 AM100JXVAFH 34.0 AM120JXVAFH 36.0 AM140JXVAFH 50.0 AM160JXVAFH 56.1 AM180JXVAFH 66.5 AM200JXVAFH 73.0 AM220JXVAFH 70.0 AM240JXVAFH 70.0 AM260JXVAFH 73.0 ❋ When installing outdoor units in module, select the power supply cable according to the sum of outdoor unit capacity. (Refer to the table for each model.) ❋... - Page 57 Caution for electrical work You must install ELCB or MCCB + ELB CAUTION - ELCB: Earth leakage breaker - MCCB: Molded case circuit breaker - ELB: Earth leakage breaker Do not operate the outdoor unit before completing the refrigerant pipe work. Do not disconnect or change the cable inside the product.
- Page 58 Electrical wiring work Power and communication cable configuration Main power and the ground cable must be withdrawn through the knock-out hole on the bottom-right or right side of the cabinet. Withdraw the communication cable from the designated knock-out hole on the bottom-right side of the front part. Install the power and communication cable using separate cable protection tube.
- Page 59 Specification of the protection tube Name Temper grade Applicable conditions When the protection tube is installed indoor and not exposed Flexible PVC conduit to outside, because it is embedded in concrete structure When the protection tube is installed indoor but exposed to Class 1 flexible conduit Galvanized steel sheet outside so there are risk of damage to the protection tube...
- Page 60 Electrical wiring work Power wiring diagram 3 phase 3wires 208-230V [AM✴✴✴✴XVAF✴] 3 phase 3wires 460V [AM✴✴✴✴XVAJ✴] MCCB+ MCCB+ MCCB+ ELCB ELCB ELCB Main unit Sub unit 1 Sub unit 2 Main unit Sub unit Single phase 2 Communication wires 208-230V cable (Outdoor unit ~ Outdoor unit) MCCB +...
- Page 61 Selecting solderless ring terminal Select a solderless ring terminal for a power cable according to the nominal dimensions for cable. Apply insulation coating to the connection part of the solderless ring terminal and the power cable. Silver solder Nominal dimensions for 4/6 (0.006/0.009) 10 (0.01) 16 (0.02) 25 (0.03) 35 (0.05)
- Page 62 Electrical wiring work Connecting the power terminal Connect the cables to the terminal board with solderless ring terminals. Properly connect the cables by using certified and rated cables and make sure to fix them properly so that external force is not applied to the terminal. Use a driver and wrench that can apply the rated torque when tightening the screws on the terminal board.
- Page 63 Examples of how to use the cable striper <Cable striper> 1. Adjust the blade position by coin. (Controller is at the bottom side of the tool.) Fix the blade position according to the outer sheath thickness of the power cable. 2.
- Page 64 Electrical wiring work Fixing the power cable 3 phase 3wires 208-230V [AM✴✴✴✴XVAF✴] 3 phase 3wires 460V [AM✴✴✴✴XVAJ✴] ELCB MCCB+ Sub unit communication cable Do not let the power cable come into contact with the pipes inside the outdoor unit. If the power supply cable touches the pipes, the vibration of the compressor is transferred to the pipes and can damage the power supply CAUTION cables or pipes, creating the danger of fire or explosion.
- Page 65 Fixing the ground cable Connect the ground cable to the grounding hole inside the power supply box. Grounding Withdrawing the power cable Withdrawing from the front side - Connect the power cable protection tube into the power supply box as shown picture.
- Page 66 Electrical wiring work Installing the Solution device When the number of indoor units installed with the outdoor unit is 16 or less Terminal block with indoor unit Terminal block with outdoor unit sub module Terminal block with solution device...
- Page 67 Grounding work Grounding must be done by a qualified installer for your safety. Grounding the power cable The standard of grounding may vary according to the rated voltage and installation place of the air conditioner. Ground the power cable according to the following table. Power condition Voltage to ground is lower than 150V Voltage to ground is over 150V...
-
Page 68: Air Tightness Test And Vacuum Drying
Air tightness test and vacuum drying Air tightness test Use tools for R-410A to prevent the inflow of foreign substances and resist against the internal pressure. Do not remove the core of filling port. Use Nitrogen gas for air tightness test as shown in the illustration. Manifold gage High pressure Low pressure side... - Page 69 Vacuum drying pipes and indoor units Use tools for R-410A to prevent the inflow of foreign substances and resist against the internal pressure. Use vacuum pump that allows vacuuming under -100.7kPa (5 Torr). Use the vacuum pump with the check valve to prevent pump oil from flowing backward while the vacuum pump is stopped.
-
Page 70: Pipe Insulation
Pipe insulation Insulating the refrigerant pipes and branch joints Check for gas leakage before completing (the hose and pipe insulation) and if there is no sign of leakage, make sure to insulate the pipes and hoses. Use EPDM material insulator that meets the following conditions. Test item Unit Standard... - Page 71 Insulate the refrigerant pipe Make sure to insulate the refrigerant pipe, branch joint, distribution header, and the connection part of the pipes. If you insulate the pipes, condensed water will not fall from the pipes. Check if there are any cracks on the insulation at the bent part of the pipe. Insulator Clamp Insulator...
- Page 72 Pipe insulation Insulate the distribution header Fix the distribution header with a cable tie and cover the connected part. Insulation Insulate the distribution header and the welded part and wrap the connected part with an adhesive insulation tape to prevent dew formation. Adhesive insulation tape Insulate after welding a stopper Insulate the refrigerant...
- Page 73 Insulating the pipe located inside of the outdoor unit With a pipe insulator, insulate the pipe up to whole service valve located inside of the outdoor unit. Seal the gap between the outdoor unit pipe and the insulator. Rainwater and dewdrops may soak through the gap between the pipe and the insulation of the outdoor unit installed on the outside.
-
Page 74: Charging Additional Refrigerant
Charging additional refrigerant R-410A refrigerant is blended refrigerant. Add refrigerant in liquid form only. (Make sure to use the refrigerant bomb in upright position) Measure the quantity of the refrigerant according to the length of the liquid side pipe. Add fixed quantity of the refrigerant using a scale. - Page 75 Open the gas side and liquid side service valve completely after charging the refrigerant. (If you operate the air conditioner with the service valve closed, the important parts may be damaged.) CAUTION Put on safety equipment when charging refrigerant. Do not charge the refrigerant when you adjust or control other product such as indoor units or EEV kits. If you charge the refrigerant with the front cabinet open, be very careful with the fan on the top of the product to prevent personal injury.
-
Page 76: Basic Segment Display
Basic segment display Step Display content Display SEG 1 SEG 2 SEG 3 SEG 4 At initial power input Checking segment display “8” “8” “8” “8” SEG 1 SEG 2 SEG 3 SEG 4 Number of communicated While setting communication units between indoor and outdoor unit Number of connected indoor units... - Page 77 Setting outdoor unit option switches: B TYPE Setting outdoor install option Step Button Display Description Note Start Outdoor unit address Outdoor unit Step1 Setting required display Outdoor unit address Press (K1+K2) 00: Main unit for 2 seconds Unit address K4 x 1 time 01: Sub1 unit Step2 for module...
- Page 78 Setting outdoor unit option switch and key function Installing and setting the option with tact switch and explanation of the functions Setting the option 1. Press and hold K2 to enter the option setting. (Only available when the operation is stopped) - If you enter the option setting, display will show the following.
- Page 79 Optional item Input unit SEG1 SEG2 SEG3 SEG4 Function of the option Remarks Disabled (Factory default) Emergency Set compressor 1 as E560 will occur when all operation for Individual malfunction state the compressors are set as compressor malfunction state. Set compressor 2 as malfunction malfunction state 7-9 (Factory default in case...
- Page 80 Setting outdoor unit option switch and key function Optional item Input unit SEG1 SEG2 SEG3 SEG4 Function of the option Remarks Factory default Increase the outdoor unit's fan speed to maximum value Do not use this option in CAUTION Fan speed an ambient correction for Individual...
- Page 81 Optional item Input unit SEG1 SEG2 SEG3 SEG4 Function of the option Remarks Basic (Factory default) Energy control option of designated operation sequence Energy saving Energy control ❋ Operating in energy saving Operaton Main mode, capacity might (B type PBA) Power decrease compared to normal operation mode...
- Page 82 Setting outdoor unit option switch and key function Optional item Input unit SEG1 SEG2 SEG3 SEG4 Function of the option Remarks Unused option Main Unused option Unused option by this model Disabled 30min (Delayed switching of When the Aux heater is connected Cooling priority heating) to the cooling and heating...
- Page 83 K1 (Number of KEY operation Display on segment press) 1 time Refrigerant charging in Heating mode “K” “1” “BLANK” “BLANK” 2 times Trial operation in Heating mode “K” “2” “BLANK” “BLANK” 3 times Pump out in Heating mode (Outdoor unit address 1) “K”...
- Page 84 Setting outdoor unit option switch and key function ❋ During "Discharge mode of DC link voltage", voltage of INV1 and INV2 will be displayed alternately. ❋ Even when the outdoor unit power is off, it is dangerous when you come in contact with inverter PCB and fan PCB since they are charged with high DC voltage.
- Page 85 Display on segment K4 (Number of KEY operation press) SEG 1 SEG2, 3, 4 21 times Main EEV2 step 2000 steps 2, 0, 0 22 times EVI EEV step 300 steps 3, 0, 0 23 times HR EEV step 300 steps 3, 0, 0 24 times Fan step (SSR or BLDC)
-
Page 86: Things To Check After Completing The Installation
Things to check after completing the installation 1. Before supplying the power, use DC 500V (AM✴✴✴✴XVAJ✴) or DC 600 V (AM✴✴✴✴XVAF✴) insulation resistance tester to measure the power (3 phase: R, S, T) terminal and the outdoor unit grounding. - Measurement should be over 30MΩ. 2. - Page 87 Are the power cable and communication cable tightened firmly on the terminal board within the range of rated tightening torque? Have you checked for cross-connection of the power and communication cables? Have you performed the earthing work 3 to the outdoor unit? Electrical wiring work Did you make sure to use 2-core cable (not multi-core cable) for the communication cable?
-
Page 88: Inspection And Test Operation
Inspection and test operation Precautions before test operation When the outdoor temperature is low, turn on the main power 6 hours before beginning the operation. CAUTION - If you start the operation immediately after turning on the main power, it may cause serious damage to the part within the product. - Page 89 Auto trial operation 1. If the Auto Trial Operation is not completed, normal operation will be prohibited. - When the auto trial operation is not completed, UP (UnPrepared) will appear on the segment after the communication check and restrict compressor from operating. (UP Mode will be cleared automatically when auto trial mode is completed.) - Auto trial operation may take 20 minutes to maximum 2 hours depending on the operation status.
- Page 90 Inspection and trial operation Measure to take when E503 error occurs (When "inspection required" sign is appeared on result report of S-NET pro) Is the service valve of the outdoor unit Open the service valve of the outdoor unit opened? Is 4way valve and main EEV operating Check the 4way valve and Main EEV normally?
- Page 91 Measure to take when E505, E506 error occurs Eable vacuum mode on all outdoor units Is the service valve of the outdoor unit Open the service valve of the outdoor unit opened? Is the value on the pressure sensor of the installed outdoor unit satisfy the following? Reset outdoor unit...
-
Page 92: Automatic Refrigerant Amount Detection Function
Automatic refrigerant amount detection function This function detects amount of refrigerant in the system through refrigerant amount detection operation Start Press the Tact switch "K2" 5 times Input S-CHECKER signal Satisfy the temperature condition Satisfy the temperature condition Check the amount of refrig er Check the amount of refrig er Check stability Check stability... - Page 93 If the temperature is out of the guaranteed range below, exact result will not be obtained. - Indoor: 20~32 °C CAUTION - Outdoor: 5~43 °C If the operation cycle is not stable, the operation of refrigerant amount check may be forcibly finished. Accuracy of the result may decrease if the product has not been operated for a long period of time or heat mode has been operated before running the function of refrigerant amount check.
- Page 94 Memo...
- Page 96 DB68-05534A-02...