Waldorf IRIDIUM User Manual
Hide thumbs
Also See for IRIDIUM:
- Quick start manual (36 pages) ,
- User manual (231 pages) ,
- Quick start manual (35 pages)
Table of Contents
Advertisement
Advertisement
Table of Contents

Related Manuals for Waldorf IRIDIUM


Summary of Contents for Waldorf IRIDIUM
- Page 1 User Manual...
-
Page 2: Table Of Contents
The Play Button Section .................. 16 Envelopes Section .................... 9 8 The Basic Functions Buttons ................. 17 LFO Section ...................... 1 04 The 16 Pads and Mode Buttons ..............17 The Effects ...................... 1 09 Basic Operation ......................18 The Modulations of Iridium ................ 1 25 Switching On / Off ..................... 18 Komplex Modulator .................. 1 30 Master Volume ....................18 Additional Modes ....................138 Panic Function ..................... 18 Master Mode Page ................... 1 38 The Iridium Mode Pages ................. 18... - Page 3 Waveform Oscillators Introduction ............ 1 92 A Short Introduction to Granular Synthesis ......... 1 98 Filter Introduction ................... 1 98 Updating the System Software .............. 2 00 FAQ - Frequently Asked Questions ............ 2 01 Modulation Sources and Destinations ............ 2 03 Technical Data .................... 2 07 Glossary ........................ 2 08 Product Support .................... 2 14 Iridium Manual...
-
Page 4: Foreword
Foreword Foreword Hint Thank you for purchasing the Waldorf Iridium. You now own a high-class desktop synthesizer featuring a wide Waldorf Music is not liable for any erroneous information range of unique sounds with approved Waldorf quality – contained in this manual. The contents of this manual may made in Germany! be updated at any time without prior notice. We made... - Page 5 Schütte, Michael von Garnier, Kurt ‘Lu’ Wangard, Haibin Wu and anyone we have forgotten. Design: Axel Hartmann Manual: Holger Steinbrink Iridium contains Sounds from Revision: 2.5.1, June 2020 Kurt Ader, AlbertZ, BT (Brian Transeau), CO5MA, Maxime Dangles, Sascha Dikiciyan, Richard Devine, Ian Dunlop, Please visit our website for further support and Wolfram Franke, Reinhold Heil, Mike Huckaby, Joerg...
-
Page 6: Control Features & Connections
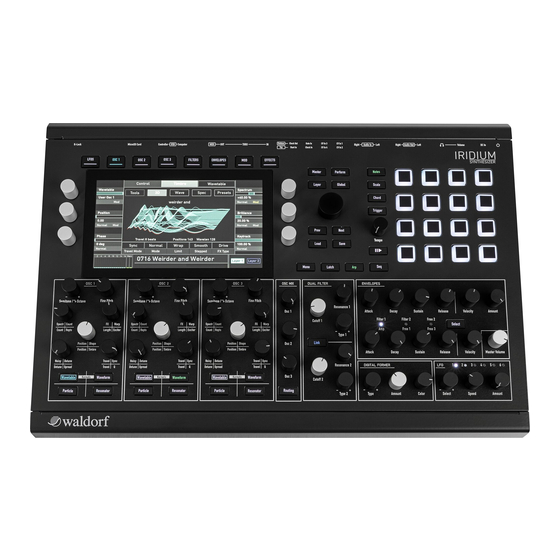
Control Features & Connections Control Features & Connections Front Panel 1) Touchscreen Display 4) Oscillator Section 7) LFO Section 2) Pad Section 5) Filters Section 8) Master Volume 3) Selection Dial & Mode Page Buttons 6) Envelopes Section Iridium Manual... -
Page 7: Rear Panel Connections
Control Features & Connections Rear Panel Connections Power Supply Jack & Power Switch Headphones Output with Volume control Stereo Audio Outputs & Stereo Audio Inputs CV/Gate/Clock Connections MIDI Thru, MIDI Out, MIDI In jacks USB 2.0 Connections MicroSD Card Port & Kensington Compatible Receptacle ® Iridium Manual... - Page 8 All of the Iridium’s buttons, controls and parameters are To avoid confusion, the terminology in this manual is ba- highlighted in bold letters throughout the manual. sed on the Iridium parameter names. You will find a Examples: glossary at the end of this manual; it explains the various terms used.
- Page 9 Introduction General Safety Guidelines Power Supply Only use the power cable that came with Iridium. • Please read the following safety tips carefully! They include several precautions you should always ob- Unplug the device when you are not using it for longer • serve when dealing with electronic equipment. Read periods. all of the instructions before operating your device. Never touch the plug with wet hands. • Suitable Operating Conditions Always pull the plug when unplugging the device - •...
- Page 10 Use only a dry, soft cloth or brush to clean the device. • Never use alcohol, cleaning solutions or similar chemi- cals. They will damage the surface of the chassis. Proper Use This device is designed exclusively to produce low- frequency audio signals for the purpose of generating sound. Any other use is prohibited and voids the warranty extended by Waldorf Music. Waldorf Music is not liable for damages due to incorrect use. Most Iridium compounds are insoluble, which makes absorption into the body difficult. Iridium Manual...
- Page 11 A printed Quick Start manual • 3. If you want to use a computer, connect the Iridi- um’s Computer USB port with a USB cable to Please ensure all the above items were included. If some- thing is missing, contact your local dealer. your computer (Windows or macOS). Thereafter, Iridium becomes automatically available as a We recommend that you save the original packing material MIDI device. for future transport. 4. To play the Iridium you need a MIDI master key- board. Connect its MIDI Out jack to the Iridium ́ s Setup MIDI Input. Alternatively, you can trigger notes or chord via the 16 pads.
- Page 12 Setup and Connections 7. Press the power switch on the rear panel of your Before connecting and disconnecting the Iridium to a Iridium. power supply source, turn your amp’s volume con- 8. Then switch on your computer (if connected), the trol all the way down to avoid damage due to on/off mixing console and finally the amplifier or active switching noise. Iridium produces a high level output monitor speakers. signal. Please take care that the connected playback device is suitable for the high level of an electronic The startup procedure is about 10-15 seconds. After instrument. Never use the microphone or phono in- this, the Iridium is ready to play.
- Page 13 Master Volume control dial. dio signal into the Iridium. Use 2 TS mono jack cables to connect the Audio output to a Therefore, the signal can either mixer. The Iridium is a stereo instrument. There is no be routed through Iridium’s inherent mono output. Use your mixing console to approp- signal path for realtime live riately distribute the stereo channels in case.
- Page 14 The USB drives can be used in all scenarios where you with data transmission. currently use MicroSD cards like importing/exporting The Computer USB port connects the Iridium to your samples, presets, patches, wavetables etc. as well as for computer or iOS device with the following system requi- updating the system software. The only use case where...
- Page 15 It is important to use a FAT or FAT32 file system Iridium: just connect the DIN MIDI out (or USB Controller formatted MicroSD card. Other file formats won´t port) to your external gear and use the Iridium knobs to work. control certian functions. For use with a computer we recommend the Computer USB port.
- Page 16 SingleTrig deactivated will re-trigger at each note Push this button open the Step Sequencer display page even when played legato. You can freely mix and match within the Autoplay tab. When you hit a note or a chord on SingleTrig settings between all envelopes. The SingleTrig the keyboard or via MIDI, it is repeated rhythmically based mode is for sustained sounds like typical 1970s solo on the entered steps. sounds. Read more about the Arpeggiator and the Sequencer in ‘The Perform Mode’ chapter. Iridium Manual...
- Page 17 Setup and Connections The Basic Functions Buttons This section offers four buttons regarding different global functions of Iridium. Read more about this in the corresponding chapters. The 16 Pads and Mode Buttons Here, you find four buttons to determine the behaviour of the 16 pads. Based on the selected mode (Notes, Scale, Chords, Trigger), the pads offer a different functionality when hit.
- Page 18 Iridium is equipped with a power switch. The Iridium Mode Pages To switch Iridium on: The Iridium offers mode pages in addition to the panel parameters or for global settings. To enter a desired mode Press the Power switch to switch on Iridium. The • page, just press the corresponding mode button above or boot procedure may take a few seconds. After this,...
- Page 19 (and vice versa). The six endless dials on the left and the the corresponding function tabs. right side of the display control the corresponding parame- ter that is shown in the display next to the dials. The dis- All modes will be described in detail in the corres- play presentation depends on the selected mode, but the ponding chapters of this manual. lower part always shows the same overview: Iridium Manual...
- Page 20 Analyzer Loading Programs (log) shows a logarithmic representation like most analy- zers. MIDI Monitor displays all MIDI messages that Iridium The Iridium offers different ways of loading sound pro- creates (Internal) as well as incoming MIDI messages grams: (from MIDI In and the USB ports). CV Inputs displays inco- ming control voltages for CV 1 to 4 inputs.
- Page 21 Tap on the Favorites button to open a new page for ma- tion is available in nearly every mode and on naging your favorite sounds. You can select any sound every display page. from the left list and add it to the Favorites list on the right side. You can add sounds to empty slots, replace or remove sound programs or change their positions (Up & Down). Iridium Manual...
- Page 22 Delete opens a pop-up window for deleting sound • program(s). Here, you can define a slot range of the programs to delete. After confirmation, the programs will be deleted irrecoverable. Rebuild Cache lets you rebuild the internal data cache • in case of any problems. Iridium Manual...
- Page 23 Some functions can be edited via the touchscreen dis- • The controls on the Iridium’s front panel offer direct play directly. Use your finger to tap on the correspon- • access to the most important sound parameters. The ding parameter/option/button on the touchscreen to panel is divided into several sections, each containing open pop-up menus or sliders which can be moved to knobs and dials associated with that section. By adjus-...
- Page 24 Basic Operation As soon as the value 0 is reached, the sweep is stopped for Saving Programs a short period to make it easier to edit Iridium. After you have finished editing a sound program you must For each parameter the original value from the save it if you intend to use it again. All of Iridium’s memory loaded patch is indicated by a vertical bar in the locations are available for this purpose. main bottom area and in the encoder displays. A useful hint: Press a button above the display se- veral times to switch through the corresponding function tabs.
- Page 25 1 to 4 on the touchscreen to open a pop-up menu selection list. Select the desired attribute. You can also add a new attribute by tapping on + next to the corresponding attribute name. It is strongly recommended to select an appropriate attribute for your sound. This helps you to lo- cate your sound later. Use the Prev/Next button or the Selection dial to select the desired sound program number, where the sound is saved to. Alternatively, tap on the number field at the bottom of the screen to enter the sound program number manually. Iridium Manual...
- Page 26 Overview of Functions Waldorf Iridium consists of numerous sound-shaping components. The following pages describe all parameters in detail. Note that Iridium consists of two different types of com- ponents for sound generation and sound shaping: Sound synthesis: Oscillator models, Filters, Digital • Former, Amplifier, Effects. These modules represent the audio signal flow. Sound generation actually occurs...
- Page 27 Sound Parameters Iridium offers three oscillators with different capacities: Oscillator Section Wavetable Oscillator, Waveform Oscillator, Particle Generator, Resonator, and Kernel synthesis. The most important oscillator controls can be found in the Oscillator section on the Iridium’s user panel. Choose the desired oscillator model by pressing the cor- responding button. To enter the Kernel mode, press Wave- table and Waveform buttons simultaneously. The button of the chosen model lights up. Every model uses its own color – as is the case for the oscillator parameter knobs.
-
Page 28: The Wavetable Oscillator
The spectral envelope of a sound can be controlled inde- Further parameters can be found on the correspon- pendently from the pitch. Furthermore, the Wavetable ding Oscillator display page. Read more on the next oscillator can perfectly produce a periodic sound up to page. noisy components. The Spectrum parameter transposes the spectrum of a sound – specifically the spectral envelo- pe. Negative values move the spectrum down; higher valu- es move it up. The default setting is 0, where no transposi- tion happens. This is the behaviour of classic wavetable synthesis. Iridium Manual... - Page 29 Timbre. Tap on the corresponding tab to select it. The Drive, Gain) which can be found on the Timbre tab page. display switches to this mode. A third tab displays the Please refer to the corresponding section below. current oscillator model. Tap on it to select another model or to switch it off. Travel Control Mode Tab Allows cyclic moving through a wavetable. Positive values Here you find parameters for tuning and basic settings. allow a forward movement; negative values a backward movement. Lower values slow down the movement speed; Iridium Manual...
- Page 30 Same functionality as for the corresponding panel parame- choose, if you want to copy the parameter settings from ter. one to one of the other two oscillators to the current oscci- Tap on Fine Pitch to open a pop-up menu for further set- lator. tings: Semitones Normal: Fine Pitch parameter change is about 2 cents. • Same functionality as for the corresponding panel parame- Fine: Fine Pitch parameter change is about 0.2 cents. • ter. Super Fine: Fine Pitch parameter change is about 0.02 • Tap on Semitones to open a pop-up menu for further cents. settings: Set Default: sets Fine Pitch to its default value 0. • Iridium Manual...
- Page 31 Tap on Keytrack to open a pop-up menu for further set- Set Default: sets Osc 1 volume to its default value 0 dB, • tings: and Osc 2 & 3 to their defaults -inf. Normal: Keytrack change is about 4%. • Set Last Loaded: resets the parameter to the last • loaded value from the current sound patch. Fine: Keytrack change is about 0.4%. • Modulations: opens the Mod menu to sets up a modu- Super Fine: Keytrack change is about 0.04 %. • • lation for this parameter. How to set up a modulation Set Default: sets Keytrack to its default value 100%. • can be read in ‘The Modulation Mode’ chapter. Iridium Manual...
- Page 32 How to set up a modulation Set Default: sets Osc 1/2/3 Dest to its default setting • can be read in ‘The Modulation Mode’ chapter. Main. MIDI Learn CC: Activates MIDI Learn, which maps an • Set Last Loaded: resets the parameter to the last • incoming MIDI control change to this parameter. loaded value from the current sound patch. Iridium Manual...
- Page 33 To simulate the pitch variations that analog circuits have Set Default: sets RingMod volume to its default value 0 due to component tolerances, missing calibration and • dB. temperature effects, the Iridium assigns each oscillator of each voice a random out-of-tune coefficient at startup. The Set Last Loaded: resets the parameter to the last • amount by which these out-of-tune coefficients affects loaded value from the current sound patch.
- Page 34 Below the graphical wavetable representation, Tra- Set Default: sets Pitchvar to its default value 0.17. • vel and Wavetable info is shown. Set Last Loaded: resets the parameter to the last • loaded value from the current sound patch. MIDI Learn CC: activates MIDI Learn, which maps an • incoming MIDI control change to this parameter. Wavetable Here you can select all available factory wavetables and your own custom wavetables. Iridium Manual...
- Page 35 Trig or Voice Index, each voice will use a different Phase wavetable. Of course this is also true for LFO or Envelope based modulation. Sets the initial phase of the wavetable in degree. By this you could e.g. generate clicks at note onsets if these are Iridium Manual...
- Page 36 MIDI Learn CC: activates MIDI Learn, which maps an A setting of this parameter is only audible, when Spect- • incoming MIDI control change to this parameter. rum is transposed relative to the original pitch of a sound. Higher settings result in narrow peaks. This can lead to an Spectrum effect, whereby the perceived pitch comes from the sound spectrum instead of the oscillators’ pitch. Value changes of Same functionality as for the corresponding panel parame- this parameter are sometimes subtle. ter. Tap on Brilliance to open a pop-up menu for further set- Tap on Spectrum to open a pop-up menu for further set- tings: tings: Normal: Brilliance change is about 1 %. • Normal: Spectrum change is about 2 %. • Fine: Brilliance change is about 0.1 %. • Fine: Spectrum change is about 0.2 %. • Super Fine: Brilliance change is about 0.01 %. • Iridium Manual...
- Page 37 Tap on Keytrack to open a pop-up menu for further set- note uses the same travel cycle. tings: Sync: the Travel speed is controlled by the internal • Normal: Keytrack change is about 1 %. • tempo of Iridium (adjustable with the Arpeggiator or Sequencer Bpm parameter) or an incoming synchroni- Fine: Keytrack change is about 0.1 %. • sation signal via MIDI. If Sync is selected, you can set Iridium Manual...
- Page 38 Set Last Loaded: resets the parameter to the last • MIDI Learn CC: activates MIDI Learn, which maps an • loaded value from the current sound patch. incoming MIDI control change to this parameter. MIDI Learn CC: activates MIDI Learn, which maps an • incoming MIDI control change to this parameter. Limit Determines the wavetable interpolation quality when using the Travel parameter. Iridium Manual...
- Page 39 Off: no FX type is used. The FX parameter dial has no • a clean wavetable sound. function. Stepped: no interpolation is used to create a more • Tap on FX Type to open a pop-up menu for further set- pristine sound tings: Iridium Manual...
- Page 40 These words will be synthesized as a wavetable when tapping on Return. Analyze Audio: enables you to select an audio file • from the file browser of Iridium's Flash memory or a connected MicroSD card/USB storage device. This au- dio file will be automatically synthesized as a new wavetable. Select the desired file and tap on Analyze.
- Page 41 Flash memory or a connected MicroSD Card/USB tings. Here, the following options are available: storage device. This enables you to exchange user On the left you find a list of all Wavetable oscillator • wavetables with other Iridium users. presets. Tap on the desired name to load it immedia- Save Wavetable: exports the current wavetable to the tely. Current oscillator settings will be overwritten. •...
-
Page 42: The Waveform Oscillator
Sound Parameters The Waveform Oscillator Waveform Oscillator Panel Parameters Iridium offers a standard oscillator model to create typical Semitone / Octave analog synthesizer waveforms (sawtooth, triangle etc.) plus other classic waveforms like square (which is the Sets the pitch of the oscillator in semitone steps. The stan- father of the pulse waveform) and the sine wave (also part dard setting for this parameter is 0, but there are cases of every other waveform). Also, different noise signals can... - Page 43 Square selects the pulse waveform. A pulse waveform • a rising saw wave (lowest setting) into a regular triang- with a pulse width of 50% has only the odd harmonics le wave (middle setting) to a falling saw wave (highest of the fundamental frequency present. This waveform setting). produces a hollow/metallic sound. If Square is selected, the Warp parameter changes the • Pink Noise – this special kind of noise produces higher • pulse width of the square wave levels in the deeper frequency range. It is a better match with the human hearing than the unfiltered whi- te noise. Iridium Manual...
- Page 44 Timbre. Tap on the corresponding tab to select it. The display switches to this mode. A third tab displays the current oscillator model. Tap on it to select another model Count or to switch it off. Same functionality as for the corresponding panel parame- Control Mode Tab ter. Here you find parameters relating to tuning and some Tap on Count to open a pop-up menu for further settings: basic settings. The functions and options are the same as Normal: Count change is about 0.3 semi. • Iridium Manual...
- Page 45 MIDI Learn CC: activates MIDI Learn, which maps an • incoming MIDI control change to this parameter. Set Default: sets Shape to its default Sawtooth. • Set Last Loaded: resets the parameter to the last • Warp loaded value from the current sound patch. Same functionality as for the corresponding panel parame- MIDI Learn CC: activates MIDI Learn, which maps an • ter. incoming MIDI control change to this parameter. Tap on Warp to open a pop-up menu for further settings: Detune Normal: Warp position change is about 1 %. • Same functionality as for the corresponding panel parame- Fine: Warp position change is about 0.1 %. • ter. Iridium Manual...
- Page 46 Set Last Loaded: resets the parameter to the last • signals within the stereo field. loaded value from the current sound patch. Tap on Stereo to open a pop-up menu for further settings: Modulations: opens the Mod menu to sets up a modu- • lation for this parameter. How to set up a modulation Normal: Stereo change is about 2 degree. • can be read in ‘The Modulation Mode’ chapter. Fine: Stereo change is about 1 degree. • MIDI Learn CC: activates MIDI Learn, which maps an • Super Fine: Stereo change is about 0.1 degree. • incoming MIDI control change to this parameter. Iridium Manual...
- Page 47 Running results in free-running oscillators as in ana- • log synthesizers. A played note „jumps in“ the current phase cycle. Reset forces the oscillator waveform to start with • phase 0 for every played new note. Use this setting if Iridium Manual...
-
Page 48: The Particle Generator
Read more on this in the corresponding The whole oscillator section lights section. up in blue. The Iridium can playback WAV or AIFF/AIFC files The Particle Generator needs to be fed with one or more samples. The Particle Generator can use one single sample (stereo or mono) with any sample rate and bit rate. as well as multi samples that are mapped over the key- We recommend to use samples with a rate of 44.1... - Page 49 Values in between ment, negative values a backward movement. Lower valu- two integer values mean that an additional grain oscillator es slow down the movement speed, higher values speed it is mixed in at a reduced level. up. Cyclic means that a sample starts automatically again from beginning when the end is reached. If you don’t want a cyclic modulation, use the Position parameter modula- ted with an envelope, an LFO, or any other modulation Iridium Manual...
- Page 50 The functions are the same as for the Wavetable oscillator. Please refer to the corresponding chapter. The Particle parameter page can only be reached, if Timbre Mode Tab the Mode is set to ‘Granular’. This can be done by Here you find specific parameters for the Particle Genera- tapping on the Particle button (and confirming the tor as well as the option to load samples into this genera- granular mode switch) or selecting Granular with tor. the Mode parameter. Here, the display visualizes the envelopes and grain distri- bution. Iridium Manual...
- Page 51 MIDI Learn CC: activates MIDI Learn, which maps an • incoming MIDI control change to this parameter. Modulations: opens the Mod menu to sets up a modu- • lation for this parameter. How to set up a modulation Travel (only in Granular Mode) can be read in ‘The Modulation Mode’ chapter. Same functionality as for the corresponding panel parame- MIDI Learn CC: activates MIDI Learn, which maps an • ter. incoming MIDI control change to this parameter. Iridium Manual...
- Page 52 Tap on Gate Length to open a pop-up menu for further Length (only in Granular Mode) settings: Same functionality as for the corresponding panel parame- Normal: Gate Length change is about 0.9%. ter. • Fine: Gate Length change is about 0.09 %. Tap on Length to open a pop-up menu for further settings: • Super Fine: Gate Length change is about 0.009 %. Normal: Length change is about 2.5 msec. • • Set Default: sets Gate Length to its default value of Fine: Length change is about 0.25 msec. • • 100.0%. Super Fine: Length change is about 0.025 msec • Iridium Manual...
- Page 53 Super Fine: Grain Jitter change is about 0.01 %. • Global: a granular sample automatically starts again Set Default: sets Grain Jitter to its default value 0.0%. • • from beginning when the end is reached. Every note Set Last Loaded: resets the parameter to the last • played uses the same travel cycle. loaded value from the current sound patch. Tap on Travel Mode to open a pop-up menu for editing. Iridium Manual...
- Page 54 Same functionality as for the corresponding panel parame- • lation for this parameter. How to set up a modulation ter. can be read in ‘The Modulation Mode’ chapter. Tap on Grain Poly to open a pop-up menu for editing. MIDI Learn CC: activates MIDI Learn, which maps an • Set Default: sets Count to its default value 8. • incoming MIDI control change to this parameter. Set Last Loaded: resets the parameter to the last • loaded value from the current sound patch. Iridium Manual...
- Page 55 Set Last Loaded: resets the parameter to the last • Determines the amount that grains are displaced from loaded value from the current sound patch. center pitch. MIDI Learn CC: activates MIDI Learn, which maps an • Tap on Pitch Spread to open a pop-up menu for further incoming MIDI control change to this parameter. settings: Normal: Pitch Spread change is about 0.1 • Fine: Pitch Spread change is about 0.01. • Iridium Manual...
- Page 56 Cluster: constantly displaces each lane equidistant • Set Last Loaded: resets the parameter to the last • from its neighbouring lane. loaded value from the current sound patch. Spread: works similar to “Cluster” but with much more • MIDI Learn CC: activates MIDI Learn, which maps an • spread while keeping the overall pitch amplitude (from incoming MIDI control change to this parameter. highest to lowest lane) constant, regardless of grain poly. Iridium Manual...
- Page 57 MIDI Learn CC: activates MIDI Learn, which maps an • incoming MIDI control change to this parameter. Semitone 1 - 6 Here you can set up a map with up to six intervals – see also Pitch Mode. Tap on the corresponding Semitone button to open a pop-up menu with semitone settings from -0 up to 24. Tap on Semitone 1 - 6 to open a pop-up menu for further settings: Iridium Manual...
- Page 58 Determines how often the exciter signal is repeated. The the keyboard range. higher the value (up to 16), the more repeats include the sound. The speed of the repeats depends on the Decay For a better understanding on how the Resonator settings at the Resonator display page. works, we recommend initializing a sound program (on the Load page) and starting with a default Re- sonator. Try out all parameters to become familiar with the functionality of this powerful sound crea- tion tool. Iridium Manual...
- Page 59 Use higher set- Control Mode Tab tings when you want to simulate the blowing sound of a wind instrument. If a loaded sample is used as exciter, this Here you find parameters relating to the tuning and some parameter influences how the sample sounds. basic settings. The functions are the same as for the Wave- table generator. Please refer to the corresponding chapter. For more information about loading and editing Timbre Mode Tab samples, please refer to ‘The Loading & Editing Samples’ chapter. Here you find specific parameters for the Resonator. Iridium Manual...
- Page 60 • ter. Fine: Q Curve change is about 0.001. • Tap on Q to open a pop-up menu for further settings: Super Fine: Q Curve change is about 0.0001. • Normal: Q change is about 0.01. • Set Default: sets Q Curve to its default value of 0.32. • Fine: Q change is about 0.001. • Set Last Loaded: resets the parameter to the last • Super Fine: Q change is about 0.0001. • loaded value from the current sound patch. Set Default: sets Q to its default value of 0.68. • MIDI Learn CC: activates MIDI Learn, which maps an • incoming MIDI control change to this parameter. Iridium Manual...
- Page 61 MIDI Learn CC: activates MIDI Learn, which maps an • repeats. incoming MIDI control change to this parameter. Tap on Decay to open a pop-up menu for further settings: Attack Normal: Decay change is about 0.01. • Works similar to the attack parameter of an envelope. It Fine: Decay change is about 0.001. • controls the attack phase of the exciter. The more partials the exciter has (e.g. Exciter parameter set to maximum), Super Fine: Decay change is about 0.0001. • the more the Attack parameter has an influence. Set Default: sets Decay to its default value of 0.10. • Iridium Manual...
- Page 62 • MIDI Learn CC: activates MIDI Learn, which maps an out exponentially. This sounds like a sawtooth wave. • incoming MIDI control change to this parameter. The more Timbre is turned up, the more partials will suddenly disappear. This leads to a less complex sound. Iridium Manual...
- Page 63 Stiffness: uses a smaller range of stretching. The re- incoming MIDI control change to this parameter. • sults of the Stretch parameter are less drastic. Stereo Tap on Spread Mode to open a pop-up menu for further settings: Spreads the signal in the stereo field. Set Default: sets Timbre Mode to its default Stretch • Tap on Stereo to open a pop-up menu for further settings: setting. Set Default: sets Stereo to its default value of 0.50. • Iridium Manual...
- Page 64 Set Last Loaded: resets the parameter to the last • loaded value from the current sound patch. MIDI Learn CC: activates MIDI Learn, which maps an • incoming MIDI control change to this parameter. Samples Button One ore more samples can be used as an exciter for the Resonator. To use a sample, simply tap on the Samples button. The Sample display page opens. Iridium Manual...
- Page 65 Sound Parameters ons for velocity, various key tracking possibilities, plus The Kernel Synthesis Mode presenting feedback, level, pitch, and wavetable position as modulation targets in the Iridium’s Modulation Matrix. Press Wave- table and Meanwhile, kernel pitch can be set in relation to note pitch, Waveform as well as being set to fixed frequency in audio or LFO buttons range. Pitch envelopes could be also applied to each kernel multaneously to activate the Kernel mode for the cor- individually using the Iridium’s Modulation Matrix. responding oscillator 1, 2, or 3. The whole oscillator section lights up in pink.
- Page 66 Due to the fact that there are nearly endless possibilities for kernel mode parameters, the 5 panel parameters (except Semitone and Fine Pitch) of the Oscillator sectio- nand corresponds to the 5 template parameters shown in the touchscreen display. For example, if the template "FM Simple" is loaded, the Position dial controls Timbre, the Kernel mode with template "FM Simple" Spectrum dial controls Ratio and so on. This allows you a fast editing of all important parameters of a template. Iridium Manual...
- Page 67 But some fearless might want to press “Edit”: are the 5 main pots each oscillator has on the panel. Since Edit each template uses them differently, their names and set- tings are put on the main screen. Tap on the Edit button to open the deeper editing level of the Kernel mode. You can use the pre-installed templates, but you can also build your own ones. Technically templates are nothing Iridium Manual...
- Page 68 INIT state without any template macro defined and build freely and individually on the Kernel Mod page, but in up from there step by step, or using an existing template addition the Algorithm screen provides some presets for and start from there. an easy start from scratch. Iridium Manual...
- Page 69 FM algorithms (which is their word for how kernels/operators are connected to each other). Kernel 1 Wave display page When tapped on one of the four option buttons, the In the second row the buttons will switch between Wave, template name automatically changes to Custom. Mod, Env and Level pages. Tap on Exit to leave edit mode. Keep in mind, the Kernel synthesis is much more Below the Wave button of the left side there is an On/Off then FM. Further, in contrast to classic FM, there is button to enable and disable the particular kernel. This is no restriction of FM feedback to a single kernel. Each e.g. useful for temporarily disabling a modulation by disab- of them could have it, even multiple in parallel. ling the modulating kernel. Iridium Manual...
- Page 70 K1..6 Type: Each kernel can generate Sine waves for K1...6 Level determines the level of the corresponding classic FM, the whole range of Iridium factory wavetables, kernel. For a kernel sending to the oscillator out, this is classic waveforms like Saw up/down, Triangle, Square, as simply its volume. For kernels modulating other kernels, resonant waveform as well as White & Pink noise. The...
- Page 71 MIDI Learn CC: activates MIDI Learn, which maps an • for each kernel waveform, or set it to Free for getting a incoming MIDI control change to this parameter. random phase at each note onset. K1...6 PitchMode: You can switch between 6 modes that determine how pitch is handled for kernels. Each mode has then one (Fixed and LFO) or two additional parameters for pitch control. Ratio: The kernel pitch is derived from the oscillator • base pitch by putting a multiplier into the game. Iridium Manual...
- Page 72 True FM modulates in fact the frequency (and not the • The Mod display page for Kernel 1 phase like in traditional phase-based FM). Compared to Phase FM the sonic effect is even more drastic and can The following parameters are available: quickly get very nasty. If this is what you want, that is K1...6 ModSrc 1/2/3: Each kernel can have up to 3 other your mode. kernels as direct kernel modulation sources (not to confu- Ring does classic ring modulation between modulating se with conventional modulation from modulation matrix • kernel and target kernel. The sonic effect is mostly de- termined by the pitch difference of both kernels. Turn Iridium Manual...
- Page 73 In FM this is a classic way to add quickly partials to the sound mostly in sawtooth like direction but depending on the amount and level it can go quickly into harsh noise up to white-noise like sonic terri- tory. Use it with care, but it is mega-fun since potentially every kernel could have its own feedback. When a kernel is FM-modulated already by another kernel, self-feedback Envelope page for Kernel 1 still can be applied and added. Iridium Manual...
- Page 74 This is of course only valid for kernels that have been activated to send to the output by the Out button. This parameter is identical to the corresponding parameter on the Level page. The envelope parameters below the envelope graphic set the envelope stages in milliseconds (ms). Except for the Level page for Kernel 1 Iridium Manual...
- Page 75 K1...6 OutPan determines how the kernel signal (which that controls which kernel parameters are affected by the itself is mono) is panned to the oscillator stereo output. knob macro value. This is of course only valid for kernels that have been activated to send to the output by the Out button. This parameter is identical to the corresponding parameter on the Env page. Iridium Manual...
- Page 76 (“Slots”) regardless if in the same kernel or different kernels simultaneously are uased. You can set the target parameter and amount for each slot. The sonic results can be hugely satisfying when a single knob movement con- trols a whole range of kernel parameters. Please check out the various templates for ideas what can be achieved here and then create your own ones. Example: Macro assignment for Simple FM template Each knob macro can be a descriptive name given as well as the overall template can be named. All these settings Slot selects one of the six available knobs for assignment. will be of course saved in a Iridium sound patch. But if you Iridium Manual...
- Page 77 Select K1 and then Mod for setting the modulation vidual kernel parameters simultaneously. • source. So, these first two modulation level are happing all inside Select K2 in K1 ModSrc 1 (top left encoder). the kernel oscillator. The third level is simply the fact that • the 5 knob macros are available in the Iridium modulation Select K2 from above to edit kernel 2. • matrix as modulation targets. By these, you can use Iridi- um’s LFOs, Envelopes, Komplex Modulator etc. to modula- Activate K2 by tapping the Off button below Wave • te the inner sonic aspects of the kernel oscillators. The only which then changes to On.
- Page 78 Goto Wave, set K1 Type to Wavetable, choose a • wavetable as you like but leave position at 0. Goto Patch -> Controls. • Select Macro to Center from top left encoder. • Keep Slot at 1. • Set Macro3 Dest1 from middle right encoder to K1 • WTB Pos. Set Amount to like 80%. • Play around with the middle dial. • Tap on Edit Name in the middle below the dial graphic • and rename it to Timbre or whatever you like. Tap on the name field to the right of the Controls but- • ton and rename Custom to whatever name you like, for example First FM. Tap on Exit. • Iridium Manual...
- Page 79 Level Osc 1 / Osc 2 / Osc 3 Determines the volume of the corresponding oscillator. Routing Button Press the Routing button to enter the Routing display page. Read more about signal routing in the Filter chapter in the corresponding section. Iridium Manual...
- Page 80 Sound Parameters Dual Filter Section The Dual Filter section can be bypassed by setting all Osc Dest parameter on the corresponding Oscillator Iridium offers two filters with different types and additio- Control display pages to DF 100 Fil 0. nal settings (e.g. 12 dB/24 dB Lowpass with resonance - clean, saturated or dirty). With the Link parameter diffe- Further filter parameters can be found on the Filter rent filter routings can be realized (e.g. Boost, Twin Peaks, display page. Escaping, Opposition and many more). Filter Panel Parameters Cutoff 1 & 2 Controls the cutoff frequency for the selected filter types.
- Page 81 12dB/24 dB slope. The an affect on the sound signal. Cutoff 2 and Resonance necessary signal adaption is done by a saturation stage. 2 have no influence here. This leads to a light driven audio signal. Boost: only Cutoff 1 and Resonance 1 (Filter 1) have • 12dB dirty HP / 24dB dirty HP removes frequencies • an affect on the sound signal. Cutoff 2 is set to an au- below the cutoff point with a 12dB/24dB slope. The Iridium Manual...
- Page 82 Cutoff 2 and Resonance 2 have no influence here. Independent: both filters allow independent settings • Digital Former and Routing will be explained in for Cutoff 1 and 2 and Resonance 1 and 2. the corresponding chapters. Linked: both filters allow independent settings for • Cutoff 1 and 2 and Resonance 1 and 2, but Cutoff 1 controls the overall frequency cutoff. Iridium Manual...
- Page 83 Determines how much the cutoff frequency depends on the MIDI note number. The reference note for Keytrack is Resonance (for Dual Filter 1 & 2) E3, note number 64. For positive settings the cutoff fre- quency rises on notes above the reference note; for negati- See corresponding description in the ‘Filter Panel Parame- ve settings the cutoff frequency falls by the same amount, ters’ chapter. and vice versa. A setting of +100% corresponds to a 1:1 Iridium Manual...
- Page 84 +30% are optimal to keep the sound smooth at higher notes. Nave: offers a filter type with Waldorf Nave • synthesizer characteristic. Tap on Keytrack 1 or Keytrack 2 to open a pop-up menu PPG: offers a filter type with Waldorf PPG Wave 3.V • for further settings: synthesizer characteristic. Normal: Keytrack change is about 2 %. • Quantum: offers a filter type with Waldorf Quantum •...
- Page 85 It is similar to the Amount pa- This parameter is only displayed when the ENV rameter in the Envelopes section. button is deactivated. Determines the amount of influence the filter 1 or filter 2 Sets the panning for the audio signal that comes from the envelope has on the cutoff frequency parameter of filter 1 corresponding filter. or 2. For positive settings, the modulation is increased by of the envelope; for negative settings, it is decreased. Tap on Filter Pan to open a pop-up menu for further set- tings: Iridium Manual...
- Page 86 Determines the amount of influence the filter 1 or filter 2 Set Default: sets Type to its default setting 12 dB LP. • envelope has on the cutoff frequency parameter of filter 1 Set Last Loaded: resets the parameter to the last or 2 for the filter envelope, based on keyboard velocity. • loaded value from the current sound patch. This parameter works similarly to the Filter Amount parameter with the difference that its intensity is velocity based. Use this feature to give a more expressive character Iridium Manual...
- Page 87 Set Last Loaded: resets the parameter to the last • loaded value from the current sound patch. Filter -> Former: the audio signal first leads into the • Dual Filter section and from there into the Digital MIDI Learn CC: activates MIDI Learn, which maps an • Former section. incoming MIDI control change to this parameter. Iridium Manual...
-
Page 88: Setup
• time graphic spectrum analyzer that is shown as an mines if the audio signal is routed into the Dual Fil- ter section before or after passing the Digital Former overlay. Keep in mind, that the analyzer curve displays section. Therefore, the Routing parameter is the filtered audio signal. available on the Filter display page. Animate/Hide Mods: Animates the filter curve when a • modulation (e.g. via LFO) is set up. Digital Former Panel Parameters Type The following Digital Former types are available. Depen- ding on the selected type, Amount and Color control diffe- rent settings. This will be explained in the following list: Iridium Manual... - Page 89 The follo- the delay length, which is controlled through Freq, wing drive curves are available: while the amount of colorization is set by the Comb fil- ter feedback, which is controlled through Feedback. PNP generates a distortion based on a bipolar tran- • Iridium offers two comb filter types (+ and -) which dif- sistor. fer in the shape of the peaks. Tube simulates the asymmetric distortion of a tube • Bit Crusher: produces lo-fi sound effects by decima- •...
- Page 90 Largo HP 12 / HP 24: offers a highpass filter with • • resonance as in the Waldorf Nave synthesizer. This resonance as in the Waldorf Largo synthesizer. Freq filter type was implemented due to compatibility controls the cutoff frequency while Reso controls the reasons because Iridium can load sound programs emphasis.
- Page 91 To access the Digital Former display page for further pa- Largo Notch 12 / Notch 24: offers a notch filter with rameters, press the FILTERS button. Tap on the Digi For- • resonance as in the Waldorf Largo synthesizer. Freq mer tab on the touchscreen to select the corresponding controls the cutoff frequency while Reso controls the display page. emphasis.
- Page 92 Tap on Color to open a pop-up menu for further settings: corresponding Types. Normal: Color change will be normal. • Tap on Amount to open a pop-up menu for further set- tings: Fine: Color change will be fine. • Normal: Amount change will be normal. Super Fine: Color change will be very fine. • • Fine: Amount change will be fine. Set Default: sets Color to its default setting. • • Set Last Loaded: resets the parameter to the last Super Fine: Amount change will be very fine. • • loaded value from the current sound patch. Iridium Manual...
- Page 93 Set Last Loaded: resets the parameter to the last • tings: loaded value from the current sound patch. Normal: Keytrack change will be normal. Modulations: opens the Mod menu to sets up a modu- • • lation for this parameter. How to set up a modulation Fine: Keytrack change will be fine. • can be read in ‘The Modulation Mode’ chapter. Super Fine: Keytrack change will be very fine. • MIDI Learn CC: activates MIDI Learn, which maps an • incoming MIDI control change to this parameter. Set Default: sets Keytrack to its default setting. • Iridium Manual...
- Page 94 MIDI Learn CC: activates MIDI Learn, which maps an MIDI Learn CC: activates MIDI Learn, which maps an • • incoming MIDI control change to this parameter. incoming MIDI control change to this parameter. Routing Tools Button Determines the routing of the audio signal that comes from This button is only available when a filter type is the oscillators. selected. Iridium Manual...
- Page 95 • time graphic spectrum analyzer that is shown as an ting display page. overlay. Keep in mind, that the analyzer curve displays the filtered audio signal. You can also access the Routing display page by pressing the Routing button in the OSC MIX section. Animate/Hide Mods: Animates the filter curve when a • modulation (e.g. via LFO) is set up. Here you will get a graphic overview of the Iridium’s signal routing. You can also control the routing of the three oscil- lators and set up the ring modulation for the current sound. Iridium Manual...
- Page 96 (DF), and the Amplifier (AMP), followed by the 5 FX slots. Main: routes the signal to the full signal path (Dual • The audio signal finally leaves the Iridium via the Master Filter, Digital Former, VCA) as determined with the output. Routing parameter on the Filter page. The signal path changes when one of the following para- VCA: routes the signal directly to the VCA without •...
- Page 97 Set Last Loaded: resets the parameter to the last • setting. loaded value from the current sound patch. Set Last Loaded: resets the parameter to the last • MIDI Learn CC: activates MIDI Learn, which maps an loaded value from the current sound patch. • incoming MIDI control change to this parameter. MIDI Learn CC: activates MIDI Learn, which maps an • incoming MIDI control change to this parameter. Iridium Manual...
-
Page 98: Envelopes Section
Decay value until it reaches the predetermined Sustain The Envelopes Section value. It remains at this value until the key is released. The envelope then descends to zero at the rate determined by Iridium’s envelopes allow you to manipulate sound para- the Release parameter. meters via rate or timed modulations. Iridium offers six independent programmable envelopes for every sound program: Envelope Panel Parameters • Two Filter Envelopes (Filter 1 and 2). These envelo-... - Page 99 – especially Once the note has ended, the release phase begins. During when a filter does not behave as you expect. You can this phase, the envelope fades to zero at the rate deter- also create interesting effects by setting one para- mined by the release value. meter to a positive and the other to a negative amount. Iridium Manual...
- Page 100 How to set up a modulation can be read in ‘The Modulation Mode’ chapter. MIDI Learn CC: activates MIDI Learn, which maps an • incoming MIDI control change to this parameter. Delay Delays the start of the envelope by the selected time after a The display page parameters for every one of the six note trigger happens. envelopes are similar. Tap on Delay to open a pop-up menu for further settings: Attack, Decay, Sustain, Release Normal: Delay change will be normal. • See corresponding parameter in the ‘Envelope Panel Pa- Fine: Delay change will be fine. • rameters’ chapter. Iridium Manual...
- Page 101 Set Last Loaded: resets the parameter to the last • Fine: EnvelopeVar change is about 0.001. loaded value from the current sound patch. • Super Fine: EnvelopeVar change is about 0.0001. MIDI Learn CC: activates MIDI Learn, which maps an • • incoming MIDI control change to this parameter. Set Default: sets EnvelopeVar to its 0.35 default value. • Decay Curve Set Last Loaded: resets the parameter to the last • loaded value from the current sound patch. Sets the characteristic of the decay phase. Iridium Manual...
- Page 102 After releasing the note, Release phase of the envelope starts. Sets the characteristic of the release phase. ADSR Loop is identical to AD. As soon as the Release Exponential (Exp) switches the release phase to ex- • • phase starts, the loop will go on. ponential. Tap on Loop Mode to open a pop-up menu for further Alternate Exponential (Exp alt) switches the release • settings: phase to an alternative exponential curve. Set Default: sets Loop Mode to its default Off setting. • Linear (Lin) switches the release phase to linear. • Iridium Manual...
- Page 103 Afterwards the release phase is active. Tap on Single Trig to open a pop-up menu for further settings: Set Default: sets Single Trigger to its Off default set- • ting. Set Last Loaded: resets the parameter to the last • loaded value from the current sound patch. Iridium Manual...
-
Page 104: Lfo Section
Sound Parameters Speed LFO Section Determines the frequency of the selected LFO. At low valu- In addition to the main oscillators, Iridium is equipped es it might take four minutes for the LFO to perform a with six low frequency oscillators (LFOs) that can be used complete cycle while higher values are in the audible ran- for modulation purposes. Each LFO generates a periodic ge. waveform with adjustable frequency and shape. When the LFO Sync parameter is set to On, you can adjust Speed Ratio in musical values. The lowest possible value is 1024 bars, meaning that a complete LFO cycle would need 1024 bars. - Page 105 Speed /Speed Ratio The Sine shape is best suited for oscillator FM or pan • See corresponding description in the ‘LFO Panel Parame- modulations. ters’ chapter. The Triangle shape is perfect for smooth pitch, filter • Tap on Speed to open a pop-up menu for further settings: or volume modulations. Normal: Speed change is about 2.8 Hz. • Iridium Manual...
- Page 106 All Amounts the upper or lower phase of the waveform. See corresponding description in the ‘LFO Panel Parame- If Triangle is selected, higher values turn the wave • ters’ chapter. into a rising sawtooth wave while lower values create a falling sawtooth wave. Tap on All Amounts to open a pop-up menu for further settings: If Square is selected, Warp changes the pulsewidth of • the waveform. Iridium Manual...
- Page 107 When Sync is activated, the corresponding LFO is synced MIDI Learn CC: activates MIDI Learn, which maps an • to the global Tempo of the Iridium (can be set with the incoming MIDI control change to this parameter. Bpm parameter). The Speed setting (called Speed Ratio here) can be changed to offer musically meaningful values.
- Page 108 MIDI Learn CC: activates MIDI Learn, which maps an • • incoming MIDI control change to this parameter. Set Last Loaded: resets the parameter to the last • loaded value from the current sound patch. Slew MIDI Learn CC: activates MIDI Learn, which maps an • Determines the slew rate of the selected LFO waveform. incoming MIDI control change to this parameter. The higher the setting, the smoother the slew rate. Higher Iridium Manual...
-
Page 109: The Effects
Sound Parameters Delay The Effects Controls the delay in seconds, with which the correspond- Iridium offers five effect units with a bunch of different ing LFO is faded in. With this parameter you can create effect types. Effet set up and editing is done on the Effects slowly rising modulations that might create interest when display page. routed to wave, pitch, or volume. Keep in mind that the five effect units provide insert Tap on Delay to open a pop-up menu for further settings: effects with a serial routing. That means that the signal will first go through Effect 1, then through Set Default: sets Delay to its default value of 0 secs.. - Page 110 By tapping on Active the corresponding effect unit is • takes place. set to bypass. No effect signal is generated. Tap on By- pass to unmute the effect again. Tap on Presets to open a pop-up window. Here you • can load, save, and manage effect presets for the cor- responding effect type. Here the following options are available: Iridium Manual...
- Page 111 Sound Parameters The Effect Types of Iridium Phaser Phase shifting is a sweeping effect that was first popula- rized in the 1960s. It adds motion and a swirling character to the sound. It works by splitting the incoming signal, changing the phase of one side, and recombining it with the unaffected signal. This creates a notch-comb filter that can be swept through the frequency spectrum, causing the signature ‘whooshing’ sound of the phase shifter. The...
- Page 112 Sound Parameters Spread Model Controls the phase position of the Phaser signal. Lower Determines the Phaser model that is used. You can select settings produce a more resonant Phaser effect. between the Phaser from Waldorf’s Nave and PPG Wave 3.V. Feedback Tap on the corresponding effect parameter to open a pop- Controls the feedback amount of the signal. up menu for further settings (not all settings are available for all effect parameters): Phase Diff Normal: parameter change is about 1%.
- Page 113 Depth trolled in speed and depth. Sets the modulation depth of the Chorus effect. Speed Sets the LFO speed of the Chorus effect. Delay Determines a delay for the chorus signal in milliseconds. Feedback Controls the feedback amount of the signal. Spread Controls the phase position of the chorus signal. Lower settings produce a more resonant chorus effect. For the typical Chorus effect sound the Dry/Wet parameter should be set to 50%. Iridium Manual...
- Page 114 Determines the numbers of stages that are used for the Chorus effect. The Chorus offers four chorus types with MIDI Learn CC: activates MIDI Learn, which maps an • either two, four, six, or eight independent delay lines, whe- incoming MIDI control change to this parameter. re half of them are routed to the left input and output and the others to the right input and output. HighCut Reduces the high frequencies of the chorus signal. LowCut Reduces the low frequencies of the chorus signal. Tap on the corresponding effect parameter to open a pop- up menu for further settings (not all settings are available for all effect parameters): Normal: parameter change is about 1%. • Fine: parameter change is about 0.1%. • Super Fine: parameter change is about 0.01%. • Iridium Manual...
- Page 115 100% the pure effect signal will be hear a whistling sound which is very characteristic of a heard. flanger effect. Depth Sets the modulation depth of the Flanger effect. Speed Sets the LFO speed of the Flanger effect. Feedback Controls the feedback amount of the flanger-signal. Delay Determines a delay for the flanger signal in milliseconds. Phase Diff Determines the start phase of the modulation waveform in For the typical Flanger effect sound the Dry/Wet degrees. parameter should be set to 50%. Iridium Manual...
- Page 116 MIDI Learn CC: activates MIDI Learn, which maps an • signal is sent to the output only so that no effect can be incoming MIDI control change to this parameter. heard. Higher values will increase the effect signal. At maximum setting of 100% the pure effect signal will be heard. Iridium Manual...
- Page 117 This leads to a less static delay high frequencies of the feedback signal. sound. LowCut Delay-R Dampens the low frequencies produced by the Delay Sets the length of the Delay tap for the right channel in effect. milliseconds or rather seconds. If Sync is activated, the delay length can be entered in musical values. Tap on the corresponding effect parameter to open a pop- up menu for further settings (not all settings are available for all effect parameters): Iridium Manual...
- Page 118 Sound Parameters Reverb Normal: parameter change is about 1%. • Fine: parameter change is about 0.1%. The Reverb effect is probably the most widely used effect • in music production. Iridium’s reverb effect is an addition Super Fine: parameter change is about 0.01%. • to the sound to make it more expressive with a three- dimensional feel. Set Default: sets the parameter to its default value. • Set Last Loaded: resets the parameter to the last • loaded value from the current sound patch. Modulations: opens the Mod menu to sets up a modu- • lation for this parameter. How to set up a modulation can be read in ‘The Modulation Mode’ chapter.
- Page 119 Predelay Determines the delay between the direct sound and the reverb effect output. Lower settings connect the reverb more to the original signal while higher settings separate the effect signal to produce a more spacious sound. Tap on the corresponding effect parameter to open a pop- up menu for further settings (not all settings are available for all effect parameters): Normal: parameter change is about 1%. • Fine: parameter change is about 0.1%. • Super Fine: parameter change is about 0.01%. • Set Default: sets the parameter to its default value. • Iridium Manual...
- Page 120 EQ Dry/Wet EQ (Equalizer) This parameter controls the volume ratio between the Iridium offers a parametric equalizer to adjust the sound original signal and the effect output. If set to 0%, the dry frequencies to your needs. signal is sent to the output only so that no effect can be heard. Higher values will increase the effect signal. At...
- Page 121 How to set up a modulation Mid Q / Mid2 Q can be read in ‘The Modulation Mode’ chapter. Controls the quality or width of the corresponding band. MIDI Learn CC: activates MIDI Learn, which maps an • Higher values result in a narrower band, lower values incoming MIDI control change to this parameter. widen it. Iridium Manual...
- Page 122 This parameter controls the volume ratio between the Tube simulates the asymmetric distortion of a tube • original signal and the effect output. If set to 0%, the dry circuit. signal is sent to the output only so that no effect can be heard. Higher values will increase the effect signal. At Iridium Manual...
- Page 123 How to set up a modulation can be read in ‘The Modulation Mode’ chapter. Sets the amount of gain reduction (compression) applied to signals above the set threshold. A ratio of 4:1 means that MIDI Learn CC: activates MIDI Learn, which maps an • for every 4 dB the input level increases, the output level incoming MIDI control change to this parameter. increases by 1 dB. Iridium Manual...
- Page 124 Compensates for output gain loss caused by compression. Set Last Loaded: resets the parameter to the last • loaded value from the current sound patch. Auto Gain Modulations: opens the Mod menu to sets up a modu- • Switch on the Auto Gain function for an automatic control lation for this parameter. How to set up a modulation of Output Gain when adjusting the Threshold. can be read in ‘The Modulation Mode’ chapter. MIDI Learn CC: activates MIDI Learn, which maps an • incoming MIDI control change to this parameter. Iridium Manual...
-
Page 125: The Modulations Of Iridium
A complete table of all available sources and destina- meter. tions can be found in the Appendix. This is how the Modulation Assignment works: How to set up a modulation If you have pressed the Mod button, first select a modulation destination by turning one of the pa- Iridium offers an easy way to determine modulation by rameter dials that are lit in blue. This step is not using the dials on the panel. This modulation assignment necessary if the Modulation option is selected in can be called up in different ways: the pop-up menu of a display parameter. Press the MOD button • Select the corresponding modulation source by... - Page 126 MOD button. Tap on the Modulation Matrix tab on the touchscreen to select the display page. Keep in mind that you can set up positive or negati- ve modulation amounts. Positive amounts will be shown as as green bar while negatives will be shown as a red bar. The same goes for the LEDs below the corresponding modulation source. The Modulation Assignment window includes some more options: Clear Selected button: tap on the desired modulation • entry to select it. Tap on the Clear Selected button to delete the selected modulation assignment. Clear All button: tap on this button to delete all modu- • lation assignments that are shown in this list. Iridium Manual...
- Page 127 You can also add a Controller with a Control tion using the wheel. Amount to a modulation assignment. More on this below. Tap on Controller to open a pop-up menu for further settings: Slot Set Default: sets the parameter to its default Off set- • ting. Selects the respective Modulation Slots 1 to 40. Iridium Manual...
- Page 128 • Set Last Loaded: resets the parameter to the last • ting amplitude lies within the range of -1…0…+1. These loaded value from the current sound patch. sources are: all LFOs, Keytrack, and Pitchbend. MIDI Learn CC: activates MIDI Learn, which maps an • Tap on Amount to open a pop-up menu for further set- incoming MIDI control change to this parameter. tings: Normal: parameter change is about 2%. • Iridium Manual...
- Page 129 Set Last Loaded: resets the parameter to the last a separate bar in the Amount column. • loaded value from the current sound patch. MIDI Learn CC: activates MIDI Learn, which maps an • incoming MIDI control change to this parameter. Active Button Select a desired modulation entry. Tap on the Active but- ton to disable the corresponding modulation assignment. The button is labeled ‘Disabled’ and the modulation slot is greyed out. Use this to temporarily bypass a modulation. Tap on Disabled to activate the modulation again. Iridium Manual...
-
Page 130: Komplex Modulator
Mixes the result of Curve A and Curve B. The leftmost setting (A 100%) only uses the signal from Curve A as modulation source while the rightmost setting (B 100%) only uses Curve B. Other settings morph Curve A into Curve B, and vice versa. Tap on Blend to open a pop-up menu for further settings: Iridium Manual... - Page 131 Depending on the created Komplex Modulator shape the waveform. At low values it might take four minutes to Warp parameter folds the waveform. The result may look perform a complete cycle while higher values go up to the different, based on the initial waveform. audible range. Tap on Warp to open a pop-up menu for further settings: When the Komplex Modulator Sync parameter is set to On, Normal: Warp change is about 0.02. • you can adjust the Speed in musical values. The lowest possible value is 1024 bars, meaning that a complete cycle Fine: Warp change is about 0.002. • would need 1024 bars. Super Fine: Warp change is about 0.0002. • Tap on Speed to open a pop-up menu for further settings: Iridium Manual...
- Page 132 Tap on All Amounts to open a pop-up menu for further incoming MIDI control change to this parameter. settings: Normal: All Amounts change is about 2.0 %. Entropy • Fine: All Amounts change is about 0.2 %. • Determines how intensive a random noise signal has in- fluence on the time axis. The higher the Entropy value, the Super Fine: All Amounts change is about 0.02 %. • more randomly the complete waveform seems to be in all cycles. The graphic display of the waveform may give an Iridium Manual...
- Page 133 Set Last Loaded: resets the parameter to the last • When Sync is activated, the Komplex Modulator is synced loaded value from the current sound patch. to the global Tempo of the Iridium, which can be deter- mined via the Arpeggiator or Sequencer pages. The Speed setting (called Speed Ratio here) changes to offer musically meaningful values.
- Page 134 Set Last Loaded: resets the parameter to the last • incoming MIDI control change to this parameter. loaded value from the current sound patch. Phase MIDI Learn CC: activates MIDI Learn, which maps an • incoming MIDI control change to this parameter. Controls the initial phase of the Komplex Modulator shape when a new note is started. Free means that the Komplex The Mod Tgts (Modulation Targets) Button Modulator isn’t restarted on a new note but runs freely while other values set the Komplex Modulator phase to the Read more in the ‘Modulation’ chapter. respective offset in degrees. Tap on Phase to open a pop-up menu for further settings: Iridium Manual...
- Page 135 • immediately to this position. For more precise editing of steps we recommend using the corresponding display page parameters. Step A/B Selects a desired step for further editing. The current sel- ected step is lit in red. Num Steps A/B Determines the number of available steps. Here you can set up step numbers from a minimum of two through to a Curve A and B use the same parameters for editing. maximum of 32. Iridium Manual...
- Page 136 Set Last Loaded: resets the parameter to the last • loaded value from the current sound patch. Saw: uses a sawtooth-like curve that rises or falls to • the next step. This depends on the step level. MIDI Learn CC: activates MIDI Learn, which maps an • incoming MIDI control change to this parameter. Curve: uses a curve characteristic that can be defined • with the Curve Type parameter. Iridium Manual...
- Page 137 Clear: clears all steps and sets their levels to 0. • Curve Val A/B All Steps: sets all steps to the Step curve type. • If the Curve Type is set to Curve, you can shade the curve All Lin: sets all steps to the linear curve type. • from exponential to linear to inverse exponential. All Saw: sets all steps to the sawtooth curve type. • Tap on Curve Val to open a pop-up menu for further set- All Cos: sets all steps to the cosine curve type. • tings: All Curve: sets all steps to the Curve type. • Normal: Curve Val change is about 0.01. • Fine: Curve Val change is about 0.001. • Super Fine: Curve Val change is about 0.0001. • Set Default: sets Curve Val to its default setting of 0.50. • Set Last Loaded: resets the parameter to the last • loaded value from the current sound patch. Iridium Manual...
- Page 138 Set Last Loaded: resets the parameter to the last • loaded value from the current sound patch. Modulations: opens the Mod menu to sets up a modu- • lation for this parameter. How to set up a modulation can be read in ‘The Modulation Mode’ chapter. MIDI Learn CC: activates MIDI Learn, which maps an • incoming MIDI control change to this parameter. Layer 1 / 2 Pan Determines the panning for the corresponding layer. Tap on Layer Pan to open a pop-up menu for further set- tings: Iridium Manual...
-
Page 139: Master Volume
Bass Boost range of the overall audio signal. The signal seems to be louder and more assertive. The compressor effect is posi- Activates/deactivates the typical Waldorf bass emphasis tioned after the effect units and before Master Volume. for the overall audio signal. Tap on Compression to open a pop-up menu for further... -
Page 140: Perform Mode Page
When playing the pads in Split mode, the current wheel, a pitch bend, aftertouch pressure (AT) and a veloci- selected layer is used. ty value for the pads (Pad Velo). Layered: both Sound layers are played simultaneously • over the whole keyboard range. Use this option to combine two sounds, such as a pad sound and a poly lead. Iridium Manual... -
Page 141: Favorites Tab
Set. If you want to load a sound program, press the Selection dial. One Set can contain only one sound program at any given time. This means that if you want to add the same sound program as previously ad- ded, the older one disappears when saving the new one to a desired location. Iridium Manual... -
Page 142: Autoplay Tab
An Arpeggiator is a device that splits an incoming chord into its individual notes and repeats them rhythmically. Different sequence modes can be defined for the Arpeggia- tor to cover a wide range of applications. In addition to the synthesis features Iridium offers a programmable arpeg- giator. It can play a wide range of different rhythm pat- Sets the overall tempo for the Arpeggiator and the Se- terns. - Page 143 With the pop-up menu Pattern you can select one of the octaves are transposed upward. The arpeggio starts in 31 internal rhythm and accent patterns. the original octave and goes up to the highest octave (determined with Octaves). Then the arpeggio is Reset repeated. Sets up a limit for the played notes. This is useful to create If Down is selected, the note list is played backward • inclined measures. Set Reset to 8 or 16 to start an arpeggio and the octaves are transposed downward. The arpeg- at the beginning of a measure. gio starts in the highest octave (determined with Octa- Iridium Manual...
- Page 144 With the settings in the pop-up menu SortOrder you can last note of the note list in the highest octave to play. determine how the notes you originally play are split up Then the arpeggio is repeated. for the arpeggio: Iridium Manual...
- Page 145 • sed on all notes from the note list. loaded value from the current sound patch. Modulations: opens the Mod menu to sets up a modu- • Velocity lation for this parameter. How to set up a modulation can be read in ‘The Modulation Mode’ chapter. With the settings in the pop-up menu Velocity you can determine how velocity is interpreted in the arpeggio: MIDI Learn CC: activates MIDI Learn, which maps an • incoming MIDI control change to this parameter. Iridium Manual...
- Page 146 Move your finger up and down to change the pitch of the selected step. Move your finger from left to right or vice versa to ‘draw’ a sequence. Above the graphic you find the same number of blocks. • Each block represents a step. Tap on a desired block to mute the corresponding step. the same applies for un- muting. A selected block lights up in red and displays the current pitch (e.g. +3). For a more accurate editing of a selected step you can • The sequencer outputs MIDI notes in case the MIDI use the Pitch parameter. Out function on the Global menu page is enabled. Iridium Manual...
- Page 147 Param 1...8 controls the parameter modulation for Step Length the Parameter sequencer. Read more on this on page Determines the rate at which notes are triggered – that is 150. to say, the speed at which the sequence is running. In addi- tion to the Bpm parameter this gives you further control over the playback speed. You can specify a value in frac- tions of beats. For example, if Step Length is set to 1/8, the sequence plays eight notes per measure. Iridium Manual...
- Page 148 The last step is repeated and the RelGate (Release Gate) sequence is running back to the first note, which also is repeated and so on. With the settings of the pop-up menu RelGate you can determine the note length depending on the original If One-Shot is selected, the notes are running from the • length. The lower the value, the shorter the played notes. first step to the last. Then the sequence stops. Iridium Manual...
- Page 149 Here you start or stop the sequencer playback. You can Determines the tonic keynote for used scale. also use the Play button below the Tempo dial. Tap on the corresponding sequencer parameter to open a Record/Stop Record pop-up menu for further settings (not all settings are available for all sequencer parameters): Here you can start and stop the realtime recording func- tion. It records a played note (pitch) for each step, one at a Normal: parameter change is about normal. • time. Fine: parameter change is about fine. • Iridium Manual...
- Page 150 Tap on the Presets button to open a pop-up window for loading, saving, and managing Step sequences. For more information on the available options please refer to the Presets chapter in the Wavetable section. The Parameter Sequencer Param 1...8 Beside arpeggiator and step sequencer, Iridium offers a so- Tap on this button to open a pop-up menu where you can called parameter sequencer that is made for parameter switch between the 8 parameter sequences. modulation purposes. 1-32/1-16/17-32 Tap on the Mode button and select Param Seq to switch to the corresponding display page.
- Page 151 Mod Targets With Destination, you can select a desired modulation • Tap on this button to switch the display representation for target. assigning modulations for the parameter sequencer. Up to Amount determines the modulation intensity. This can 40 modulation assignments can be made. • be adjusted positive or negative. You can also add a Controller with a Control Amount • to a modulation assignment. Tap on the Clear Selected button to delete the selected • modulation assignment. Clear All: tap on this button to delete all modulation assignments that are shown in this list. To end the Mod Targets mode, tap on the Mod Targets • button. Read more about modulation assignments in the chapter 'The Modulations of Iridium'. The Parameter Sequencer with Mod Targets Iridium Manual...
-
Page 152: Xy Pad Tab
This pitches of each pad and therefore of the sequenced the latched ones will play. For the other ones a rest will be steps will be taken from either the Notes, Scale or Chords inserted. If you like to get back using all pads in playback, pitch configurations of the pads. Press the respective but- then simply press Latch to un-latch everything. ton for setting up these pitches. XY Pad Tab This page provides a X-Y pad, a two-dimensional controller based on two selected modulation parameters. First you need to define the X and Y controller within the Modulation Matrix. You can, for example, easily set up a modulation for Cutoff (Pad X) and Resonance (Pad Y). Iridium Manual... - Page 153 MIDI Learn CC: Activates MIDI Learn, which maps an • incoming MIDI control change to this parameter. X/Y Polarity Both controllers can be switched from Bipolar to Unipolar. For the so-called unipolar modulation sources the resul- ting amplitude lies within the range of 0…+1. For the so- called bipolar modulation sources the resulting amplitude lies within the range of -1…0…+1. Spring Back X/Y If set to On, the button jumps back in the middle of the pad, when you release your finger. If set to Off, the button stays in its last position. Iridium Manual...
-
Page 154: Layer Mode Page
To select the desired mode tap on the corresponding tab (Levels, Pitch or Voices). Levels Tab Iridium offers a dual sound mode which means that two different sounds can be played simultaneously either as layered or as split sounds. Input Volume To switch between Layer 1 and Layer 2 just tap on the... - Page 155 • Off: an incoming signal is ignored. • Super Fine: Volume change with super fine values. • Main Output: an incoming audio signal is directly • Set Default: sets Volume to its default value of 0 dB. • routed to the Iridium’s Main Output. Set Last Loaded: resets the parameter to the last • FX Layer 1: an incoming audio signal is directly routed • loaded value from the current sound patch. into the Effect section of Layer 1. Modulations: opens the Mod menu to sets up a modu- • Filter L1: an incoming audio signal is directly routed •...
- Page 156 With a setting of 0.0% velocity will have no effect on the volume. Classic organs work in this way because they do not have dynamic response. For positive settings the volume rises with higher velocities. This is the most commonly used setting, which gives a piano-like character. Iridium Manual...
- Page 157 This effect can be created on fretless stringed instruments or some brass instruments (e.g. trombone). It is very common on synthesizers and used throughout all music styles. Please note that Glide affects the pitch of all oscillators. Iridium Manual...
- Page 158 Tap on Glide Type to open a pop-up menu for further Normal: Glide Rate change is about 0.08 secs. settings: • Fine: Glide Rate change is about 0.01 secs. Set Default: sets Glide Type to its default mode: Onset. • • Super Fine: Glide Rate change is about 0.001 secs. Set Last Loaded: resets the parameter to the last • • loaded value from the current sound patch. Set Default: sets Glide Rate to its default 0.045 secs. • MIDI Learn CC: activates MIDI Learn, which maps an • incoming MIDI control change to this parameter. Iridium Manual...
- Page 159 Voices tab page with active Unisono section • lation for this parameter. How to set up a modulation Timbre Mode can be read in ‘The Modulation Mode’ chapter. MIDI Learn CC: activates MIDI Learn, which maps an Iridium offers three different modes for the Sound layers: • incoming MIDI control change to this parameter. Single: both Sound layers have individual settings and • cannot be played together. You can switch between two layers by tapping on the Layer 1 or Layer 2 but- ton in the touch screen display.
- Page 160 • Tap on Count to open a pop-up menu for further settings: Set Default: sets Detune to its default value of 0.20. • Set Default: sets Count to its default value of Off. • Set Last Loaded: resets the parameter to the last • loaded value from the current sound patch. Set Last Loaded: resets the parameter to the last • loaded value from the current sound patch. MIDI Learn CC: activates MIDI Learn, which maps an • incoming MIDI control change to this parameter. Iridium Manual...
- Page 161 Voices (only for Split Mode) • loaded value from the current sound patch. Here you determine, how many voices the corresponding MIDI Learn CC: activates MIDI Learn, which maps an • sound layer is able to play. Keep in mind that the Iridium incoming MIDI control change to this parameter. offers an overall polyphony of eight voices. If you set Layer 1 to five voices, Layer 2 automatically switches to three Unisono Delay voices, and vice versa.
- Page 162 Additional Modes Both: wheels and play controls affect both layers. • Layer 1 / Layer 2: wheels and play controls affect • Layer 1 or Layer 2. Selected: wheels and play controls affect the current • selected layer. Iridium Manual...
-
Page 163: Global Mode
To access the Global Mode page press the single signals (as for Osc 1, 2 or 3) or the signal that Global button above the Tempo dial. To passes a component of Iridium’s signal flow (Filter, Di- select the desired function tap on the cor- gital Former, VCA, Pre-FX, Compressor), a layer signal, responding tab in the upper display area. On the next pa- the Input signal of the external audio input as well as ges, we describe every Tab mode page in detail. -
Page 164: Pitch Tab
Additional Modes for MIDI note A3. The default setting is 440 Hz, which Pitch Tab is commonly used by most instruments. Here you can make settings relating to the overall tuning of Scale: Opens a pop-up menu for a wide-ranging selec- the Iridium. • tion of musical scales – chromatic, major, minor, or ly- dian dominant, for example. You can also choose User 1 - 8 for selecting a user definable tuning. In this case, an additional Edit Tuning button is available. Scale Root: Determines the tonic keynote for the selec- • ted scale. This parameter is not available for the User scales. Edit Tuning Button If a User scale is selected with the Scale option, you can... -
Page 165: Audio Tab
Additional Modes Audio Tab Use the Step dial to select the desired Step for editing. • Use the Step Type dial to edit individual steps by spe- Here you find a simple and easy-to-use audio recorder and • cifying Interval in cents From Root, from previous sample editor to record and edit any audio signal from the Step or by numeric Ratio like 5/4 (with Numera- Audio Input or the Outputs into the Iridium’s Flash memo- tor/Denominator). Skip certain keys to distribute scale ry. notes over keyboard to be more playable. Tune individual steps by holding a note and then turn • interval encoder. The Import/Export option allows to load/save a User • Tuning table from and to Iridium´s MicroSD card. Tab on Pitch to return to the regular Pitch page. • If a User table is selected, it can be renamed, copied •... - Page 166 Turn the Rec. Source display dial to select the If you want to record an external audio signal, first make desired input signal. You can either record an ex- sure to connect a suited signal source to the Iridium´s ternal audio signal (Input) or the output signal of audio inputs: Iridiums Main output. In the latter case, no Turn the Rec. Source display dial and select In-...
- Page 167 • complete sampel waveform. Reverse reverses the selection so that it sounds as if • you play back a tape backwards. Selection displays the sample selection that is defined • before. To define a sample area, draw a selection with Silence allows you to replace the sample selection with • your finger. The area is shown in yellow. You can move silence. the area by holding and moving. Copy L -> R/Copy R -> L copies the left channel sound • Sel. Start/Sel. End displays the sample selection to the right channel or vice versa. • start/end for a detailed overview. Tap on the Undo button to undo the last edit command. If Tap on the Edit button to open a pop-up menu with diffe- made, the Undo button will become a Redo button to redo the last undo command. rent sample selection edit options: Iridium Manual...
-
Page 168: Midi Tab
MIDI Out on or off. keep in mind that Arp & Step Se- quencer will send MIDI notes for enabled MIDI outputs Send CC Mappings: Here you can activate all mapped • MIDI Control Change (MIDI CC) data being sent out for the panel pots, buttons, and encoder. If you have MIDI Controller routed in both directions, you could use your DAW automation function to easily control Iridium. Sync Inputs Determines how the Iridium reacts to incoming MIDI Clock Here you can make settings regarding the MIDI inputs messages. (DIN In, USB Controller In, USB Computer In): Tap on Sync Source, to determine the sync behaviour: State: Tap on the first state button to switch the cor- •... - Page 169 Additional Modes Internal means that Iridium doesn’t react to incoming Set: Tap on set to open a page for set up a desired MIDI • • MIDI Clock, nor does it send MIDI Clock. Iridium only CC connection to any panel parameter dial, potentio- syncs to its own tempo base that is set by the Tempo meter, or button. Follow the instructions on the touch- dial or the BPM parameter which can found on the Au- screen display. toplay page. Clear: Deletes the current selected MIDI Controller •...
-
Page 170: Settings Tab
• saver starts. It will automatically disappear when a no- te is played, a knob is turned, or a button is pressed. button. Iridium is always ready to play even when in screen saver mode. Keep in mind that the screen saver doesn not acti- vate a sleep mode. It is just to protect the screen from burn-in when left running for hours. - Page 171 Relative means that a value must be picked up before changing. With CV/Gate signals you can play notes on the Iridium form external devices such as modular sys- Switch Screens: here you can determine whether the • touchscreen display should automatically open the tems. CV (Control Voltage) defines the pitch of a no-...
- Page 172 For example, if you have an analog envelope generator as clocking signals from a huge range of vintage devices. CV source which is going from 0V to 5V, you can set the CV The Clock In jack is intended to receive signals from an scale to 5V to get its full amount at 100% in the mod mat- external device so that the Iridium Sequencer and Arpeg- rix. giator can be synchronized to an external clock source. Or if you have an along LFO which only goes from -3V to The Clock Out jack sends signals to an external device so +3V, then you can set the CV scale to 3V to experience its that is can be synchronized to Iridiums tempo clock.
-
Page 173: System Tab
Analog gate signals can be fed into Gate In. A positive ching it on when the ambient light is dark. voltage will gate a new note in Iridium, using a default pitch of MIDI 60. You can use one of the CV inputs as Custom Section Color List: Here you can define a •... - Page 174 Additional Modes nel. Tap on Support Log to save a log file onto a How to update the Iridium operating system connected MicroSD card or a USb storage device in Iridium has a service-friendly feature to update the system case you need support or service for your Iridium. software without changing any parts. Test buttons: Tap on one of the buttons to perform the • All software updates come in the form of a .bin file that can corresponding test routine. Please follow the onscreen be copied on every FAT file formatted MicroSD card or USB instructions. storage device. The fastest way to get this file is by down- loading it from our web site at: waldorfmusic.com/iridium...
-
Page 175: Working With The Pads
Additional Modes Tap on the Update button on the System tab pa- Working with the Pads ge (Info tab). The 16 RGB colored pads can be set up for different purpo- Locate the MicroSD card or the USB storage de- ses. This depends on the pressed button left from the pad vice and select the iridium.update.bin file. Tap on section. Load. Keep in mind that each layer has its own pad confi- Follow the onscreen instruction. guration. The pads will have the pad configuration of Wait until the operation is completed. If updating the active layer. Everything will be saved with a was successful, Iridium will perform a system re- patch. set and start up. The pads can be used to play live or to setup latch patterns to be auto-played in one of three modes: Do not under any circumstances turn off the Iri- dium while the update step is in progress. A com-... - Page 176 Tap on Octave to open a pop-up menu for further settings: Set Default: sets Octave to its default value of Oct 3. • Set Last Loaded: resets the parameter to the last • loaded value from the current sound patch. MIDI Learn CC: activates MIDI Learn, which maps an • incoming MIDI control change to this parameter. Velocity Determines the velocity that is used for all 16 pads. You can also use the live velocity slider on the Wheels page (on the Perform display page). Iridium Manual...
- Page 177 If active, a pushed pad will hold a note until it is pressed again. Presets Button Tap on the Presets button to open a pop-up window for Scale loading, saving, and managing note assignments. For more information on the available options please refer to the Determines the musical scale, e.g. Chromatic, Major, Minor Presets chapter in the Wavetable section. or Lydian Dominant. Tap on Scale to open a pop-up menu for further settings: Set Default: sets Scale to its default: Major. • Iridium Manual...
- Page 178 Set Last Loaded: resets the parameter to the last • loaded value from the current sound patch. Velocity MIDI Learn CC: activates MIDI Learn, which maps an • incoming MIDI control change to this parameter. Determines the velocity that is used for all 16 pads. You can also use the live velocity slider on the Wheels page (on Latch Button the Perform display page). Tap on Velocity a pop-up menu for further settings: If active, a pushed pad will hold its note until it is pressed again. Normal: Velocity changes with normal values. • Fine: Velocity changes with fine values. • Iridium Manual...
- Page 179 Each pad can be assigned a specific chord type with vari- Determines the chord interval for the selected pad. Also, ous voicing and inversions. tension notes are also possible. Octave Determines the octave transposition for all 16 pads. Tap on Octave to open a pop-up menu for further settings: Set Default: sets Octave to its default value of Oct 3. • Set Last Loaded: resets the parameter to the last • loaded value from the current sound patch. MIDI Learn CC: activates MIDI Learn, which maps an • incoming MIDI control change to this parameter. Iridium Manual...
- Page 180 If no pad is latched all pads will be used to sequence the incoming MIDI control change to this parameter. notes. For rhythmic variation you can use the parameters Rhythm Pattern, Swing and Rel Gate. Vocing You could also press the Latch button and then select a set Determines the voicing for the selected chord. beside root, of steps by pressing the corresponding pads. These will different inversions and splits are also available. then lit white and only these will be used for playback, i.e. when the algorithm is wandering through the pads only Latch Button the latched ones will play. For the other ones a rest will be inserted. If you like to get back using all pads in playback, If active, a pushed pad will hold its defined chord until it is then simply press Latch to un-latch everything. pressed again. Iridium Manual...
-
Page 181: Loading & Editing Samples
Iridium’s Flash As you may know, Iridium can play back samples via the memory. Here the samples are stored permanently and Particle generator or as an exciter for the Resonator. can be used for loading and further editing. Out of the box Iridium is delivered with a bunch of audio Record own audio samples: you can use the Audio • samples, but you can also record or use your own samples Recorder on the Global page to record samples via the to create interesting sounds. - Page 182 Velo) so the incoming velocity determines which sample is played. Use this function to create stacked samples that react on different velocities. To edit the following parameters we recommend loading a sample. For more information please refer Pitch to ‘The Actions Tab’ chapter. Determines the pitch of the currently selected sample. Use The Display Representation this parameter to tune samples that don’t match up with your desired tone pitch. If one sample is loaded, the central display shows a graphic waveform representation of this sample. If more than one Iridium Manual...
- Page 183 Set From Keys: play a key on your keyboard to set the • Granular: uses the Iridium Particle engine for granular • corresponding pitch. playback. Live Granular: uses Iridium’s Audio Input for a live • From Note / To Note granular transformation. Make sure to set up the audio Here you determine the keyboard range of the currently input on the Layer Levels page (Input Volume, Input Routing).
- Page 184 • after the other from the top of the sample list to the tor) end, and so on. The Iridium is able to playback mono and stereo sample Reverse Robin: the samples are played repeatedly one • files. Sometimes stereo samples have a stereo width that after the other from the end of the sample list to the doesn’t fit with your needs. Use Stereo Width to adapt the...
- Page 185 Add: finally adds the selected sample to the Partic- • le Generator or the Resonator. The Actions Button Here you load and manage your samples. Tap on this but- ton to open a pop-up menu with further options: Add: opens the Add Samples window. Here you have • full access to all the samples in Iridium’s Flash memo- ry. Here you can select a sample by tapping through the directories. By tapping the corresponding button be- low the window you can perform further options: New Dir: creates a new directory folder. The direc- • tory path depends on the selected row. You need to name the new folder. Delete: deletes the selected folder/sample after a •...
- Page 186 • Import: imports a sample from a connected MicroSD • card or a USB storage device into the Iridium’s Flash memory. If imported, the sample can be loaded by u- sing the Add function. Reload: if one or more samples don’t work properly, •...
- Page 187 Normal: parameter change is normal. • Fine: parameter change is fine. • Fine: parameter change is fine. • Super Fine: parameter change is super fine. • Super Fine: parameter change is super fine. • Pitch Direction Determines the pitch of the currently selected sample. Use this parameter to tune samples that don’t match with your Determines the playback direction of the sample. (Forward desired tone pitch. or Backward) Tap on Pitch to open a pop-up menu for further settings: Loop Mode Normal: Pitch change is about 10.0 cents. • Determines if the sample loop is active (On) or not (Off). A Fine: Pitch change is about 1.0 cents • third option is Ping Pong which lets the loop moving for- wards and backwards again and again. Super Fine: Pitch change is about 0.1 cents. • Iridium Manual...
- Page 188 Tap on the Select button to open a pop-up menu with Zoom All zooms to an overall representation of the • different selection options: complete sampel waveform. All selects the complete sample. • Selection displays the sample selection that is defined • before. To define a sample area, draw a selection with None deselects any selection of the sample. • your finger. The area is shown in yellow. You can move Start->End selects the sample area between sample the area by holding and moving. • satrt and end point. Iridium Manual...
- Page 189 Set Loop sets a loop around the selection which means • that the loop start point is set to the beginning of the selection and the loop end point to the selection end. Play start the sample playback of the selction. If no • selection is made, the playback starts from the beginn- ging of the sample. The Close Button Tap on the Close button to return to the Sample page. Iridium Manual...
-
Page 190: Appendix
An LFO can modulate the position within the wave- • table. You can create subtle to drastic sound changes. User-selected controllers, such as the mod wheel, can • Wavetable Synthesis change the position within the wavetable. When you turn the wheel while playing a chord, each note’s wave The sound generation of the wavetables in Iridium is based will be modified instantly. on wavetable synthesis. You should keep the following sentence in mind: The following overview explains how the wavetable syn- thesis works: A wavetable is a list with two or more waves, among A wavetable is a table consisting of single waveforms. Each which you can move at will. - Page 191 Exceeded Waves of a Wavetable Of course you can combine envelope and keytrack modula- tions or add other modulation sources. All these modulati- Time ons will be added so that maybe the end or the beginning As soon as you play a note the envelope moves through the of a wavetable could be exceeded. In such cases, the waves wavetable positions generating different waveforms over will be cyclically repeated. time. The decay stage would move through these waves in the opposite direction while ultimately holding a certain wave at its sustain stage. When you release the note, the envelo- pe decays to zero. Most wavetables are created so that they start with a hol- low wave at position 0 and go through increasingly brigh- ter waves up to maximum position. This results in a beha- viour similar to a low pass filter so that they can be conve- niently controlled by an envelope. Iridium Manual...
-
Page 192: Waveform Oscillators Introduction
Therefore, the sine wave sounds a little sure, this is only a minimal selection of the endless variety artificial to the ear. However, the sine wave can be an of waveforms, but the Waldorf Iridium provides all those interesting oscillator waveform to emphasize a certain waveforms, plus other classic waveforms like square... - Page 193 Appendix Cyclic waveforms such as the waveforms in the Iridium only feature sine waves in integer frequency ratios to the 1st Harmonic Magnitude 1 fundamental like double frequency, triple frequency and so on. Those partials are called harmonics because their fre- quency is a harmonic multiple of the fundamental. 2nd Harmonic Magnitude 1/2 Confusing? Let’s generalize it to cyclic waveforms: a cyclic waveform – like sawtooth, square, etc. – only consists of...
- Page 194 11 13 15 Harmonics fifth magnitude and so on. The following images illustrates Additive components of a square wave with 50% pulse width how the individual harmonics build up the sawtooth wave: The square wave was thought as an abstraction of wind instruments like a pan flute or a recorder. They consist of a tube that can contain a certain amount of air. The player Iridium Manual...
- Page 195 9 11 13 15 Additive components of Pulse wave with different pulse widths The first thing you probably observe is that the lower part of the wave has a narrower excursion. This is because the energy of the wider pulse is higher than the one of the narrower pulse. If this were not compensated, the overall signal would have an unwanted DC offset. As you have read in the previous chapter the harmonic content of a 50% pulse wave is a special case. It has a very Iridium Manual...
- Page 196 – i.e. guitar or bass guitar, e-piano, or even a flute. The most powerful feature of the pulse wave is the ability to change its width while sounding. This is called pulse width modulation. When the pulse width is changed the waveform starts to sound thicker. This happens because the effect is very similar to what you hear when you have two oscillators running with slightly different frequencies. They interfere and create irregular troughs in the resulting waveforms. Iridium Manual...
- Page 197 Amplitude Magnitude Time Frequency 11 13 15 Harmonics Additive components of the Triangle wave The reason why the triangle wave is so popular in classic synthesizers is that it can act as a sub-oscillator wave, to emphasize certain frequencies or to frequency modulate other oscillators. Iridium Manual...
-
Page 198: A Short Introduction To Granular Synthesis
The frequency below the pitched spectra from them. Sounds with longer grains cutoff point is called the pass band range; the frequencies usually play back with the pitch of the original sample. above are called the stop band range. The Iridium’s filter If you play back the same portion of a sample over and dampens frequencies in the stop band with a certain slope. over again, the sound may become too static. You can use The slope can be 12dB or 24dB per octave. This means that... - Page 199 The Iridium’s filter also features a resonance parameter. Resonance in the context of a low, band or high pass filter means that a narrow frequency band around the cutoff point is emphasized. The following image illustrates the...
-
Page 200: Updating The System Software
Appendix Updating the System Software Tap on the Update button and follow the onscreen • instructions. Iridium has a service-friendly feature that makes it possib- After the file is installed correctly, Iridium burns le to update the system software without changing any • the update into its FLASH memory. parts. Wait until the operation is completed. If updating All software updates come in the form of a .bin file that can • was successful, Iridium will perform a system reset be copied on a FAT/FAT32 file formatted MicroSD card or and start up. -
Page 201: Faq - Frequently Asked Questions
MicroSD card. menu on the left and unfold it. Select USB. Check if y- our device is listed there. Iridium doesn't recognize the update file, alt- hough it definetly is located in the top directory On Windows: Press the Win key + R. En- •... - Page 202 Appendix lation. E.g., an unipolar LFO can be achieved with Constant in the Control amount of the same modulation slot. Iridium has crashed! First, please update Iridium's OS. We often release a new firmware with new features and we definetly recomment going for it. The procedure takes less than a minute. Iridi- um's OS is really stable so crashes rarely occur. If Iridium crashes anyway, please generate a system logfile by pres- sing Global -> System -> Support Log. Include your name and crash date in the file name when saving. Send us your...
-
Page 203: Modulation Sources And Destinations
Free Envelope 2 signal Constant Constant modulation value Free Env3 Free Envelope 3 signal Mod Pad X Modulation Pad position X LFO 1 LFO 1 signal Mod Pad Y Modulation Pad position Y LFO 2 LFO 2 signal SeqParam 1 - 8 Step Sequencer parameter values LFO 3 LFO 3 signal CV 1 -4 CV 1 - 4 input signal LFO 4 LFO 4 signal CV Start CV start signal LFO 5 LFO 5 signal CV Gate CV gate signal LFO 6 LFO 6 signal Komplex Komplex Modulator signal Wheel Modulation wheel (CC #1) Pitchbend MIDI Pitchbend signal After Touch Keyboard Pressure Data Pedal MIDI Sustain pedal (CC #64) Iridium Manual... - Page 204 Particle Pitch Spread of Oscil- Brilliance lator 1...3 lator 1...3 WT1/WT2/WT3 FX Wavetable FX of Oscillator Osc1/2/3 Samp Start Sample start point of Osc 1...3 1...3 RS1/RS2/RS3 Timbre Resonator Timbre of Oscilla- WT1/WT2/WT3 Table Wavetable selection of Oscil- tor 1...3 lator 1...3 RS1/RS2/RS3 Exciter Resonator Exciter of Oscilla- WF1/WF2/WF3 Warp Waveform Warp of Oscillator tor 1...3 1...3 Iridium Manual...
- Page 205 Digital Former Color (based Free1/2/3 Env Sustain Sustain level of Free Envelope on the selected Type) 1/2/3 DF Pan Digital Former Panning Free1/2/3 Env Relealse Release rate of Free Envelope DF Level Digital Former Level 1/2/3 Filter 1/2 Cutoff Cutoff of Filter 1/2 FX1/2/3/4/5 DryWet FX Dry Wet for Effect 1...5 Filter 1/2 Reso Resonance of Filter 1/2 FX1/2/3/4/5 Control FX Control for Effect 1...5 Filter 1/2 Pan Filter Panning (based on the selected FX Type) Filter 1/2 Level Filter Level Volume Amplifier output volume VCA VCA Iridium Manual...
- Page 206 <- see destination name Chorus Depth <- see destination name Drive Amount <- see destination name Chorus Speed <- see destination name Drive Gain <- see destination name Chorus Feedback <- see destination name Compress Ratio <- see destination name Phaser DryWet <- see destination name Compress Thresh <- see destination name Phaser Depth <- see destination name Arp/Seq RelGate <- see destination name Phaser Speed <- see destination name Arp/Seq Swing <- see destination name Phaser Feedback <- see destination name Seq Length <- see destination name Phaser Spread <- see destination name Flanger DryWet <- see destination name Flanger Depth <- see destination name Flanger Speed <- see destination name Flanger Feedback <- see destination name Iridium Manual...
-
Page 207: Technical Data
Appendix Technical Data Power Supply Supply Voltage 100 – 240 V AC / 50-60 Hz Nominal Voltage Output 12 V DC Maximum current consumption: 1.0 A max Maximum power consumption: 50 W Dimensions and Weight Width: 440 mm Depth: 305 mm Height (including knobs): 85 mm Total weight: 5,4 kg Iridium Manual... -
Page 208: Glossary
Clipping is a sort of distortion that occurs when a signal exceeds its maximum value. The curve of a clipped signal is Amplifier dependent of the system where the clipping takes place. In the analog domain, clipping effectively limits the signal to An amplifier is a component that influences the volume its maximum level. In the digital domain clipping is similar level of a sound via a control signal. This control signal is to a numerical overflow and so the polarity of the signal’s often generated by an envelope or an LFO. part above the maximum level is negated. Iridium Manual... - Page 209 Envelope A coffee filter is a coffee-brewing utensil, usually made of An envelope is used to modulate a sound-shaping compo- disposable paper. It is part of an essential toolkit for survi- nent within a given time frame so that the sound is chan- val when working with the Waldorf Iridium. ged in some manner. For instance, an envelope that modu- lates the cutoff frequency of a filter opens and closes this filter so that some of the signal's frequencies are filtered Control Change (Controllers) out. An envelope is started via a trigger – usually a fixed...
- Page 210 The filter cutoff frequency is a significant factor for filters. connections. A lowpass filter dampens the portion of the signal that lies Essentially, this is how MIDI works: One sender is connec- above this frequency. Frequencies below this value are ted to one or several receivers. For instance, if you want to allowed to pass through without being processed. use a computer to play the Iridium, then the computer is the sender and the Iridium acts as the receiver. With a few exceptions, the majority of MIDI devices are equipped with LFO is an acronym for Low-Frequency Oscillator. The LFO two or three ports for this purpose: MIDI In, MIDI Out and generates a periodic oscillation at a low frequency and in some cases, MIDI Thru. The sender transfers data to the receiver via the MIDI Out jack. Data is sent via a cable to features variable waveshapes. Similar to an envelope, an...
- Page 211 Its Release pitch is derived from the note number, which lies between An envelope parameter. The term ‘Release’ describes the 0 and 127. The velocity lies between 1 and 127. A value of descent rate of an envelope to its minimum value after a 0 for velocity is similar to ‘Note Off’. trigger is terminated. The Release phase begins immedia- tely after the trigger is terminated, regardless of the enve- Iridium Manual...
- Page 212 For instance, a MIDI note or an audio frequency (harmonics). A spectrum display like that which signal can be used as a trigger. The events a trigger can is in the Iridium is a graphical overview of all the frequen- initiate are also very diverse. A common application for a cies of a wavetable with their amplitudes over time. trigger is use to start an envelope.
- Page 213 In con- trast to the samples in a sampler, all waves in Waldorf Wavetable synthesizers have the same lengths and are played back in the same pitch.
-
Page 214: Product Support
Appendix Product Support Service & Repair Iridium does not contain any user-serviceable parts. If your Iridium develops a fault or needs servicing, please refer to a Waldorf authorised service center. For more information, please ask your musicians dealer or your local Waldorf distributor. Any Questions? Visit our support area at waldorfmusic.com If you have any questions about your Waldorf product, feel free to contact us. We’re here to help. Use the support form at our website. This is the most efficient and fastest way to contact us. Your questions will... - Page 215 Waldorf Music GmbH • Lilienthal Straße 7 • D-53424 Remagen © 2020 Waldorf Music GmbH • All rights reserved www.waldorfmusic.com...
Need help?
Do you have a question about the IRIDIUM and is the answer not in the manual?
Questions and answers