Advertisement
Important Safety Instructions:
•
These instructions are provided for your safety. It is very important that they are read carefully and completely before
beginning the assembly and installation of this lighting fixture.
•
For your safety and convenience, it is strongly recommended that two people install the lighting fixture.
•
If the flexible cable or cord of this lighting fixture is damaged, it shall be exclusively replaced by the manufacturer or
his service agent or a similar qualified person to avoid a hazard.
•
This fixture has been rated for up to one (1) E27 40-watt maximum standard light bulb (not included), do not
exceed the recommended lamp wattage.
•
This lamp is meant for indoor use.
•
Save these instructions.
WARNING:
•
To reduce the risk of fire, electrical shock or personal injury, always turn off and unplug the light fixture and
allow it to cool prior to replacing the light bulb.
•
Do not touch bulb when fixture is turned on. Do not look directly at lit bulb.
•
Keep flammable materials away from lit bulb.
Pre-assembly:
Remove all parts and hardware from box along with any plastic protective packaging.
Do not discard any contents until after assembly is complete to avoid accidentally discarding small parts or
hardware.
Parts Included:
(A) Shade (1)
(C) Socket (1)
(D) Upper Stem (1)
(H) Lower Stem (1)
(I) Joint (1)
(J) Base (1)
Hardware Enclosed:
(G) Allen Key (1)
(E) Washers (2)
(F) Screws (2)
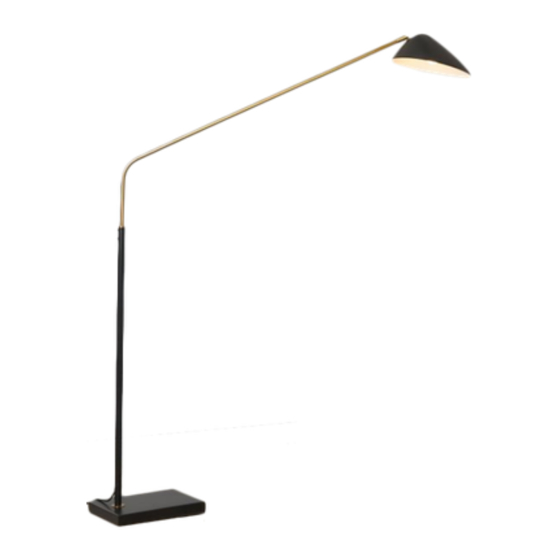
Overarching Curvilinear Mid-Century Floor Lamp
UK/Middle East
Assembly Instructions
Page 1 of 2
Advertisement
Table of Contents

Related Manuals for West Elm Overarching Curvilinear Mid-Century Floor Lamp


Summary of Contents for West Elm Overarching Curvilinear Mid-Century Floor Lamp
- Page 1 Overarching Curvilinear Mid-Century Floor Lamp Assembly Instructions Important Safety Instructions: • These instructions are provided for your safety. It is very important that they are read carefully and completely before beginning the assembly and installation of this lighting fixture. •...
- Page 2 To Assemble: 1. Insert the Joint (I) into the Low Stem (H), aligning the holes in the Joint (I) with the holes from the Low Stem (H). 2. Attach the washers (E) and Screws (F) onto the Low Stem (H) and fasten Screws (F) with Allen Key (G) driver in a clock direction until tight.
Need help?
Do you have a question about the Overarching Curvilinear Mid-Century Floor Lamp and is the answer not in the manual?
Questions and answers