
Related Manuals for Bticino Legrand MyHOME Up


Summary of Contents for Bticino Legrand MyHOME Up
- Page 1 MyHOMEServer1 Installation Manual DEVICE ID: 0000000 INSTALLER CODE: 00000000 www.homesystems-legrandgroup.com...
- Page 2 MyHOMEServer1 Installation Manual DEVICE ID: 0000000 INSTALLER CODE: 00000000...
- Page 3 MyHOMEServer1 Installation Manual Contents General information Warnings and recommendations Function limits MyHOMEServer1 connections Light and Automation Devices that can be directly associated via MyHOMEServer1 Temperature Control Devices that can be directly associated via MyHOMEServer1 Description Wiring diagrams Connections Access to the system Connection to the system Home page Zones...
- Page 4 MyHOMEServer1 Installation Manual Settings System check Associations Groups General controls System Burglar-alarm system Weather Geolocation Network Email Date and time System reset Disconnect Maintenance What to do if...
- Page 5 BTicino accepts no responsibility for any faults. We would like to inform you that the service provided by BTicino by means of remote use via the APP involves the use of data. The cost linked to data usage depends on the type of contract which the customer has with his ISP (Internet Service Provider) and is solely the customer’s responsibility.
- Page 6 – create and manage scenarios. *Note: the device may not be compatible with some models or their firmware versions. Bticino is not responsible for any present and future malfunctionings or incompatibilities which can be attributed to third-party devices.
- Page 7 (Connections to the same gateway or to different gateways). MyHOMEServer1 connections Services Addresses Door Protocols Cloud Services Main Server myhomeup.bticino.com 8000 https, wss Slave Server '193.178.246.170, 193.178.246.164 pool.ntp.org NTP Service (by default, to be changed by the user) Log Service log.bs.iotleg.com...
- Page 8 MyHOMEServer1 Installation Manual Light and Automation Devices that can be directly associated via MyHOMEServer1 Channels Channels From From Legrand configured configured Description production BTicino code production code automatically by automatically by batch: batch: MyHOMEServer1 MyHOMEServer1 LG-573902 08W51 09W08 LG-573903 08W51...
- Page 9 MyHOMEServer1 Installation Manual Channels Channels From From Legrand configured configured Description production BTicino code production code automatically by automatically by batch: batch: MyHOMEServer1 MyHOMEServer1 DIN 1000 dimmer LG-002621 BT-F416U1 1000 W DIN dimmer LG-003652 09W50 BT-F414 09W29 400 VA DIN dimmer...
- Page 10 MyHOMEServer1 Installation Manual Temperature Control Devices that can be directly associated via MyHOMEServer1 From From Description Legrand code production BTicino code production batch: batch: LG-067459 LG-064170 BT-LN4691 Thermostat with Display LG-752131 BT-H4691 LG-752731 BT-KM4691 Temperature control probe BT-KG4691 BT-KW4691 BT-L4693...
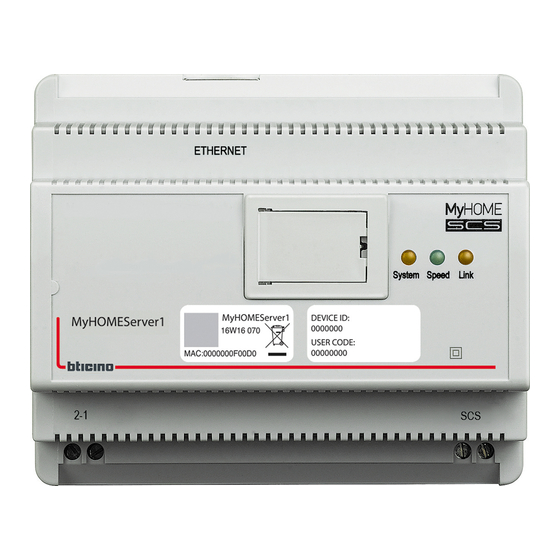
- Page 11 MyHOMEServer1 Installation Manual Description DEVICE ID: 0000000 INSTALLER CODE: 00000000 1. RJ 45 for LAN Ethernet 10/100 Mbit. 2. USB port for future uses. 3. User interface LEDs: – System: On connecting the power supply it switches on and off and the next time it switches on it indicates that the Web Server is operative.
- Page 12 MyHOMEServer1 Installation Manual Wiring diagrams Burglar-alarm central unit Home Wi-Fi Router +P1 M1 M2 - +P1 M3 M4 C NO +A +R RJ 45 F411U2 F411U2 E46ADCN DEVICE ID: 0000000 INSTALLER CODE: 00000000 MyHOMEServer1 230 Vac L4652/2 L4652/2 Note: to make use of all its functions, the MyHOMEServer1 must be connected to the internet Note: only supplies the system after all the devices are connected.
- Page 13 MyHOMEServer1 Installation Manual Access to the system To be able to configure the system so that the user can use all the functions which the MyHOME_ Up system puts at your disposal you must: 1. download the App from the stores (for iOS devices from App Store, for Android devices from Play Store);...
- Page 14 MyHOMEServer1 Installation Manual Connection to the system MyHOME_Up Add a connection to the MyHOME_Up Gateway powered by ISAAC 1. Touch to connect to your MyHOMEServer1. If this is not found see chapter “What to do if”. The list of found MyHOMEServer1s appears MyHOME_Up DEVICE ID: DEVICE ID:...
- Page 15 MyHOMEServer1 Installation Manual MyHOME_Up Cancel Createte a connection Save Access with PIN CODE If you already have an account, assign User1 a name to the connection and Thiagomax66@gmail.com enter your credentials Connection name User name password I do not have the credentials > powered by ISAAC 3.
- Page 16 MyHOMEServer1 Installation Manual MyHOME_Up MyHOME_Up Home System 1 Access with PIN CODE Structure loading in progress, wait... powered by ISAAC powered by ISAAC 7. The system is now connected, touch to access. A scan and the automatic detection of the connected devices will activate automatically. An address will be allocated to each actuator channel, even if not used to drive a load.
- Page 17 MyHOMEServer1 Installation Manual Home page On entering the Home Page you can access the navigation structure to be customised depending on the Customer's requirements. Here you can configure all the components/objects connected to the home-automation system, organising them in the best way. Ground floor Kitchen Living room...
- Page 18 Resets the Gateway and/or system and Gateway Disconnect Disconnects the installer from the system *Note: this function is only present if you have a BTicino Burglar Alarm system (alarm control units 4200, 4201, 4203) and have made the connection with the control unit following the procedure.
- Page 19 MyHOMEServer1 Installation Manual Before adding and configuring the objects the zones and rooms should be customised as required by the user Zones The various rooms which make up the system can be organised in zones (e.g.: Ground floor, second floor etc...). As well as moving between the various zones you can create new ones, change the name, rearrange them or cancel them Create a zone...
- Page 20 MyHOMEServer1 Installation Manual Modify a zone Ground floor Ground floor Kitchen Kitchen List of zones List of zones Ground floor Ground floor First floor First floor Tavern Tavern Living room Living room Add a zone Add a zone Cancel Cancel Favourites Home Scenarios...
- Page 21 MyHOMEServer1 Installation Manual Rearrange a zone Ground floor Ground floor Kitchen Kitchen List of zones List of zones Ground floor Ground floor First floor First floor Garden Garden Living room Living room Add a zone Add a zone Cancel Cancel Favourites Home Scenarios...
- Page 22 MyHOMEServer1 Installation Manual Delete a zone Ground floor Ground floor Kitchen Kitchen List of zones List of zones Garden Garden Ground floor Ground floor First floor First floor Living room Living room Add a zone Add a zone Cancel Cancel Favourites Home Scenarios...
- Page 23 MyHOMEServer1 Installation Manual Rooms The objects which make up your system are organised in rooms. As well as moving between the various rooms and adding objects, you can: Add a room; 2. To change the background image that represents it and modify the name; 3.
- Page 24 MyHOMEServer1 Installation Manual To change the background image and modify the name: Tavern Tavern Tavern Cancel Kitchen Save Room Kitchen name Kitchen Kitchen Kitchen Kitchen Add an object Modify Move Living room Living room Living room Delete Cancel Favourites Home Scenarios Security Other...
- Page 25 MyHOMEServer1 Installation Manual To move a room into another zone: Tavern Tavern Tavern Kitchen Kitchen Kitchen Kitchen Add an object Modify List of zones Move Ground floor Living room Living room Living room Delete First floor Cancel Close Favourites Home Scenarios Other Favourites...
- Page 26 MyHOMEServer1 Installation Manual To rearrange a room in the same zone: Tavern Tavern Tavern Kitchen Living room Kitchen Living room Living room Kitchen Favourites Home Scenarios Security Other Favourites Home Scenarios Security Other Favourites Home Scenarios Security Other 1. Touch and keep pressed until the image darkens 2.
- Page 27 MyHOMEServer1 Installation Manual Objects After creating the zones rooms which represent the user's house, you can create objects and associate them to the devices on the system; once they are entered, you can cancel, modify or rearrange them. Grou... Kitchen Kitchen Light 1 Kitchen Dimmer 1.
- Page 28 MyHOMEServer1 Installation Manual Modify the object You can modify the settings of the entered objects at any time. In particular you can rename the object, modify the system it belongs to and modify the associations to the system devices. Grou... Kitchen Grou...
- Page 29 MyHOMEServer1 Installation Manual Modify the object Grou... Kitchen Grou... Kitchen Kitchen Light 1 Kitchen Dimmer Kitchen Dimmer Kitchen Light 1 1. Touch and drag to move the object inside the room 2. Drag to close the Modifytion panel Move the object in another room Grou...
- Page 30 MyHOMEServer1 Installation Manual Grou... Kitchen Kitchen Light 1 Move the object Kitchen Dimmer Do you want to move the object Kitchen Light 1 in the Living room in Tavern zone? Cancel 4. Touch to confirm Associate the objects How to associate the graphic objects to the actuators and the physical controls on the system is shown below.
- Page 31 Security system on by means of the insertion scenarios. *Note: the device may not be compatible with some models or their firmware versions. Bticino is not responsible for any present and future malfunctionings or incompatibilities which can be attributed to...
- Page 32 MyHOMEServer1 Installation Manual Light object On configuring the devices on the system and associating them to the light object, the user can switch a light on/off and adjust it. In the case of the coloured light object you can manage Philips Hue, Lifx and Enttec ODE coloured LED lamps.
- Page 33 MyHOMEServer1 Installation Manual Grou... Kitchen Light Object Ground floor - Kitchen Select the type of light object to be configured On-Off Dimmer Coloured Close 4. Touch to select the On-Off light type 5. Touch to confirm Grou... Kitchen Cancel Create an object Save On/Off Light object Ground floor - Kitchen...
- Page 34 MyHOMEServer1 Installation Manual Grou... Kitchen Associated devices Light - Kitchen 1 Ground floor - Kitchen No associated actuator/output No associated control/input Add device A. Display the actuator associated to the object B. Display the command associated to the object To configure the light graphic object you must associate the actuator Kitchen Light 1 connected to the load and the control which actuates it.
- Page 35 MyHOMEServer1 Installation Manual Not accessible actuator (e.g. wired in the false ceiling) Grou... Kitchen Identification Actuator/Output To identify the actuator/output to associate to the graphic object Kitchen Light 1, press any one of the pushbuttons on the device I can't press the ... Close 10.
- Page 36 MyHOMEServer1 Installation Manual Grou... Kitchen Compatible actuators/outputs Kitchen Light 1 Search for ID or model F411/4 - ID:00D16020 Test No label F411/4 - ID:00D1604B Test No label Add device Close 11. Touch to start the test A. The system the loads connected to the actuator are activated in sequence for one second. This allows you to visually identify the load to be associated to athe graphic object and the channel number.
- Page 37 MyHOMEServer1 Installation Manual Grou... Kitchen Identified device MOD: F411/4 ID:00D16020 Choose the channel to be associated to the Kitchen Light 1 of the Ground floor - Kitchen Cancel 14. Select the channel If the channel is busy, see chapter “What to do if”. 15.
- Page 38 MyHOMEServer1 Installation Manual Grou... Kitchen Identification Control / Input To identify the Control/Input to associate to the graphic object Kitchen Light 1, press any one of the pushbuttons on the device I can't press the ... Close 17. Press any one of the pushbuttons on the control on the system 17.
- Page 39 MyHOMEServer1 Installation Manual Grou... Kitchen Grou... Kitchen Cancel Create an object Save Associated devices Light - Kitchen 1 Ground floor - Kitchen On/Off Light object Ground floor - Kitchen F411/4 - ID:00D16020 - Channel 1 Object Kitchen Light 1 No label name Product/system MyHOME...
- Page 40 MyHOMEServer1 Installation Manual Dimmer Ground floor Kitchen Living room Favourites Home Scenarios Security Other 1. Touch to enter the room where you want to add a dimmer object Grou... Kitchen Grou... Kitchen Add an object Light Shutter Thermostat Player Smart TV Controlled socket Create the controls for this room^and the...
- Page 41 MyHOMEServer1 Installation Manual Grou... Kitchen Light Object Ground floor - Kitchen Select the type of light object to be configured On-Off Dimmer Coloured Close 4. Touch to select the Dimmer light type 5. Touch to confirm Grou... Kitchen Cancel Create an object Save Dimmer Light Object Ground floor - Kitchen...
- Page 42 MyHOMEServer1 Installation Manual MyHOME dimmer Grou... Kitchen Grou... Kitchen Cancel Create an object Save Associated devices Kitchen Dimmer Ground floor - Kitchen Dimmer Light Object Ground floor - Kitchen No associated Object Kitchen Dimmer actuator/output name Product/system MyHOME selection No associated Associate control/input the devices...
- Page 43 MyHOMEServer1 Installation Manual Not accessible actuator (e.g. wired in the false ceiling) Grou... Kitchen Identification Actuator/Output To identify the actuator/output to associate to the graphic object Kitchen Dimmer, press any one of the pushbuttons on the device I can't press the ... Close 10.
- Page 44 MyHOMEServer1 Installation Manual Grou... Kitchen Compatible actuators/outputs Kitchen Dimmer Search for ID or model F418U2 - ID:00D16035 Test No label F418U2 - ID:00D1638B Test No label Add device Close 11. Touch to start the test A. In the system the loads connected to the actuator are activated in sequence for one second. This allows you to visually identify the load to be associated to the graphic object and the channel number.
- Page 45 MyHOMEServer1 Installation Manual Grou... Kitchen Identified device MOD: F418U2 ID:00D16035 Choose the channel to be associated to the Kitchen Dimmer of the Ground floor - Kitchen Cancel 14. Select the channel If the channel is busy, see chapter “What to do if” 15.
- Page 46 MyHOMEServer1 Installation Manual Grou... Kitchen Identification Control / Input To identify the Control/Input to associate to the graphic object Kitchen Dimmer, press any one of the pushbuttons on the device I can't press the ... Close 17. Press any one of the pushbuttons on the control on the system 17.
- Page 47 MyHOMEServer1 Installation Manual Grou... Kitchen Grou... Kitchen Cancel Create an object Save Associated devices Kitchen Dimmer Ground floor - Kitchen Dimmer Light Object Ground floor - Kitchen F418U2 - ID:00D16035 - Channel 1 Object Kitchen Dimmer No label name Product/system MyHOME selection HC4411 - ID:00B4785B -...
- Page 48 MyHOMEServer1 Installation Manual Enttec ODE dimmer Grou... Kitchen Grou... Kitchen Cancel Create an object Save Dimmer Light Object Ground floor - Kitchen Object Red dimmer Node name System Enttec ODE (DMX) 192.168.0.111 Node Choose Cancel 8. Enter the IP address of the Enttec ODE device (Tested models: ODE DIN) 9.
- Page 49 MyHOMEServer1 Installation Manual Coloured light Ground floor Kitchen Living room Favourites Home Scenarios Security Other 1. Touch to enter the room where you want to add a coloured light object Grou... Kitchen Grou... Kitchen Add an object Light Shutter Thermostat Player Smart TV Controlled...
- Page 50 MyHOMEServer1 Installation Manual Philips Hue Grou... Grou... Grou... Kitchen Kitchen Kitchen Cancel Create an object Save Coloured Light Object Ground floor - Kitchen Philips Hue Object Kitchen Coloured Light name Select the Bridge to use for the graphic Select Philips Hue object Kitchen Coloured Light Philips hue (192.168.84.28) Product/System...
- Page 51 MyHOMEServer1 Installation Manual Grou... Kitchen Grou... Kitchen Cancel Create an object Save Coloured Light Object Ground floor - Kitchen Philips hue (192.168.84.28) Object Kitchen Coloured Light name Select the lamp to configure with the Select Philips Hue graphic object Kitchen Coloured Light Product/System Bridge Philips hue (192.168.84.28)
- Page 52 MyHOMEServer1 Installation Manual Lifx Grou... Grou... Grou... Kitchen Kitchen Kitchen Cancel Create an object Save Cancel Create an object Save Coloured Light Object Coloured Light Object Ground floor - Kitchen Ground floor - Kitchen Lamp Object Object Kitchen Coloured Light Kitchen Coloured Light name name...
- Page 53 MyHOMEServer1 Installation Manual Enttec ODE Grou... Kitchen Grou... Kitchen Grou... Kitchen Cancel Create an object Save Cancel Create an object Save Coloured Light Object Coloured Light Object Ground floor - Kitchen Ground floor - Kitchen Object Object Red Coloured Light Red Coloured Light Node name...
- Page 54 MyHOMEServer1 Installation Manual Rolling shutter object On configuring the devices on the system and associating them to the rolling shutter object, the user can adjust the opening and closing of rolling shutters, blinds and garage. On enabling the function you can allow the user to adjust the opening level (only rolling shutters with preset function).
- Page 55 MyHOMEServer1 Installation Manual Grou... Kitchen Rolling shutter Object Additional options: Position management Close 4. Touch to enable the adjustment of the opening level (only rolling shutters with preset function) on the object 5. Touch to continue Grou... Kitchen Cancel Create an object Save Rolling shutter Object Ground floor - Kitchen...
- Page 56 MyHOMEServer1 Installation Manual Grou... Kitchen Associated devices Shutter - Kitchen 1 Ground floor - Kitchen No associated actuator/output No associated control/input Add device To associate the rolling shutter graphic object you must associate the actuator Kitchen Rolling shutter 1 connected to the load and the control which actuates it 9.
- Page 57 MyHOMEServer1 Installation Manual Not accessible actuator (e.g. wired in the false ceiling) Grou... Kitchen Identification Actuator/Output To identify the actuator/output to associate to the graphic object Kitchen Rolling shutter 1, press any one of the pushbuttons on the device I can't press the ... Close 10.
- Page 58 MyHOMEServer1 Installation Manual Grou... Kitchen Compatible actuators/outputs ShutterKitchen 1 Search for ID or model F411/4 - ID:00D16020 Test No label F411/4 - ID:00D1604B Test No label Add device Close 11. Touch to start the test A. In the system the loads connected to the actuator are activated in sequence for one second. This allows you to visually identify the load to be associated to the graphic object and the channel number.
- Page 59 MyHOMEServer1 Installation Manual Grou... Kitchen Identified device MOD: F411/4 ID:00D1604B Choose the channel to be associated to the Kitchen Rolling shutter 1 of the Ground floor - Kitchen Cancel 14. Select the channel, the system will use two adjacent channels for the rolling shutter function (up/down) If the channel is busy, see chapter “What to do if”...
- Page 60 MyHOMEServer1 Installation Manual Grou... Kitchen Identification Control / Input To identify the Control/Input to associate to the graphic object Kitchen Rolling shutter 1, press any one of the pushbuttons on the device I can't press the ... Close 17. Press any one of the pushbuttons on the control on the system 17.
- Page 61 MyHOMEServer1 Installation Manual Grou... Kitchen Grou... Kitchen Cancel Create an object Save Associated devices Shutter - Kitchen 1 Rolling shutter Object Ground floor - Kitchen Ground floor - Kitchen Position management F411/4 - ID:00D1604B - Channel 3 Object Kitchen Rolling shutter 1 No label name System...
- Page 62 MyHOMEServer1 Installation Manual Thermostat object (without control unit) On configuring the devices on the system and associating them to the thermostat object, the user can adjust the home temperature. First floor First Double room First Double room Add an object Light Shutter Thermostat...
- Page 63 MyHOMEServer1 Installation Manual First Double room First Double room Back Wizard Thermo Next Back Wizard Thermo Next Type of system Thermostat Select the type of system Associate the thermostat Heating and Associate the device cooling 10. Touch to continue 11. Touch to associate a thermostat to the object. Two situations may occur: Accessible thermostat First Double room...
- Page 64 MyHOMEServer1 Installation Manual You will be proposed the list the thermostats which you can associate to the object. You can identify the thermostat by its ID number. First First Double room Double room Compatible thermostats Compatible thermostats Search for ID or model Search for ID or model LN4691 - ID:0063B995 LN4691 - ID:0063B995...
- Page 65 MyHOMEServer1 Installation Manual Thermostat options Temperature range First Double room Thermostat options Back LN4691 Apply to all Temperature range for all thermostats Heating setpoint temperature range 40.0 3.0 °C °C Antifreeze 7.0 °C Close A. Apply the setting to all the system thermostats* *Note: if a thermostat has not yet been configured or its configuration is not compatible with the same parameters, it will not be modified.
- Page 66 MyHOMEServer1 Installation Manual Circulation pump delay First Double room Thermostat options Back LN4691 Apply to all Pump delay for all thermostat Heating pump delay 00:00 Cooling pump delay 00:00 Close 1. Touch to set a delay time for the activation of the pumps thus avoiding them starting before the zone valves have opened, both for heating and cooling.
- Page 67 MyHOMEServer1 Installation Manual Celsius/Fahrenheit First Double room Thermostat options Back LN4691 Apply to all Temperature format for all thermostats Celsius Fahrenheit Close 1. Touch to select the format of the displayed temperature between Celsius and Fahrenheit degrees Key management First Double room Thermostat options Back...
- Page 68 MyHOMEServer1 Installation Manual Backlighting First Double room Thermostat options Back LN4691 Apply to all Backlighting for all thermostats Enable display backlighting Display backlighting level Close 1. Activates/deactivates the display backlighting 2. Scroll to adjust the backlighting intensity precisely Adjustment range Prim...
- Page 69 MyHOMEServer1 Installation Manual Window contact function First Double room First Double room Thermostat options Back LN4691 Thermostat options Apply to all Back LN4691 Window contact for all thermostats Heating contact opening Always off No action On when open, off when closed Protection Enable windows contact Manual...
- Page 70 MyHOMEServer1 Installation Manual Prim... Camera matrimoniale Thermostat options Back LN4691 Manual Set temperature 10°C Heating contact opening activation delay 00:00 Heating contact closing activation delay Heating contact opening timeout (minutes) Close 8. Touch to set the system to a certain temperature when the contact is opened/closed. 9.
- Page 71 MyHOMEServer1 Installation Manual After associating the thermostat to the object, you can associate one or more 4693 temperature probes. On associating several probes to a thermostat you can for example obtain the average temperature of a large room. First Double room Back Wizard Thermo Next...
- Page 72 MyHOMEServer1 Installation Manual You will be proposed the list of compatible probes which you can associate to the object. You can identify the probe by its ID number. First First Double room Double room Compatible sensors Compatible sensors Search for ID or model Search for ID or model L/N/NT4693 - ID:000B014C L/N/NT4693 - ID:000B014C...
- Page 73 MyHOMEServer1 Installation Manual First Double room First Double room Back Wizard Thermo Next Heating and cooling Actuator channel mode Double room Thermostat Select the operating mode of the Heating only load The actuator channel will only be actuators you are using for the used for heating zone named Cooling only load...
- Page 74 MyHOMEServer1 Installation Manual After associating the thermostat and the probes to the object, select the type of heating system load to be controlled First Double room Back Wizard Thermo Next Heating Select the type of load to control ON/OFF valve 28.
- Page 75 MyHOMEServer1 Installation Manual After selecting the type of load you can associate a heating system actuator First Double room Back Wizard Thermo Next Heating Associate the actuator output to manage heating Associate the device 32. Touch to associate an actuator Accessible actuator First Double room...
- Page 76 MyHOMEServer1 Installation Manual You will be proposed the list of compatible actuators which you can associate to the object. You can identify the actuator by its ID number: First Double room First Double room Heating compatible with actuators Heating compatible with actuators Search for ID or model Search for ID or model F430R8 - ID:00020514...
- Page 77 MyHOMEServer1 Installation Manual First Double room First Double room First Double room Back Wizard Thermo Next Device identified for heating actuators Heating MOD: F430R8 ID:00020514 Select channel to be associated with Thermostat Double room of First floor - Double room Associate the actuator output to manage heating Associated heating actuator...
- Page 78 MyHOMEServer1 Installation Manual Accessible pump First Double room Identification of heating actuators In order to identify pumps to be paired with this zone of heating nd cooling press any of the buttons on board I can't press the ... Cancel 41.
- Page 79 MyHOMEServer1 Installation Manual You will be proposed the list of actuators compatible with the pumps which you can associate to the object. You can identify the actuator/pump by its ID number. First Double room First Double room heating compatible with pumps heating compatible with pumps Search for ID or model Search for ID or model...
- Page 80 MyHOMEServer1 Installation Manual First Double room First Double room First Double room Back Wizard Thermo Next Device identified for riscaldamento pompa Pump Heating MOD: F430R8 ID:00020514 Select channel to be associated with Thermostat Double room There are one or more of First floor - Double room pumps used for Thermostat Double room...
- Page 81 MyHOMEServer1 Installation Manual First Double room Back Wizard Thermo Next Cooling Select the type of load to control ON/OFF valve 51. Touch to continue After selecting the type of load you can associate a cooling system actuator First Double room Back Wizard Thermo Next...
- Page 82 MyHOMEServer1 Installation Manual Not accessible actuator First Double room Identification of cooling actuators In order to identify actuator to be paired with this zone of heating and cooling, press any of the buttons on board I can't press the ... Cancel 53.
- Page 83 MyHOMEServer1 Installation Manual Whether the actuator is accessible or not, you must select the channel to use from those available First Double room Device identified for cooling actuator MOD: F430R8 ID:00020514 Select channel to be associated with Thermostat Double room of First floor - Double room Close 56.
- Page 84 MyHOMEServer1 Installation Manual After associating the thermostat, probes and actuator to the object, you can associate a pump. First Double room Back Wizard Thermo Next Pump Cooling There are one or more pumps used for cooling Thermostat Double room Associate the device 60.
- Page 85 MyHOMEServer1 Installation Manual You will be proposed the list of actuators compatible with the pumps which you can associate to the object. You can identify the actuator/pump by its ID number. First Double room First Double room cooling compatible with pumps Device identified for cooling actuator Search for ID or model Search for ID or model...
- Page 86 MyHOMEServer1 Installation Manual First Double room First Double room First Double room Back Wizard Thermo Device identified for cooling pump Pump Cooling MOD: F430R8 ID:00020514 Select channel to be associated with Thermostat Double room There are one or more pumps of First floor - Double room used for cooling Thermostat Double room...
- Page 87 MyHOMEServer1 Installation Manual Thermostat object (with 99 zone control unit item 3550) On importing the device* configuration on the system and associating them to the thermostat object, the user can adjust the home temperature. Note: the MyHOME_UP system is not compatible with the 4-zone control unit (item L/N/NT4695 –...
- Page 88 MyHOMEServer1 Installation Manual First Double room First Double room First Double room Back Create an object Save Back Create an object Save Thermostat Object Thermostat Object First floor - Double room First floor - Double room Fan-coil Fan-coil Object Object Zone address Double room Thermostat Double room Thermostat...
- Page 89 MyHOMEServer1 Installation Manual Player object On associating a Nuvo or Sonos* music reader to the player object, the user can play music or listen to radio stations. First floor First Double room Double room Create the controls for this room^and the device configurations Children bedroom Favourites...
- Page 90 MyHOMEServer1 Installation Manual NuVo First Double room First Double room First Double room Cancel Create an object Save Cancel Create an object Save Player Object Player Object First floor - Double room First floor - Double room Select player Object Object Double room Player Double room Player...
- Page 91 The object is available for the user to use *Note: the device may not be compatible with some models or their firmware versions. Bticino is not responsible for any present and future malfunctionings or incompatibilities which can be attributed to...
- Page 92 *Note: the device may not be compatible with some models or their firmware versions. Bticino is not responsible for any present and future malfunctionings or incompatibilities which can be attributed to third-party devices.
- Page 93 MyHOMEServer1 Installation Manual LG Tv Note: the television must be ON and connected to the same LAN/Wi-Fi network of the MyHOMEServer1. Grou... Living room Grou... Living room Cancel Modify the object Save Smart TV object Ground floor - Living room Object Smart TV Living room Select Smart TV...
- Page 94 MyHOMEServer1 Installation Manual Samsung TV Note: the television must be ON and connected to the same LAN/Wi-Fi network of the MyHOMEServer1. Grou... Living room Grou... Living room Cancel Modify the object Save Smart TV object Ground floor - Living room Select Smart TV Object Smart TV Living room...
- Page 95 MyHOMEServer1 Installation Manual IR Trans Cancel Grou... Grou... Smart TV Living room Save Living room Living room Power Get code Cancel Create an object Save Menu Get code Mute Get code Smart TV object Get code Ground floor - Living room Get code Object Smart TV Living room...
- Page 96 MyHOMEServer1 Installation Manual Repeat the same procedure for all the keys of the remote control that you wish to associate Cancel Grou... Smart TV Living room Save Grou... Living room Living room Power Code saved Menu Code saved Mute Code saved Code saved Code saved Code saved...
- Page 97 Close 15. Scroll to display other controls *Note: the device may not be compatible with some models or their firmware versions. Bticino is not responsible for any present and future malfunctionings or incompatibilities which can be attributed to third-party devices.
- Page 98 MyHOMEServer1 Installation Manual Controlled socket object On configuring the devices on the system and associating them to the Controlled socket object, the user can control the load connected to a socket (e.g. standard lamp in the living room). Ground floor Kitchen Living room Favourites...
- Page 99 MyHOMEServer1 Installation Manual Grou... Living room Cancel Create an object Save Controlled socket object Ground floor - Living room Object Controlled socket 1 name Product/system MyHOME selection Associate the devices 4. Touch to modify the object name 5. Touch to select the relevant system 6.
- Page 100 MyHOMEServer1 Installation Manual Accessible actuator (e.g. wired in the electrical panel) Grou... Living room Identification Actuator/Output To identify the actuator/output to associate to the graphic object Controlled socket 1, press any one of the pushbuttons on the device I can't press the ... Close 8.
- Page 101 MyHOMEServer1 Installation Manual Grou... Living room Compatible actuators/outputs Controlled socket Search for ID or model F411/4 - ID:00D16020 Test No label F411/4 - ID:00D1604B Test No label Add device Close 9. Touch to start the test A. In the system the sockets connected to the actuator are activated in sequence. This allows you to visually identify the socket to be associated to the graphic object and the channel number.
- Page 102 MyHOMEServer1 Installation Manual Grou... Living room Identified device MOD: F411/4 ID:00D16020 Choose the channel to be associated to Controlled socket of the Ground floor - Living room Cancel 12. Select the channel If the channel is busy, see chapter “What to do if”. 13.
- Page 103 MyHOMEServer1 Installation Manual Grou... Living room Identification Control / Input To identify the Control/Input to associate to the graphic object Controlled socket 1, press any one of the pushbuttons on the device I can't press the ... Close 15. Press any one of the pushbuttons on the control on the system 15.
- Page 104 MyHOMEServer1 Installation Manual Grou... Living room Grou... Living room Cancel Create an object Save Associated devices Controlled socket Ground floor - Living room Controlled socket object Ground floor - Living room F411/4 - ID:00D16020 - Channel 1 Object Controlled socket No label name Product/system...
- Page 105 MyHOMEServer1 Installation Manual Door lock object On configuring the devices on the system and associating them to the Door lock object, the user can control a system door lock. Ground floor Kitchen Entrance hall Favourites Home Scenarios Security Other 1. Touch to enter the room where you want to add a door lock object Grou...
- Page 106 MyHOMEServer1 Installation Manual Grou... Entrance hall Door lock object Ground floor - Entrance hall Object Door lock name Product/system MyHOME selection Associate the devices 4. Touch to modify the object name 5. Touch to select the relevant system 6. Touch to associate to the door lock graphic object a device found on the Door lock system in the initial scanning...
- Page 107 MyHOMEServer1 Installation Manual Accessible actuator (e.g. wired in the electrical panel) Grou... Entrance hall Identification Actuator/Output To identify the actuator/output to associate to the graphic object Door lock 1, press any one of the pushbuttons on the device I can't press the ... Close 8.
- Page 108 MyHOMEServer1 Installation Manual Grou... Entrance hall Compatible actuators/outputs Door lock Search for ID or model F411/4 - ID:00D16020 Test No label F411/4 - ID:00D1604B Test No label Add device Close 9. Touch to start the test A. In the system the loads, the door locks connected to the actuators are activated in sequence for one second.
- Page 109 MyHOMEServer1 Installation Manual Grou... Entrance hall Identified device MOD: F411/4 ID:00D16020 Choose the channel to be associated to the Door lock of the Ground floor - Entrance hall Cancel 12. Select the channel If the channel is busy, see chapter “What to do if”. 13.
- Page 110 MyHOMEServer1 Installation Manual Grou... Entrance hall Identification Control / Input To identify the Control/Input to associate to the graphic object Door lock 1, press any one of the pushbuttons on the device I can't press the ... Close 18. Press any one of the pushbuttons on the control on the system 18.
- Page 111 MyHOMEServer1 Installation Manual Grou... Entrance hall Grou... Entrance hall H4652/2 - ID:00B4765D - Pushbutton 1 Apply to all the H4652/2 modules with light configuration Associated devices Door lock Cyclical Ground floor - Entrance hall Timed ON F411/4 - ID:00D16020 - Channel 1 No label ON/OFF with adjustment H4652/2 - ID:00B4765D -...
- Page 112 MyHOMEServer1 Installation Manual Grou... Entrance hall Grou... Entrance hall Cancel Create an object Save Associated devices Door lock Ground floor - Entrance hall Door lock object Ground floor - Entrance hall F411/4 - ID:00D16020 - Channel 1 Object Door lock No label name Product/system...
- Page 113 MyHOMEServer1 Installation Manual Audio MyHOME object On configuring the devices on the system (only in multichannel systems with F441M matrix) and associating them to the Audio MyHOME object, the user can control the BTicino sound system components. Ground floor Grou...
- Page 114 MyHOMEServer1 Installation Manual Grou... Living room Grou... Living room MyHOME Audio Living room Ground floor - Living room Select source Smart TV Living room MyHOME Audio Living room Oggetto disabilitato Configurazione non completa Close The object is available for the user to use...
- Page 115 MyHOMEServer1 Installation Manual Energy object On configuring the devices on the system (F520 or F521 measurer) and associating them to the Power object, the user can display the instantaneous power consumption of a load. Ground floor Grou... Living room Grou... Living room Add an object Light...
- Page 116 MyHOMEServer1 Installation Manual Grou... Living room Cooker 0,4 Kw Now the user can display the instantaneous consumption...
- Page 117 MyHOMEServer1 Installation Manual Burglar-alarm Zone Object By associating a zone (of the Burglar Alarm system) to the burglar alarm zone object, the user can exclude/include the zone from the Burglar Alarm system. Ground floor Grou... Kitchen Grou... Kitchen Add an object Light Shutter Thermostat...
- Page 118 MyHOMEServer1 Installation Manual Grou... Kitchen Grou... Kitchen Select zone Search by name Kitchen IR Cancel Create an object Save Living room IR Garden IR Garage IR Security zone object Ground floor - Kitchen Room Window Cont Object Kitchen Window Cont Create the controls for this room^and the Create the controls for this room^and the name...
- Page 119 MyHOMEServer1 Installation Manual Scenarios In this section you can independently create and manage customised scenarios depending on your specific requirements. Creating a scenario, means controlling several home devices at the same time, in a simple way, using a single control. perform the scenario You can only immediately or automatically if certain conditions you have set...
- Page 120 MyHOMEServer1 Installation Manual Createte a Scenario To Createte a Scenario: Assign a name to the Scenario and a representative image Enter one or more actions which the objects in the room will perform when the Scenario starts (e.g. switching the Kitchen Light on) Enter an action of the burglar-alarm system (e.g.
- Page 121 MyHOMEServer1 Installation Manual Scenarios Scenarios Cancel New scenario Next Scenario name Createte new operation sequences to be started manually or automatically Customise the Scenario image Predefined images Take photo Photo library Close Favourites Home Scenarios Other Favourites Home Scenarios Security Other 5.
- Page 122 MyHOMEServer1 Installation Manual Back Back Back Kitchen Rooms Actions to be performed Actions to be performed Actions to be performed Kitchen Light 1 Kitchen Light 2 Kitchen Rolling shutter 1 Kitchen Smart TV 1 Set the objects to Set the objects to Set the objects to Zones Ground floor...
- Page 123 MyHOMEServer1 Installation Manual Burglar-alarm System actions Now enter an action of the burglar-alarm system Back Back Back Actions to be performed Actions to be performed Actions to be performed Kitchen Rolling shutter 1 Stop Kitchen Rolling shutter 1 Stop Kitchen Rolling shutter 1 Stop Add an action Object...
- Page 124 MyHOMEServer1 Installation Manual Back Back Actions to be performed Actions to be performed Kitchen Rolling shutter 1 Stop Kitchen Rolling shutter 1 Stop Internal Perimeter Armed Internal Perimeter Cancel Add an action Add an action 19. Enter the user code 20.
- Page 125 MyHOMEServer1 Installation Manual Insertion scenarios Back Back Actions to be performed Actions to be performed Kitchen Rolling shutter 1 Stop Kitchen Rolling shutter 1 Stop Bewapenen scenes Security system protection grade Disarmed The system needs to store your Code to enable the scene. Total insertion This operation can lower the security level of your burglar alarm system: do you agree to...
- Page 126 MyHOMEServer1 Installation Manual Special actions On entering these actions you can delay and/or receive a confirmation that the Scenario has been performed Waiting time Enter the wait time before the next commands are performed Sending Automatically send an email after the Scenario is performed email Automatically send a push notification to the smartphones after the actions or entire Scenario are performed.
- Page 127 Kitchen Rolling shutter 2 100 % Kitchen Rolling shutter 2 100 % Kitchen Rolling shutter 2 100 % Sending email Object Set the addressee J.Smith@BTicino.com J.Smith@BTicino.com Addressee Enter the addressee Waiting time Object Enter the object Push notification Text Enter the text...
- Page 128 1 min : 30 sec 1 min : 30 sec Kitchen Rolling shutter 2 100 % Kitchen Rolling shutter 2 100 % Select the users who will receive this notification J.Smith@BTicino.com J.Smith@BTicino.com J.Smith@BTicino.com Set the message Set the message D.Brown@BTicino.com M.Robinson@BTicino.com Cancel...
- Page 129 MyHOMEServer1 Installation Manual Perform a Scenario After creating the scenario you can perform it directly from the scenario page or condition it to start when particular events occur. Direct performance Scenarios Scenarios Scenario performance Do you want to start Day? Start Cancel Favourites...
- Page 130 MyHOMEServer1 Installation Manual Conditional performance Scenarios Scenarios Start condition Start condition No start condition for this Scenario Modify Duplicate Share Delete Cancel Add a condition Favourites Home Scenarios Security Other Favourites Home Scenarios Other 1. Touch to open the Scenario Modifytion panel 2.
- Page 131 MyHOMEServer1 Installation Manual Pushbutton On setting this condition you can start a Scenario by pressing a pushbutton on the system Start condition Start condition Start condition Pushbutton Objects No start condition No start condition for this Scenario for this Scenario Pushbutton Weather Position...
- Page 132 MyHOMEServer1 Installation Manual Start condition Start condition Pushbutton No start condition for this Scenario Pushbutton H4652/2 - ID:B475CE - Pushbutton 2 No label Confirmation Cancel Add a condition Add a condition 10. Touch to save the condition 11. The condition is set Note: if the actions linked to the burglar-alarm system are entered in the scenario they will be performed without the user code being requested.
- Page 133 MyHOMEServer1 Installation Manual Objects On setting this condition you can start a Scenario when an object, selected from those in the various rooms, is in a particular status deEndd by you. You can use the characteristic statuses whose implementation activates the Scenario for any type of object. Start condition Start condition Start condition...
- Page 134 MyHOMEServer1 Installation Manual For each object a series of parameters whose combination determines the status which will implement the scenario is at your disposal. OBJECT COND 1 COND 2 COND 3 START IF... The light is switched ON equal The light is switched OFF ON/OFF LIGHT The light is switched OFF different...
- Page 135 MyHOMEServer1 Installation Manual OBJECT COND 1 COND 2 COND 3 START IF... the thermostat is OFF the thermostat is in hot mode equal cold the thermostat is in cold mode auto the thermostat is in automatic mode mode the thermostat is ON the thermostat is OFF or in cold/auto mode different cold...
- Page 136 MyHOMEServer1 Installation Manual Weather On setting this condition you can start a Scenario when some weather conditions supplied by the online weather service occur (www.wunderground.com). registered to the service You can only use this condition if you have already and set the place to monitor.
- Page 137 MyHOMEServer1 Installation Manual Weather Close Start condition Start condition Roma Temperature maggiore 20° 24 ° No start condition Weather forecast: Clear for this Scenario Wind speed: 0 km/h Humidity: 62% Dawn: 5:52 AM Sunset: 21:8 PM Add a condition 7. The condition is set 8.
- Page 138 MyHOMEServer1 Installation Manual Position On setting this condition you can start a Scenario depending on your position with respect to MyHOMEServer1. As an example you can set the “switch front door lights on” Scenario to activate when you are approaching the house and the distance between you and the MyHOMEServer1 is less than 200 metres.
- Page 139 MyHOMEServer1 Installation Manual Date and time On setting this condition you can start a Scenario at a set time and day. Start condition Start condition Start condition Back Date and time Start condition Every Monday Pushbutton Every Tuesday Date and time Objects No start condition No start condition...
- Page 140 MyHOMEServer1 Installation Manual Burglar-alarm system On setting this condition you can start a scenario when particular events of the burglar-alarm system occur. In particular you can set an event which will occur in the partition (e.g. switching on the “Volumetric day” partition) or running an insertion scenario (e.g. switching the burglar-alarm system on by means of the “total switching-on”...
- Page 141 MyHOMEServer1 Installation Manual The scenario is activated when: Switched off The partition is switched off Output The output time starts in a delayed output partition Switched on The partition is switched on (if it is with delay, at the end of all the delays) Prealarm The input time starts in a partition with delayed input Alarm...
- Page 142 Actions to be performed Kitchen Rolling shutter 1 Stop Total insertion Cancel Next Scenario 1 min : 30 sec name Kitchen Rolling shutter 2 100 % Start condition J.Smith@BTicino.com Modify Performed Scenario Duplicate Share Delete Cancel Add an action Favourites Home Scenarios Other...
- Page 143 Kitchen Rolling shutter 1 Stop Total insertion Cancel Next Scenario 1 min : 30 sec Night name Kitchen Rolling shutter 2 100 % J.Smith@BTicino.com Customise the Scenario image Performed Scenario Predefined images Take photo Photo library Close Add an action Favourites Home Scenarios...
- Page 144 MyHOMEServer1 Installation Manual Scenarios Scenarios Scenarios Night Night Night Night Favourites Home Scenarios Security Other Favourites Home Scenarios Security Other Favourites Home Scenarios Security Other 9. If you want to move a Scenario, touch and keep pressed until the image darkens 10.
- Page 145 MyHOMEServer1 Installation Manual Share a Scenario You can share the Createted Scenarios with other users Scenarios Scenarios Scenarios Start condition Modify Duplicate Share the Day Scenario with Share J.Smith@BTicino.com Delete Share Cancel Cancel Favourites Home Scenarios Other Favourites Home Scenarios...
- Page 146 In this page you can enter, for quick use, the commonly used objects, Scenarios and main commands. Ground floor Favourites Favourites General Lights General Lights Compatible with BTicino-Legrand components Compatible with BTicino-Legrand components General Rolling shutters General Rolling shutters Compatible with BTicino-Legrand components Compatible with BTicino-Legrand components Kitchen...
- Page 147 Favourites Favourites Ground floor Kitchen General Lights General Lights Kitchen Light 1 Compatible with BTicino-Legrand components Compatible with BTicino-Legrand components General Rolling shutters General Rolling shutters Kitchen Light 2 Compatible with BTicino-Legrand components Compatible with BTicino-Legrand components Kitchen Light 1...
- Page 148 MyHOMEServer1 Installation Manual Favourites Favourites General Lights General Lights Compatible with BTicino-Legrand components Compatible with BTicino-Legrand components General Rolling shutters General Rolling shutters Compatible with BTicino-Legrand components Compatible with BTicino-Legrand components Kitchen Light 1 Kitchen Light 1 Ground floor Kitchen...
- Page 149 Burglar Alarm system on by means of the insertion scenarios. Note: this function is only present if you have a BTicino Burglar Alarm system (alarm control units 4200, 4201, 4203) and your installer has connected it to the control unit.
- Page 150 MyHOMEServer1 Installation Manual Faults In this page it is possible to display the faults in progress in the system Security system Back Faults Disarmed Ethernet failure Full disarmed No issue found Faults Panel Tamper Faults found Issue found Partitions Power supply disconnected or absent No active partitions No issue found Peripheral status...
- Page 151 MyHOMEServer1 Installation Manual Partitions In this page you can display and switch the partitions of your burglar-alarm system on regularly without using the insertion scenarios. Security system Back Partitions Disarmed Internal perimeters Full disarmed Faults Outdoor perimeters No faults detected Partitions Day volumetric No active partitions...
- Page 152 MyHOMEServer1 Installation Manual Settings In this page there is a series of functions for more complete management of the system. Ground floor Other System check Check the component status on... Associations Display all the associations Groups Create and manage the group controls General controls Kitchen Create and manage the general controls...
- Page 153 MyHOMEServer1 Installation Manual Object association status - System completely new Status Actuator Control Flush mounted actuator Actuator channel All the channels addressed and physical automatically addressed No pushbutton used pushbuttons that controls and ready to be associated it, see also note (1) All the channels associated to a graphic object with All the pushbuttons...
- Page 154 MyHOMEServer1 Installation Manual System check Back ID 00D16020 F411/4 Bathroom light Label actuator Enter a label which allows to identify the physical position of the module on the system.. Channel association status e.g. Panel 1 of the Ground Floor Not associated Channel 1 Not associated Associated...
- Page 155 MyHOMEServer1 Installation Manual Back System check 6 Devices found 2 actuators 4 controls 0 flush-mounting actuator Cancel Continue 0 of other types System reading Search for ID or model To continue with the complete reading of the system, enter the code 3453 Model: F411/4, ID: 00D16020 and touch Continue Bathroom light actuator...
- Page 156 MyHOMEServer1 Installation Manual Associations Can display the association between the graphic objects and the devices on the system. Other Back Associations System check Search for the association Check the component status on... Associations Bathroom Controlled socket 1 Display all the associations Ground floor - Bathroom Groups Bathroom Controlled socket 2...
- Page 157 MyHOMEServer1 Installation Manual Association error correction When there is an association error (e.g. two actuators use the same channel) an error icon is displayed. Through this function you will be guided by a tutorial to identify the error and correct it. Other Back Associations...
- Page 158 MyHOMEServer1 Installation Manual Repeat the procedure, entering the correct parameters to correct the error. (In the example the error was made during the association of the heating actuator) Back Associations Search for the association Back Wizard Thermo Next Double room Thermostat First floor - Double room Bathroom Controlled socket 2 Heating...
- Page 159 MyHOMEServer1 Installation Manual You will be proposed the list of compatible actuators which you can associate to the object. You can identify the actuator by its ID number: Back Associations Back Associations Search for the association Search for the association Double room Thermostat Double room Thermostat First floor - Double room...
- Page 160 MyHOMEServer1 Installation Manual Back Associations Back Associations Back Associations Search for the association Search for the association Search for the association Back Wizard Thermo Next Double room Thermostat Double room Thermostat Double room Thermostat Device identified for heating actuators First floor - Double room First floor - Double room First floor - Double room Bathroom Controlled socket 2...
- Page 161 MyHOMEServer1 Installation Manual Back Associations Back Associations Search for the association Search for the association Wizard Thermo Close Create an object Save Double room Thermostat Double room Thermostat First floor - Double room First floor - Double room Bathroom Controlled socket 2 Bathroom Controlled socket 2 Wizard completed Ground floor - Bathroom...
- Page 162 Groups Groups Back Back Back MyHOME MyHOME MyHOME Cancel Save New group New group Bticino Groups No associated Add a description actuator/output Select the type of group to be configured Light No associated Associated control/input devices Shutter Add device Close 3.
- Page 163 MyHOMEServer1 Installation Manual Groups Back MyHOME Identification Actuator/Output or Control / Input Per identificare l'attuatore/uscita o il Comandi/Ingresso da associare al gruppo 1 di tipo Light, premi uno qualunque dei pulsanti a bordo del dispositivo I can't press the ... Close 8.
- Page 164 MyHOMEServer1 Installation Manual At the end the following screen will be displayed: Groups Groups Back Back MyHOME MyHOME Cancel Save New group New group F411/4 - ID:00D16020 - Channel 1 No label Add a description F411/4 - ID:00D16020 - Channel 2 No label Associated H4652/2 - ID:00B475CE - Pushbutton 1...
- Page 165 MyHOMEServer1 Installation Manual General controls In this section you can associate one or more physical pushbuttons to the main lights or rolling shutter control. As well as from the physical pushbutton you can perform the function from the graphic object entered in the favourites page. Other Back General controls...
- Page 166 8. Touch to end the procedure 9. Press to switch all the lights on or: Ground floor Favourites Favourites Lights General Lights General Compatible with BTicino-Legrand components Compatible with BTicino-Legrand components Shutters General Shutters General Compatible with BTicino-Legrand components Compatible with BTicino-Legrand components Kitchen...
- Page 167 MyHOMEServer1 Installation Manual System In this page you can display some information on the MyHOMEServer1 and the App. Other Other System check System check Check the component status on... Check the component status on... Cancel System Save Associations Associations Display all the associations Display all the associations MyHOMEServer1 Groups...
- Page 168 MyHOMEServer1 Installation Manual Burglar-alarm system In this page you can connect MyHOME_Up to the BTicino Burglar Alarm system Ground floor Other Other System check System check Check the component status on... Check the component status on... Cancel Security system Save...
- Page 169 MyHOMEServer1 Installation Manual Remove Burglar-alarm System Other Other Other System check System check System check Check the component status on... Check the component status on... Check the component status on... Cancel Security system Save Associations Associations Associations Display all the associations Display all the associations Display all the associations Insert User and Password of the...
- Page 170 MyHOMEServer1 Installation Manual Weather In this page you can display the weather data, activate the Online weather service and set the city to monitor Other Other System check System check Check the component status on... Check the component status on... Associations Associations Display all the associations...
- Page 171 MyHOMEServer1 Installation Manual 7. Touch to create an account 8. If you are using the service for commercial reasons, enter the name of the activity and select the type among the options shown in the pull-down menu. 9. Confirm to save. Note: the above operation is optional 10.
- Page 172 MyHOMEServer1 Installation Manual Other Other System check System check Check the component status on... Check the component status on... Associations Associations Display all the associations Display all the associations Groups Groups Create and manage the group controls Create and manage the group controls Cancel Weather activation Active...
- Page 173 MyHOMEServer1 Installation Manual Geolocation In this page you can set the geographical position of the MyHOMEServer1 and use it to activate a scenario depending on your position with respect to the MyHOMEServer1 Other Actual position Close System check Check the component status on... Associations Display all the associations Groups...
- Page 174 MyHOMEServer1 Installation Manual Network In this page it is possible to display/set the network connection parameters. Other Other Security system System Cancel Network Save Connect security system to MyHome_Up Obtain general information and modify... Weather Security system DHCP Set the city to be monitored Collegare il Security system a My...
- Page 175 MyHOMEServer1 Installation Manual Email In this page you can set the parameters for the configuration of the post account from where the emails notifying the performance of a scenario will be sent (see send email special object). Other Other Security system Security system Connect security system to MyHome_Up Connect security system to MyHome_Up...
- Page 176 MyHOMEServer1 Installation Manual Date and time In this page it is possible to display and set the date and time Other Security system Connect security system to MyHome_Up Weather Set the city to be monitored Geolocation Set the geographic position Network Set the network parameters Email...
- Page 177 MyHOMEServer1 Installation Manual Other Security system Connect security system to MyHome_Up Cancel Date and time Save Weather Set the city to be monitored Master Set MyHOMEServer1 as time master Geolocation Set the geographic position Automatic Network Set the network parameters NTP Server pool.ntp.org Email...
- Page 178 MyHOMEServer1 Installation Manual System reset In this page you can reset the factory settings of the MyHOMEServer1 and/or BTicino devices connected to the system Other Back Reset Security system Connect security system to MyHome_Up Reset only Gateway Weather Set the city to be monitored...
- Page 179 MyHOMEServer1 Installation Manual Disconnect This function will disconnect you from your account. Other MyHOME_Up Security system Home Connect security system to MyHome_Up Access with PIN CODE Weather Holiday home Set the city to be monitored Access with PIN CODE Geolocation Set the geographic position Network Set the network parameters...
- Page 180 MyHOMEServer1 Installation Manual Maintenance The information (configuration) in the MyHOMEServer1 can be backed up. These operations are strongly recommended for carrying out future operations. http://192.168.0.158:3443/ 192.168.0.158:3443 1. In a browser, type the MyHOMEServer1 IP address and indicate the 3443 connection port (e.g. 192.168.0.158:3443) To display the IP address in MyHOME_Up, touch “Other/Network”...
- Page 181 MyHOMEServer1 Installation Manual http://192.168.0.158:3443/ 192.168.0.158:3443 DEVICE ID: 0000000 INSTALLER CODE: 00000000 DEVICE ID: 0000000 INSTALLER CODE: 00000000 2. Enter the INSTALLER CODE found on the front side of the device 3. Press to confirm A screen with 3 choices appears: http://192.168.0.158:3443/ 192.168.0.158:3443 A.
- Page 182 MyHOMEServer1 Installation Manual What to do if When I press the pushbutton on a device already configured with the same function as that to be set (e.g. Lights). The following screen appears: Home Kitchen Notification Channel 3 already used. Do you want to import the association? Cancel 1.
- Page 183 MyHOMEServer1 Installation Manual When I press the pushbutton on a device already configured with a different function from that to be set (e.g. Rolling shutter). The following screen appears: Device configured in physical mode Home Kitchen Notification Channel 3 already used. Do you want to import the association? Cancel 1.
- Page 184 MyHOMEServer1 Installation Manual When you are associating an control and select a pushbutton which is already associated, the following screen appears Home Kitchen Notification Pushbutton 1 already used. Do you want to overwrite the association? Cancel 1. Touch to confirm the selection and overwrite the previous association 2.
- Page 185 MyHOMEServer1 Installation Manual When, while creating a connection, your MyHOMEServer1 is not found automatically, you must enter the address manually MyHOME_Up MyHOME_Up Cancel Createte a connection Save If you already have an account, assign a name to the connection and enter your credentials Connection name Add a connection to the...
- Page 186 MyHOMEServer1 Installation Manual MyHOME_Up Cancel Createte a connection Save The connection with code allows access only through your network Connection name Add a connection to the MyHOME_Up Gateway PIN CODE Address IP Serial Where do I find the PIN CODE? > 6.
- Page 187 MyHOMEServer1 Installation Manual When your MyHOMEServer1 is not found in the connection phase, the following screen appears: MyHOME_Up System 1 Access with PIN CODE Notification No detected gateway Close powered by ISAAC Check the connections and/or the Wi-Fi connection. The smartphone and the MyHOMEServer1 must be connected to the same LAN network. 1.
- Page 188 MyHOMEServer1 Installation Manual If scanning and the automatic detection of the connected devices shows a number of devices exceeding the maximum number that can be managed by the bus, the following message appears: MyHOME_Up Home Attention! Caricamento struttura in corso, attendere... Maximum number of devices manageable by the bus exceeded.
- Page 189 MyHOMEServer1 Installation Manual When you are associating a probe which is already associated to another thermostat, the following screen appears First Double room Notification Canale 1 già utilizzato. Vuoi sovrascrivere l'associazione? Cancel 1. Touch to confirm the selection and overwrite the previous association 2.
- Page 190 Legrand SNC BTicino SpA 128, av. du Maréchal-de-Lattre-de-Tassigny Viale Borri, 231 87045 Limoges Cedex - France 21100 Varese www.legrand.com www.bticino.com Legrand SNC reserves at any time the right to modify the contents of this booklet and to communicate, in any form and...
Need help?
Do you have a question about the Legrand MyHOME Up and is the answer not in the manual?
Questions and answers