Table of Contents
Advertisement
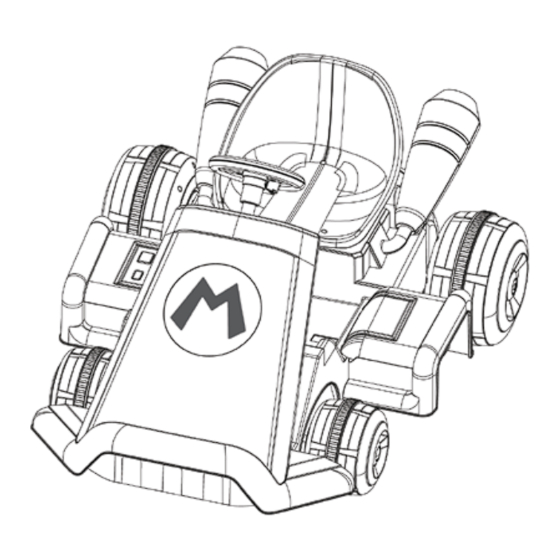
Page 1
AGES
ÂGE
3-5
BC
MOTORIZED
RIDE ON
6V DELUXE MARIO KART
KART
T M
MOTORISÉ
KART MARIO MOTORISÉ - 6 V
ASSEMBLY BY AN ADULT
MONTAGE PAR UN ADULTE.
Should you require assistance with your toy, contact JAKKS consumer relations at consumers@jakks.com or 1-877-875-2557 in North America only.
Pour toute assistance concernant ce produit, prière de joindre le Service à la clientèle de JAKKS par courriel : consumers@jakks.com ou
composer le 1-877-875-2557 en Amérique du Nord uniquement.
Advertisement
Table of Contents

Related Manuals for JAKKS Pacific World of Nintendo Mariokart 7


Summary of Contents for JAKKS Pacific World of Nintendo Mariokart 7
- Page 1 Page 1 AGES ÂGE MOTORIZED RIDE ON 6V DELUXE MARIO KART KART MOTORISÉ KART MARIO MOTORISÉ - 6 V ASSEMBLY BY AN ADULT MONTAGE PAR UN ADULTE. Should you require assistance with your toy, contact JAKKS consumer relations at consumers@jakks.com or 1-877-875-2557 in North America only. Pour toute assistance concernant ce produit, prière de joindre le Service à...
-
Page 2: Table Of Contents
Page 2 Please read this manual before assembly. Save your Receipt for Warranty. Adult Assembly and Maintenance Required. Prière de lire ce mode d’emploi avant l’assemblage. Conserver le ticket de caisse pour garantie. Montage et entretien devant être confié à un adulte Table of Contents Table Des Matières A) Toy Specification... -
Page 3: C) Safety Warning And Cautions
Page 3 C) Safety Warnings and Cautions Sécurité - Mises Et Garde Et Avertissements Electrical Hazard - Risk of Fire, Do Not Bypass. Replace only with same 30A Fuse. (see P.15) - Only use provided charger or Input AC 100-240V 50-60Hz, Output DC 7.2V 1.0A battery charger. - Never modify the toy’s electrical system. -
Page 4: D) Battery Charging
Page 4 D) Charging, Installation, Care & Disposal Recharge, installation, entretien et élimination de la BATTERIE Toy’s Battery and Charger Care - Changes or modifications to this unit not expressly approved by the party responsible for compliance could void the user’s authority to operator the equipment. - Page 5 Page 5 This device complies with Part 15 of the FCC Rules. Operation is subject to the following two conditions: this device may not cause harmful interference, and this device must accept any interference received, including interference that may cause undesired operation. Warning: Changes or modifications to this unit not expressly approved by the party responsible for compliance could void the user’s authority to operate the equipment.
-
Page 6: E) Parts
Page 6 E) Parts Diagram #A Schéma des pièces A 1. Carrosserie de jouet 1. Toy’s Body 2. Pare-choc avant 2. Front Bumper 3. Roue avant (2) 3. Front Wheel X 2 4. Capuchon de roue avant (2) 4. Front Wheel Cover Cap X 2 5. - Page 7 Page 7 E) Part Diagram #B Schéma des pièces B MARIO KART HOOD CAPOT MARIO KART EXHAUST POT D’ÉCHAPPEMENT Charger x 1 Nut Tools x 2 Chargeur (x1) Serre-écrou (2) MARIO KART LEFT CÔTÉ GAUCHE DU KART Short Spacer X 1 Petite Entretoise (1) Bushing x 3 Bague (3)
-
Page 8: F) Label Application
Page 8 F) Label Application APPLICATION DES DÉCALQUES Place the labels exactly as shown in the illustrations Placer les décalques exactement comme illustré. MARIO KART EXHAUST POT D’ÉCHAPPEMENT MARIO KART HOOD CAPOT MARIO KART LEFT MARIO KART RIGHT CÔTÉ GAUCHE DU KART CÔTÉ... -
Page 9: G) Assembly Instructions
Page 9 G) Assembly Instruction MONTAGE Install Front Bumper Installing the front bumper Step #1 (Toy’s Body, Front Bumper) Connect the Front Bumper to the Toy’s Body front. Étape 1 (Carrosserie de jouet, pare-choc avant) Insérer le pare-choc avant à l’avant sur la carrosserie de jouet Step #2 (Screw x 6) Turn over the Toy’s Body and insert 6 screws... - Page 10 Page 10 Install Rear Wheel Installation de la roue arrière LONG SPACER ENTRETOISE LONGUE Step #5 (Long Spacer x 1, Rear Axle) Place the Long Spacer at Rear Body bottom as shown. Slide the end of the Rear Axle throught the opening into the Toy’s Body and across through the Long Spacer hole in the gear box.
- Page 11 Page 11 Step #9 (Nut tool x2) Tighten the Left Wheel and Right Wheel nuts by using 2 Nut Tools. Hold 1 side of the nut by 1 tool then tighten the opposite side of the nut with the other tool. Étape 9 (2 serre-écrous) Serrer l’écrou de la roue gauche et de la roue droite avec les 2 serre-écrous.
- Page 12 Page 12 Install Exhaust Installation du pot d’échappement Step #13 (Right Exhaust x1, Left Exhaust x1) Insert the Right Exhaust into the Toy’s Body rear hole. Insert the Left Exhaust into the opposite hole. Étape 13 (pots d’échappement droite, pots d’echappement gauche) Insérer le pot d’échappement droite dans le trou arrière droite sur la carrosserie de jouet.
- Page 13 Page 13 Step #17 Insert the Front Hood into the Toy’s Body and the Front Bumper. Étape 17 Insérer le capot avant sur la carrosserie et le pare-choc avant. Step #18 (Screw with Washer x2) Insert 2 Screws with Washers into the Front Hood hole. Tighten the screw using the Philips Screwdriver.
- Page 14 Page 14 Install Left Side Box Installation de la caisse de résonance gauche Step #22 (Left Side Box, Screw x4) Connect the Left Side Box to the Toy’s Body left side. Then turnover the Toy’s Body and insert 4 screws into the Left Side Box holes.
-
Page 15: H) Operation Instructions
Page 15 H) Operation Instruction FONCTIONNEMENT Steering Function HORN SOUND Direction KLAXON SONORES MUSIC SOUND EFFETS SONORES Realistic steering with the buttons for Horn and Music sound. Press Reset button to start over the sound again. (Ensure the batteries are installed) RESET Direction imitant la réalité... -
Page 16: J) Troubleshooting
Page 16 J) Troubleshooting RÉSOLUTION DE PROBLÈMES 1. Toy does not start or operate property: - Battery charge may be low - charge the battery for 10-12 hours - Blown fuse – replace the blown fuse with the same type and value fuse (30A) - Loose charger connection –... -
Page 17: K) Limited Warranty
GARANTIE LIMITÉE DE 90 JOURS Thanks for purchasing a great JAKKS Pacific® product! Nous vous remercions d’avoir fait l’acquisition de cet article de JAKKS Pacific® ! Please immediately register your product online at Veuillez enregistrer immédiatement votre article en ligne à... -
Page 18: L) Note
Page 18 L) NOTES NOTES... - Page 19 Page 19...
- Page 20 TM ET © 2014 NINTENDO TM ET © 2014 NINTENDO TM & © 2014 MANUFACTURED BY JAKKS PACIFIC INC., 22619 PCH, MALIBU, CA 90265 U.S.A ALL OTHER SYMBOLS, MARKS, LOGOS AND DESIGNS (COLLECTIVELY "TRADEMARKS") ARE TRADEMARKS OF AND PROPRIETARY TO THEIR RESPECTIVE OWNERS AND USED UNDER LICENSE.
Need help?
Do you have a question about the World of Nintendo Mariokart 7 and is the answer not in the manual?
Questions and answers