Table of Contents
Advertisement
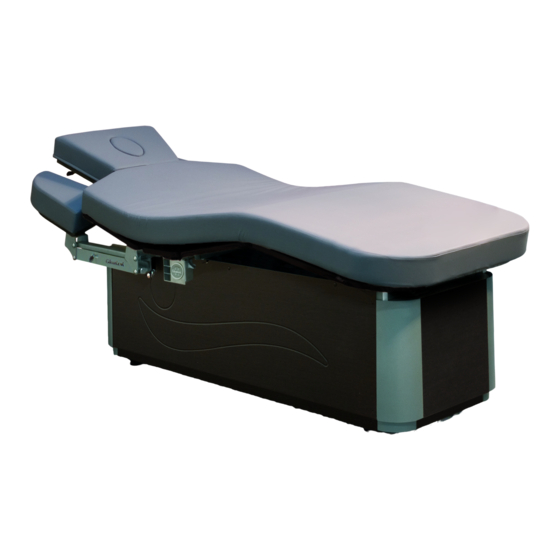
Spa Table MLW Classic / MLW Soft
➢ Phone:
➢ Fax:
➢ Customer service hotline:
➢ E-mail:
➢ Web:
Empty field for entering the
The serial number of the MLW is on the rating
plate (s. chapter 7. R
Instruction Manual
MLW C
MLW S
Gharieni Group GmbH
Am Schürmannshütt 24
D - 47441 Moers
SERIAL NUMBER
).
ATING PLATE
LASSIC
OFT
+49 (0)2841/88300-0
+49 (0)2841/88300-999
+49 (0)2841/88300-40
.
service@gharieni.de
www.gharieni.de
Advertisement
Table of Contents

Subscribe to Our Youtube Channel
Related Manuals for GHARiENi MLW Classic


Summary of Contents for GHARiENi MLW Classic
- Page 1 Instruction Manual Spa Table MLW Classic / MLW Soft MLW C LASSIC MLW S Gharieni Group GmbH Am Schürmannshütt 24 D - 47441 Moers ➢ Phone: +49 (0)2841/88300-0 ➢ Fax: +49 (0)2841/88300-999 ➢ Customer service hotline: +49 (0)2841/88300-40 ➢ E-mail: service@gharieni.de...
-
Page 2: Table Of Contents
REFACE Dear Customer, we would like to thank you for purchasing this quality-product as well as for your confidence. Read the complete IM before you use the MLW for the first time. Reading the complete IM is essential for its proper and confident use and will help you to operate the MLW to your entire satisfaction. - Page 3 9.2.2 MLW Medium / Width 85 cm ................24 9.2.3 MLW Large / Width 92 cm ................24 9.3 Before initial use ......................25 9.4 View / Example: MLW Classic ................25 9.5 Gas pressure springs ....................27 9.6 Headrest ........................27 9.7 Armrests ........................
- Page 4 22.2 Ambient conditions for storing and transportation........... 62 22.3 Ambient conditions for operation ................ 62 23. Technical data ......................... 63 23.1 Technical data / MLW Classic and MLW Soft ..........63 23.2 Technical data / Triple Airback ................64 23.3 Technical data / Vibro Wellness ................64 23.4 Technical data / Smart Thermo ................
-
Page 5: Safety Information
Copies of this instruction manual are available upon request. ➢ The Gharieni Group GmbH shall not be held responsible for any damages, direct or indirect, caused to people, animals or objects resulting from negligence or non- compliance with the instructions contained herein. -
Page 6: Abbreviations
1.1 Abbreviations ➢ G MLW C / MLW S HARIENI ABLE LASSIC ➢ S MART HERMO MART HERMO HEATING SYSTEM ➢ M ANUAL CONTROL PANEL ➢ O PERATING ADVICE 1.2 Signal words indicates a hazardous WARNING! indicates a hazardous DANGER! situation which, if ignored, will result in situation which, if ignored, could result... - Page 7 6. The power supply cable shall not be placed below the MLW, except it is expressly permitted by the manufacturer. RISK OF ELECTRIC SHOCK! 7. The power cord must not be placed near the motor during connection or repositioning as it can be damaged while operating the motor. RISK OF ELECTRIC SHOCK! 8.
- Page 8 5. Always ensure that the power cord is not bent or squeezed during installation. 6. Do not use any extension cords, multiple sockets or adapters. RISK OF FIRE! 7. Do not open the housings of the electric control panels! RISK OF ELECTRIC SHOCK! 8.
- Page 9 SHOCK! RISK OF DAMAGE! 25. Any repairs and maintenance work must be carried out by qualified professionals authorized by the Gharieni Group GmbH only! RISK OF ELECTRIC SHOCK! RISK OF FIRE! 26. Do not use a steam cleaner for cleaning. RISK OF ELECTRIC SHOCK! 27.
-
Page 10: Intended Use
No other use is permitted: it will affect your guarantee rights. ❖ The Gharieni Spa Table MLW is not a medical device relevant to the medical products law (German: MPG). ❖ The MLW is intended for indoor use only. -
Page 11: Scope Of Delivery
If you have purchased additional optional accessories for your Spa Table, these are also included in the scope of delivery. 4. Preliminary remarks ❖ The Gharieni Spa Table MLW is subject to the highest safety and quality standards. ❖ Before initial operation, please check that all components are present and that they are not visible damaged. -
Page 12: Unpacking
ELIVERY BY THE HARIENI ROUP If the MLW is delivered by the Gharieni Group GmbH, the driver will help with the installation of the MLW and will also dispose of the packaging material and the special pallet. ELIVERY BY AN EXTERNAL FORWARDER If the MLW is delivered by an external forwarder, the MLW is normally only delivered. -
Page 13: Assembly And Transport Of The Mlw
PACKAGING TAPES PPER CARDBOARD PECIAL PALLET HORT SIDES OF THE CARDBOARD 1. Cut the packaging tapes (A) with scissors and remove them. 2. D open the upper cardboard (B) but lift it carefully and vertically as a O NOT whole from the MLW and from the special pallet (C). For this purpose, you will need two persons (one person each on the short sides / D of the cardboard). -
Page 14: Transport
6.2 Transport A transport of the MLW can be severely affected to some extent due to unfavourable environment conditions. Such unfavourable environmental conditions are e.g. narrow doors, narrow corners behind doors, narrow corridors, narrow staircases, spiral staircases etc. The weight of the MLW is at least 130 kg; the length is approx. -
Page 15: Use Of The Special Carrying Aids
6.2.1 Use of the special carrying aids DANGER! After transport, while putting down the MLW, the power cord must not be under the SPA Table; otherwise the adjustable feet may squeeze the power cord and cause permanent damage while putting down the MLW or when retracting the castors. - Page 16 3. Then unplug the MLW again. 4. Lift the lower casing (A) by hand (s. fig. below). 5. Insert the special carrying aids (C) into the four intended openings (B) in the adjustable feet (2 at the front, two at the back) and screw them tight (s. fig. below). 6.
-
Page 17: Extendable / Retractable Castors
PENING FOR THE SPECIAL CARRYING AID DJUSTABLE FOOT OCK NUT NOTICE! When you have placed the MLW in a suitable position providing sufficient free space, remove the special carrying aids and store them at a safe place for future use. NOTICE! If the floor is not level, you must ensure proper stability of the MLW by adjusting the four adjustable feet. - Page 18 WARNING! The MLW must never be used (neither with nor without castors) for carrying or transporting persons or heavy loads. RISK OF INJURY! RISK OF DAMAGE! SE OF THE MECHANICALLY EXTENDABLE CASTORS Figures similar: All following figures serve as examples only. 1.
- Page 19 4. Pull the lever (B) towards you to extend the castors. Thereby, you have to overcome a resistant point. 5. The castors are now extended. Before moving the MLW, unplug it, roll up the power cord properly and store the power cord in such a way, that you cannot roll over it when moving the MLW. Do not retract the castors unless the MLW stands at its desired site and you have checked that the cables are not located under the MLW.
-
Page 20: Rating Plate
7. Rating plate ❖ The rating plate is located in the casing under the cover plate on the head side of the MLW (s. below; fig. 1 and fig. 2). ❖ The lever (B / fig. 2) is intended for the operation of the extendable / retractable castors (s. -
Page 21: Upholstery Of The Mlw
8. Upholstery of the MLW MLW C LASSIC ❖ The MLW Classic is equipped with a comfortable one-piece upholstery (s. fig. below). ❖ The inner material of the upholstery is made of high quality foam material. ❖ The outer material of the upholstery is made of PU (polyurethane) and available in various colours of our colour collection for PU upholstery. -
Page 22: Operation Of The Mlw
❖ The MLW is a versatile Spa Table. You can use it for e.g. cosmetic applications or full body massages in dry rooms. ❖ The Gharieni MLW is a Spa Table which is equipped with four actuators. With these actuators you can easily adjust the desired positions electrically using the manual control panel. -
Page 23: Model Variants
❖ The maximum loading capacity of the armrests is 25 kg. ❖ The MLW provides versatile adjustment options and therefore it can be used for various applications. 9.2 Model variants ❖ The Spa Tables of the Gharieni MLW series are available in three various widths: MALL EDIUM ARGE... -
Page 24: Mlw Medium / Width 85 Cm
➢ The armrests and the headrest of the MLW S are pneumatically adjustable. MALL ➢ The manual control panel of the MLW S is equipped with four memory MALL positions. 9.2.2 MLW Medium / Width 85 cm MLW M EDIUM IS EQUIPPED WITH FOUR ACTUATORS Actuator 1 Electrical adjustment of the WORK HEIGHT... -
Page 25: Before Initial Use
➢ The dedicated safety socket must be grounded properly and must meet the proper voltage (230 V AC). Before installation provide sufficient free space for the MLW. 9.4 View / Example: MLW Classic (Fig. similar: Colour, decor and upholstery can vary depending on model) (supporting structure) / U... - Page 26 EAT SECTION ➢ Thigh section to knee bend section ➢ The of the seat section is electrically adjustable INCLINATION KNEE BEND ➢ s. chapter 10.4 A DJUSTMENT OF THE INCLINATION OF THE SEAT SECTION ACKREST ➢ Electrically adjustable. ➢ s. chapter 10.3 A DJUSTMENT OF THE BACKREST EADREST ➢...
-
Page 27: Gas Pressure Springs
9.5 Gas pressure springs ❖ The armrests as well as the headrest can be adjusted pneumatically using a gas pressure spring by means of a lever. ❖ If you carry out any setting by means of the lever of the gas pressure spring, you only need to operate the lever when lowering the armrests or headrest. - Page 28 For this purpose, the headrest is equipped with a separate upholstery part, which can be removed (s. below; fig. 6). ❖ Using a gel cushion (s. fig. 7, optional available at Gharieni) on the headrest upholstery can additionally support the face of the person to be treated (see also chapter 21.1 G...
-
Page 29: Armrests
9.7 Armrests WARNING! Do not carry out any physical force to the armrests (instructions are not depending on the adjustment of the lying surface). Failure to do so can cause permanent damage to the construction of the MLW. RISK OF TIPPING! RISK OF DISINTEGRATION! RISK OF INJURY! ❖... -
Page 30: Backrest
9.9 Backrest ❖ The backrest of the MLW can be adjusted electrically (s. chapter 10.3 DJUSTMENT OF THE BACKREST ❖ The inclination of the backrest can also be adjusted using the appropriate function button of the footswitch (s. chapter 11. F OOT CONTROL PANEL 10. - Page 31 1 / 2 Push buttons for the adjustment of the WORK HEIGHT 3 / 4 Push buttons for the adjustment of the BACKREST Push buttons for the adjustment of the INCLINATION OF THE 5 / 6 SEAT SECTION KNEE BEND 7 / 8 Push buttons for the adjustment of the LEG SECTION...
-
Page 32: Adjustment Of The Work Height
At this height, your ENTRY HEIGHT customer has easy access to the MLW from the side. ➢ MLW Classic: approx. 57 cm / seat in horizontal position ➢ MLW Soft: approx. 62 cm / seat in horizontal position 10.3 Adjustment of the backrest... -
Page 33: Adjustment Of The Inclination Of The Seat Section
❖ The inclination of the backrest can also be adjusted easily using the MCP. ❖ For the adjustment of the backrest press the corresponding pair of push buttons (3 / 4) (s. fig. in chapter 10.1 M ANUAL CONTROL PANEL ❖... -
Page 34: Memory Functions Of The Mcp
10.6 Memory functions of the MCP ❖ The manual control panel of the MLW is equipped with four memory positions (M1 - M4 / s. fig. in chapter 10.1 M ANUAL CONTROL PANEL ❖ The memory function saves your desired treatment positions. OW TO SAVE A MEMORY POSITION 1. -
Page 35: Foot Control Panel (Optional Equipment)
11. Foot control panel (optional equipment) ❖ The foot control panel (s. fig. below) can be connected additionally and optionally together with the MCP and allows the control of the basic functions as well as the activation of previously saved memory positions. ❖... -
Page 36: Smart Thermo Heating System (Optional Equipment)
OOT CONTROL PANEL RIGHT ACKREST ACKREST EMORY POSITION ➢ Foot control panel (right); press button 3 and button 4 simultaneously. OOT CONTROL PANEL LEFT AND FOOT CONTROL PANEL RIGHT EMORY POSITION ➢ Foot control panel (left); press button 2 and foot control panel (right);... - Page 37 The heating parameters of the Smart Thermo can be programmed and saved if desired (s. chapter 12.1 O PERATING OF THE MART HERMO HEATING SYSTEM If desired, you can set 5 heating levels using the control panel of the Smart Thermo heating system (s.
-
Page 38: Operating Of The Smart Thermo Heating System
12.1 Operating of the Smart Thermo heating system ❖ You can operate the heating system using the 4 buttons (s. fig. below: CONTROL PANEL OF THE MART HERMO HEATING SYSTEM ❖ The setting of the heating power and the time selection is indicated by a 10-level LED bar-diagram. - Page 39 2 blue LEDs 2 green LEDs 2 yellow LEDs 2 orange LEDs 2 red LEDs UTTON ❖ Press this button to switch on the Smart Thermo. 1. When the Smart Thermo is switched on, it starts heating at the maximum heating / power level for 5 minutes (level 5: the 2 red LEDs (E) are illuminated).
- Page 40 IVE HEATING POWER LEVELS ARE AVAILABLE Level 1 Minimum power = low temperature Level 2 Heating / power level between minimum and medium power Level 3 Medium power = medium temperature Level 4 Heating / power level between medium and maximum power Level 5 Maximum power = high temperature The selected heating / power level will be displayed on the LEDs above the...
- Page 41 IME SELECTION BUTTON ❖ Press this button to set the required heating time of the Smart Thermo. ➢ Ten time settings (in 10-minutes intervals) are available which are displayed on the LEDs (10 LEDs). ➢ You can select a heating time from 10 minutes up to 100 minutes by pressing one or several times.
-
Page 42: Audio-Relax Headrest (Optional Equipment)
8. After the set time has elapsed the Smart Thermo switches off automatically. ➢ If you wish to quit the heating time earlier, press the button to switch off the Smart Thermo. ❖ When programming the Smart Thermo it does not matter whether you wish to set the time at first and the temperature secondly or vice versa. -
Page 43: Vibro Wellness 10 (Optional Equipment)
14. Vibro Wellness 10 (optional equipment) ❖ The V for the MLW is optional available for an IBRO WELLNESS FUNCTION additional charge. V 10 is a pleasantly massaging vibration system IBRO WELLNESS and includes many various adjustment options. WARNING! 1. Do not use the option Smart-Thermo when your customer ➢... - Page 44 (fig. similar / fig. serves as an example only) FF BUTTON NDIVIDUAL BUTTON ULSE MASSAGE BUTTON ULSE BUTTON ELLNESS MASSAGE BUTTON AVE BUTTON NTENSITY BUTTONS SHOULDER AREA BACK AREA NTENSITY BUTTONS FUSELAGE AREA BACK AREA NTENSITY BUTTONS PELVIC AREA BACK AREA NTENSITY BUTTONS LEG AREA NTENSITY BUTTONS...
-
Page 45: Operation
14.2 Operation TARTING OF A MASSAGE ➢ You can start a massage by pressing the FOLLOWING BUTTONS FF BUTTON ❖ When the massage unit is operated for the first time, the setting INDIVIDUAL activated. ❖ All massage motors operate in the manufacturer`s setting (intensity level 2 / medium intensity). - Page 46 ➢ Now you can set each motor to three levels of intensity using the INTENSITY (5) - (9). BUTTONS ➢ The levels are indicated on the LED-display as follows. Level 0 ( Level 1 Level 2 Level 3 LED O LED O ➢...
-
Page 47: Triple Airback (Optional Equipment)
15. Triple Airback (optional equipment) ❖ The Triple-Airback-Technology is an electro-pneumatically 3-zone-lumbar- support-system of the upholstery and optional available for the MLW Classic; for an additional charge. The Triple-Airback-Technology is optional available for the MLW Classic only. -
Page 48: Scope Of Delivery
15.1 Scope of delivery ➢ Control unit incl. 3 rocker switches for the adjustment of the air cushions (s. chapter 15.3 C and fig. in ONTROL PANEL OF THE RIPLE IRBACK YSTEM chapter 9.4 V : MLW C XAMPLE LASSIC 15.2 Characteristics of the Triple Airback System ❖... -
Page 49: Control Panel Of The Triple Airback System
15.3 Control panel of the Triple Airback System . 10 (Fig. similar: Modifications of the control panel are possible) 1 (upper part of the lumbar area) IR CUSHION 2 (lower part of the lumbar area) IR CUSHION 3 (thigh area) IR CUSHION For deflating the air;... -
Page 50: Magnetic Flap Table
16. Magnetic flap table ❖ A magnetic flap table (s. fig. below) for the MLW is optional available for an additional charge. ❖ The magnetic flap table is mounted below the nose slot of the headrest. After use, the magnetic flap table is folded up to save space and secured by means of an invisible magnet. -
Page 51: Initializing Of The Software Of The Mlw
17. Initializing of the software of the MLW If a previously-saved position is no longer properly set, you may have to initialize the software. To correct the differences of position, you have to carry out the following steps: NITIALIZING . 11): MUST BE DRIVEN IN THE FOLLOWING POSITION BELOW . -
Page 52: Cleaning And Maintenance Of The Mlw
. 12 The adjustment (initialisation) must be carried out manually, i.e. each motor has to be run individually. When the final positions are set, please keep pressing the push buttons for additional 2 to 3 seconds. WARNING! The adjustment (initializing) must be carried out manually, i.e. -
Page 53: Cleaning And Care Of The Pu Upholstery
❖ Do not wear any arm and finger decoration such as rings or bracelets while carrying out any cleaning or maintenance operations. Otherwise you can scratch and damage the upholstery and / or the material of the base of the MLW unintentionally. -
Page 54: Cover Of The Upholstery
18.3 Cover of the upholstery ❖ The standard upholstery surface of the MLW is made of PU (polyurethane). ❖ We recommend the use of suitable to keep the lying surface PROTECTIVE COVERS in good condition. ❖ See also chapter 21.4 P ROTECTIVE COVERS ROTECTIVE COVERS AVAILABLE AT HARIENI... -
Page 55: Malfunctions (Possible Causes And Troubleshooting)
19. Malfunctions (possible causes and troubleshooting) ALFUNCTION OSSIBLE CAUSE ROUBLESHOOTING LL MOTORS DO NOT WORK 1. No connection to the mains. 1. Check the connection status. 2. The power supply cable is damaged. 2. Power supply cable must be replaced (please contact customer... -
Page 56: Repair Of The Mlw
1. When contacting the customer service, the information about the serial number is absolutely necessary. 2. Repairs and modifications must be carried out by Gharieni Group GmbH or a person authorized by Gharieni Group GmbH. 3. The electrical installation of the room the MLW is installed in must meet the current legal regulations at the site where the MLW is operated. -
Page 57: Optionally Available Accessories
EL CUSHIONS FOR NOSE SLOTS RTICLE NUMBER For detailed information regarding the right size and suitable version for your Spa Table please contact the Gharieni customer service. We will be glad to advise you! 21.2 Towels for nose slots (disposable cloths) ❖... -
Page 58: Neck Rest -Dentalax
Spa Table incl. armrests. For detailed information regarding the right size and suitable version for the headrest of your Spa Table please contact the Gharieni customer service. We will be glad to advise you! 21.3 Neck rest -Dentalax-... -
Page 59: Protective Covers
(fig. similar: fig. serves as an example only) For detailed information regarding the right size and suitable version of the covers as well as the compatibility with your Spa Table please contact the Gharieni customer service. We will be glad to advise you! -
Page 60: Protective Covers Made Of Pu
(fig. similar: fig. serves as an example only) For detailed information regarding the right size and suitable version of the covers as well as the compatibility with your Spa Table please contact the Gharieni customer service. We will be glad to advise you! 21.4.3 Ayurveda cover... -
Page 61: Protective Foot Cover
(fig. similar: fig. serves as an example only) For detailed information regarding the right size and suitable version of the cover as well as the compatibility with your Spa Table please contact the Gharieni customer service. We will be glad to advise you! 21.4.4 Protective foot cover... -
Page 62: Conditions Of Transport, Storage And Operation
If you would like to order a protective foot cover for your Spa Table at a later point of time, please indicate during the ordering process that the fleece strip (Counter-Velcro) should be supplied. 22. Conditions of transport, storage and operation 22.1 Transport (with castors / without castors) ❖... -
Page 63: Technical Data
23. Technical data 23.1 Technical data / MLW Classic and MLW Soft ENERAL DATA Total Length 203 cm Total Width Small 76 cm Total Width Medium 85 cm Total Width Large 92 cm Width of the base approx. 55 cm Adjustable height MLW Classic approx. -
Page 64: Technical Data / Triple Airback
23.2 Technical data / Triple Airback ENERAL DATA Power of transformer (primary) 230 V AC / 50 Hz / 100 VA max. Power of transformer (secondary) 12 V AC / 100 VA max. Protection 1,6 Ampere AT ❖ Technical modification reserved AINS CONNECTION Power supply 230 V AC / 50 Hz... -
Page 65: Waste Management
9. If suitable containers are not available at your residential area, dispose of these materials at a suitable municipal collection point for waste-recycling. 10. Receive more detailed information from your retailer, municipal facilities or: Gharieni Group GmbH ➢ Phone: +49 (0)2841/88300-0 ➢... - Page 66 Claims must be filed within 8 days after the delivery of the Gharieni MLW. Apart from the cases specified in the supply agreement, the guarantee is void when: The malfunctioning is attributable to the operator.
- Page 67 D-47443 Moers Gutenbergstr. 40 Germany declare that the product (Type or model, name) MLW Classic / MLW Soft 2017 is produced in accordance with the requirement specified in Low Voltage Directive (LVD) 2014/35/EU applied standards: EN 60335-1 Electromagnetic compatibility 2014/30/EU...
- Page 68 RESERVED. ITS REPRODUCTION OR TRANSMISSION TO THIRD PARTIES IS FORBIDDEN WITHOUT THE AUTHORISATION OF THE OWNING COMPANY. THE POWER TO PROTECT ITS RIGHTS IS RESERVED AND OFFENDERS SHALL BE PROSECUTED. Gharieni Group GmbH Am Schürmannshütt 24 D - 47441 Moers...
Need help?
Do you have a question about the MLW Classic and is the answer not in the manual?
Questions and answers