
Related Manuals for Bosch AXXIS WTL 5410


Summary of Contents for Bosch AXXIS WTL 5410
- Page 1 XXIS WTA 3510 Electric Vented Dryer XXIS WTL 5410 Electric Condensation Dryer Use and Care Manual Installation Instructions Internet: http://boschappliances.com...
-
Page 3: Table Of Contents
Quick Reference Index Use and Care Manual IMPORTANT SAFETY INSTRUCTIONS GROUNDING INSTRUCTIONS ABOUT YOUR DRYER ..... GETTING TO KNOW YOUR DRYER ENERGY SAVING TIPS . -
Page 4: Use And Care Manual
Use and Care Manual IMPORTANT SAFETY INSTRUCTIONS WARNING: To reduce the risk of fire, electric shock, serious injury or death to persons when using your dryer, follow basic precautions, including the following. 1. Bosch dryers are provided with an Use and Care Manual and an Installation Instruction manual. -
Page 5: Grounding Instructions
IMPORTANT SAFETY INSTRUCTIONS (continued) 21. Replace worn power cords and/or loose plugs. 22. Do not operate the dryer with any guards and/or panels removed. 23. Do not operate the dryer with missing or broken parts. 24. Do not bypass any safety devices. 25. -
Page 6: Dryer Overview
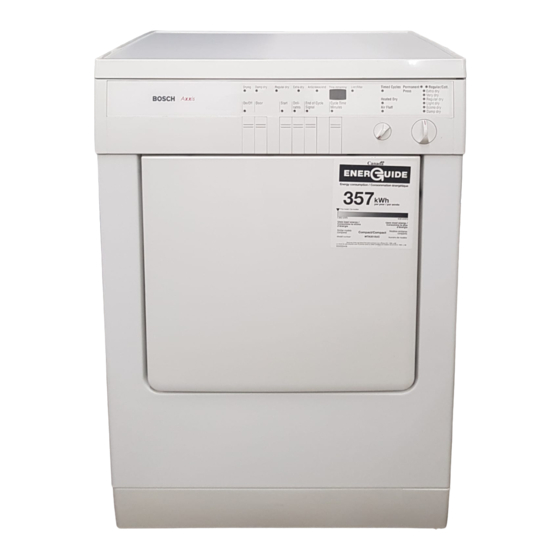
ABOUT YOUR DRYER Congratulations on having selected a Bosch clothes dryer, the choice of those that demand exceptional performance from their clothes dryer. The Bosch WTA 3510 and WTL 5410 dryers offer the following standard features: High Efficiency Precision Drying System with... -
Page 7: Energy Saving Tips
GETTING STARTED Below, in order to get started, you will find a summary of how to operate the clothes dryer. Also, refer to the CYCLE SELECTION CHART, Table 1. Turn On the Dryer Press the ‘‘On/Off’’ button. The indicator light will become illuminated and the indicator above the ‘Start’’... -
Page 8: Cycle Selection Chart (Recommendations)
CYCLE SELECTION CHART (Recommendations) ELECTRONIC AUTO DRY CYCLES Cotton or linen items (whites and coloreds), full load * Note: For heat-sensitive items press the ‘‘Delicates’’ button. Bed and table linen, towels Bed and table linen, towels, T-shirts, work clothes T-shirts, trousers, work clothes, underwear Bath towels, tea towels, hand towels, bed linen, underwear, cotton socks Bath towels, tea towels, hand towels, bed... - Page 9 3. Load the dryer For best results it is recommended that the drying load be sorted by fabric type and desired dryness level. Also, close all zippers, hooks and eyelets and tie loose belts and apron strings, etc. before placing in the dryer.
- Page 10 7. Select ADDITIONAL FUNCTIONS, if desired The additional functions available are accessible by depressing the buttons: ‘‘Delicates’’ The ‘‘Delicates’’ button, see Figure 5, will reduce the drying temperature and lengthen the drying time when depressed. It is recommended that the ‘‘Delicates’’...
-
Page 11: Care And Cleaning
CARE and CLEANING The housing and control panel should only be cleaned with a soft cloth rinsed in soapy water, or with a solvent free, non-scouring cleaning agent. Other areas requiring periodic cleaning or maintenance are listed below: Lint Filter The lint filter should be cleaned after each use or If the ‘‘Lint Filter’’... -
Page 12: Moisture Sensor
Moisture Sensor Occasionally the moisture sensors will need cleaning, due to a build-up of a fine layer of lime scale on the inside of the drum. This build-up of lime scale can be easily removed by wiping the sensors, the metal inserts in the paddles, and the inside of the drum with a soft cloth soaked in vinegar (use white vinegar). -
Page 13: Troubleshooting
SELF-HELP Dryers may exhibit problems that are unrelated to a malfunction of the dryer itself. The following table may serve to answer your question about a problem you are having without having to call a serviceman. PROBLEM ‘‘On/Off’’ Indicator light does not come on Dryer does not start Cycle is interrupted and ‘‘Lint... -
Page 14: Statement Of Warranties Bosch Clothes Dryers
Lifetime Limited Warranty against Stainless Steel Rust Through From Date of Installation* * Date of installation shall refer to the earlier of the date the clothes dryer is installed or ten business days after the delivery date. Exclusions This warranty does not cover service calls or repairs to correct the installation of the clothes dryer, to provide instructions on the use of your clothes dryer, to replace house fuses or correct plumbing or the electric wiring in your home or to repair any clothes dryer that’s use was in a manner other than what is normal and customary for home use. -
Page 15: Installation Instructions
Installation Instruction Introduction Read these installation instructions completely and carefully. They will save you time and effort and help to ensure optimum dryer performance. Be sure to observe all listed warnings and cautions. These installation instructions are intended for use by qualified installers. -
Page 16: Additional Grounding Procedure
Additional Grounding Procedure Some local codes may require a separate ground. In such cases, the required accessory ground wire, clamp and screw must be purchased separately. Never ground the dryer to plastic plumbing lines, gas lines or water pipes. Electrical Receptacle The receptacle for the dryer cord must be located so that the power supply cord will be accessible when the dryer is in the installed position. -
Page 17: Technical Data
Check local codes before choosing a location. Some codes do not permit installation of a clothes dryer in a garage, closet, mobile home or sleeping area. Your local building inspector should be able to advise you of the codes in your area. -
Page 18: Built-In Installation
(600 mm) minimum ’’ (590 mm) (850 mm) minimum Figure 13. Built in Installation The Bosch dryer can be built-in: that is, you can install the Bosch dryer under-counter in a kitchen cabinet opening. The cabinet opening should be square and have the dimensions as shown in Figure 13. -
Page 19: Installation
INSTALLATION Step 1 Unpack the Dryer Carefully remove the packing material from the outside of the dryer. Step 2 Inspect the Dryer Thoroughly inspect the dryer, prior to installation, for possible freight or cosmetic damage. Step 3 Position Dryer near Installation Area Move the dryer so that it is within four feet of the desired position. -
Page 20: Checking/Installing Exhaust Ducting
The connecting piece supplied with your WTA 3510 dryer must then be inserted in the vent opening that will be used. See Figure 16. Figure 16. Checking/Installing Exhaust Ducting The ducting system of the dryer, for optimum performance, should be as short as possible with a minimum number of elbows. -
Page 21: Step 6 Electrical
Step 6 Electrical The Bosch dryer comes with 4-wire power supply cord pre-installed. This cord fits a 4-wire receptacle as shown in the upper section of Figure 11. If your receptacle is a 3-wire receptacle, as shown in the lower section of Figure 1, a 3-wire ‘‘Dryer Cord’’ must be purchased locally. -
Page 22: Additional Grounding Procedure
Figure 20. 11. Check the nut on the U.L. strain relief clamp to make sure that it is tight and the strain relief clamp cannot turn. 12. Replace the cover on the junction/splitter box and fasten in place. The dryer is now ready to be plugged into the 3-wire receptacle, of the proper rating. -
Page 23: Step 8 Connect Duct System To Dryer
The dryer should be level with all four feet firmly on the ground. The dryer must not wobble. If the dryer is not level or if it does wobble, the legs must be adjusted. Refer to Figure 22. Adjust the leveling legs until the dryer does not rock and is level, both front-to-back and side-to-side. - Page 24 1101 en 5550 006 630...
Need help?
Do you have a question about the AXXIS WTL 5410 and is the answer not in the manual?
Questions and answers