Advertisement
Quick Links
M
O
D
E
L
#
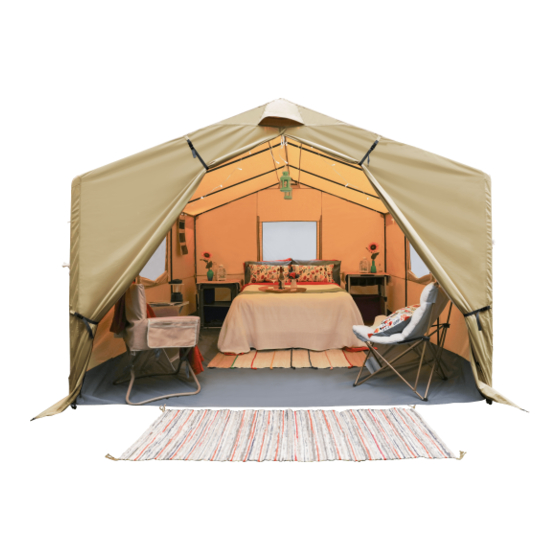
WF-121090 WALL TENT WITH STOVE JACK
12ft x 10ft x 90in/3.65m x 3.04m x 2.28m
FABRIC BODY:
Tent Body
1
9
Steel, chain-corded Roof Pole – black w/red taped
8
Steel, chain-corded Roof Gable Pole – black w/white taped
Steel, chain-corded Leg Pole – black w/yellow taped
8
Carry Bag w/ wheels
1
2
3 way hubs – for ends in middle roof pole
2
4 way hubs – for center in middle roof pole
3 way hubs – for front right / rear left shoulder corners
2
2
3 way hubs – for front left / rear right shoulder corners
4
4 way hubs – for center in side roof poles
Pole Bag
1
1
Stake Bag
Guy Ropes: φ6mm, 3.0m
8
STAKES:
φ7mm steel stakes, length 25cm
24
Review your parts list above to make sure all parts listed above have included in your package.
Call our toll free number:1-877-579-1550 Monday-Friday 8:30 am - 5:30 pm EST
ASSEMBLY INSTRUCTIONS
STEP 2: Set Up the Tent
Select a smooth level site and spread out your tent.
Extend all of your poles and sort into groups by style i.e. roof
poles, roof gable poles, leg poles. This will simplify the assembly
process. ( see fig. 1)
Select a smooth level site and spread out your tent.
Chain-corded Roof Pole – black
chain-corded Roof Gable Pole – black
chain-corded Leg Pole – black
Lay out the Center Roof Pole and Side Roof Poles as shown below
C
(see fig.2).
Take 3 Roof Poles (RPOL-115BK) and connect them to the 4-way
a)
hubs (4WAY-CR) by matching the red hub to the red pole ends.
Then connect the other side of the poles into the 3-way hubs
(3WAY-ER), again matching the red hub to red pole end. All
push pins should click into place.
Similar to step(a), match the remaining red poles to the hubs
b)
(4 WAY-CRS). Then slide into the hubs (3 WAY C-1 / 3 WAY
C-2) by matching the colors at the end of the pole.
RPOL-115BK
RPOL-115BK
3 WAY C-2
4 WAY-CRS
RPOL-115BK
RPOL-115BK
3 WAY-ER
4 WAY-CR
RPOL-115BK
RPOL-115BK
3 WAY C-1
4 WAY-CRS
N/A
RPOL-115BK
RGPL-147BK
LPOL-159BK
N/A
3WAY-ER
4WAY-CR
3 WAY C-1
3 WAY C-2
4 WAY-CRS
N/A
N/A
GROPE-3M-6
ST25CM-7MM
RPOL-115BK
RGPL-147BK
LPOL-159BK
RPOL-115BK
4 WAY-CRS
3 WAY C-1
RPOL-115BK
4 WAY-CR
3 WAY-ER
RPOL-115BK
4 WAY-CRS
3 WAY C-2
Slide Roof Gable Pole (RGPL-147BK) into the corresponding hubs
D
by matching the white hub to the white pole end and lock
into place. Repeat with all other Roof Gable Poles.
E
Slide the leg poles (LPOL-159BK) into the roof frame by matching
the yellow pole ends into the corresponding yellow hubs.
Tip: Please try to keep the push pins in the middle hole and
use the upper and lower options to adjust the frame if
necessary.
3 WAY-ER
RGPL-147BK
4 WAY-CRS
3 WAY C-2
4 WAY-CRS
RPOL-115BK
Put the tent body onto the frame. Position the pin-rings on
F
base of tent into the pole end. Secure the tent by fastening the
velcro to the frame.
STEP 3: Stake the tent
Stake the tent by driving stake through the rings on base of tent.
A
B
To secure guy lines, find the guy line plastic slider and look for
the portion of the line opposite the knot. Pull this portion, forming
a loop (works like a slip knot). Extend guy line to ground and stake.
Stake the mud flap through the tri-angle rings.
C
Tip: Stakes provided are for solid ground. Camping in sand?
We suggest corkscrew style. Check favorite retailer for
availability.
A
B
STEP 4: Add Accessories
Attach the floor by inserting the pins into the leg poles. Fasten
A
the buckle on each corner to straighten the walls. Use the Velcro
on the wall to secure the floor.
Hook organizers on the side roof pole.
B
C
Tie the guyrope loop to the central roof pole to hang camping
light.
Attach the LED light string with the plastic hooks to the O-rings
D
sewn inside the tent, and put the Power Box into the pockets.
A
B
DISASSEMBLY INSTRUCTIONS
STEP 2: Take Down the Tent
Take down the organizer and remove the floor
A
Remove the leg poles from the pin-rings, and undo ties securing
B
leg poles. Take down the tent body from the frame.
C
Disengage poles from hubs.
D
Carefully fold poles and store them in their bag.
STEP 3: Fold the Tent
Fold tent into rectangular shape the width of pole bag. Place
organizer, floor on tent body. Lay pole bag at one end of tent and
roll tightly together, slowly squeezing air out as you go.
4 WAY-CR
RPOL-115BK
3 WAY-ER
RGPL-147BK
3 WAY C-2
4 WAY-CRS
3 WAY C-1
3 WAY C-1
RPOL-115BK
LPOL-159BK
C
Advertisement

Related Manuals for Ozark Trail WF-121090


Summary of Contents for Ozark Trail WF-121090
- Page 1 Repeat with all other Roof Gable Poles. WF-121090 WALL TENT WITH STOVE JACK 12ft x 10ft x 90in/3.65m x 3.04m x 2.28m Slide the leg poles (LPOL-159BK) into the roof frame by matching the yellow pole ends into the corresponding yellow hubs.
Need help?
Do you have a question about the WF-121090 and is the answer not in the manual?
Questions and answers