Table of Contents
Advertisement
Advertisement
Table of Contents

Related Manuals for Hyundai Smartboard A S65UCAI


Summary of Contents for Hyundai Smartboard A S65UCAI
- Page 1 SMART BOARD Model : S65UCAI/S75UCAI/S86UCAI User Guide...
-
Page 2: Table Of Contents
Contents IMAGE QUALITY OF THE PRODUCT ..................3 PRECAUTIONS FOR USE ......................3 PRECAUTIONS FOR INSTALLATION ..................4 ACCESSORIES ......................... 5 HOW TO USE .......................... 5 TITLE AND FUNCTION OF EACH PART 1,2,3 .................6,7,8 REMOTE CONTROL ......................... 9 CONNECTING PERIHERAL EQUIPMENT ..................10 CONNECTING THE POWER CORD ....................11 ANDROID HOMEPAGE ......................12 POP-UP MENU ........................13... -
Page 3: Image Quality Of The Product
IMAGE QUALITY OF THE PRODUCT CAUSE Due to the nature of LCD's property, Afterimage can occur. Afterimage appears when identical frames/ images are displayed continuasly. If dispalyed for prolonged periods of time this can become permanent. PREVENTION When you display a freeze frame for a long time, lower the brightness and contrast (Brightness, 70/ Contrast, 80). Also it can be decreased by using Pixelshift function. -
Page 4: Precautions For Installation
- Use an unstable and unshakable stand or install on a flat surface when installing the product. - Make sure that at least 4 people work safely when moving or installing the product. - Do not hanging on or climbing over the stand or product. - Remove the power code when the product is not in use for a long time. -
Page 5: Accessories
ACCESSORIES Unpack the boxes and check the accessories provided below. Option Please open the product packaging to make sure it contains the items above and contact the services center if any items are missing. The content may vary depending on the purchase model and may be attached to the product. -
Page 6: Title And Function Of Each Part 1,2,3
TITLE AND FUNCTION OF EACH PART 1 The front part Indicator, Remote control receiver and Optical sensor receiver Power button Home button (go back to main home) Return button System button VOLUME - VOLUME +... - Page 7 TITLE AND FUNCTION OF EACH PART 2 The side part 1 HDMI2 2.0 Input Port 7 SPDIF Output Port 2 HDMI1 2.0 Input Port 8 HDMI Output Port 3 DP Input Port 4 Android USB2 Port 5 Android USB1 Port 6 Touch-USB Port...
- Page 8 TITLE AND FUNCTION OF EACH PART 3 The bottom part 1 RJ45 Port 7 PC AUDIO Port 2 RS232 Port 8 VGA Port 3 YPbPr Port(for option) 4 AV Input Port(for option) 5 AV Output Port(for option) 6 AUDIO Output Port...
-
Page 9: Remote Control
REMOTE CONTROL Insert Battery [Information] Open the rear cover, check the positive (+) and • If the battery is exhausted, it will not work negative (-) marks, insert the "AAA" battery correctly properly, so replace it with a new battery. and close the cover. -
Page 10: Connecting Periheral Equipment
CONNECTING PERIHERAL EQUIPMENT WARNING • Make sure that the peripheral is switched off, then connect the signal cable and power cord in order. • Connect the termianl cable with care not to confuse the output/input terminals. TIPS • To use touch panel, connect the USB cable to the connected computer. •... -
Page 11: Connecting The Power Cord
CONNECTING THE POWER CORD First, connect to the power cord provided on the AC power terminal at the back of the product. 2. Second, connect the power cord to the power outlet. LED light Mode Green Power On Power Off Signal Standby(Sleep) Startup/Shutdown 1. -
Page 12: Android Homepage
ANDROID HOMEPAGE Operate writing software program. Displays a list of available apps. Operate file explorer. Operate an Internet browser. Touch to display the sidebar menu. Bottom bar menu. (Swiped up along the edge of the bottom left corner of the screen) Bottom bar menu Help Switch to mute mode... -
Page 13: Pop-Up Menu 1
Pop-up menu 1 System setting Returns to the Homepage Returns to the previous page Operate the overlay writing software Signal source/menu setting Swicthing to the Pop-up menu 2 Reduce the Pop-up menu Pop-up menu 2 Operate the screen lock Specifing a range to take a screenshot Operate the qiuck clean memory View the current running apps Adjust the screen brightness... -
Page 14: Sidebar Menu
Sidebar menu System setting Signal source/menu setting Small tools View the current running apps Returns to the Homepage Exit the sidebar menu Operate the overlay annotation writing software... -
Page 15: Change Source
Signal source setting The signal source can be switched using the remote control or touch function. 1.Press the "Source" Key on the remote control, click the signal source menu, select the source with the orientation key and press OK button 2.Sidebar menu ->... -
Page 16: Quick Menu
Quick menu (Small tools) Specifing a range to take a screenshot Shaded and higlighted, excluding certain areas Operate Calculator Operate countdown function Lock the screen to prevent others using Improve speed by organizing unnecessary tasks... -
Page 17: Writing Program(Blackboard)
Writing Software(Blackboard) Though accurate touch writing software enables efficient presetation, meetings and more. How to use 1. Touch the Blackboard on the Homepage or select a remote control to run it. 2. When running normally, the screen above is displayed. UI Setting Background Setting Brush Setting... - Page 18 Background Setting ▣You can change the predefined background screen and add a background through the lower right icon. Brush Setting ▣The thickness difference in the front and back of the touch pen included in the product allows you to specify different settings for your writing edition. When enabling the accurate eraser function, the thick brush part can be used like an eraser.
- Page 19 Memo/ Spot light/ Import Picture/ Split Writing Can use Memo by placing it on the screen. Shaded and higlighted, excluding certain areas. Import Picture 2 or 3 screen division split writing Lasso Move ▣ When activating the function, the icon is displayed darkly and you can select a certain area to copy, move, or delete.
- Page 20 File Save And Share Exit the Blackboard. Saves the current work. Bring the saved memo from the export of memo. Converts the current work states to an image and shares it with an email. Converts the current work states to an image and shares it with QR cord.
- Page 21 Share through Email(SolMail) ▣ When you choose email sharing feature, SolMail app launched automatically You can launch the SolMail app in the Menu folder on the Home menu separately. ▣ After launched the app, the menu is shown above and use the email service you choose. (Currently, the Google Gmail is not available) ※If you fail your email account setup, please switch the server setting between POP3/IMAP and check the status in your current email service.
-
Page 22: How To Use Mirroring Application
Mirroring (Screen Sharing) For iOS 1.Launch the iMirror app in the Menu folder on the Home Menu 2.The 'Screen Name' is on the display, then set your iOS devices network connection to the same with your IFPD 3. In the Control Center menu on iOS, select 'Screen Mirroring'. The Screen Name will be shown in the list then select it. - Page 23 Other devices (Android, PC) 1.Launch the EShareServer in the Menu folder on the Home menu. 2.Once the app is on the screen, check the 'Screen Name' on top of the screen. Then set your devices network connection as the same with your IFPD. 3.To connect IFPD, visit the eshare.app website or scan QR code.
- Page 24 4. Launch the Eshare client and select the same 'Screen Name' on the IFPD. Mirroring will be start.
-
Page 25: System Setting
System Setting Network Setting WLAN ▣ To use WLAN feature, it is required USB type wireless network dongle(option) Ethernet Setting ▣ To use Ethernet connection, connect RJ45 cable to the LAN port of IFPD ▣ Select "DHCP" in IP settings, and then the machine will automatically obtain an IP address and connect to network. - Page 26 Network Setting Hot Spot ▣ To activate Hot Spot, turn on hot spot switch. But the WiFi connection will be disconnected. ▣ Depending on the selecting bandwidth between 2.4G and 5G, the connection may not be recognized properly. So please make sure the bandwidth availability to use Hot Spot.
- Page 27 Date and Language Setting Date Setting ▣ During the setting, the error may occur if the network connection is not available in Date and Time Auto Configuration mode. Language Setting ▣ If you install an additional keyboard app for the product, it may cause a problem.
- Page 28 Lock Control Setting System configuration ▣ The default Screen Lock password is '888888'. Lock Control ▣ Note that you cannot control the product if you choose the touch lock option without remote controller.
-
Page 29: Diagnosis
Troubleshooting Guide Requriements before contacting the service center. Issues Solutions Lines or dotted line appears It may be caused by electric interference. Please do not use the product near the cars, on the screen neon lights, hairdryer to avoid electric signal interference. Please check the power is on. -
Page 30: Specification
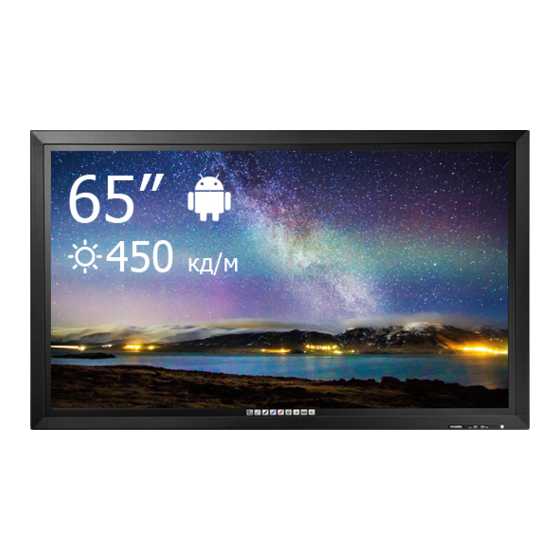
SPECIFICATION S65UCAI S75UCAI S86UCAI Size 65“ 75“ 86“ Resolution 3840 x 2160 @60Hz Aspect ratio 16:9 Backlight DLED / IPS Ultra HD Brightness (typ.) 450cd/㎡ 450cd/㎡ 400cd/㎡ Touch Resolution 32767 x 32767 <10ms Touch response Touch Type Advanced Infra-red Multi Touch Windows 20 points/ Android 10 points Interface USB 2.0 compatible(full speed), Plug &...
Need help?
Do you have a question about the Smartboard A S65UCAI and is the answer not in the manual?
Questions and answers