Welch Allyn RetinaVue 100 Directions For Use Manual
Hide thumbs
Also See for RetinaVue 100:
- Directions for use manual (64 pages) ,
- Directions for use manual (58 pages)
Table of Contents
Advertisement
Quick Links
Advertisement
Table of Contents

Related Manuals for Welch Allyn RetinaVue 100


Summary of Contents for Welch Allyn RetinaVue 100
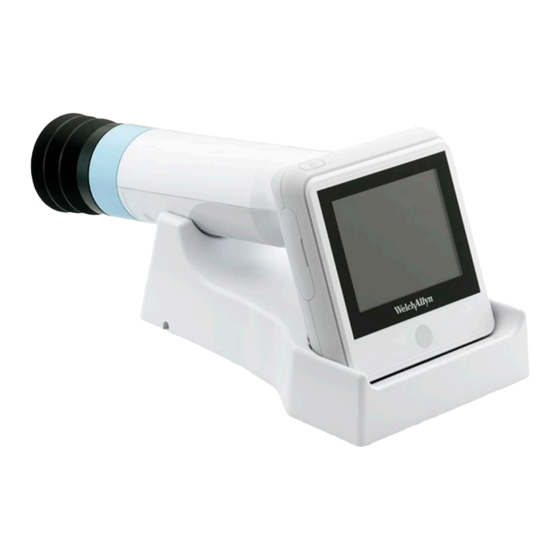
- Page 1 Welch Allyn RetinaVue™ 100 Imager Directions for use Software version 6.XX...
- Page 2 © 2018 Welch Allyn. All rights are reserved. To support the intended use of the product described in this publication, the purchaser of the product is permitted to copy this publication, for internal distribution only, from the media provided by Welch Allyn. No other use, reproduction, or distribution of this publication, or any part of it, is permitted without written permission from Welch Allyn.
-
Page 3: Table Of Contents
First time selection of USB connectivity workflow ........... 19 First time selection of Wi-Fi connectivity workflow .......... 21 Select or change a clinic on the RetinaVue 100 Imager camera (wireless only) ........................28 Select or change a Multi-State clinic on the RetinaVue 100 Imager camera (wireless only) .................... - Page 4 Welch Allyn RetinaVue™ 100 Imager Appendix ....................83 RetinaVue 100 Imager Home screen ..............83 Update the RetinaVue 100 Imager software to version 6.XX and above (USB and wireless) ......................97 Viewing or changing the RetinaVue 100 Imager settings ........ 100 RetinaVue 100 Imager Accessories ..............
-
Page 5: Symbols
Meets essential requirements of the of the DFU is available on this website. A European Medical Device Directive 93/ printed copy of the DFU can be ordered 42/EC. from Welch Allyn for delivery within 7 calendar days. Power symbols Power button Direct current (DC) - Page 6 2 Symbols Welch Allyn RetinaVue™ 100 Imager Connectivity symbols Wireless Expected connection to the the RetinaVue Network Server is not occuring. Wireless radio symbols Non-ionizing electromagnetic radiation Wireless signal strength • Best (4 bars) • Good (3 bars) • Fair (2 bars) •...
- Page 7 Directions for use Symbols 3 Recyclable Miscellaneous symbols Product Identifier Reorder Number Global Trade Item Number For indoor use only Type BF applied part Prescription only or "For Use by or on the order of a licensed medical professional" Clock; time switch; timer Serial Number Authorized Representative in the IPXO...
- Page 8 4 Symbols Welch Allyn RetinaVue™ 100 Imager...
-
Page 9: Introduction
Introduction Intended use The Welch Allyn RetinaVue 100 Imager is a digital hand-held eye-fundus camera used to record digital photographs of the fundus (including retina, macula and optic disc) of the human eye and surrounding area. Prescription only or "For Use by or on the order of a licensed medical professional". - Page 10 CAUTION Within the patient environment, only connect the equipment (the RetinaVue 100 Imager) to computers or laptops that have passed the safety standard for information technology equipment IEC 60601-1, EN 60601-1, ANSI/AAMI ES 60601-1 to ensure the safety of the USB electrical connection.
- Page 11 Note The RetinaVue 100 Imager can be used on patients with eye implants and intraocular lenses. While the RetinaVue 100 Imager can be used on patients with cataracts and other eye opacities, the use of the RetinaVue 100 Imager may result in a lower quality image due to the increased reflection of the flash off the patient's intraocular lens.
-
Page 12: Controls And Connectors
Controls and connectors No. Feature Description Docking station Charges the RetinaVue 100 Imager Pro and enables data transfer to a computer. Connect to an electrical outlet or to the “Always On” USB port of a computer. Note USB ports supply power only when the computer is on. - Page 13 Directions for use Introduction 9 No. Feature Description Cancel ○ Power indicator • When the LED light is green, it indicates that the device is docked and is fully powered. • When the LED light is amber, it indicates that the device is docked and is in the process of charging.
- Page 14 10 Introduction Welch Allyn RetinaVue™ 100 Imager...
-
Page 15: Using The Retinavue 100 Imager
Using the RetinaVue 100 Imager View images saved to the RetinaVue 100 Imager on the LCD touchscreen. The images saved on the SD card are encrypted. To view the images on the PC, install the RetinaVue Network software. For information on the RetinaVue Network Software visit www.RetinaVue.com. - Page 16 Install the battery/replace the battery Set the RetinaVue 100 Imager on a flat, clean surface with the LED display facing down. WARNING Personal injury risk. Improper handling of the battery can lead to heat generation, smoke, explosion, or fire.
- Page 17 Directions for use Using the RetinaVue 100 Imager 13 4. For first-time setup of the RetinaVue 100 Imager, insert the battery into the battery compartment. For battery replacement, remove the existing battery and then insert the new replacement battery into the battery compartment.
- Page 18 1. Remove the lens cap from the RetinaVue 100 Imager. 2. Slide the eye cup over the bezel on the RetinaVue 100 Imager. 3. Use the eye cup to cover the patient's examined eye and allow them to focus on the...
- Page 19 Using the RetinaVue 100 Imager 15 Hold the RetinaVue 100 Imager for a patient exam The RetinaVue 100 Imager must be held level and in line with your patient’s eye. There are two recommended techniques to properly hold the RetinaVue 100 Imager for a...
- Page 20 100 Imager. Guide (Patient End) Hand Hold the patient end of the RetinaVue 100 Imager with just the thumb and forefinger. Use the small and ring finger to steady the RetinaVue 100 Imager by anchoring them gently on the patient’s forehead.
-
Page 21: Docking Station
(Optional) Plug the USB cable into the “Always On” USB port on a computer. 4. Place the RetinaVue 100 Imager on the docking station charger with the contact pins of the RetinaVue 100 Imager touching the contact pins of the docking station... -
Page 22: Startup
18 Using the RetinaVue 100 Imager Welch Allyn RetinaVue™ 100 Imager 5. Before the first use, allow the RetinaVue 100 Imager to charge for 5 hours on the docking station charger. Note The power indicator light turns amber to indicate that the RetinaVue 100 Imager is in the processing of charging. -
Page 23: First Time Selection Of Usb Connectivity Workflow
Power up the RetinaVue 100 Imager The RetinaVue 100 Imager runs a brief diagnostic self-test each time it powers up. CAUTION Always use the RetinaVue 100 Imager with an adequately charged and properly functioning battery. - Page 24 20 Using the RetinaVue 100 Imager Welch Allyn RetinaVue™ 100 Imager After the RetinaVue 100 Imager displays the Welch Allyn logo, the first-time camera setup wizard screen appears. The USB or Wi-Fi camera setup only needs to be completed Note once unless a change to the connectivity workflow is desired.
-
Page 25: First Time Selection Of Wi-Fi Connectivity Workflow
Directions for use Using the RetinaVue 100 Imager 21 First time selection of Wi-Fi connectivity workflow The RetinaVue 100 Imager runs a brief diagnostic self-test each time it powers up. 1. Press to power up the RetinaVue 100 Imager. After the RetinaVue 100 Imager displays the Welch Allyn logo, the first-time camera setup wizard screen appears. - Page 26 7. To continue setup, launch an internet browser from a computer and enter the following address: https://www.retinavue.net/RN_CustomerPortal/. 8. On your RetinaVue 100 Imager camera, touch Next. 9. On the RetinaVue Network Customer Portal, enter your RetinaVue Network Username and Password then click Log In.
- Page 27 10. On the RetinaVue Network Customer Portal, select Manage Devices (wireless only) and click Next. 11. Click Add Device. 12. On your RetinaVue 100 Imager camera, touch Next to generate a Device Registration Code. 13. On the RetinaVue Network Customer Portal, enter the Device Registration Code...
- Page 28 14. On the RetinaVue Network Customer Portal , enter a Device Name (optional) and select a clinic, or clinics, where the RetinaVue 100 Imager camera will to be used. Select each clinic by clicking the check box next to the clinic name and then click...
- Page 29 100 Imager to prevent unintended access to patient information by unauthorized individuals. 15. On your RetinaVue 100 Imager camera, touch Next at the Device Registration Code screen. 16. On your RetinaVue 100 Imager camera, touch Next on the screen: Camera...
- Page 30 26 Using the RetinaVue 100 Imager Welch Allyn RetinaVue™ 100 Imager 17. (Optional) If a Device Access Code was selected at the RetinaVue Network Customer Portal, touch OK at the dialogue: A new Device Access Code has been downloaded. The camera will require this code on next encounter.
- Page 31 Directions for use Using the RetinaVue 100 Imager 27 20. (Optional) If a Device Access Code was set at the RetinaVue Network Customer Portal, enter the Device Access Code on the RetinaVue 100 Imager and touch OK.
-
Page 32: Select Or Change A Clinic On The Retinavue 100 Imager Camera (Wireless Only)
28 Using the RetinaVue 100 Imager Welch Allyn RetinaVue™ 100 Imager Select or change a clinic on the RetinaVue 100 Imager camera (wireless only) 1. Touch Settings on the RetinaVue 100 Imager Home screen. 2. Touch Clinic / States. 3. Use the drop-down menu to select a clinic. -
Page 33: Select Or Change A Multi-State Clinic On The Retinavue 100 Imager Camera (Wireless Only)
Directions for use Using the RetinaVue 100 Imager 29 Select or change a Multi-State clinic on the RetinaVue 100 Imager camera (wireless only) 1. Touch Settings on the RetinaVue 100 Imager Home screen. 2. Touch Clinic / States. 3. If multiple clinics are set up, use the drop-down menu to select the clinic you would like to set up for Multi-State use. - Page 34 30 Using the RetinaVue 100 Imager Welch Allyn RetinaVue™ 100 Imager For each exam performed in multi-state use, select the state Note where the exam was performed. Touch OK to confirm.
-
Page 35: Schedule A Patient From The Retinavue Network Customer Portal (Wireless Only)
Directions for use Using the RetinaVue 100 Imager 31 Schedule a patient from the RetinaVue Network Customer Portal (wireless only) 1. Select Schedule a Patient (wireless only) from the RetinaVue Network Customer Portal Welcome screen and then click Next. 2. Use the drop-down menu to select a clinic. - Page 36 (within the RetinaVue Network) meeting any of the search parameters appear on the Patients Search screen. 4. Ensure that the RetinaVue 100 Imager camera is powered on and connected to a secure Wi-Fi network. Touch Patients. The Patients screen appears.
- Page 37 Directions for use Using the RetinaVue 100 Imager 33 6. Touch OK to start a new exam. The Pre-acquisition screen appears.
- Page 38 34 Using the RetinaVue 100 Imager Welch Allyn RetinaVue™ 100 Imager 7. Refer to the section Perform an eye exam using the Auto exam mode for instructions on performing exams and acquiring images. View Scheduled Patients on the RetinaVue Network Customer Portal (wireless only) 1.
- Page 39 Directions for use Using the RetinaVue 100 Imager 35 Note Scheduled patients appear as Scheduled in the Status column. If the patient's exam has been completed the patient record appears as Submitted until the patient's report is returned. Schedule a Demo patient from the RetinaVue Network Customer Portal without submitting an exam for over-read (wireless only) 1.
- Page 40 36 Using the RetinaVue 100 Imager Welch Allyn RetinaVue™ 100 Imager 4. The View Scheduled Patients screen appears. 5. Ensure that the RetinaVue Imager camera is powered on and connected to a secure Wi-Fi network. Touch Patients. The Patients screen appears.
-
Page 41: Create A New Patient On The Retinavue 100 Imager Camera (Wireless And Usb)
9. Refer to the section Perform an eye exam using the Auto exam mode for instructions on performing exams and acquiring images. Create a new patient on the RetinaVue 100 Imager camera (wireless and USB) 1. From the Home screen, touch Patients. The Patients screen appears. (Wireless... - Page 42 38 Using the RetinaVue 100 Imager Welch Allyn RetinaVue™ 100 Imager (Optional for wireless) Touch to search for a patient. (Optional for wireless) Touch to refresh the patient list from the RetinaVue Network Customer Portal Scheduled Patients list. 2. Touch (New patient).
- Page 43 Directions for use Using the RetinaVue 100 Imager 39 CAUTION When manually entering patient information, do not use the same patient identifier for multiple patients. This may result in inaccurate data association. 3. Touch within the Patient's Last name, First name, or Middle initial entry box to launch the on-screen keyboard.
-
Page 44: Select A Patient From The Patient List (Wireless And Usb)
40 Using the RetinaVue 100 Imager Welch Allyn RetinaVue™ 100 Imager 10. Refer to the section Perform an eye exam using the Auto exam mode for instructions on performing exams and acquiring images. Select a patient from the patient list (wireless and USB) 1. - Page 45 Directions for use Using the RetinaVue 100 Imager 41 3. Confirm the patient demographics and touch More (wireless only) to view the second Patient summary screen with additional Referring Physician and Diabetes type required fields. 4. Touch OK to start a new exam. The Pre-acquisition screen appears.
-
Page 46: Review Patient Tests (Usb Workflow)
42 Using the RetinaVue 100 Imager Welch Allyn RetinaVue™ 100 Imager 5. Refer to the section Perform an eye exam using the Auto exam mode for instructions on performing exams and acquiring images. Review patient tests (USB workflow) 1. From the Home screen, touch Review. The patient's Review screen appears. - Page 47 Directions for use Using the RetinaVue 100 Imager 43 4. After the review is complete, touch (Back) to return to the Review screen and then touch (Home) to return to the Home screen.
- Page 48 44 Using the RetinaVue 100 Imager Welch Allyn RetinaVue™ 100 Imager About image quality scores Good quality If the image is of good quality, it is very likely to be read by a specialist. (Scores of 40 +) green Acceptable quality If the image is of good enough quality, it is likely to be read by a specialist.
-
Page 49: About The Auto And Manual Exam Modes
Directions for use Using the RetinaVue 100 Imager 45 About the Auto and Manual Exam modes Auto Mode Auto Mode is the default image capture mode. Available automatic features include: • Image capture • Focus • Flash brightness • Sequential image capture order of the right and left eye •... - Page 50 46 Using the RetinaVue 100 Imager Welch Allyn RetinaVue™ 100 Imager Manual mode contains advanced image capture options. Note A manual touch of the capture button is required to obtain an image. Available manual features include: • Focus adjustment (values range from -1 to +1) •...
-
Page 51: Adaptive Software In The Auto Exam Mode For Software 6.10.02 And Higher
Directions for use Using the RetinaVue 100 Imager 47 Adaptive software in the Auto exam mode for software 6.10.02 and higher Auto exam mode Once the view is in-fundus, the adaptive software will enlarge the on-screen diamond at specific first stage time intervals. -
Page 52: Perform An Eye Exam Using The Auto Exam Mode
While the RetinaVue 100 Imager can be used on patients with cataracts Note and other eye opacities, the use of the RetinaVue 100 Imager may result in a lower quality image due to the increased reflection of the flash off the patient's intraocular lens. - Page 53 • Make slight, micro adjustments with your guide hand to fine tune the position of the RetinaVue 100 Imager. Do not use your hand on the LCD side to make minor adjustments. For additional information about techniques to capture the highest quality...
- Page 54 (R1). The Exam acquisition screen appears. 5. Hold the patient end of the RetinaVue 100 Imager two to three inches directly in front of the patient's examined eye. Continue forward to compress the eye cup against the examined eye.
- Page 55 7. Look for a white circular reflection at the top of the eye's image on the LCD touchscreen. This is your initial target. 8. Guide the green circle on the RetinaVue 100 Imager LCD touchscreen towards the initial target by slowly moving the RetinaVue 100 Imager towards the eye.
- Page 56 9. Once the reflection has filled the screen, push slightly forward until a “bubble” appears. 10. Keep the RetinaVue 100 Imager in line. Slightly adjust the RetinaVue 100 Imager away from any shadows that appear. 11. Move the patient end of the RetinaVue 100 Imager toward the bubble.
- Page 57 Directions for use Using the RetinaVue 100 Imager 53 13. An audible tone alerts you that the image has been captured. The acquired image appears on the LCD touchscreen for review in about five seconds. 14. Touch (Accept) to begin the second exam of the patient's left eye (L1) and wait at least 1 minute before repeating the steps until the second image is automatically captured.
-
Page 58: Perform A Manual Image Capture While In Auto Exam Mode
54 Using the RetinaVue 100 Imager Welch Allyn RetinaVue™ 100 Imager Note Touch to review the current image. Images with a red ) denote low quality images. Touch (navigates to the Acquisition screen) or touch (navigates to the Pre-acquisition screen) to dispose of an image and then... - Page 59 Directions for use Using the RetinaVue 100 Imager 55...
-
Page 60: Skip An Image Capture While In Auto Exam Mode
56 Using the RetinaVue 100 Imager Welch Allyn RetinaVue™ 100 Imager Skip an image capture while in Auto exam mode 1. From the Home screen, touch Exam. The Pre-acquisition screen appears. 2. Touch (Next) or touch , or , or (Image Order) to skip to the next image in the sequence. -
Page 61: Perform A Manual Image Capture While In Manual Exam Mode
Directions for use Using the RetinaVue 100 Imager 57 Perform a manual image capture while in Manual exam mode 1. From the Home screen, touch Exam. The Pre-acquisition screen appears. 2. Touch MANUAL to enter Image acquisition mode and begin the exam of the patient's eye. - Page 62 4. Hold the patient end of the RetinaVue 100 Imager two to three inches directly in front of the patient's examined eye. Continue forward to compress the eye cup against the examined eye.
-
Page 63: Troubleshooting
CAUTION A defective device should not be used. A device with parts which may be broken or missing, visibly worn, distorted, or contaminated should be replaced immediately. To correct an error, follow these instructions or contact Welch Allyn Technical Support: www.welchallyn.com/service. Troubleshooting image quality... - Page 64 60 Troubleshooting Welch Allyn RetinaVue™ 100 Imager Problem Solution Dark semi-circle on top Move the patient side of the RetinaVue 100 Imager down and away from dark semi-circle. Dirty lens Clean the lens with an appropriate cleaning cloth. Error messages...
- Page 65 Directions for use Troubleshooting 61 Error message/problem Solution Failed saving files to the SD card. Check the write-protection switch on the SD card and ensure that it is in the forward position. Reinsert or replace the SD card and click Retry. Camera is docked.
- Page 66 62 Troubleshooting Welch Allyn RetinaVue™ 100 Imager Problem Solution Battery is not installed. Camera will not charge. The power Install the battery and check to ensure that the indicator LED light on the camera blinks between green and amber polarity on the battery matches the + and - polarity when placed in the docking station.
- Page 67 Directions for use Troubleshooting 63 Wireless connectivity Problem Solution Cannot connect to the network. Ensure that the signal strength is sufficient. The Connection drops. signal strength appears in the top right corner of the device status bar. Wireless signal strength - Best (4 bars) - Good (3 bars) - Fair (2 bars)
- Page 68 64 Troubleshooting Welch Allyn RetinaVue™ 100 Imager Wireless connectivity (Continued) Problem Solution Level: 56% Noise 0 L.Q. 100 IP Adr: 194.168.0.20 Netmask: 266.266.266 Broadcast: 194.168.0.255 Ensure that your network meets the supported credentials type. Check with your network administer and ensure the network you are...
- Page 69 Directions for use Troubleshooting 65 Wireless connectivity (Continued) Problem Solution RetinaVue Imager camera does not connect to the network. Enure that the correct Username and Password are entered. Touch Settings. Touch Wi-Fi. Select a network name from the list, enter your Username and Password, and check the "Remember this connection"...
- Page 70 66 Troubleshooting Welch Allyn RetinaVue™ 100 Imager Wireless connectivity (Continued) Problem Solution Touch Patients. Touch (refresh). Patients assigned to your clinic appear in the Patient list. Follow all steps for connecting to RetinaVue Network Server. Touch Review. Any exams appearing in this list, have not been sent to the RetinaVue Network Server.
- Page 71 In the event that you have an active Wi-Fi connection and unsent CAUTION Restoring the factory exams on the RetinaVue 100 Imager camera, the camera attempts defaults will result in a loss of any to send exams before allowing the reset to factory defaults.
- Page 72 Confirm. Touch OK. Reset the codes and data Problem Solution Locked out of the RetinaVue 100 Imager. CAUTION Resetting the codes Cannot recall the Device access code or the will result in a loss of any images Advanced settings code.
-
Page 73: Maintenance
Clean on a routine basis according to your facility's protocols and standards Note or local regulations. The RetinaVue 100 Imager has been tested to verify that it is compatible with the approved cleaning agents. Cleaning the RetinaVue 100 Imager lens Wipe the surface of the lens with a cleaning cloth or a lens cleaning tissue such as Thorlabs Inc.. - Page 74 Disinfect according to your facility's protocols and standards or local regulations. Use a pre-moistened wipe or soft cloth slightly moistened with an approved disinfectant to disinfect the RetinaVue 100 Imager, eye cup, and docking station charger. Follow the manufacturers recommendations. Approved cleaning agents...
-
Page 75: Specifications
Specifications Specifications View Angle 45 Degree (Typical) Diopter -20 ~ +20D (Typical) Dimensions L 8.8 inches (224.2 mm) × W 4.2 inches (106.7 mm) × H 4.1 inches (105.2 mm) Weight 565 Grams ±5% Search Fundus Infrared LED Lighting Camera flash light Natural White Light Emitting Diode (LED) Captures Auto capture and Manual capture Camera Resolution 2048 x 1536 pixels... - Page 76 Firmware updates and support may require an annual subscription service after the initial one (1) year warranty period. The expected battery life is at least one (1) year. If the RetinaVue 100 Imager device fails to hold a charge, a new battery can be ordered.
-
Page 77: Device Radio
Device radio The RetinaVue 100 Imager's radio operates on 802.11 networks. WLAN standard IEEE802.11b/g/n, Wi-Fi compliant Frequency Range 2.412 to 2.484 GHz Data Rate 802.11b: 11, 5.5, 2, 1 Mbps DSSS 802.11g: 54, 48, 36, 24, 18, 12, 9, 6 Mbps OFDM 802.11n: HT20 MCS0~7, HT40 MCS0~7... - Page 78 74 Device radio Welch Allyn RetinaVue™ 100 Imager Australia and New Zealand: Australian Communications and Media Authority (ACMA) Radio Compliance Mark (RCM) New Zealand maintains a Mutual Recognition Agreement (MRA) with Australia. To ensure compliance with local regulations, be sure the correct country in which the access point is installed is selected.
-
Page 79: General Compliance And Standards
Electrical Equipment (WEEE). If this product is contaminated, this directive does not apply. For more specific disposal or compliance information, see www.welchallyn.com/weee, or contact Welch Allyn Customer Service at +44 207 365 6780. General radio compliance The wireless features of this device must be used in strict accordance with the manufacturer’s instructions as described in the user documentation that comes with the... - Page 80 This booklet is available from the U.S. Government Printing Office, Washington, D.C. 20402. Stock No. 004-000-0034504. Welch Allyn is not responsible for any radio or television interference caused by unauthorized modification of the devices included with this Welch Allyn product, or the substitution or attachment of connecting cables and equipment other than specified by Welch Allyn.
- Page 81 Directions for use General compliance and standards 77 This Class B digital apparatus complies with Canadian ICES-003, CAN ICES-3(B)/ NMB-3(B). Cet appareil numérique de classe B est conforme à la norme ICES-003 du Canada, CAN ICES-3 (B) / NMB-3 (B). RF Radiation Hazard Warning Using higher gain antennas and types of antennas not certified for use with this product is not allowed.
- Page 82 78 General compliance and standards Welch Allyn RetinaVue™ 100 Imager Hungarian A Medimaging Integrated Solution Inc. (MiiS) ezúton kijelenti, hogy ez az alacsony teljesítményű adó megfelel a 2014/53/EK irányelv alapvető követelményeinek és egyéb vonatkozó rendelkezéseinek Italian In questo modo, Medimaging Integrated Solution Inc. (MiiS) dichiara che questo trasmettitore di bassa potenza è...
- Page 83 Directions for use General compliance and standards 79 Emissions and immunity information Electromagnetic emissions The 901103 is intended for use in the electromagnetic environment specified below. The customer or user of the 901103 should assure that it is used in such an environment. Emissions test Compliance Electromagnetic environment - guidance...
- Page 84 80 General compliance and standards Welch Allyn RetinaVue™ 100 Imager Electromagnetic immunity power supply input recommended that the 901103 be powered 100% interruption in 100% interruption in lines from an uninterruptible power supply or a 250 cycles 250 cycles battery.
- Page 85 Directions for use General compliance and standards 81 Recommended separation distances between portable and mobile RF communications equipment and the 901103 The 901103 is intended for use in an electromagnetic environment in which radiated RF disturbances are controlled. The customer or user of the 901103 can help prevent electromagnetic interference by maintaining a minimum distance between portable and mobile RF communications equipment (transmitters) and the 901103 as recommended below, according to the maximum output power of the communications equipment.
- Page 86 82 General compliance and standards Welch Allyn RetinaVue™ 100 Imager...
-
Page 87: Appendix
Appendix RetinaVue 100 Imager Home screen The RetinaVue 100 Imager Home screen includes the following areas: Item Area Device status Content Device Status Area The Device Status Area, located at the top of the Home screen, displays the Battery condition. Estimated battery capacity is displayed in a charged or discharged status format. - Page 88 Touching one of the five buttons navigates to the next screen associated with that workflow or training. • Patients: Presents a list of patients created on the RetinaVue 100 Imager or transferred from the RetinaVue™ Network (requires additional software). •...
- Page 89 Software version ○ Regulatory Information ○ Network Information • Training: Provides demonstrations and interactive training exercises on the RetinaVue 100 Imager. Short video clips and interactive training help you practice the three key steps necessary to master the RetinaVue 100 Imager.
- Page 90 86 Appendix Welch Allyn RetinaVue™ 100 Imager Navigation controls in the Training mode From the Home screen touch Training. The RetinaVue 100 Imager Interactive Training Video screen appears. Note Navigation controls change with each mode. Touch anywhere within the RetinaVue 100 Imager touchscreen to display the training navigation controls.
- Page 91 Appendix 87 Navigation controls in the Exam mode The Navigation area is located at the bottom of the RetinaVue 100 Imager screen. Navigation controls change with the mode. The navigation controls for Pre-, post-, and acquisition in Exam mode include:...
- Page 92 The navigation controls for the Settings mode include the back, home, and advance to next buttons. The primary navigation area is located at the bottom of the RetinaVue 100 Imager screen. While on the Settings screen, the > (Advance to next screen) button navigates to the next dialogue.
- Page 93 Directions for use Appendix 89 Image Pre-acquisition controls (Auto mode) From the Home screen touch Exam. The Exam Pre-acquisition screen appears. No. Feature No. Feature START enters automatic image acquisition mode. Navigates to the Home screen. (Image Acquisition Settings) navigates to MANUAL switches to advanced image capture the Capture settings screen.
- Page 94 90 Appendix Welch Allyn RetinaVue™ 100 Imager Use the RetinaVue 100 Imager touchscreen inspection control to navigate to the Inspection screen, then zoom in or out with a pinch or pull. Touch (Back) to navigate to the Post-acquisition screen. Or, touch...
- Page 95 Directions for use Appendix 91 Exam summary controls (Post-acquisition and Review modes) Exam summary from the Post-acquisition screen From the Post-acquisition screen, touch (Accept) to navigate to the Exam summary screen. Each image on the Exam summary screen contains a quality score and status. (Wireless workflow images shown) Touch (Good quality green) to view that image.
- Page 96 92 Appendix Welch Allyn RetinaVue™ 100 Imager Touch to create a new patient, or touch on an existing patient's name from within the Patients screen to select that patient. (USB only) Touch SAVE to accept all images and to return to the Home screen.
- Page 97 Directions for use Appendix 93 Exam summary from the Review screen Touch Review. Touch on a patient's name. The Exam summary screen appears for that patient. Touch (Good quality green), (Acceptable quality yellow), or (Unacceptable quality red) to view the image. Touch (Patient) to review patient...
- Page 98 2. A dialogue box appears with three options: • Power Off • Sleep • Cancel 3. Touch one of the options. The RetinaVue 100 Imager will power off, go into Sleep mode, or return to the prior screen, depending on the option you choose.
- Page 99 To conserve power, the RetinaVue 100 Imager enters Sleep mode if approximately 2 minutes have passed since the last screen press. To bring the RetinaVue 100 Imager out of Sleep mode, use any of these methods: 1. Touch the power button.
- Page 100 Lifting or moving the RetinaVue 100 Imager also brings the Note RetinaVue 100 Imager out of Sleep mode. 2. After performing one of the options, the RetinaVue 100 Imager will awaken from Sleep mode, or return to the prior screen.
-
Page 101: Update The Retinavue 100 Imager Software To Version 6.Xx And Above (Usb And Wireless)
Update the RetinaVue 100 Imager software to version 6.XX and above (USB and wireless) Note (USB only) Patient list changes will only be made to the RetinaVue 100 Imager after it is undocked from the docking station charger. (Transferring patient list information requires additional RetinaVue Network software.) - Page 102 RetinaVue 100 Imager automatically reboots. 12. After the RetinaVue 100 Imager boots up to the Home screen, confirm the software update. a. Touch Settings.
- Page 103 Appendix 99 • If the software update on the SD Card is corrupted, the RetinaVue 100 Imager displays a failed update error message indicating that the RetinaVue 100 Imager is unable to load the software from the SD Card. Remove the SD Card, reformat it on a PC.
-
Page 104: Viewing Or Changing The Retinavue 100 Imager Settings
100 Appendix Welch Allyn RetinaVue™ 100 Imager Viewing or changing the RetinaVue 100 Imager settings To view or change the settings Touch Settings. Modify the settings as desired. • Touch WiFi On/Off. ○ Touch (On) or (Off) to turn the wireless radio on or off. - Page 105 1. Follow the steps in the Battery installation and replacement section to install the battery and then press and hold the power button to turn the device on. 2. Touch Settings on the RetinaVue 100 Imager Home screen. 3. Touch Time. Touch...
- Page 106 (Back) to return to the Settings screen. 7. Touch (Home) to return to the RetinaVue 100 Imager Home screen. Set the Device access code at the RetinaVue 100 Imager camera (USB only) Note Setting the Device access code before first use provides additional security features in the RetinaVue 100 Imager to prevent unintended access to patient information by unauthorized individuals.
- Page 107 Imager access code and need to erase the access code. 1. Remove the RetinaVue 100 Imager from the docking station charger. 2. If you are not already logged in, enter the existing access code for the RetinaVue 100 Imager. 3. Touch Settings on the RetinaVue 100 Imager Home screen.
- Page 108 1. Remove the RetinaVue 100 Imager from the docking station charger. 2. If the RetinaVue 100 Imager is set with a Device access code (in addition to the Advanced settings code) and you are not already logged in, enter the existing Device access code.
- Page 109 Imager Home screen without using an Advanced setting code. 9. Touch OK to accept the code and touch OK again at the confirmation screen. 10. Touch (Back) to return to the Settings screen. 11. Touch (Home) to return to the RetinaVue 100 Imager Home screen.
-
Page 110: Retinavue 100 Imager Accessories
#1 Phillips Screwdriver w/ Logo 723481 Laptop for RetinaVue Network 724224 RetinaVue 100 Imager camera case 723484 Lens spray 723671 Lens cloth Applied parts Part number Description 106404 Reusable Eye Cups for Welch Allyn RetinaVue 100 Imager: Qty. 5... - Page 111 Service for RetinaVue 100 Imager; 3 years S1-RV100-1P Welch Allyn Partners in Care Comprehensive Partnership Program Premium Service for RetinaVue 100 Imager; 1 year S1-RV100-2P Welch Allyn Partners in Care Comprehensive Partnership Program Premium Service for RetinaVue 100 Imager; 2 years...
- Page 112 108 Appendix Welch Allyn RetinaVue™ 100 Imager...
-
Page 113: Warranty
Warranty Welch Allyn warrants the product to be free of defects in material and workmanship and to perform in accordance with manufacturer's specifications for the period of one year from the date of purchase from Welch Allyn or its authorized distributors or agents. - Page 116 Material No. 411492...
Need help?
Do you have a question about the RetinaVue 100 and is the answer not in the manual?
Questions and answers