Advertisement
Quick Links
Advertisement

Related Manuals for KWM Gutterman 5 IRONMAN


Summary of Contents for KWM Gutterman 5 IRONMAN
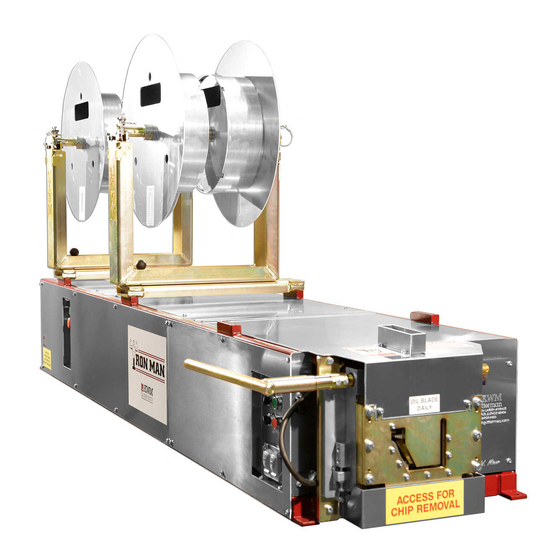
- Page 1 KWM Gutterman Inc. 5”/6” IRONMAN COMBO CONVERSION...
- Page 2 KWM Gutterman Inc. SECTION: 2 6” To 5” Conversion • This section will direct you in converting your combo machine from a 6” to 5” machine.
- Page 3 KWM Gutterman Inc. BEFORE BEGINNING CHANGEOVER • Eliminate electrical power source by unplugging the machine. • Remove Tool Kit which is located behind stored guillotine. • The tool kit consists of a flat head screwdriver, a 5/32, a 3/16, and a 5/16 allen wrench...
- Page 4 KWM Gutterman Inc. STEP #1: REMOVE COVERS • Remove the lids that are fastened with quarter turn screws with the flat head screw driver that is supplied to you in your conversion tool bag.
- Page 5 KWM Gutterman Inc. STEP #2: REMOVE GUILLOTINE • Remove 6” guillotine from the machine by loosening the four bolts that mount the guillotine to the frame as shown in the picture with the ½” wrench supplied in your conversion kit.
- Page 6 KWM Gutterman Inc. STEP #3: MOVE BEAD ASSEMBLY • Loosen the two bolts that are marked in the picture and slide the bead assembly down to the 5” position. • The positions are marked for 5” and 6” for easy placement...
- Page 7 KWM Gutterman Inc. STEP #4: REMOVE BACK BELL ROLLER • Remove back bell roller using the bolt holding the center shaft in place. • Set the back bell roller aside.
- Page 8 KWM Gutterman Inc. STEP #6: REVERSE #3 EXIT DRIVE ROLLER • Remove the backside exit top roller by removing the two RED flush head cap screws with the 5/32 allen wrench supplied in your conversion kit. • Remove roller from the shaft and turn 180°...
- Page 9 KWM Gutterman Inc. STEP #5: MOVE BACK GUIDE BAR • Loosen the five bolts on the back guide bar and move it toward the skate as close as possible. • Retighten the 5 bolts.
- Page 10 KWM Gutterman Inc. STEP #7: RE-INSTALL BACK BELL WHEEL • Re-install the back bell wheel into the new position labeled 5.
- Page 11 KWM Gutterman Inc. STEP #8: INSTALL 5” GUILLOTINE • Remove the 5” guillotine from the side of the machine and install it on the frame with the four bolts used before to remove the 6” guillotine (The guillotine is factory set and should not be adjusted.)
- Page 12 KWM Gutterman Inc. STEP #9: ADJUST SKATE ROLLERS • There are four center skates in the machine, each have retractable rear skate forming rollers that extend between 5” and 6” position. • To change pull the adjusting pin up at each skate roller until the pin disengages from skate shaft.
- Page 13 KWM Gutterman Inc. STEP #10: MOVE ENTRANCE GUIDE SHOES • The combo has two black split collars used as stops on the entrance guide shaft to locate each entrance guide shoe for the 5” and 6” position. • To position the guides from 6”...
- Page 14 KWM Gutterman Inc. STEP #11: MOVE FACE BOX ROLLERS • Move the three face box roller assemblies by pulling the quick release pin located at the top of each face box station. • Drop the face roller down to the 5”...
- Page 15 KWM Gutterman Inc. STEP #12: MOVE LIP BOX ASSEMBLY • Loosen the two bolts at the exit and entrance of the machine as shown in the pictures. • Move the lip box down and in on the box mounts. • Retighten the same four...
- Page 16 KWM Gutterman Inc. STEP #13: REMOVE 6” INSIDE BOX ROLLER BAR ASSEMBLY • Remove the two red screws on the top of the box as marked in the pictures. • Make sure to remove the assembly exactly as shown in the pictures.
- Page 17 KWM Gutterman Inc. STEP #14: MOVE OUTSIDE BOX ROLLERS • There are six quick release pins at the bottom of the lip box. • Remove the pin and move the bottom portion of the outside roller up to the 5” position in each station.
- Page 18 KWM Gutterman Inc. STEP #15:INSTALL 5” INSIDE ROLLER BAR ASSEMBLY • Remove the assembly from above the gear box and install as shown in the pictures. • Retighten the two red screws from before.
- Page 19 KWM Gutterman Inc. STEP #16:STORE THE 5” ROLLER BAR ASSEMBLY • Store the 6” roller bar assembly from where the 5” assembly was located.
- Page 20 KWM Gutterman Inc. STEP #17: RE-INSTALL THE COVERS • Re-install the covers you replaced in step 1 with the quarter turn screws.
- Page 21 KWM Gutterman Inc. STEP #18: MOVE UPRIGHT BASE PLATE • Rotate the upright to access the bolts on the face side. • Loosen the four bolts as shown in the picture (two on both sides.) • Slide the base plate to the 5”...
- Page 22 KWM Gutterman Inc. STEP #19: REPLACE SPOOL WITH 5” COIL • Pull pin from the upright as shown in the picture. • Pull the pin from the spool shaft and change the position to 5” and reinsert the pin. • Remove the spool from the upright and change your coil to your 11-3/4” or 11-7/8” material.
- Page 23 KWM Gutterman Inc. CONGRATULATIONS! • YOU HAVE SUCCESSFULLY CONVERTED YOUR COMBO FROM 6” TO 5”. ** REMEMBER TO VIEW SECTION: 1 FOR CONVERSION OF 5” TO 6” ** • FEEL FREE TO CONTACT KWM GUTTERMAN FOR ANY QUESTIONS YOU MAY HAVE...
Need help?
Do you have a question about the 5 IRONMAN and is the answer not in the manual?
Questions and answers