Table of Contents

Related Manuals for Ultrasport Uni-Jump 244

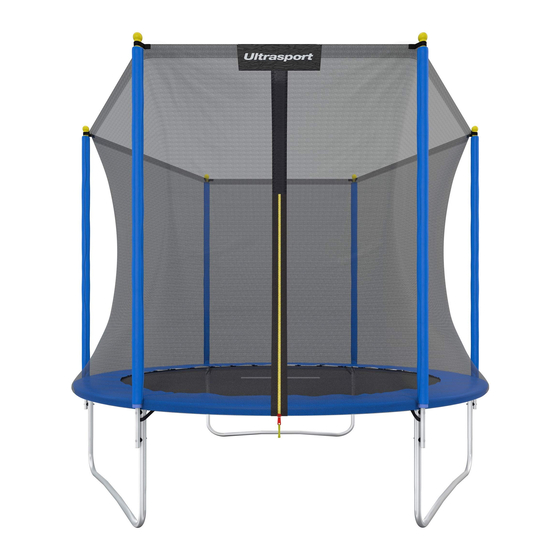
Summary of Contents for Ultrasport Uni-Jump 244
- Page 1 TRAMPOLINE UNI-Jump 244/305 TRAMPOLINE UNI-Jump 244/305 TRAMPOLINE UNI-Jump 244/305 TRAMPOLINE UNI-Jump 244/305 CAMA ELÁSTICA UNI-Jump 244/305 BEDIENUNGSANLEITUNG USER MANUAL/MANUEL D’UTILISATION/MANUALE D’USO/MANUAL DEL USUARIO...
- Page 2 WARNING YOU MUST CAREFULLY READ AND UNDERSTAND THESE OPERATING INSTRUCTIONS BEFORE PUTTING TOGETHER AND USING THIS TRAMPOLINE. KEEP THESE OPERATING INSTRUCTIONS SO THAT YOU CAN REFER BACK TO THEM LATER OR PASS THEM ON IF YOU SELL THIS TRAMPOLINE. THIS TRAMPOLINE MAY ONLY BE USED TOGETHER WITH THE NET THAT COMES WITH ATTENTION ! - Only for domestic use - This toy is designed for use outdoors...
- Page 3 INTRODUCTION Before you use this trampoline, carefully read all information in these operating instructions and make sure you follow it. Just like any other leisure activity, there is a risk of injury. To avoid injuries, ensure that you observe the corresponding safety regulations and tips.
- Page 4 • Do not jump if you are tired. Keep the exercise times short. • Properly secure the trampoline when it is not in use. Secure it against unauthorized usage. If a ladder is being used, the spotter should remove this from the trampoline if they leave the area in order to prevent unauthorized access by children under the age of six.
- Page 5 WIND In the event of strong wind, the trampoline can be blown away. If you are expecting strong wind, the trampoline must be placed in a sheltered position or dismantled. Another option is to secure the round outer part (top frame) of the trampoline in the ground with the help of ropes and stakes.
- Page 6 • Other objects: Do NOT use the trampoline if animals, other people or any objects are under the trampoline. This can otherwise increase the risk of injury. Don’t hold ANY objects and do NOT put anything on the trampoline while someone is jumping on it.
- Page 7 LESSON PLAN plicated jumps. Read and understand all safety information before actually getting on the trampoline and using it. In addition, the spotter and pupil should fully discuss body movements and trampoline safety information and the spotter should perform a demonstration. Lesson 1 B.
- Page 8 BASIC TRAMPOLINE JUMPS BASIC JUMP 1. Start out standing with your feet a shoulder’s width apart, your head held up high and your eyes focused on the mat. 2. Swing your arms to the front and up in a circular shape. 3.
- Page 9 PARTS LIST Please select your trampoline size. Reference Number Description 244cm (8’) 305cm (10’) Ring Element Foot Frame pad Trampoline mat, stitched with V-Rings Galvanized springs Screw REMEMBER TO USE GLOVES DURING ASSEMBLY TO AVOID PINCHING and IT WILL TAKE AT LEAST TWO PEOPLE TO ASSEMBLE THE TRAMPOLINE STEP 1 –...
- Page 10 STEP 2 - Support Assembly Slide all Leg(3) onto the Foot (2) as shown STEP 3-Top Rail Assembly Two people will be necessary at this point to assemble the trampoline. One person lifts the Support Assembly from step 1 to a standing (vertical) position and inserts one of the sockets of the Ring Element (#1) into the Leg (#3) portion of the Support Assembly.
- Page 11 IMPORTANT NOTICE Make sure the holes on the Ring Element (#1) and the Leg (#3) are aligned. · If the holes are not aligned,please rotate the Leg (#3) so that the 2 holes match each other. · These holes needs to be aligned so that you can assemble the safety net. ·...
- Page 12 C. Select your spring quantity. #1-48...
- Page 13 #1-54...
- Page 14 D. If you notice that you have skipped a hole and V Ring connection, recount and remove or attach any springs required to maintain the count of springs. STEP 5-Frame Pad Assembly A. Attaching the frame pads securely to the frame and in the proper position prior to use the trampoline B.
- Page 15 CARE AND MAINTENANCE This trampoline was designed and manufactured with quality materials and craftsmanship. If proper care and maintenance is provided, it will provide all jumpers with years of exercise, fun, and enjoyment as well as reduce the risk of injury. Please follow the guidelines listed below: This trampoline is designed to withhold a certain amount of weight and use.
- Page 16 Assembly Instruction for Safety Enclosure 1. Parts List Reference Number Description 244cm (8’) / 305cm (10’) Upper pole A 6pcs Upper pole B 6pcs Bar Spacers 12pcs Curved Washers 12pcs Screws 12pcs Nuts 12pcs Pole Cover 6pcs 6pcs Safety Net 2.
- Page 17 3. Assembly Instruction STEP 1: FIGURE 1 FIGURE 2 FIGURE 3 STEP 2 : Repeat step 1 until all the poles are set up. FIGURE 4 Mount the upper poles onto Firm the bolt using the the Leg using parts of spacer, wrench washer, screw, and nut.
- Page 18 STEP 3 : Spread safety net (#9) out on the trampoline mat. Locate the panel with the doorway and align the net as to where you would like to get in and out of the trampoline. The edge with the pre-sewn hanging loop on the upper part of the net will be hooked at the top of the pole.
- Page 19 STEP 5 : FIGURE 6 STEP 6 : help). So the net will very tight for trampoline. FIGURE 7 IMPORTANT WARNING!! YOU SHOULD GO BACK NOW AND STRETCH ALL ATTACHMENT HOOKS TIGHT AND DOUBLE CHECK TO SEE WHETHER YOU HAVE FASTENED THE SCREW AND BOLT OR NOT, SO THE SAFETY NET STANDS STIFF. OTHERWISE, THE SAFETY NET WILL NOT FUNCTION PROPERLY.
- Page 20 If you wish to make a claim under the guarantee, Manufacturer & Service Summary Handels-und Dienstleistungs GmbH, Zusestrasse 1, 25524 Itzehoe, Germany Hotline: 00800 880 880 08 Email: service.uk@ultrasport.net 2 Jahre Garantie 2 years warranty Garantie de 2 ans Garanzia die 2 anni Garantía de 2 años...
Need help?
Do you have a question about the Uni-Jump 244 and is the answer not in the manual?
Questions and answers