Table of Contents
Advertisement
Advertisement
Table of Contents

Related Manuals for Powrtran Tailfin

Summary of Contents for Powrtran Tailfin
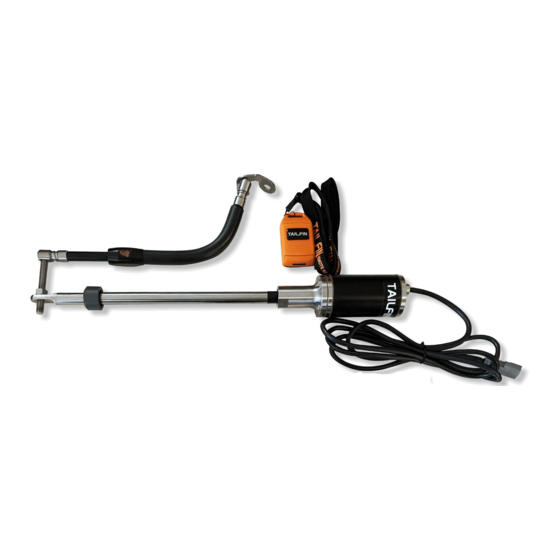
- Page 1 TAIL FIN REMOTE KICKER STEERING SYSTEM...
- Page 2 “” Love my Powrtran for my kicker. Will have it on my boat from here on out and every other fishing boat I will own in the future! -John H.
-
Page 3: Introduction
1-800-466-7697. A DIVISION OF 24253 COUNTY ROAD 7 ST. CLOUD, MN 56301 1-800-466-7697 WWW.POWRTRAN.COM ...to control your kicker TAIL FIN... -
Page 4: Table Of Contents
TABLE OF CONTENTS Introduction....................3 Installation Instructions..............5 Programming the System...............36 Care and Maintenance..............38 Troubleshooting...................40 Wiring Diagram...................42 iTroll......................43 Warranty....................44 About Us....................46 There’s nothing quicker... TAIL FIN... -
Page 5: Installation Instructions
INSTALLATION STEPS Tools Required • Tape Measure • 9/16” Wrench • Permanent Marker • 5/8” Wrench • Phillips Screwdriver • 1/2” Wrench • Adjustable Wrench • Air Compressor • 3/16” Allen Wrench ATTENTION! Failure to properly follow the installation steps WILL VOID any and all warranty. - Page 6 STEP 2 Determine which side of the kicker motor you will mount the motor on and which side you will mount the linkage arm on. NOTE: You need 7.5” of clearance on the motor side and 9” of clearance on the linkage side. STEP 3 Locate the actuator assembly and remove the...
- Page 7 STEP 4 Slide the tab-end of the actuator through the steer tube so that it ends up on the side of the kicker that you are mounting the linkage. STEP 5 Slide the wiper nut over the end of the actuator and screw it onto the steer tube.
- Page 8 STEP 6 Twist the actuator screw out a few turns. You do not have to extend the actuator all the way out; you just want to have some space to install the motor onto the actuator coupler. STEP 7 Locate the motor. There is a slot in the motor shaft which will engage with the tab in the end of the...
- Page 9 STEP 8 Slide the motor mount over the coupler, ensuring that the motor shaft engages the actuator tab. STEP 9 Apply light pressure to the other end of the actuator to keep the motor shaft engaged as you twist the motor onto the steer tube.
- Page 10 STEP 10 Twist the motor onto the steer tube until it is hand- tight. STEP 11 Use an adjustable wrench to tighten the motor another quarter-turn. There’s nothing quicker... TAIL FIN...
- Page 11 STEP 12 Route the motor cable to the battery compartment. STEP 13 The motor cable MUST be allowed a gradual bend. Pinching or stressing the cable can lead to fatigue and possible failure..to control your kicker TAIL FIN...
- Page 12 STEP 14 Locate your Relay Control Assembly. The relay is shipped fully assembled. If you need to disconnect any cables for installa- tion, please refer to the wiring diagram on Pg.42. STEP 15 Mount your Relay Control in the battery compartment.
- Page 13 STEP 16 Connect the POSITIVE (+) power lead from the Relay Control. STEP 17 Connect the NEGATIVE (-) power lead from the Relay Control..to control your kicker TAIL FIN...
- Page 14 STEP 18 Locate the LED Switch Box. The LED is used in programming and troubleshooting, as well as, serving as the ON/OFF switch for the system. Mount the LED wherever you wish. STEP 19 Make sure the LED is in the ON position.
- Page 15 STEP 20 Using your wireless remote, retract the actuator in as far as it will STEP 21 Use a permanent marker to draw a mark on the actuator where it meets the wiper nut..to control your kicker TAIL FIN...
- Page 16 STEP 22 Using your remote, extend the actuator as far out as it will go. STEP 23 Use your permanent marker to mark the actuator where it meets the wiper nut. There’s nothing quicker... TAIL FIN...
- Page 17 STEP 24 Measure the distance between the marks you made in Steps 21 and 23 and mark the actuator at the centerpoint of the two marks. STEP 25 Retract the actuator until the mark you made in Step 24 meets the wiper nut.
- Page 18 STEP 26 Position the outboard so it is facing straight forward. STEP 27 Locate your fit kit. There’s nothing quicker... TAIL FIN...
- Page 19 INSTALLING YOUR LINKAGE The next few pages will show diagrams on how the linkage arms should be assembled depending on the Kit and orientation you are installing. A few important notes on linkage installation: • Due to variations between different motor manufacturers, you may need to alter how you install the bracket.
- Page 20 There’s nothing quicker... TAIL FIN...
- Page 21 ...to control your kicker TAIL FIN...
- Page 22 There’s nothing quicker... TAIL FIN...
- Page 23 ...to control your kicker TAIL FIN...
- Page 24 There’s nothing quicker... TAIL FIN...
- Page 25 ...to control your kicker TAIL FIN...
- Page 26 There’s nothing quicker... TAIL FIN...
- Page 27 ...to control your kicker TAIL FIN...
- Page 28 STEP 28 Twist the standoff and jam nut onto the threaded end of the actuator. STEP 29 Install the rest of the standoff assembly with the bushing-side of the linkage. There’s nothing quicker... TAIL FIN...
- Page 29 STEP 30 Install the bracket on the front of the motor. In this example, we are using the bolts that hold the tiller- arm in place to secure the bracket. NOTE: If you are using the tiller-arm bolts, it is HIGHLY recommended you use threadlocker on the bolt threads before re-...
- Page 30 STEP 31 Install the 3/8” x 1/2” shoulder bolt through the grommet making sure the metal washer remains under the head of the sholder bolt. STEP 32 Install the plastic washer. There’s nothing quicker... TAIL FIN...
- Page 31 STEP 33 Connect the linkage to the bracket. STEP 34 Install the nylock nut and tighten in place..to control your kicker TAIL FIN...
- Page 32 STEP 35 The linkage comes assembled with the standard-mount arm. To install the Quick- Disconnect arm, you must first replace the standard arm with the Quick- Disconnect arm. Refer to the diagrams on Pg. 21, 23, 25, and 27. STEP 36 Place the threaded end of the ball stud through the mounting hole you are...
- Page 33 STEP 37 Remove the stud from the spring housing and install the nylock nut. STEP 38 Tighten the nylock nut and reconnect the linkage to the stud..to control your kicker TAIL FIN...
- Page 34 STEP 39 Adjust the height of the standoff to ensure the linkage arm is parallel with the actuator. NOTE: This is critical to the life and performance of the system. DO NOT SKIP THIS STEP! STEP 40 Install the nylock nut onto the standoff.
- Page 35 STEP 41 Mount your two-button switch and route the cable back to the battery compartment. NOTE:The switch is necessary for certain programming functions on the remote. Therefore, if you do not wish to mount the remote, it should still be kept accessible in the boat at all times.
-
Page 36: Programming The System
PROGRAMMING THE SYSTEM Located on the master shut-off switch near the motor, is an LED indicator, which is used for programing the system and troubleshooting. For normal operation, the LED will blink at a rate of one blink/second (1Hz) with a 50% duty cycle. Pairing the Remote: Press and hold both the LEFT and RIGHT buttons on the corded switch and hold for 5 seconds. - Page 37 PROGRAMMING THE SYSTEM Configuring the Speed: Press and hold the ‘1’ key for 5 seconds. The LED will go solid until the ‘1’ key is released, indicating user is in the program mode for the motor speed. 2. LED will flash to indicate speed, default is 50% of full speed (and full current).
-
Page 38: Care And Maintenance
CARE AND MAINTENANCE OVERVIEW The TAILFIN Steering System was designed to withstand and perform in the harshest marine environments. That said, a few simple steps can help maximize the life and performance of your system. GENERAL CARE After using your boat, open the battery compartment to allow any trapped moisture or gasses to escape. - Page 39 CARE AND MAINTENANCE To properly disassemble the actuator, you will want to secure it in a vice. Great care must be taken when doing this to ensure the actuator tube is not marred or crushed. It is HIGHLY recommended you pad the vice jaws with a towel first and avoid over-tightening.
-
Page 40: Troubleshooting
TROUBLESHOOTING TROUBLESHOOTING There’s nothing quicker... TAIL FIN... - Page 41 Linkage mounting point Adjust or reinstall the incorrect linkage mounting point, keeping it as close to the center of the outboard as possible IF your problem still persists, please contact Powrtran Customer Service at 1-800-466-7697..to control your kicker TAIL FIN...
-
Page 42: Wiring Diagram
WIRING DIAGRAM NOTE: iTroll hookup is only for those customers installing an iTroll. If, after installing the iTroll, the directional buttons on the iTroll behave opposite of desired, simply reverse the position of the Red and Green wires. There’s nothing quicker... TAIL FIN... -
Page 43: Itroll
The iTroll allows you to set up a remote kicker control station anywhere in your boat. If you pair your TAILFIN with the iTroll, you can steer and control throttle right from the iTroll, while also using the TAILFIN’s wireless remote to steer. -
Page 44: Warranty
WARRANTY It is Customer’s responsibility to make a careful inspection of the Product for evidence of loss or damage, both apparent and concealed. loss or damage by motor freight, freight forwarders, railway express, rail or air shipments, secure a notation of any loss or damage on Customer’s copy and on the carrier’s copy of the delivery receipt, retain products and shipping containers, and call carrier immediately for an inspection and file a claim with the carrier. - Page 45 WARRANTY This warranty shall not apply to Products that have been repaired or altered by anyone other than Manufacturer. This Warranty shall not apply to any Products subject to misuse due to common negligence or accident, or any product which has been improperly installed. Any oral statement concerning the Products inconsistent with this warranty shall be of no force or effect.
-
Page 46: About Us
Check out our website, www.powrtran.com, to see how we can Elevate Your Boating Experience! There’s nothing quicker... - Page 48 Reproduction of this booklet, in whole or in part, without permission is prohibited. All artwork contained within this booklet has been properly licensed by Powrtran Inc. for the sole purpose of this publication. Any images of other company’s products and/or logos is in no way intentional and does not signify any business relationship between said company and Powrtran Inc.
Need help?
Do you have a question about the Tailfin and is the answer not in the manual?
Questions and answers