Table of Contents
Advertisement
Quick Links
Advertisement
Table of Contents

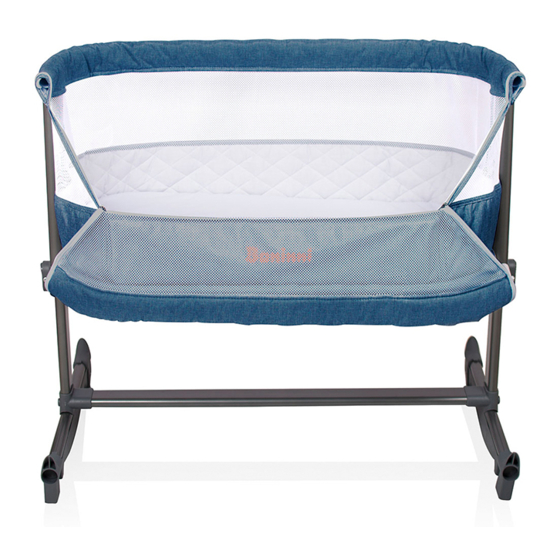
Summary of Contents for Baninni Bed side crib Nesso
- Page 2 WARNING: 1. BEFORE USE, REMOVE AND DISPOSE OF ALL PLASTIC BAGS AND PACKAGING MATERIALS AND KEEP THEM OUT OF REACH OF CHILDREN. 2. The product is ready for use only when all locking mechanisms are engaged. Check carefully that these are engaged before use. 3.
- Page 3 WAARSCHUWING: 1. VOORDAT U HET PRODUCT GEBRUIKT, VERWIJDER ALLE PLASTIEKE VERPAKKINGEN EN HOUD ZE BUITEN BEREIK VAN KINDEREN. 2. Het product is alleen klaar voor gebruik als alle vergrendelingsmechanismen zijn aangesloten. Controleer zorgvuldig dat deze voor gebruik in gebruik zijn. 3.
- Page 4 ATTENTION: 1. A VANT UTILISATION, ENLEVER ET ÉLIMINER TOUS LES SACS EN PLASTIQUE ET LES MA- TÉRIAUX D’EMBALLAGE ET LES GARDER HORS DE LA PORTÉE DES ENFANTS. 2. Le produit est prêt à l’emploi uniquement lorsque tous les mécanismes de verrouillage sont en- clenchés.
- Page 5 WARNUNG: 1. VOR VERWENDUNG DES PRODUKTS ALLE KUNSTSTOFF- UND VERPACKUNGSMATERIA- LIEN ENTFERNEN UND VON DEN KINDERN AUSBEHALTEN. 2. Das Produkt ist nur dann betriebsbereit, wenn alle Verriegelungen angeschlossen sind. Überprüfen Sie, ob diese vor Gebrauch verwendet werden. 3. Alle Öffnungen, Einstellungen, Verankerungen und Positionierungen des Produkts dürfen nur von Erwachsenen durchgeführt werden.
- Page 6 PARTS - ONDERDELEN - PIÈCES - TEILE 1. crib body - wieg - berceau - krippe 2. matress - matrasje - matelas - matratze 3. side frame stand - onderstel stand - support de cadre latéral - seitenrahmenständer 4. support bar - ondersteuningsbalk - barre de support - stützleiste 5.
- Page 7 INSTRUCTION - INSTRUCTIES - INSTRUCTIONS - ANLEITUNG GB 1. Insert support bar “C” to left side frame stand “A”(fig 1) and secure with 2 screws (fig 2). Use the allen wrench to tighten screws in clockwise direction (fig 3). Repeat the same for the right side frame stand “B”(fig 4). NL 1.
- Page 8 GB 2. Attach the handrail joint to the top of the frame stand tubing,insert bolt(a) into (b) as illustrated. The spring pin will click into place once secure. Repeat for the right side of frame. Insert mattress into the crib. NL 2.
- Page 9 GB 3. To close the crib side panel; lift up the side of the crib and attach the tubing to the tubing of the crib body. Attach the studs on the tubing to secure. NL 3. Om het wiegje sidepanel te sluiten; lig de kant van de wieg op en bevestig de buizen aan de buis van het wieglichaam.
- Page 10 GB 4. Fasten the side of the crib with the mesh window using the side zips and close them completely (fig 8). Your crib is now ready to be used as a stand alone crib. NL 4. Bevestig de zijde van de wieg met het gaasvenster met behulp van de zijkant en sluit ze helemaal dicht (fig.
- Page 11 WHEELS , LEG & HEIGHT ADJUSTMENT - WIELEN , BEEN & HOOGTE VERSTELLEN - ROUES , JAMBE & REGLAGE DE LA HAUTREUR - RÄDER , BEIN - UND HÖHENVERSTELLUNG Anti-slipper GB 1. There are wheels located on the front of the frame legs for easy moving. To access wheels, hold the crib rear long handrail and lift up.
- Page 12 adjustment botton GB 2. The crib can be adjusted to 6 different height positions. In order to adjust the height, press the top of the adjustment button down and adjust the crib to the desired position (fig 10). Repeat this operation on the opposite side. The base of the crib can be inclined slightly by adjusting the two legs to different heights.
- Page 13 GB 3. The two ends of the frame leg could be revolved .Put them out and revolve to upward.Repeat the same for the order frame leg. WARNING! Use the ends of the legs upward in cradle mode only.Rock the cradle slightly when a child in it. NL 3.
- Page 14 INSTRUCTION FOR FIXING TO PARENTS’ BED INSTRUCTIE VOOR HET VASTMAKEN AAN HET BED VAN OUDERS INSTRUCTION POUR FIXATION AU LIT DES PARENTS HINWEISE ZUR BEFESTIGUNG AN DAS BETT VON ALTEN GB 1. Open the side of the crib with the mesh window using the side zips. Open them completely NL 1.
- Page 15 GB 3. Move the crib close to the parents bed and check the height of the crib compared with the mattress of the bed (fig 15 ) WARNING! The mattress of parent’s bed shall be aligned to or over the height of the drop side in the lowest position.


Need help?
Do you have a question about the Bed side crib Nesso and is the answer not in the manual?
Questions and answers