
Related Manuals for Victor EDGE ESS3


Summary of Contents for Victor EDGE ESS3
- Page 1 PARTS, SERVICE & REPAIR BULLETIN ESS3 ESS4 ESS7 EST4 ESL4 Pressure Regulators ELC4 Revision: D Issue Date: March 2011 Form No.: 0056-1966...
- Page 2 INDEX Section Models Page ESS3 & ESS4 Future EDGE Models ESS7, EST4, ESL4 & ELC4 Future EDGE Models Future EDGE Models - i -...
- Page 3 Qualified Repair Technician. The term “Qualified Repair Technician” refers to repair personnel capable of servicing apparatus in strict accordance with all applicable Victor “Parts & Service Bulletins” and literature. Improper service or repair, or modification of the product, could result in damage to the product or injury to the operator.
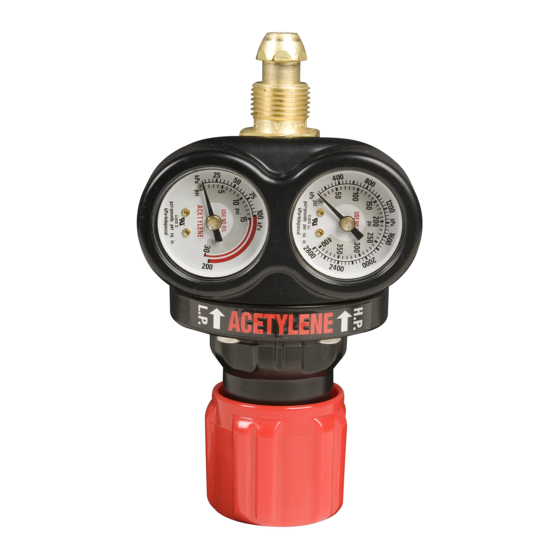
- Page 4 - 2 - ESS3/ESS4 SECTION 1...
- Page 5 - 3 - ESS3/ESS4 SECTION 1...
- Page 6 - 4 - ESS3/ESS4 SECTION 1...
-
Page 7: Disassembly Procedures
SERVICE & REPAIR PROCEDURES ESS3 & ESS4 Single Stage EDGE™ Series Regulators DISASSEMBLY PROCEDURES Refer to the exploded view for reference numbers [Shown in brackets] 1. Mount the Inlet Swivel Assembly Plug in the Bench Vise and firmly attach the Regulator. 2. -
Page 8: Cleaning Parts
ASTM G-127 “Standard Guide for the Selection of Cleaning Agents for Oxygen Systems” For metal parts, Victor brand suggests using CCI Envirospray Liquid, used per the manufacturer's instructions, followed by a hot water rinse and thorough drying. Additional information can be found at http://www.ccichemical.com. - Page 9 Attach the Relief Valve to a 450 PSIG source of oil-free air or dry nitrogen. b. Slowly pressurize the Relief Valve, increasing to the recommended blow-off pressure VICTOR listed below. Note that Relief Valves are stamped with their nominal set pressure, in case you’re unsure which Relief Valve you have.
- Page 10 Regulator Max. Mating Relief Recommended Delivery Pressure Valve (Nominal) Blow-off Pressure 15 PSIG 30 PSIG 27 to 33 PSIG 40 PSIG 60 PSIG 55 to 66 PSIG 125 PSIG 200 PSIG 180 to 220 PSIG 200 PSIG 400 PSIG 360 to 440 PSIG 9.
- Page 11 centers itself in a recessed pocket in the top of the Body. Don’t forget the Thrust Washer! Regulator function will be impaired without it. 18. Install the Bonnet onto the Body. Take care while slipping the Bonnet down over the internal components –...
-
Page 12: Test Procedures
TEST PROCEDURES WARNING! For your safety, and the safety of others: • Always test with oil-free air or dry nitrogen only. • Always wear eye protection while testing a Regulator. • Always perform all of the following test procedures after reassembling a Regulator. 1. - Page 13 8. LEAK TEST a. With the Test Gun closed and the Manifold Valve open, adjust the Regulator to deliver PSIG. b. Close the Manifold Valve and turn the Adjusting Knob one turn counterclockwise. c. Observe the Low Pressure and High Pressure Gauges for five (5) minutes: 1.
-
Page 14: Troubleshooting
TROUBLESHOOTING CAUSES POSSIBLE CORRECTIVE ACTIONS 1. No gas flows through the Regulator and the High Pressure Gauge does not indicate pressure. a. Inlet or Inlet Filter is plugged. Blow 40-45 PSIG of air through the Filter in reverse direction of the normal gas flow. b. - Page 15 CAUSES POSSIBLE CORRECTIVE ACTIONS Regulator experiences excessive drop. a. Friction Damper too tight. Replace the Friction Damper and/or Gland. b. Wrong size orifice in Test Gun. Insure the correct orifice is installed in the Test Gun - size #52 (.0635”). c.
- Page 16 CAUSES POSSIBLE CORRECTIVE ACTIONS 10. Rapid pressure drop on both High and Low Pressure Gauges. a. Loose connection – Bonnet to Tighten Bonnet Screws using 12-15 ft-lbs. Body. Follow the sequence shown in STEP 19 FIGURE 1 of the Assembly Procedure. b.
- Page 17 Qualified Repair Technician. The term “Qualified Repair Technician” refers to repair personnel capable of servicing apparatus in strict accordance with all applicable Victor “Parts & Service Bulletins” and literature. Improper service or repair, or modification of the product, could result in damage to the product or injury to the operator.
- Page 18 EXPLODED VIEW - ESS7 HIGH-FLOW L.P. GAUGE H.P. GAUGE INFO DECAL RETAINING RING INLET SWIVEL INLET NUT PLUG OUTLET INLET FILTER BODY SEAT GUIDE FRICTION DAMPER Diaphragm BACKUP RING Assembly RELIEF VALVE GLAND Back-Up Ring (See DETAIL A) Orientation Body In Assembly VALVE SPRING Bonnet...
- Page 19 L.P. GAUGE EXPLODED VIEW - ESL4 / EST4 / ELC4 INLET SWIVEL INLET NUT RETAINING RING INLET FILTER INFO DECAL PLUG BODY PLUG FRICTION DAMPER INLET FILTER INLET NUT VALVE SPRING INLET SWIVEL O-RING SEAT GUIDE GLAND PLUG SEAT ASSM. OUTLET NOZZLE DIAPHRAGM ASSM.
- Page 20 - 18 - ESS7/EST4/ESL4/ELC4 SECTION 3...
- Page 21 - 19 - ESS7/EST4/ESL4/ELC4 SECTION 3...
- Page 22 SERVICE & REPAIR PROCEDURES ESS7, EST4, ESL4 & ELC4 Single Stage EDGE™ Series Regulators DISASSEMBLY PROCEDURES Refer to the exploded views for reference numbers [Shown in brackets] 1. Mount the Inlet Swivel Assembly Plug (hereafter called “Inlet Plug”) in the Bench Vise and firmly attach the Regulator.
- Page 23 ASTM G-127 “Standard Guide for the Selection of Cleaning Agents for Oxygen Systems” For metal parts, Victor brand suggests using CCI Envirospray Liquid, used per the manufacturer's instructions, followed by a hot water rinse and thorough drying. Additional information can be found at http://www.ccichemical.com.
- Page 24 Attach the Relief Valve to a 450 PSIG source of oil-free air or dry nitrogen. b. Slowly pressurize the Relief Valve, increasing to the recommended blow-off pressure VICTOR listed below. Note that Relief Valves are stamped with their nominal set pressure, in case you’re unsure which Relief Valve you have.
- Page 25 10. Apply only Loctite® #222 threadlocker to the Outlet Connection [27] threads. Install the Outlet Connection into the Body and torque to 15 ft-lbs. 11. At this point, thoroughly blow out the Body assembly with pressurized oil-free air or dry nitrogen to insure it is completely free of chips and debris.
- Page 26 17. Install the Adjusting Spring [22], preassembled Adjusting Mechanism and Thrust Washer [14] onto the Regulator Body. Don’t forget the Thrust Washer! Regulator function will be impaired without it. 18. Install the Bonnet [15] onto the Body. Take care while slipping the Bonnet down over the internal components –...
- Page 27 TEST PROCEDURES WARNING! For your safety, and the safety of others: • Always test with oil-free air or dry nitrogen only. • Always wear eye protection while testing a Regulator. • Always perform all of the following test procedures after reassembling a Regulator. 1.
- Page 28 8. ESS7 LEAK TEST (When HP/LP Gauges are present): a. With the Test Gun closed and the Manifold Valve open, adjust the Regulator to deliver PSIG. b. Close the Manifold Valve and turn the Adjusting Knob one turn counterclockwise. c. Observe the Low Pressure and High Pressure Gauges for five (5) minutes: 1.
- Page 29 TROUBLESHOOTING CAUSES POSSIBLE CORRECTIVE ACTIONS 1. No gas flows through the Regulator and the High Pressure Gauge does not indicate pressure (or if no High Pressure Gauge is present). a. Inlet or Inlet Filter is plugged. Blow 40-45 PSIG of air through the Filter in reverse direction of the normal gas flow.
- Page 30 CAUSES POSSIBLE CORRECTIVE ACTIONS Regulator experiences excessive drop. a. Friction Damper too tight. Replace the Friction Damper and/or Gland. b. Wrong size orifice in Test Gun. Insure the correct orifice is installed in the Test Gun - size #52 (.0635”). c.
- Page 31 CAUSES POSSIBLE CORRECTIVE ACTIONS 10. Rapid pressure drop on both High and Low Pressure Gauges. a. Loose connection – Bonnet to Tighten Bonnet Screws using 12-15 ft-lbs. Body. Follow the sequence shown in STEP 19 FIGURE 1 of the Assembly Procedure. b.
Need help?
Do you have a question about the EDGE ESS3 and is the answer not in the manual?
Questions and answers