Table of Contents
Advertisement
Quick Links
Advertisement
Table of Contents

Summary of Contents for Mec Empower Broadband Calix GigaCenter
- Page 1 GigaCenter Quick Start Guide...
-
Page 2: Table Of Contents
GigaCenter Quick Reference 1. Logging into the GigaCenter………………………………………………………………………. 2. Change the name and password of the wireless network………………………….. 3. Connect to the wireless network………………………………………………………………. 4. Change the “admin” user password………………………………………………………….. 5. Block a website from being accessed………………………………………………………… 6. Restrict access to the Internet by time-of-day…………………………………………… 7. - Page 3 1. Logging in to the Calix GigaCenter a. Connect an Ethernet cable between your computer and the Ethernet “1” port on your Gigacenter. b. From your browser, access the GigaCenter at http://192.168.1.1 c. The following window should appear. If you receive a security warning, click on “Advanced”...
- Page 4 e. The GigaCenter dashboard should now appear as follows:...
-
Page 5: Change The Name And Password Of The Wireless Network
Change the name and password of the wireless network a. From the GigaConnect dashboard, click on the “Wireless” icon: b. From the “Wireless” column on the left under “2.4G Network,” click “SSID Setup.” c. Change the default “SSID (Network Name)” by typing the name you desire into the “Rename SSID”... -
Page 6: Connect To The Wireless Network
Connect to the wireless network a. Click on the wireless icon on the right side of the task bar at the bottom of your screen. b. Click on the name of your wireless network. - Page 7 c. Ensure that “Connect automatically” is checked, then click “Connect” d. Press the “WPS” button on the side of the Calix GigaCenter. The connection may take as much as two minutes. If you are unable to connect to the Gigacenter by pressing the “WPS” button, manually key in your password on the device you are trying to join to the network.
-
Page 8: Change The "Admin" User Password
4. Change the “admin” user password a. Click the “Advanced” icon from the dashboard, or the “Advanced” button on the blue line near the top of the screen. b. Click “Security” in the left column of your screen. c. Click the “Show” checkbox, then type the new password [“newpass” in this example]. d. - Page 9 e. Click the “Ok” button in the “Residential Gateway” box. f. Login with user “admin” and the new password for “Password.”...
-
Page 11: Block A Website From Being Accessed
5. Block a website from being accessed a. Click the “Advanced” icon from the dashboard, or the “Advanced” button on the blue line near the top of the screen. b. Click “Website Blocking” in the left column. - Page 12 c. Type in a website name, e.g. “badstuff.com” and click the “Apply button.
-
Page 13: Restrict Access To The Internet By Time-Of-Day
6. Restrict access to the Internet by time-of-day a. Click the “Advanced” icon from the dashboard, or the “Advanced” button on the blue line near the top of the screen. b. From the “Create Schedule” screen, “Device” pull-down menu, choose the name of the computer you desire to restrict. -
Page 14: Change The Firewall Security Settings
7. Change the firewall security settings a. Click the “Advanced” icon from the dashboard, or the “Advanced” button on the blue line near the top of the screen. b. In the left column, click “Security, then click “Firewall.”... - Page 15 c. Choose the desired “Security Level,” then click “Apply.”...
-
Page 16: Add Port Forwarding Rules
8. Add Port Forwarding rules a. Click the “Advanced” icon from the dashboard, or the “Advanced” button on the blue line near the top of the screen. b. In the left column, click “Security, then click “Port Forwarding.” c. Click “Add,” key in the port forwarding rule parameters, then click “Apply.” d. -
Page 17: Turn On "Remote Access
9. Turn on “Remote Access” a. Click the “Advanced” icon from the dashboard, or the “Advanced” button on the blue line near the top of the screen. b. In the left column, click “Security, then click “Remote Management.” c. Click “Enabled” for “Remote GUI State.” d. - Page 18 e. The WAN IP address is valid for up to three days (72 hours) when the GigaCenter is powered off, but will need to be re-determined and reentered if the previous WAN IP address has expired. The GigaCenter otherwise keeps the same IP address.
-
Page 19: Extending Wireless Coverage
10. Extending wireless coverage using the Calix 804Mesh Dual Wi-Fi device a. Connect the power supply and plug in the Calix 804Mesh Dual Wi-Fi device in the part of the building you desire to extend wi-fi service. Once the power light and two of the Wi-Fi Backhaul lights are solid green (see sections “i”... - Page 20 GigaCenter Quick Start Guide This document provides general installation practices for the GigaCenter model 844G/854G. This document also provides guidance for site preparation, installation, and basic troubleshooting. Scan the QR code at left to access the installation instructions for this product. All product documentation is available online from the Calix Resource Center (support.calix.com).
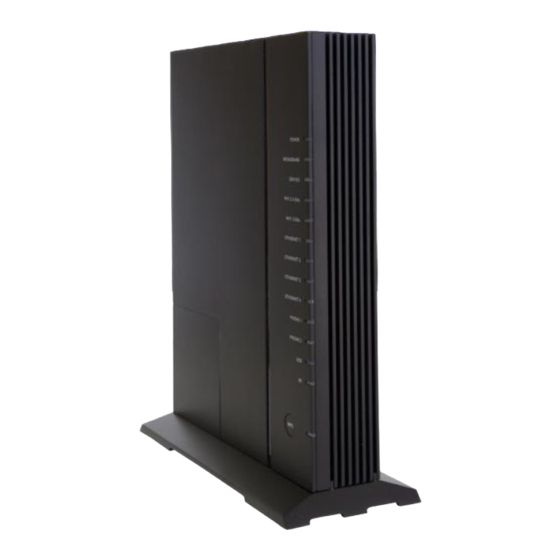
- Page 21 A Quick Look Power POWER Broadband USB Port BROADBAND Service Reset Button SERVICE 2.4, 5 GHz Wi-Fi WiFi 2.4 GHz Ethernet Ports (x4) ETHERNET 1 (RJ-45) ETHERNET 2 Ethernet (1-4) ETHERNET 3 Telephone Ports (x2) ETHERNET 4 Model 844G-2, 854G-2 (RJ-11) Only PHONE 1...
- Page 22 Tabletop Mounting Calix GigaCenters can be mounted on a tabletop in a “tower” confi guration using the tabletop stand shipped with the product. Assemble the tabletop stand and the GigaCenter as shown in the following diagram. ETHERNET 2 854G GigaCenter Shown ETHERNET 1 PHONE 1 PHONE 2...
- Page 23 Wall Mounting Dimensions The GigaCenter can be mounted to a wall or a Structured Wiring Enclosure. 6.0” (15.2 cm) 3.0” (7.6 cm) 2.0” 3.5” (5.1 cm) (8.9 cm) 3.0” 4.125” † (7.6 cm) 3.25” (10.5 cm) (8.3 cm) 6781 † = Standard Electrical 5.0”...
- Page 24 Connecting Outside Services Subscriber voice, IP video and data services are attached to the rear of the GigaCen- ter. Locate the telephone, video, and data cables coming from the home. Connect the incoming telephone lines to the RJ-11 connectors on the rear of the GigaCenter.
- Page 25 Getting Started To turn up network services on the GigaCenter, two options are available: Connect an active optical fi ber to the GigaCenter’s bulkhead fi tting, power the unit on, and allow the network OLT (for example, a Calix E7) to discover the de- vice as an unprovisioned ONT.
- Page 26 Frequently Asked Questions Q: How do I reset the device without having to unplug the unit? A: If the RESET button is depressed for less than 5 seconds, it resets the unit using the current confi guration settings. Q: How do I reset the device back to factory settings? A: Pressing the RESET button on the back of the unit for at least 5 seconds, or access the “Restore Defaults”...
- Page 27 Q: My Wi-Fi signal strength is lower than I expected? A: A wireless signal degrades with distance and obstructions. Common signal im- pairments include walls, ceilings, metal, concrete, cinder blocks, fl uorescent lights, microwaves, furniture, etc. While the GigaCenter has been optimized to provide wireless coverage for most applications, there may be dependencies based on the location where the device is installed.
- Page 28 • Do not use this product near water, for example, near a bathtub, washbowl, kitchen sink, laundry tub, in a wet basement, or near a swimming pool. • Do not attempt to disassemble the GigaCenter. A broken warranty seal will void the warranty.
- Page 29 • To reduce risk of damage to the electric cord, remove it from the outlet by holding onto the AC power adapter rather than the cord. Make sure the cord is positioned so that it will not be stepped on, tripped over or otherwise subjected to damage or stress.
- Page 30 CAUTION! Changes or modifi cations to this product not expressly approved by the party responsible for compliance could void your authority to operate the equipment and invalidate approvals. Environmental Conditions Maximum environmental values during use: Temperature: 0° C to +40° C (32° to 104° F), Humidity: 5% to 95% RH, non-condens- RoHS Compliance This 844G/854G GigaCenter meets the requirements detailed in the European RoHS Directive (2002/95/EC).
- Page 31 License Information Open Source Software Utilization Notice The 844G/854G GigaCenter uses Open Source Software Programs. Such software programs are made available subject to certain third party terms and conditions. The fact that you are about to begin using or have purchased this product requires that you be informed of the use of these software packages and or libraries and in some cases, the third party terms and conditions applicable to such software.
Need help?
Do you have a question about the Empower Broadband Calix GigaCenter and is the answer not in the manual?
Questions and answers