Advertisement
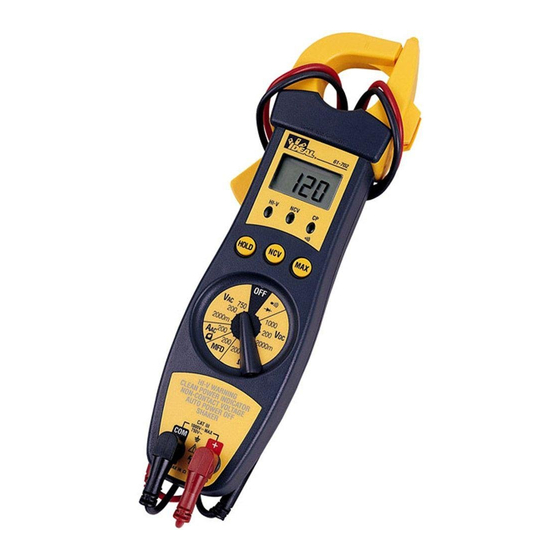
700 Series
200 Amp Clamp Meters
#61-702
#61-704
5
4
1. Non-contact voltage (NCV) (#61-702)
With the NCV tab on the tip of the clamp close to an AC
voltage, press the NCV button. The NCV LED will light and
the beeper will beep. The closer the NCV tab is to AC volt-
age, the louder the beep.
To differentiate between hot and neutral in an outlet, insert
the NCV tab into each slot in the outlet. The beeper will be
much louder on the hot side of the outlet than the neutral.
1
2
3
6
7
8
2
Advertisement
Table of Contents

Related Manuals for IDEAL 700 Series


Summary of Contents for IDEAL 700 Series
- Page 1 #61-702 #61-704 700 Series 200 Amp Clamp Meters 1. Non-contact voltage (NCV) (#61-702) With the NCV tab on the tip of the clamp close to an AC voltage, press the NCV button. The NCV LED will light and the beeper will beep. The closer the NCV tab is to AC volt- age, the louder the beep.
-
Page 2: Indicator Lights
The test lead can also be used to differentiate between the 7. Max button hot and neutral. Insert the rod test lead into the + port and Press Max prior to a measurement to capture the maximum snap it into the test probe holder. Press the NCV button reading displayed during the measurement. -
Page 3: General Operation
4. Visually inspect leads for damage before using. Replace if Lead Storage insulation is damaged or leads appear suspect. Silicone test leads are provided with the meter. These test 5. Never ground yourself when taking electrical measurements. leads stay flexible in very cold weather and can withstand high Do not touch exposed metal pipes, outlets, fixtures etc. - Page 4 DC Voltage To Measure AC Current: 1. Set the rotary switch to the appropriate AAC range. Range Resolution Accuracy 2. With the jaws closed, separate one wire from a bundle using Display the long fixed jaw. 2000mV 1999 ±(0.5%+1) 3. Slide the wire to the corner where the two jaws meet, then 200V 0.1V 199.9 ±(0.5%+1)
- Page 5 Resistance (Ohms) Capacitance Testing Range Resolution Accuracy Display Range Resolution Accuracy Display 200MFD 0.1MFD 199.9 ±(3% +5) 200Ω 0.1Ω 200.0 ±(1% +3) To Measure Capacitance: 200kΩ 0.1kΩ 200.0 ±(1% +3) 1. Disconnect the capacitor from power. 2. Short the terminals to discharge the capacitor. To Measure Resistance: 3.
- Page 6 Low Battery Indication: when the battery voltage drops below operating voltage Any implied warranties arising out of the sale of an IDEAL Auto Power Off: Approx. 60 min. product, including but not limited to implied warranties of mer- Temperature Coefficient: 0.1 x (specified accuracy) /...
Need help?
Do you have a question about the 700 Series and is the answer not in the manual?
Questions and answers