
Related Manuals for Sandstrom SL-DBTB18


Summary of Contents for Sandstrom SL-DBTB18
- Page 1 Portable Bluetooth® DAB Radio Instruction Manual SL-DBTB18 / SL-DBTC18 / SL-DBTG18...
-
Page 3: Table Of Contents
Contents Safety Warnings ....................5 Unpacking ....................... 8 Product Overview ................... 9 Front View ........................... 9 Rear View ...........................11 Connections ....................12 Using the AUX Connection ..................12 Using Earphones ......................13 Power Source ....................14 Battery Power ........................15 Battery Life (Approx. Hours) ..................15 Knowing when to Replace the Batteries ..............15 Basic Operation .................... - Page 4 Manually Tuning In DAB Radio Stations ..............23 Saving Preset Stations ....................23 Recalling a Preset Station ....................23 DAB Display Modes .......................24 FM Operation ....................26 Auto Scan ..........................26 Manual Tune ........................26 Scan Setting ........................26 Audio Setting ........................27 Saving Preset Stations ....................27 Recalling a Preset Station ....................27 FM Display Modes ......................28 Bluetooth®...
-
Page 5: Safety Warnings
Safety Warnings Place the unit well away from • Read all the instructions carefully heat sources such as radiators or before using the unit and keep gas / electric fires. them for future reference. • Avoid exposure to direct sunlight •... - Page 6 • Do not install or place this unit in Use only power supplies listed a bookcase, built-in cabinet or in in the user instructions. another confined space. Ensure Interference the unit is well ventilated. • Do not place the unit on or near Safety appliances which may cause •...
- Page 7 Supervision Service • Children should be supervised to • To reduce the risk of electric ensure that they do not play with shock, do not remove screws. The the unit. unit does not contain any user- serviceable parts. Please leave all •...
-
Page 8: Unpacking
Thank you for purchasing your new product. We recommend that you spend some time reading this instruction manual in order that you fully understand all the operational features it offers. You will also find some hints and tips to help you resolve any issues. -
Page 9: Product Overview
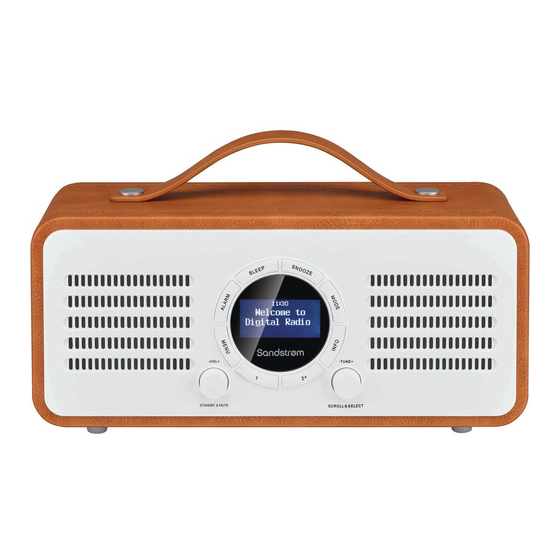
Product Overview Front View -VOL+ -TUNE+ STANDBY & MUTE SCROLL & SELECT SPEAKER ALARM Button Press to set the ALARM. SLEEP Button Press to set the SLEEP time. HANDLE SNOOZE Button Press to set the SNOOZE time when the alarm rang. MODE Button Press to switch between FM, DAB, Bluetooth and Auxiliary Input mode. - Page 10 -TUNE+ -VOL+ SCROLL & SELECT STANDBY & MUTE -VOL+ / STANDBY & MUTE Dial • Press to switch the unit between the On and Standby mode when using main power. • Press and hold to switch On the unit when using battery power. •...
-
Page 11: Rear View
Rear View 2 3 4 DAB / FM Aerial AUX IN Socket Headphones Socket DC IN 12V 1A Socket Battery Compartment... -
Page 12: Connections
Connections Using the AUX Connection Connect the AUX IN socket at the rear of the unit to the line output sockets on the auxiliary equipment using a 3.5 mm to 3.5 mm stereo audio cable (included), as illustrated. Rear of the unit Auxiliary Equipment 3.5 mm stereo audio cable (Included) -
Page 13: Using Earphones
Using Earphones Turn down the volume before connecting the earphones (not included). Slowly raise the volume with the earphones on until you reach your desired volume. When earphones are connected, the speaker is automatically muted. Long-term exposure to loud music may cause hearing damage. It is best to avoid extreme volume when using earphones, especially for extended periods. -
Page 14: Power Source
Power Source Your unit can be mains powered or battery powered. We recommend for prolonged use to use the mains power. 1. Fully extend the aerial before plugging the unit into the mains. 2. Connecting the unit to any other power source may damage the unit. Unwind the mains adapter cable to its full length. -
Page 15: Battery Power
Battery Power Insert 4 × 1.5V AA battery (not included) into the battery compartment located at the rear of the unit. Battery Life (Approx. Hours) Battery Type Alkaline (Size AA) Using your radio at high volume will reduce your battery life. Knowing when to Replace the Batteries When the batteries become weak, the sound becomes weak and distorted. - Page 16 Handling the Batteries • Improper or incorrect use of batteries may cause corrosion or battery leakage, which could cause personal injury or damage to property. • Install the batteries correctly by following the polarity (+ and –) indications in the battery compartment. •...
-
Page 17: Basic Operation
Basic Operation Switching ON/OFF While using battery power: Press and hold the STANDBY & MUTE dial to switch the unit on. • Press the STANDBY & MUTE dial to switch the unit off. • While using mains power: Press the STANDBY & MUTE dial to switch the unit on. •... -
Page 18: System Settings
System Settings Equaliser Your radio has preset equaliser setting. This feature enables you to set a sound equalization profile. The equalization setting will change the tone of the sound from your radio. 1. In ON mode, press the MENU button, and then turn the SCROLL & SELECT dial to select <System>. -
Page 19: Backlight
Backlight You can set the brightness for the power on screens and the Standby screen. 1. In ON mode, press the MENU button, and then turn the SCROLL & SELECT dial to select <System>. Press the SCROLL & SELECT dial to confirm. -
Page 20: Factory Reset
Factory Reset If you want to delete all your stations and settings, you can return your radio back to the default setting by running a Factory Reset. 1. In ON mode, press the MENU button, and then turn the SCROLL & SELECT dial to select <System>. -
Page 21: Activate/Deactivate The Alarm Function
On time 00:00 (manually set up the time) Source Buzzer / DAB / FM (If the wake-up source is DAB / FM and the signal strength is low, the Buzzer alarm will be triggered.) Preset Last listened or saved preset station (not available for Buzzer mode) Frequency Daily / Once / Weekends / Weekdays... -
Page 22: Dab Operation
DAB Operation The first time you use DAB make sure the aerial if fully extended before selecting DAB mode, because your radio will automatically scan for DAB radio stations. If the aerial is not fully extended your radio will not tune in properly. -
Page 23: Manually Tuning In Dab Radio Stations
Manually Tuning In DAB Radio Stations If your radio have missed some stations when it performed a scan you can manually tune them in. You will need to know which multiplex the station you are looking for is in. 1. Press MENU. Turn SCROLL & SELECT dial to select MANUAL TUNE then press SCROLL &... -
Page 24: Dab Display Modes
DAB Display Modes Every time you press INFO on the unit, the display will cycle through the following display modes. The information is displayed on the lower segment of the display. DLS (Dynamic Label Segment) Dynamic label segment is a scrolling message that the broadcaster may include with their transmissions. - Page 25 Programme Type Multiplex Name / Frequency Signal Error / Signal Strength Bit Rate / Codec / Channels Todays Date...
-
Page 26: Fm Operation
FM Operation Press MODE to select FM radio. Auto Scan While listening to an FM station, press SCROLL & SELECT dial to perform auto scan. Once a station has been found, the scanning will stop automatically. Manual Tune To tune FM frequency manually, turn SCROLL & SELECT dial until your desired frequency is reached. -
Page 27: Audio Setting
Audio Setting If you find that the station you are listening is not clear, you can select to listen to it in MONO this can often clear up some of the static. 1. In FM mode, press MENU to display the FM menu. 2. -
Page 28: Fm Display Modes
FM Display Modes Every time you press INFO on the unit, the display will cycle through the following display modes. The information is displayed on the lower segment of the display. Radio Text The broadcaster can include Radio Text a message that displays information about the current programme. -
Page 29: Bluetooth® Operation
2. Activate Bluetooth on your device i.e. mobile phone and look for your radios model number in the Bluetooth list (SL-DBTB18 / SL-DBTC18 / SL-DBTG18). Once selected the Bluetooth logo on the screen will stop flashing. Your device is now paired with the unit. -
Page 30: Aux In Operation
AUX IN Operation 1. Before connecting to the mains socket, use the 3.5 mm audio stereo cable (not included) to connect to your external audio device through the AUX IN socket at the rear of the unit. • When connecting the external audio device, refer to the owner’s manual of the external device, as well as this manual. -
Page 31: Maintenance
Maintenance Cleaning the Unit Ensure the unit is fully unplugged from the mains socket before cleaning. • To clean the unit, wipe the case with a slightly moist, lint-free cloth. • Do not use any cleaning fluids containing alcohol, ammonia or abrasives. -
Page 32: Hints And Tips
Hints and Tips If a problem occurs, it may often be due to something very minor. The following table contains various tips. Problem Solution No Power. • Ensure the mains cable is properly connected. • Make sure that the unit is turned on. The unit does not respond •... -
Page 33: Specifications
Specifications SL-DBTB18 / SL-DBTC18 / Model SL-DBTG18 Power Adapter (Use only power adapter listed below) Power Adapter Manufacturer Shenzhen Flypower Technology Co., Ltd. Power Adapter Model PS12F120K1000BD Input AC 100 - 240 V~ 50/60 Hz, 0.35 A Output 12.0 V... - Page 34 Power Consumption • Mains operation: 2 × 3 W • Battery operation : Up to 2 x 0.8 W Working Environment - Temperature 0°C ~ 40°C Working Environment - Relative 5% ~ 80% Humidity <10% >65 dB(A) Play Mode Bluetooth / Aux in / FM / DAB Net Weight 1.528 kg Dimension (W ×...
- Page 36 For general information about this appliance and handy hints and tips, please visit www.knowhow.com/ knowledgebank or call 0344 561 1234. Visit Partmaster.co.uk today for the easiest way to buy electrical spares and accessories. With over 1 million spares and accessories available we can deliver direct to your door the very next day.
Need help?
Do you have a question about the SL-DBTB18 and is the answer not in the manual?
Questions and answers