Table of Contents
Advertisement
Advertisement
Table of Contents

Related Manuals for Cosmetal NIVES A


Summary of Contents for Cosmetal NIVES A
- Page 1 Installazione, uso e manutenzione Installation, use and maintenance handbook Installation, Gebrauch und Wartung Installation, usage et entretien Instalación, uso y mantenimiento NIVES A NIVES H NIVES WG NIVES HWG NIVES IN A NIVES IN H NIVES IN WG NIVES IN HWG...
- Page 2 GERÄTEKENNZEICHNUNG Modell Speisespannung Kühlgasmenge MARCATURA Klasse DELL’APPARECCHIO Gesamtaufnahme Modello Frequenz Tensione di alimentazione Matrikelnummer MANUFACTURER Quantità di gas refrigerante Konstruktionsjahr- Monat Classe WATER COOLERS PLAQUETTE SIGNALETIQUE Assorbimento totale Frequenza Modèle Mod....Numero di matricola Tension d’alimentation Anno-mese di costruzione Quantité de gaz réfrigérant ..V ..Hz ..W...
- Page 3 BEFORE USING THE APPLIANCE WARNINGS GENERAL PRECAUTIONS AND SUGGESTIONS Before carrying out any maintenance or cleaning operation, In order to use your appliance to its best, we advise reading these remove the plug from the mains socket. instructions carefully as they contain useful information. • Do not pull on the supply cable in order to remove the plug from the socket.
-
Page 4: Prima Di Usare L'apparecchio
PRIMA DI USARE L’APPARECCHIO il locale rivenditore o il servizio di assistenza tecnica. l’inosservanza di una qualsiasi norma di sicurezza potrebbe L’utilizzo della macchina in queste condizioni potrebbe causare incendi o causare incendi, scosse elettriche o danneggiare la macchina scosse elettriche. • Periodicamente, scollegare la macchina dalla presa di corrente e, con un LUOGO DI INSTALLAZIONE panno asciutto, pulire la spina e la presa di corrente. -
Page 5: Avant D'utiliser L'appareil
• Regelmäßig den Netzstromanschluss der Maschine unterbrechen und mit • Vor Reinigung der Maschine diese ausschalten und den Stromanschluss einem trockenen Tuch den Stecker und die Steckdose reinigen. unterbrechen. Sollte die Maschine während der Reinigung nicht ausgeschal- Sollte die Maschine an einem staubreichen, rauchigen oder sehr feuchten tet oder versehentlich eingeschaltet werden, könnte dies Personen- oder Ort betrieben werden, könnte der sich auf dem Stecker abgesetzte Staub Maschinenschäden verursachen. Feuchtigkeit aufnehmen, die Isolierung beeinträchtigt und ein Brand verur- • Dieses Gerät wird nicht für Personen (einschließlich Kinder)mit verringerten sacht werden. körperlichen, sensorischen oder Geistesfähigkeiten oder Mangel an Erfah- • Keine Wasserstrahlen auf das Gerät richten, denn diese könnten Stromschlag rungund Wissen beabsichtigt, essei denn sie überwachung oder die Anwei- oder Brand verursachen. sunghinsicchtlich ist des Gebrauches des Gerätes von einer Person erteilt worden sind, die für ihre Sicherheit verantwortilich ist. • Das Gerät darf nicht installiert werden, wo Wasserspritzer entstehen können. Kinder solten überwacht werden, um sicherzugehen, daß sie nichtmit dem • Ein feuchtes Tuch zur Reinigung der Maschine verwenden. Keine entzünd- lichen Flüssigkeiten, wie Alkohol, Benzol oder Lösungsmittel benützen. -
Page 6: Consigli Per La Salvaguardia Dell'ambiente
JE1610-010 DISIMBALLO • Ponete l’apparecchio nel punto d’installazione (cap. 5- INSTALLAZIONE). • Tagliare le reggette R e sfilate il cartone C, il polistirolo F e il sacco in plastica esterno S. • Eliminate subito i sacchi in plastica S e i polistiroli F i quali possono rappresentare pericolo per i bambini. • Una volta liberato l’apparecchio dal suo imballo eliminate il basamento B. CONSIGLI PER LA SALVAGUARDIA DELL’AMBIENTE Imballo Il materiale di imballo è riciclabile al 100%. Per lo smaltimento seguite le normative Il simbolo presente sull’apparecchio o sulla documentazione indica locali. Il materiale di imballaggio (sacchetti di plastica, parti in polistirolo, ecc.) deve che il prodotto non deve essere trattato come rifiuto domestico ma essere tenuto fuori dalla portata dei bambini in quanto potenziale fonte di pericolo. deve essere consegnato presso un idoneo centro di raccolta per il Informazione riciclaggio di apparecchiatute elettriche ed elettroniche. Questo apparecchio è senza CFC (il circuito refrigerante contiene un gas non dannoso per l’ozono). Lo smaltimento deve avvenire seguendo le normative locali per lo smaltimento Per maggiori dettagli, riferitevi alla targhetta matricola posta sull’apparecchio. dei rifiuti. Per ulteriori informazioni sul trattamento, recupero e riciclaggio di Prodotto questo prodotto, contattate l’idoneo ufficio locale, il servizio di raccolta dei Questo apparecchio è contrassegnato in conformità alla Direttiva Europea... -
Page 7: Entfernung Der Verpackung
ENTFERNUNG DER VERPACKUNG • Transportieren Sie das Gerät an die Stelle, wo es aufgestellt werden soll. (s. Kap. 5, AUFSTELLUNG). • Die Bänder R durchschneiden und den Karton C, das Polystyrol F und den äußeren Plastiksack S entfernen. • Die Plastiksäcke S und das Polystyrol F sofort entfernen, da diese eine potentielle Gefahr für Kinder darstellen. • Entfernen Sie daraufhin das Verpackungs-Untergestell B und sämtliche anderen Verpackungsrückstände. UMWELTSCHUTZEMPFEHLUNGEN Verpackung Das Verpackungsmaterial ist 100% recyclefähig. Das Verpackungsmaterial Auf dem Produkt oder der beiliegenden Produktdokumentation ist fol- (Plastikhüllen, Steroporteile usw.) müssen für Kinder unerreichbar gendes Symbol einer durchgestrichenen Abfalltonne abgebildet. Es aufbewahrt werden, da diese eine potenzielle Gefahrenquelle darstellen. weist darauf hin, dass eine Entsorgung im normalen Haushaltsabfall Information nicht zulässig ist Entsorgen Sie dieses Produkt im Recyclinghof mit Dieses Gerät verwendet kein FCKW (der Kühlkreis enthält ein Gas, das einer getrennten Sammlung für Elektro- und Elektronikgeräte. die Ozonschicht nicht beschädigt). Nähere Angaben entnehmen Sie bitte dem Typenschild des Gerätes. Produkt Die Entsorgung muss gemäß den örtlichen Bestimmungen zur Abfallbeseitigung er- In Übereinstimmung mit den Anforderungen der Europäischen Richtlinie... -
Page 8: Descrizione Dell'apparecchio
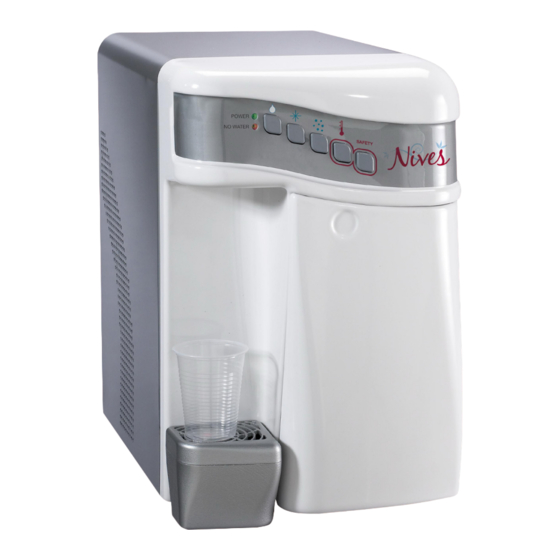
POWER NO WATER SAFETY Macchina sottobanco LATO OPERATORE OPERATOR SIDE undercounter machine Gerät mit Unterbau SEITE BEDIENER Machine sous plan CÔTÉ OPÉRATEUR Máquina bajo barra LADO OPERADOR DESCRIZIONE DELL’APPARECCHIO Questi refrigeratori sono stati studiati per servire grandi quantità di acqua fredda, Utilizzano un sistema di raffreddamento diretto (banco di ghiaccio) liscia, gassata, e calda a 95°C. Sono disponibili nei modelli: Sono di facile uso e realizzati con materiali di elevata qualità, per offrire la massima - Sopra banco (1) igiene e semplicità di manutenzione. - Sotto banco (2) Sono equipaggiati con un filtro che riduce cloro e sedimenti, accessibile dallo sportello. Alcuni modelli sono predisposti per erogare acqua gassata (ver- Indicato per ambienti domestici, può essere installato anche in altri ambienti come sioni WG e WGH) e richiedono un collegamento ad una bombola bar e uffici. L’installazione è prevista sempre al coperto e in condizioni ambientali... -
Page 9: Description Of The Appliance
DESCRIPTION OF THE APPLIANCE These water coolers were designed to provide large quantities of still and carbonated They use a direct cooling system (Ice bank) cold water and water heated to 95°C. Two types of water coolers are available: - Countertop (1) They are easy to use and manufactured using top quality materials, offering the - Undercounter (2) utmost hygiene and ease of maintenance. They are equipped with a filter which reduces chlorine and sediment accessible Some models can also provide carbonated water (HWG-WG versions), in through the door. - Page 10 VISTA GENERALE / GENERAL VIEW / GERÄTEANSICHT / VUE GENERALE / VISTA GENERAL SAFETY POWER NO WATER SAFETY POWER POWER NO WATER NO WATER SAFETY SAFETY CARICO VASCA FILL ICE BANK (I) Modelli sottobanco - (GB) Undercounter models - (D) Unterbaummodelle -- (F) Modeles sous plan - (E) Modelos debajo de mesón CARICO VASCA FILL ICE BANK Involucro...
- Page 11 Casing Main switch easily removable to reach interior parts Cold water thermostat Distribution spout Hot water thermostat (H models) positioned in the protected area 10 Hot water switch (H models) Standard dechlorination purifying filter 11 Mains water inlet 3/4M or ø 8mm Small tank to collect dripping water. 12 CO inlet ø...
- Page 12 CARATTERISTICHE TECNICHE TECHNICAL CHARACTERISTICS TECHNISCHE EIGENSCHAFTEN CARACTERISTIQUES TECHNIQUES CARACTERÍSTICAS TÉCNICAS Dimensioni Modelli sopra banco Dimensions Countertop models Abmessungen Auftisch-Gerät Modelle Dimensions Version a poser Dimensiones Modelos sobre banco Modelli sotto banco Undercounter models Untertisch-Gerät Modelle Version sous plan Modelos Bajo banco...
- Page 13 NIVES NIVES NIVES NIVES NIVES NIVES NIVES NIVES IN A IN H IN WG IN HWG Produzione acqua Lt/h 15 (8) 15 (8) 15 (8) 15 (8) Water production Trinkwasserproduktion Production d’eau Producción de agua usg/h 3,96 3,96 (2.11) 3,96 3,96 (2.11) 3,96 3,96 (2.11)
- Page 15 MANUALE PARTE II Riservato ad operatori qualificati HANDBOOK SECTION II Reserved to qualified operators HANDBUCH – 2. TEIL Für qualifizierte Betrieben MANUEL PARTIE II Resérvé aux personnel qualifié MANUAL - PARTE II Reservado a técnicos calificados...
-
Page 16: Installazione
Riservato ad operatori qualificati - Reserved to qualified operators - Für qualifizierte Betrieben - Resérvé aux personnel qualifié - Reservado a técnicos calificados INSTALLAZIONE POSA DELL’APPARECCHIO N.B: la pressione é importante sopratutto per macchine con Ponete l’apparecchio nel punto di installazione, lontano da fonti di calore e protetto dispositivo di gasatura. dai raggi diretti del sole. È sconsigliata inoltre l’installazione all’aperto e in ambienti molto umidi • Se la pressione di rete é superiore a 3 bar, predisponete un riduttore di pressione - L’apparecchio deve essere posizionato in modo da lasciare uno spazio libero A in grado di abbassare il valore di quest’ultima nel campo 2÷3 bar. di circa 6÷7 cm per l’areazione. • Questo distributore puo’ essere dotato di un dispositivo antiallagamento WATER Nei modelli sottobanco occorre predisporre delle apposite griglie/feritoie di areazio- BLOCK (optional) per prevenire eventuali perdite d’acqua accidentali (fig.6). ne nel vano di alloggiamento dell’apparecchio, in modo da favorire lo smaltimento Se il WATER BLOCK interviene, per riarmarlo è necessario smontare il raccordo del calore prodotto dal circuito frigorifero (fig.8) K e premere il pulsante P. - Assicuratevi che poggi su tutti e quattro i piedini. • Se la macchina, invece di essere collegata direttamente all’acquedotto è collegata ad una pompa autoclave, allora è necessario installare, a monte del circuito idrico, COLLEGAMENTO IDRICO ALLA RETE un dispositivo ANTISHOCK per prevenire i “colpi di ariete” (fig. 7) Prima del collegamento idrico, verificate che la pressione di rete sia compresa fra 2 e 3 bar. -
Page 17: Installation
Riservato ad operatori qualificati - Reserved to qualified operators - Für qualifizierte Betrieben - Resérvé aux personnel qualifié - Reservado a técnicos calificados INSTALLATION POSITIONING THE APPLIANCE N.B.: the pressure is especially important for those water Position the appliance in the point of installation, away from sources of heat and coolers fitted with a carbonation device. direct sunlight. We also advise against installing the appliance outdoors and in very damp rooms. - The appliance should be positioned in such a way as to leave approximately 6 ÷ 7 cm of space (A) free for air to circulate freely. • If the mains water pressure exceeds 3 bars, predispose a pressure reducer capable Special ventilation grills/slits must be prepared in the undercounter model’s housing of reducing the latter to the 1÷3 range. compartment to favour disposal of the heat produced by the refrigerating circuit • This water dispenser can be equipped with a WATER BLOCK anti-flooding device (fig.8). (optional) to prevent any accidental water leaks (fig.6). - Make sure the water cooler is resting fully on all four supporting feet. Once the WATER BLOCK device has intervened, fitting K should be disassembled and button P pressed to reset the device. WATER CONNECTION TO THE MAINS • If instead of being connected directly to the aqueduct the machine is connected to an autoclave pump, then it is necessary to install above the water supply an Before making the water connection, make sure the mains water pressure is between ANTISHOCK device to prevent “water hammers” (fig. 7) -
Page 18: Collegamento Elettrico
Riservato ad operatori qualificati - Reserved to qualified operators - Für qualifizierte Betrieben - Resérvé aux personnel qualifié - Reservado a técnicos calificados CARICO VASCA FILL ICE BANK CARICO VASCA FILL ICE BANK JE1610-0021 NI1604-120 NO1604-060 CARICO VASCA FILL ICE BANK CARICO VASCA FILL ICE BANK NI1604-140 NI1604-150 5.3.1 Collegamento idraulico Il collegamento alla rete idrica viene effettuato con l’ausilio del tubo T in dotazione (diametro 8 mm) servendosi del raccordo A in dotazione. Spingete il tubo T nell’attacco 11 esercitando la dovuta pressione. In fase di collegamento della macchina alla rete idrica, tutti i tubi, guarnizioni e giunzioni preesistenti, posti fra la macchina e la presa dell’acqua di rete, devono 5.3.2 Svuotamento banco di ghiaccio (per manutenzione) essere sostituiti da nuovo materiale per prevenire contaminazioni. - Page 19 Riservato ad operatori qualificati - Reserved to qualified operators - Für qualifizierte Betrieben - Resérvé aux personnel qualifié - Reservado a técnicos calificados 5.3.2 Ice container emptying (for maintenance) Connection to the water mains is done using the T tube provided (8 mm diameter) and the A fitting provided. Disconnect the power supply cable from the outlet. To empty the ice tank after the During connection of the appliance to the mains water supply, all pre-existing tubes, ice melted, you just have to take the vertical level and tank discharge tube (P) off its gaskets and joints placed between the appliance and the water mains connection site and let the water flow (fig. 12). After the ice container has been emptied (almost must be replaced with new material to avoid contamination. 3 litres), replace the tube in its place. 5.3 ICE CONTAINER FILLING ELECTRICITY CONNECTION Push tube T in the connection 16 with the necessary pressure. Connection to the mains electricity supply is carried out by connecting the plug to Open tap R and allow water to enter ice bank slowly until the water level in the vertical a mains socket. transparent (Fig. 11) pipe (P) reaches the position shown by plate “Fill”. (L) The supply socket must be equipped with an efficient earth plate and it must be sized Close tap R. for the load of the appliance (see technical characteristics). Take off the tube T pushing with a 8 key on the locking ring and simultaneously Make sure that the mains voltage corresponds with what is specified on the data plate.
- Page 20 Riservato ad operatori qualificati - Reserved to qualified operators - Für qualifizierte Betrieben - Resérvé aux personnel qualifié - Reservado a técnicos calificados POWER NO WATER SAFETY NI1604-050 AVVIAMENTO Attenzione! Prima di utilizzare la macchina procedere alla sanificazione (vedi paragrafo relativo) • Aprite il rubinetto dell’acqua e verificate che non vi siano perdite. • Accendete l’interruttore generale 7. Attenzione! Se l’apparecchio é stato coricato o capovolto, attendete almeno 8 ore prima di avviarlo. • Premete il pulsante acqua gasata fino ad eliminare i residui di aria nel circuito (modelli WG-HWG). • Ripetete l’operazione con il pulsante acqua fredda e ambiente • Regolate il termostato acqua fredda 8 in relazione all’utilizzo e alla stagione (po- sizioni consigliate da 4 a 7)
- Page 21 Riservato ad operatori qualificati - Reserved to qualified operators - Für qualifizierte Betrieben - Resérvé aux personnel qualifié - Reservado a técnicos calificados STARTING Warning! Before using the machine proceed with the sanitation (see relative paragraph) • Turn on the water tap and make sure there are no leaks. • Turn on the main ON/OFF switch 7. Warning! If the appliance has been laid down or turned upside down, you should wait at least 8 hours before starting it. • Press the sparkling water button until all the remaining air is eliminated from the circuit (WG-HWG models).
- Page 22 Riservato ad operatori qualificati - Reserved to qualified operators - Für qualifizierte Betrieben - Resérvé aux personnel qualifié - Reservado a técnicos calificados POWER NO WATER SAFETY JE1610-030 NI1604-160 IN CO POWER NO WATER SAFETY CARICO VASCA FILL ICE BANK JE1610-0009 NI1604-170 AVVIAMENTO ACQUA GASSATA (modelli WG-HWG) COLLEGAMENTO DELLA BOMBOLA DEL GAS CO (ANIDRIDE CARBONICA) In questo modello di refrigeratore, la bombola CO 2 può essere collegata all’esterno INSTALLAZIONE BOMBOLA MONOUSO (BU-UG) ALL’ESTERNO DELLA MAC- della macchina (fig.18) permettendo di usare anche bombole ricaricabili, oppure può...
- Page 23 Riservato ad operatori qualificati - Reserved to qualified operators - Für qualifizierte Betrieben - Resérvé aux personnel qualifié - Reservado a técnicos calificados SETTING UP THE SPARKLING WATER (WG-HWG models) GAS CYLINDER CONNECTION (CARBON DIOXIDE) In this water cooler model, the CO can be connected outside the machine (fig.18) ONE USE CYCLIDER INSTALLATION OUTSIDE MACHINE allowing the use of rechargeable cylinders as well, or it can be inside the door both for • Identify the red cap which closes the IN CO inlet on the rear panel; take it off and the TOP (fig. 17) version and for the IN version (fig.15) using CO cylinders only (B-UG). use it to close the IN CO inlet inside the machine, putting the needed pressure on CYCLIDER INSTALLATION INSIDE MACHINE the fitting.
- Page 24 Riservato ad operatori qualificati - Reserved to qualified operators - Für qualifizierte Betrieben - Resérvé aux personnel qualifié - Reservado a técnicos calificados NI1604-170 NI1604-160 AVVIAMENTO ACQUA GASSATA (modelli WG-HWG) La vite di regolazione del riduttore R è già tarata nella posizione ottimale di gasatura INSTALLAZIONE BOMBOLE DI TIPO RICARICABILE ( B-RIC) (circa 3,5 bar). È possibile comunque aumentare la quantità del gas ruotando la • L’installazione di bombole di tipo ricaricabile (B-RIC) è possibile solo vite in senso orario, o in senso antiorario per diminuirla (fig.17). L’autonomia della esternamente alla macchina, utilizzando la presa sul pannello posteriore.
- Page 25 Riservato ad operatori qualificati - Reserved to qualified operators - Für qualifizierte Betrieben - Resérvé aux personnel qualifié - Reservado a técnicos calificados SETTING UP THE SPARKLING WATER (WG-WG-HWG models) INSTALLATION OF RECHARGEABLE CYLINDERS ( B-RIC) The screw for regulating the reduction valve R has already been calibrated to the • Installation of rechargeable cylinders (B-RIC) is possible only outside of optimal pressure setting (approximately 3,5 bar). the machine using the inlet on the rear panel. In any case, the quantity of gas supplied can be increased by turning the screw in • Identify the red cap which closes the IN CO inlet on the rear panel; take it off and the clockwise direction, or decreased by turning it in the anti-clockwise direction (fig.17). Rechargeable CO cylinders can charge approximately 140 liters of water. use it to close the IN CO inlet inside the machine, putting the needed pressure on the fitting. • Remove the ø6mm tube from the installation kit and connect it to the pressure reducer R of the rechargeable (B-RIC) cylinder to the IN CO inlet on the rear...
- Page 26 Riservato ad operatori qualificati - Reserved to qualified operators - Für qualifizierte Betrieben - Resérvé aux personnel qualifié - Reservado a técnicos calificados Consigli di utilizzo per l’acqua gassata Per avviare il dispositivo di gasatura: Per garantire il buon funzionamento nel tempo della pompa è necessario che la macchina funzioni sempre con presenza di acqua nel circuito di raffreddamento. • Agite sul pulsante dell’acqua gassata Se viene a mancare l’acqua di rete, un sistema di protezione interviene e • Far defluire qualche litro di acqua fino a quando inizia ad uscire gassata.
- Page 27 Riservato ad operatori qualificati - Reserved to qualified operators - Für qualifizierte Betrieben - Resérvé aux personnel qualifié - Reservado a técnicos calificados Conseils d’utilisation pour l’eau gazeuse Pour mettre le dispositif de gazéification en marche: Pour garantir le bon fonctionnement de la pompe dans le temps, il faut toujours qu’il y ait de l’eau dans le circuit de refroidissement pendant le fonctionnement de l’appareil. • Appuyez sur la touche de l’eau gazeuse • Faites couler quelques litres d’eau jusqu’à ce qu’elle sorte gazeuse. Lorsque l’eau vient à manquer dans le circuit, un système de protection intervient et bloque le fonctionnement de la pompe (le voyant “NO WATER” s’allume). Pour rétablir le fonctionnement de l’appareil il faut déconnecter Attention ! l’appareil du circuit électrique et ne le reconnecter que lorsqu’il y aura de Les résultats de variation de pression sur la gazéification...
- Page 28 Riservato ad operatori qualificati - Reserved to qualified operators - Für qualifizierte Betrieben - Resérvé aux personnel qualifié - Reservado a técnicos calificados CARICO VASCA FILL ICE BANK CARICO VASCA FILL ICE BANK NI1604-0220 AVVIAMENTO ACQUA CALDA (H-HWG) Nell’installazione, oppure se il refrigeratore è rimasto senz’acqua, possono entrare delle bolle d’aria all’interno del gasatore. Questi refrigeratori dispongono di un serbatoio in acciaio inox da 1,0 litri per Queste bolle d’aria possono ridurre la qualità della gasatura pertanto occorre la produzione di acqua calda a 95°C max. precedere ad eliminarle: Un sistema di sicurezza consente di prelevare l’acqua calda solo premendo • Svitate la bombola dal riduttore simultaneamente il pulsante e quello SAFETY (pulsante rosso). • Rimuovete l’involucro dell’apparecchio • Spurgare il circuito tirando l’anello della valvola di sfiato V. • Ricollegate la bombola del CO al riduttore • Fate defluire almeno due litri di acqua gassata • Rimontate l’involucro dell’apparecchio NB: nel rimontaggio dell’involucro ponete attenzione a far accoppiare le due chiavi poste nella parte inferiore frontale, con le apposite asole predisposte sul fondo dell’apparecchio.
- Page 29 Riservato ad operatori qualificati - Reserved to qualified operators - Für qualifizierte Betrieben - Resérvé aux personnel qualifié - Reservado a técnicos calificados When installing the appliance, or if the water cooler has no water left inside STARTING WITH HOT WATER (H MODELS) it, a few air bubbles may enter the carbonation device. These water coolers are fitted with a 1.0 litre stainless steel tank for the These air bubbles could diminish the quality of the carbonation process, and production and storage of water heated to 95°C max. we therefore recommend you remove them: A special safety system allows for hot water to be dispensed only if both the • Unscrew the cylinder from the reducer button and SAFETY buttons (red button) are pressed simultaneously. • Remove the casing • Drain the circuit by pulling the outlet valve ring V. • Re-connect CO cylinder to the reducer • Drain off at least two litres of sparkling water • Replace the casing NB: when re-mounting the cover pay attention that the two tabs in the lower front part are aligned with the relevant slots on the bottom of the appliance...
- Page 30 Riservato ad operatori qualificati - Reserved to qualified operators - Für qualifizierte Betrieben - Resérvé aux personnel qualifié - Reservado a técnicos calificados POWER NO WATER SAFETY NI1604-050 CARICO VASCA CARICO VASCA FILL ICE BANK FILL ICE BANK • Individuare l’interruttore rosso 10; nel modello TOP è posto all’interno(fig.24) • Accendete l’interruttore 10. mentre per il modello IN è sul pannello lato operatore (fig.25) • Impostate la temperatura desiderata sul termostato 9; la regolazione va • Tenere spento l’interruttore 10 (pos.O) da un minimo di 60°C ad un massimo di 95°C. Il termostato “HOTTER” è posto all’interno dello sportello nei modelli TOP e sul pannello, lato operatore, nei modelli IN. • Tenete premuti i tasti e SAFETY simultaneamente per riempire il • Lo spegnimento dell’interruttore 10 segnala che la temperatura è stata serbatoio dell’acqua calda, fino a far uscire un flusso costante.
- Page 31 Riservato ad operatori qualificati - Reserved to qualified operators - Für qualifizierte Betrieben - Resérvé aux personnel qualifié - Reservado a técnicos calificados • Identify the red switch 10; on the TOP model it is placed inside (fig.24) • Turn on switch 10. while on the IN model it is on the operator side panel (fig.25) • Set the desired temperature on thermostat 9; the temperature can be set • Keep the switch off 10 (pos.O) from a minimum of 60°C to a maximum of 95°C. The “HOTTER” thermostat is placed inside the door on the TOP models and on the operator side panel on the IN models. • Keep the buttons and SAFETYpressed at the same time to fill the • When switch 10 turns off, the water has reached the required temperature. tank with hot water, until a constant flow exits the dispenser. This is extremely important and should be done before you turn Warning! switch 10 on, to avoid any permanent damage being caused to the hot Hot water at 95°C produces steam under pressure.
-
Page 32: Manutenzione Ordinaria
Riservato ad operatori qualificati - Reserved to qualified operators - Für qualifizierte Betrieben - Resérvé aux personnel qualifié - Reservado a técnicos calificados Le operazioni di manutenzione devono essere 27.1 compiute da personale qualificato. Maintenance operations should be carried out by a qualified professional. Die Wartungsarbeiten dürfen nur durch Fa- chpersonal durchgeführt werden. Les opérations d’entretien doivent être effec- tuées par du personnel qualifié. Las operaciones de mantenimiento deben ser ejecutadas por personal calificado. -
Page 33: Entretien Ordinaire
Riservato ad operatori qualificati - Reserved to qualified operators - Für qualifizierte Betrieben - Resérvé aux personnel qualifié - Reservado a técnicos calificados Geräteteil Vorgehensweise Häufigkeit Reinigung des Kühlkondensators • Entfernen Sie Unreinheiten oder Staub mit Hilfe eines Hausstaubsaugers oder ähnlichem. monatlich (Abb.26) • Verwenden Sie dabei keine Druckluft. • Verwenden Sie keine Metallbürsten. Wasserwechsel im Eisvitrinenbe- • Gerät ausschalten und ca. 1 Stunde warten, bis es abgetaut hat. Falls die Maschine lange Zeit hälter. • Das Wasser durch das Abfluss- und Nivellierungsrohr P ablaufen lassen (s. Abschnitt 5.3.2.). nicht in Funktion war • Wasserniveau im Eisvitrinenbehälter wie im Kapitel “INSTALLATION auffüllen. Versorgungskabel • Überprüfen Sie Zustand und Unversehrtheit des Versorgungs-kabels. Überprüfung des korrekten Was- • Überprüfen Sie Zustand und Unversehrtheit der Wasserzufuhr-leitung. seranschlusses • Vergewissern Sie sich, dass kein Wasser an ungewünschter Stelle entweicht. Auswechseln Filterpatrone • Die Patrone wie in Abbildung 28-29 abschrauben Alle 6 Monate und nach jeder... - Page 34 Riservato ad operatori qualificati - Reserved to qualified operators - Für qualifizierte Betrieben - Resérvé aux personnel qualifié - Reservado a técnicos calificados POWER NO WATER SAFETY CARICO VASCA FILL ICE BANK Le operazioni di manutenzione devono essere compiute da personale qualificato. Maintenance operations should be carried out by a qualified professional. Die Wartungsarbeiten dürfen nur durch Fachpersonal durchgeführt werden. Les opérations d’entretien doivent être effectuées par du personnel qualifié. Las operaciones de mantenimiento deben ser ejecutadas por personal calificado.
- Page 35 Riservato ad operatori qualificati - Reserved to qualified operators - Für qualifizierte Betrieben - Resérvé aux personnel qualifié - Reservado a técnicos calificados INTERNAL CLEANING/ HYGIENIC CLEANING WARNING! Considering that the products used for the hygienic cleaning are acid and alkali corrosive substances, disposable gloves must be used as well as glasses to protect your eyes. When this hygienic cleaning is carried out, you must keep to the product reaction times, percentages of hygienic detergent and quantity of water necessary for rinsing. HYGIENIC CLEANING • With the help of a pump P, connect the appliance’s water inlet to the container with the disinfecting solution.
-
Page 36: Raccordement À L'évacuation
Riservato ad operatori qualificati - Reserved to qualified operators - Für qualifizierte Betrieben - Resérvé aux personnel qualifié - Reservado a técnicos calificados Le operazioni di manutenzione devono essere compiute da personale qualificato Maintenance operations should be carried out by a qualified professional Die Wartungsarbeiten dürfen nur durch Fachpersonal durchgeführt werden Les opérations d’entretien doivent être effectuées par du personnel qualifié Las operaciones de mantenimiento deben ser ejecutadas por personal calificado COLLEGAMENTO ALLO SCARICO I modelli TOP hanno una vaschetta predisposta per essere forata e collegata a un tubo di drenaggio per lo scarico. • Forare la vaschetta nel punto indicato, utilizzando una punta da trapano da 3 - 3,5 mm compiendo una lavorazione a regola d’arte. Il tubo di drenaggio viene fatto passare sotto la macchina. Per il drenaggio utilizzare un tubo siliconico morbido, diametro interno 4 mm. DRAINING CONNECTION The TOP models have a tray prepared to be pierced and connected to a • Pierce the tray at the indicated point, using a 3 – 3.5 mm drill bit doing a draining tube. state of the art job. The draining tube passes below the machine. For draining, use a soft silicon tube, with an internal diameter of 4 mm. ANSCHLUSS AN DEN ABFLUSS Die Modelle TOP besitzen eine Wanne, an der eine Bohrung ausgeführt • Am angegebenem Punkt der Wanne im eine Bohrung durchführen; dazu benutzt wird und eine Leitung für die Entwässerung an den Abfluss angebracht wird.
Need help?
Do you have a question about the NIVES A and is the answer not in the manual?
Questions and answers