Table of Contents
Advertisement
Quick Links
Motion RC is proud to announce Skynetic, a new brand of foam electric aircraft offering high value and diverse
selection for newer pilots looking to broaden their flying experience across a range of platforms. Developed by
and available exclusively at Motion RC, Skynetic advances our vision of a global audience discovering the fun
of RC Flight. Backed by Motion RC's customer support and a full line of spare parts to keep you flying, stay
tuned for new products as we expand our exciting new brand!
Examine your kit carefully!
Skynetic models are subject to constant quality checks throughout the production process, and we sincerely hope
that you are completely satisfied with the contents of your kit. However, we would ask you to check all the parts
before you start construction, referring to the Parts List, as we cannot exchange components which you have
already mod ified . If you find any part is not acceptable for any reason, we will readily correct or exchange
it once we have examined the faulty component. Just send the offending part to our Model Department. Please
be sure to include the enclosed complaint form, duly completed. We are constantly working on improving our
models, and for this reason we must reserve the right to change the kit contents in terms of shape or dimensions
of parts, technology, materials and fittings, without prior notification. Please understand that we cannot entertain
claims against us if the kit contents do not agree in every respect with the instructions and the illustrations.
MIMM
Radio-controlled models, and especially model aircraft, are by no means playthings in the usual sense of the term.
Building and operating them safely requires a certain level of technical competence and manual skill, together
with discipline and a responsible attitude at the flying field. Errors and carelessness in building and flying the
model can result in serious personal injury and damage to property. Since we, as manufacturers, have no control
over the construction, maintenance and operation of our products, we are obliged to take this opportunity to
point out these hazards and to emphasise your personal responsibility.
1
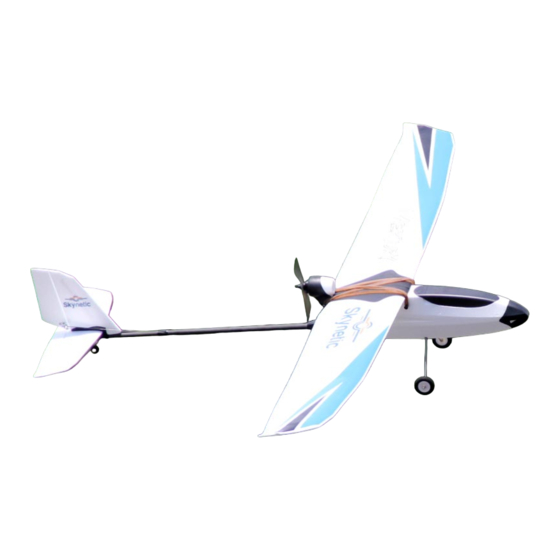
Mercury
Advertisement
Table of Contents

Related Manuals for MotionRC Skynetic Mercury


Summary of Contents for MotionRC Skynetic Mercury
- Page 1 Mercury Motion RC is proud to announce Skynetic, a new brand of foam electric aircraft offering high value and diverse selection for newer pilots looking to broaden their flying experience across a range of platforms. Developed by and available exclusively at Motion RC, Skynetic advances our vision of a global audience discovering the fun of RC Flight.
- Page 2 = � 17 c:iCJ 1. Fuselage 10. Flap Push rod 18.FPVCanopy 2-3. Wing Halves 11. Propeller 4. Vertical Stabilizer /Rudder 12. Rubber Band 5. Horizontal Stabilizer /Elevator 13. Linkage 6. Canopy 14. Tailwheel 15. Tail Nut 7. Main Landing Gear 16.
- Page 3 Mode2 Rudder/ Throttle Mode2 Power Rudder Switch Trim Installing the Transmitter Batteries Throttle Speed Insert included batteries in the transmitter CAUTION: If using rechargeable batteries, charge only rechargeable batteries. Charging non-rechargeable batteries may cause the batteries to burst, resulting in injury to persons and/or damage to property.
-
Page 4: Flight Trimming
Flight Trimming • When the aircraft roll left or right while the aileron stick is at the neutral position (centered), push the Elevator trim: -� ® aileron trim button by one "beep" increments OPPOSITE the direction of drift. Installing the Tail -�... -
Page 5: Installing The Flight Battery
------- Installing the Flight Battery 1.Open the canopy. 3.Center the wing on the fuselage by aligning the 2.lnstall the flight battery (Do Not connect the wires at center dot on the wing with the top seam on the this time) fuselage, and by centering the half circle on the wing's 3.After connecting the battery, align the canopy pins trailing edge over the fuselage center. -
Page 6: Centre Of Gravity
a._____15 LJCG 50-65MM Choose a Flying Field In order to have the most success and to protect your property and aircraft, it is very important to select a place to fly that is very open. Consult local laws and ordinances before choosing a location to fly your aircraft. -
Page 7: Servo Service
Low down the speed If you feel it flying too fast in leaning period, you can install this part to low down the flying speed. 1.Thread motor wires through the holes under motor and into fuselage. 2.lnstall motor onto motor mount, and use screws to fix. Cut off the joints between flap and wing. - Page 8 Safety Safety is the First Commandment when flying any model aircraft. Third party insurance should be considered a basic essential. If you join a model club suitable cover will usually be available through the organisation. It is your personal responsibility to ensure that your insurance is adequate.
- Page 9 Me�u� Red: 08400R Mercury Blue: 084008 Item.No: 08401 Wing Item.No: 08402 Fuselage Item.No: 08403 Stabilizer Item.No: 08404 Landing gear sets Item.No: 08405 Rudder Item.No: 08406 Motor: MS2208 KV1550...
- Page 10 Item.No: 08407 Servo 8g micro servo Item.No: 08408 Battery 11.1 V 3S 1800mAh Li-po 20C Item.No: 08409 ESC: 20A Item.No: 08410 Propeller: 6040 HD prop Item.No: 08411 2.4G Radio Item.No: 08412 Charger...
- Page 11 WARNINGS • Choose an appropriate operating site consisting of • The product is not indended for those under 14 years flat, smooth ground, and clear open filed. Do not of age without proper adult supervision. The product operate near buildings, high voltage cable lines, or is not a toy.
-
Page 12: Connection Diagram
• Before turning on your model and transmitter, please • After each use, always allow the battery to cool down check to make sure no one else is operating under the before recharging. When charging the battery pack, same frequency. Frequency interference can cause do not overcharge! If batteries get hot during your model, or other models to crash. - Page 13 Connection Diagram(For FIXED-WING) Switch to "FIXED-WING" position and enter Fixed-Wing Plane mode. Switch Switch 1 Switch 2 Switch 3 Switch 4 Switch 5 Switch 6 Elevator Throttle Rudder Reverse Alieron Mode 1 Fixed-Wing Reverse Reverse Reverse Reverse Model 2 Delta ansmitt (Mode 1) THRO...
Need help?
Do you have a question about the Skynetic Mercury and is the answer not in the manual?
Questions and answers