Table of Contents
Advertisement
Quick Links
Advertisement
Table of Contents

Related Manuals for Weber RANCH KETTLE 39950


Summary of Contents for Weber RANCH KETTLE 39950
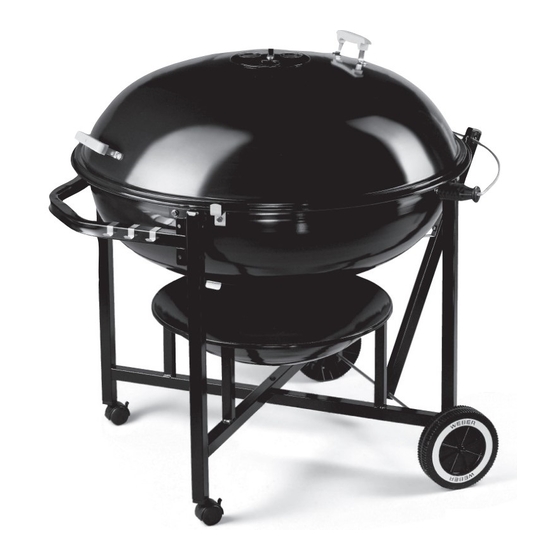
- Page 1 RANCH KETTLE ® ⁄ inch (114 cm) 39950...
-
Page 2: Assembly Instructions
7/16 inch, 1/2 inch open-end or an adjustable wrench ©2006 The following trademarks are registered in the name of Weber-Stephen Products Co., an Illinois corporation, located at 200 East Daniels Road, Palatine, Illinois 60067 U.S.A. Australia; Smokey Joe, Weber, Kettle Silhouette Benelux;... - Page 3 PARTS Top Frame Assembly Bottom Frame Assembly Lid Assembly Bowl Assembly Ash Catcher Hinged cooking grate Charcoal grate Tuck-Away frame support Axle Frame handle Wire lid holder assembly Tuck-Away support bracket Two lid tabs...
- Page 4 Three tool holders Plastic tubing plug Four aluminum tubing plugs Two wheels Two wheel hubcaps Five 1/4-20 hex nuts (actual size) Ten nylon washers (actual size) PARTS Five 1/4-20 x 1 3/4 inch bolts (actual size) Six 5/16 inch steel washers (actual size) Six 5/16-18 x 7/8 inch bolts (actual size)
-
Page 5: Assemble Frame
ASSEMBLY ASSEMBLE FRAME You will need: Top Frame Assembly (1), Bottom Frame Assembly (2), 7/16 inch open-end or an adjustable wrench and pliers. Remove hex nut and bottom washer (3) from the bolt that is preinstalled in the Top Frame Assembly. Do not remove top bolt and washer from Top Frame Assembly. -
Page 6: Continue Frame Assembly
Slide axle through the frame, Tuck-Away frame support, [make sure slot is facing up (2)], and through other end of frame. Add other wheel (WEBER side toward the hubcap) and tap on hubcap. Finish tightening bolt in center of frame assembly. - Page 7 ASSEMBLE FRAME HANDLE You will need: Frame assembly, frame handle, four 1/4-20 x 1 3/4 inch bolts, eight nylon washers, four 1/4-20 hex nuts, 7/16 inch open-end or an adjustable wrench and pliers. Hold frame handle (1) between caster legs. Place a washer (2) on bolt (3), insert through frame assembly, then through frame handle.
- Page 8 INSTALL BOWL ASSEMBLY You will need: Bowl assembly, four 5/16-18 x 7/8 inch bolts, four 5/16 inch steel washers, four 7/8 inch aluminum washers, four 5/16-18 hex nuts, four 5/16 inch lock washers, 1/2 inch open-end or an adjustable wrench and pliers. Set bowl in frame.
- Page 9 INSTALL WIRE LID HOLDER ASSEMBLY You will need: Wire lid holder assembly and a 1/2 inch open-end or an adjustable wrench. Remove 5/16-18 hex nut (1), 5/16 inch lock washer (2) and 7/8 inch aluminum washer (3) from each end of wire lid holder. Finger tighten remaining 5/16-18 hex nut (4). Note - Bushings (5) should roll freely on wire lid holder.
- Page 10 ASSEMBLY INSTALL TUCK-AWAY SUPPORT BRACKET You will need: Tuck-Away support bracket, plastic tubing plug, 1/4-20 x 1 3/4 inch bolt, two nylon washers, 1/4-20 hex nut, 7/16 inch open-end or an adjustable wrench and pliers. Insert tabs of support bracket through slot in Tuck-Away frame support (a). Place a nylon washer on bolt, insert through Tuck-Away frame support and support bracket.
-
Page 11: Final Assembly
This Limited Warranty shall be limited to the repair or replacement of parts which prove defective under normal use and service and which on examination shall indicate to Weber’s satisfaction they are defective. If Weber confirms the defect and approves the claim, Weber will elect to repair or replace such parts without charge. -
Page 12: Parts List
All items are single quantities unless otherwise specified. Parts can be ordered from Weber-Stephen Products Co. by phone or mail. Note - Do not return parts to Weber-Stephen Products Co. without first contacting the Customer Service Center by phone or mail. Returning the part may not be necessary.
Need help?
Do you have a question about the RANCH KETTLE 39950 and is the answer not in the manual?
Questions and answers