
Related Manuals for Logik LHDFSAT11


Summary of Contents for Logik LHDFSAT11
- Page 1 Instruction Manual Welcome to your new freesat satellite HD digital box. How to set up and use your LHDFSAT11...
-
Page 3: Table Of Contents
Contents Unpacking ............................5 Product Overview..........................6 Front View ..............................6 Rear View ..............................6 Remote Control .............................7 Installing Batteries in the Remote Control ....................8 Remote Control Operation Range ....................... 9 Connections ............................9 Connecting to the Satellite Dish ........................9 Connecting Your Unit ..........................10 Initial Setting .............................11 Plug In and Switch On ..........................11... - Page 4 Picture Menu ............................ 21 Screen Type ..............................21 Display Mode ............................... 21 HDMI Resolution ............................22 SCART Mode ..............................22 Sound Menu .............................22 Audio Language ............................22 Audio Description ............................23 Dolby Digital..............................23 Lip-Sync Delay Resolution ..........................23 Balance .................................23 Time Menu ............................24 Auto Standby ...............................24 Sleep Timer ..............................24 Auto Turn On..............................24 Auto Turn Off ...............................24...
-
Page 5: Unpacking
Thank you for purchasing your new Logik Satellite HD Digital Box. These operating instructions will help you use it properly and safely. We recommend that you spend some time reading this instruction manual in order that you fully understand all the operational features it offers. You will also find some hints and tips to help you resolve any issues. -
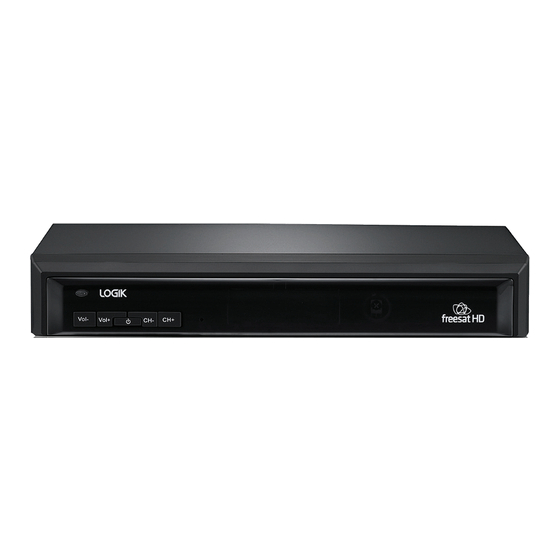
Page 6: Product Overview
Product Overview Front View Standby Indicator 4. CH+ / CH– Button Illuminates blue when the unit is turned Switches to the next or previous channel. on. Illuminates red when the unit is in 5. Remote Sensor standby mode. Receives signals from the remote control. 2. -
Page 7: Remote Control
Remote Control STANDBY Button Switches the unit on and off. 2. 0-9 Number Button Directly select channels, enter numeric values in the set-up menus and to enter your postcode. SWAP Button Switches back to the last channel watched. 4. GUIDE Button Displays the programme guide. -
Page 8: Installing Batteries In The Remote Control
Installing Batteries in the Remote Control Press and lift the battery cover of remote control. 2. Insert 2 x AAA size batteries and make sure to match the (+) and (–) ends of the batteries with the (+) and (–) ends indicated in the battery compartment. -
Page 9: Remote Control Operation Range
Remote Control Operation Range Point the remote control unit no more than 5 metres from the remote control sensor and within 60° in front of the unit. The operating distance may vary depending on the brightness of the room. 30° 30°... -
Page 10: Connecting Your Unit
Connecting Your Unit Place the unit on a firm, level surface close to the TV, a mains electricity socket, and the cable from the dish. LNB IN Connect the cable from your satellite dish to the LNB IN socket at the back of the unit (if the satellite dish cable is fitted to a wall socket inside your home, you will need a connecting cable, which you can get from your installer). -
Page 11: Initial Setting
Initial Setting Plug In and Switch On Switch your TV on and select the HDMI or SCART input. Insert the mains adapter to the rear of the unit and plug into a mains socket and switch on. The blue LED indicator will illuminate. The first freesat installation screen will show on the television screen after a few seconds. - Page 12 • Enter your postcode with the 0-9 buttons by pressing the correct button on the remote control a number of times to produce the relevant letter (printed above each button), or number, in the same way as ‘texting’ with a mobile phone. For example, for an ‘S’ , you would press the 7 button four times.
-
Page 13: Basic Operation
Basic Operation Turning On the Unit Press the button on the remote control or the front of the unit. The power light on the front panel changes from red to blue when the unit is powered up. • You should leave the unit plugged in with the socket switched on, at all times. When you are not using the unit, put it in standby by pressing the button on the remote control or the front of the unit. -
Page 14: Browsing Bar
Browsing Bar Whenever you change channel, the unit briefly displays a browsing bar at the bottom of the screen that contains information about the current channel and programme. You can press the button at anytime to display the bar again. It shows: •... -
Page 15: Subtitles And Audio Description
Subtitles and Audio Description Many freesat programmes are broadcast with subtitles for people who are hearing impaired. Channels with subtitles available show the in the information bar. If you want to turn on subtitles, first display the subtitles menu by pressing the SUB button and then press the buttons to highlight “English”... -
Page 16: Regional Channels
Regional Channels With freesat, some channels, such as BBC1, broadcast regional variations of their channels. The initial regional variations are based on the postcode that you entered when you installed the unit. You can replace the regional variation of a channel in the channel list by pressing the BLUE button while the channel is highlighted. -
Page 17: Interactive Tv Services
Press the OK button to switch the unit to the channel and programme highlighted. If the programme is on at the time, the unit will switch to that channel immediately. If the programme is scheduled for later on, a reminder is set so that when the programme is about to start, a message is displayed on-screen and, after a few seconds, the unit automatically switches to the... -
Page 18: Advanced Use
Advanced Use The Lock Pin Some of the menu functions can be locked to avoid accidental changes to the unit’s setup, and you can lock particular channels to prevent some family members, such as children, from watching them. To use a locked menu function or watch a locked channel, you need to enter the four-digit PIN that you set when you first installed the unit. -
Page 19: Changing The Channel List
Changing the Channel List The channel list contains all the freesat channels that the unit found when it was first installed, and may include some channels that you do not watch, do not want to include in the on-screen list, or do not want some members of your family to watch. -
Page 20: General Menu
Choose a channel from a favourite channels list, during normal TV viewing, by pressing the button to display the first favourite channels list. Press the buttons to switch to the other lists, and highlight the channel you want to watch using the buttons and then press the OK button. -
Page 21: Information
Information Press the MENU button to enter the SETUP menu. buttons to select General in the 2. Press the section bar. Press the buttons to select Information and then press the OK button to show technical information about your unit, including the Helpline phone number, signal strength and quality readings. -
Page 22: Hdmi Resolution
HDMI Resolution Press the MENU button to enter the Setup menu. buttons to select Picture in the section bar and then press the 2. Press the buttons to select HDMI Resolution. 3. Press the OK button to show the HDMI Resolution menu and then press the buttons to choose the correct resolution for your TV. -
Page 23: Audio Description
Audio Description Press the MENU button to enter the Setup menu. buttons to select Sound in the section bar. Press the buttons to select Audio 2. Press the Description. 3. Press the OK button to switch on audio description for all channels that provide it. Switch audio description off by pressing the OK button again. -
Page 24: Time Menu
Time Menu Auto Standby To conserve power, the unit will switch to standby after three hours if no buttons are pressed on the remote control or front panel. Press the MENU button to enter the Setup menu. buttons to select Time in the section 2. -
Page 25: Time Zone
Time Zone Press the MENU button to enter the Setup menu. buttons to select Time in the section bar. Press the buttons to select Time 2. Press the Zone. 3. Press the OK button to show the time zone menu and then press the buttons to highlight the correct European time zone for your location. -
Page 26: Parental Guidance
Parental Guidance Press the MENU button to enter the Setup menu. buttons to select System in the section bar. Press the 2. Press the buttons to select Parental Guidance. 3. Press the OK button to turn on or off the parental guidance lock. This prevents watching any programme broadcast with a parental guidance warning, or displaying the system menu, without first entering the lock PIN. -
Page 27: Software Update Via Oad
Software Update Via OAD Press the MENU button to enter the Setup menu. buttons to select System in the section bar. Press the 2. Press the buttons to select Software Update Via OAD. 3. Press the OK button to turn on or off the automatic software update. 4. -
Page 28: Online Tv
Online TV This section explains how to set up the unit to watch online TV services, such as the BBC iPlayer and ITV Player catch-up services. You must have a broadband Internet connection in your home to watch online TV. You can read the latest information about freesat online TV services on the freesat information page on channel 999. -
Page 29: Watching Online Tv
If the IP address item shows a number in four sections separated by dots, then the unit is connected to your local network. If online services still do not work, you should check your router’s connection to the Internet. If “Not Connected” is shown, you should carefully check the broadband connection and the Network Configuration. -
Page 30: Non-Freesat Channels
Non-freesat Channels This section explains how to set up your unit to receive channels that are not included with freesat. As well as receiving the many freesat channels, the unit can also be used to watch other channels, as long as they are broadcast from the same satellites as freesat and are free. Tuning in Non-freesat Channels Press the MENU button to enter the Setup menu. -
Page 31: Watching Non-Freesat Channels
When you are watching a non- freesat channel, the information bar displays the Logik logo instead of the freesat logo. While watching a non-freesat channel, you can step through the other non-freesat channels by pressing the P+ / P–... -
Page 32: Hints And Tips
Hints and Tips If a problem does occur, it may often be due to something very minor. The following table contains various tips. If you require additional assistance please call our UK Call Centre on 0844 561 1234. Our UK Customer Contact Centre is open Monday-Saturday 8am-8pm or Sunday 8am-6pm. Problem Possible Cause Solution... - Page 33 Problem Possible Cause Solution TV picture not HD • Tuned to an SD channel • Tune to an HD channel • TV not capable of HD • Connect the unit to an HD-Ready • TV connected by SCART • Connect the TV with a HDMI cable No response with • Unit in standby • Switch on the unit...
-
Page 34: Specification
Specification Model LHDFSAT11 Standard DVB-S/S2 Input Frequency 950~2150MHz Input Connector F type, female 75 ohm Tuner 14.0V / 19.0V (maximum.350mA), LNB Supply short-circuit protected Digital Signal Input Level -20 to -65 dBm Resolution 576i / 576p / 720p / HDMI Output... -
Page 35: Safety Warnings
Safety Warnings Safety Read all the instructions carefully before using the unit and keep them for future reference. • Always disconnect the unit from the mains supply Retain the manual. If you pass the unit onto a third before connecting/disconnecting other devices or party make sure to include this manual. - Page 36 CAUTION RISK OF ELECTRIC SHOCK DO NOT OPEN The lightning flash with arrowhead symbol, within an equilateral triangle, is intended to alert the user to the presence of uninsulated “dangerous voltage” within the unit’s enclosure that may be of sufficient magnitude to constitute a risk of electric shock.
- Page 37 HDMI, the HDMI Logo and High-Definition Multimedia Interface are trademarks or registered trademarks of HDMI Licensing LLC. Manufactured under license from Dolby Laboratories. Dolby and the double-D symbol are trademarks of Dolby Laboratories. All trademarks are the property of their respective owners and all rights are acknowledged. DSG Retail Ltd • Maylands Avenue • Hemel Hempstead Herts • HP2 7TG • England (P.N. LHDFSAT11-IB-002)
- Page 40 Find out more about freesat at w w w . f r e e s a t . c o . u k Follow freesat on w w w . t w i t t e r . c o m / f r e e s a t _ T V Like freesat on w w w .
Need help?
Do you have a question about the LHDFSAT11 and is the answer not in the manual?
Questions and answers