Wasp WPL305 User Manual
Thermal label printer wasp technologies dt/tt printer
Hide thumbs
Also See for Wasp WPL305:
- Programming manual (120 pages) ,
- Quick start manual (2 pages) ,
- User manual (9 pages)
Table of Contents
Advertisement
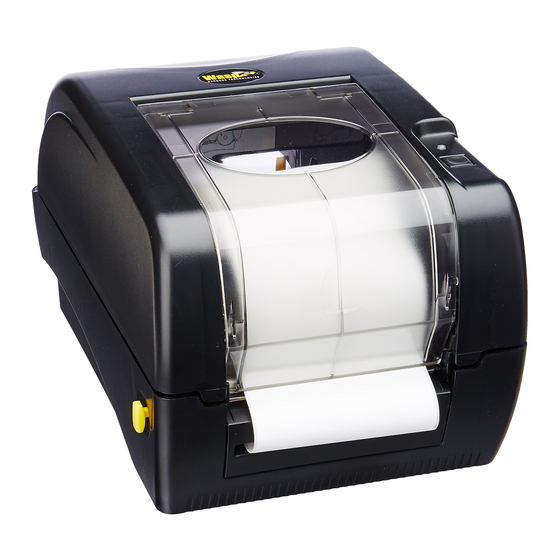
WPL305 Thermal Label Printer
User's Guide
For Wasp Technologies
DT/TT Printer
Copyright Wasp Bar Code Technologies 2004.
All rights reserved.
No part of this publication may be reproduced or transmitted in any
form or by any means without the written permission of Wasp Bar
Code Technologies. The information contained in this document is
subject to change without notice.
Wasp is a trademark of Wasp Bar Code Technologies. All other trademarks are the property of their
respective owners.
i
Advertisement
Table of Contents

Related Manuals for Wasp Wasp WPL305


Summary of Contents for Wasp Wasp WPL305
- Page 1 Wasp Bar Code Technologies. The information contained in this document is subject to change without notice. Wasp is a trademark of Wasp Bar Code Technologies. All other trademarks are the property of their respective owners.
-
Page 2: Table Of Contents
Contents 1. Introduction...1 2. Getting Started ...1 2.1 Unpacking and Inspection... 1 2.2 Equipment Checklist... 1 2.3 Printer Parts... 2 3. Setup...2 3.1 Setting Up the Printer ... 2 3.2 Loading the Ribbon... 3 3.3 Loading Label Stock ... 4 3.7 Top Cover Operation... -
Page 3: Introduction
1. Introduction Thank you for purchasing the W305 Thermal Transfer and Direct Thermal Bar Code Printer. Although the printer takes only a small amount of space, it delivers reliable, superior performance. This printer provides both thermal transfer and direct thermal printing at user selectable speed of: 2.0, 3.0, 4.0 or 5.0ips. -
Page 4: Printer Parts
2.3 Printer Parts Figure 1: Top front view 3. Setup 3.1 Setting Up the Printer 1. Place the printer on a flat, secure surface. 2. Make sure the power switch is off. 3. Connect the printer to the computer with the Centronics or USB cable. 4. -
Page 5: Loading The Ribbon
3.2 Loading the Ribbon The printer automatically detects if a ribbon is installed after power on and will switch to thermal transfer or direct thermal printing mode. If printer does not detect the ribbon, the motor that drives the ribbon rewind spindle will be turned off. -
Page 6: Loading Label Stock
Figure 3: Ribbon installation 6. Attach the ribbon spindle to the Back Hub by placing the left side of the spindle against the knob with the spring on it and compressing with the ribbon spindle. Slide the right side down over the other knob. The ribbon spindle should not be able to be removed without re-compressing the spring. - Page 7 Figure 5: Pull the lever to open the cover 3. Place the roll of labels onto the center of the paper roll mount. Printer Top Cover Paper Roll Mount Paper Guide 4. Feed the paper, printing side face up, under the Teflon bar and the paper guide and pass over the platen.
-
Page 8: Top Cover Operation
cover. 2. Do not allow the top cover to slam closed. Failure to securely close and lock the cover will result in poor print quality. 3.7 Top Cover Operation To Open: 1. When facing the front of the printer pull the cover release levers on both sides of the printer towards you. - Page 9 when closing the top cover! Figure 8: Top cover is fully open and ready to close Figure 9: Use both hands to close the top cover 5. Do not force the cover! If you are not sure if top cover is locked at a stop position, please do not push top cover to close it or the top cover will be damaged.
-
Page 10: Power On Utilities
4. Power on Utilities There are three power-on utilities to set up and test printer hardware. Printer initialization Ribbon sensor calibration Gap or black mark sensor calibration Note: You must run the #2 and #3 utilities after running the #1 to properly set up the printer. -
Page 11: Ribbon Sensor Calibration
4.2 Ribbon Sensor Calibration Note: Please make sure the ribbon is properly installed before doing this calibration. Please follow the steps below to calibrate the ribbon sensor. 1. Turn the printer power off. 2. Press and hold the FEED button then turn on the printer. 3. - Page 12 Print head check pattern Firmware version Firmware checksum Printed mileage (meter) Serial port configuration Country code Print speed (inch/sec) Print darkness Label size (inch) Gap distance (inch) Gap/black mark sensor sensitivity Numbers of download files Total & available memory space Figure 10: Self-test printout...
- Page 13 printer will enter dump mode after printing the printer configuration. In dump mode, all characters will be printed in 2 columns as in the figure below. ASCII Data Figure 11: Dump mode printout The left side characters are received from your system and the right side data are the corresponding hexadecimal values of the characters.
-
Page 14: Maintenance
5. Maintenance 5.1 Cleaning Use one or more of the following supplies that meets your needs: Cleaning pens Cleaning swabs Lint-free cloth Printer Part Printer Head Platen Roller Exterior Interior 6. Troubleshooting This section lists common problems and some suggested solutions. Problems are indicated by the LED light pattern. -
Page 15: Poor Print Quality
The printer is paused. Press the feed button to resume printing. The printer is out of label or ribbon or the printer settings are not correct Out of label or ribbon Load a roll of labels and follow the instructions in Loading the Labels, then press the feed button to resume printing. -
Page 16: Specifications
7. Specifications 7.1 Printer Specifications Item Mechanism Resolution Max. Print Width Max. Print Length Ribbon Capacity Printing Speed Peeler function Printing Method Enclosure Structure Double-walled plastic. Dimension Standard Model: 314mm(L) x 213mm(W) x 188mm(H) Operation Panel One push switch, and one indicator LED (Green, Orange, Red). -
Page 17: Label Stock Specifications
2D: PDF-417, Maxicode, and DataMatrix. Command Set Environment Operation Temperature: 5 ~ 40 . Relative Humidity: 25% ~ 85% (Non Condensing). Storage Temperature: -40 ~ 60 . Relative Humidity: 10% ~ 90% (Non Condensing). 7.2 Label Stock Specifications Item Type Label (Continuous , Die-cut , Fan-fold). -
Page 18: Product Support
8. Product Support If you experience any problems with your Wasp printer that you are unable to resolve, use our online support site to register then call for technical assistance at (214) 547-4100, Monday through Friday, 8:00 AM – 5:00 PM Central Standard Time. You must register to be eligible for technical support.
Need help?
Do you have a question about the Wasp WPL305 and is the answer not in the manual?
Questions and answers