
Related Manuals for Garaventa Lift GSL Artira

Summary of Contents for Garaventa Lift GSL Artira
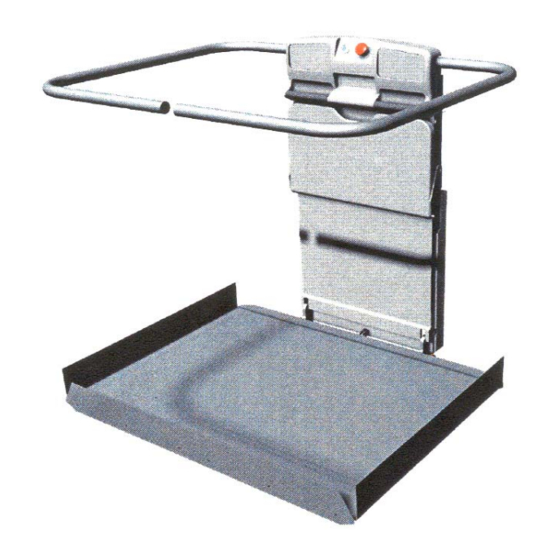
- Page 1 Garaventa Accessibility Installation Manual This manual covers: Garaventa Stair-lift Model GSL Artira...
-
Page 3: Table Of Contents
Table of Contents Safety First! Receiving the lift Unpacking the Lift Spare Parts Before the installation Beginning the installation Locating the Tubes Fitting Splices Positioning the Drive Box Anchoring the Lift Installing the Ropes (Standard Drive) Installing the Ropes (Compact Drive) Wiring the system Mounting the Conveyance Lower Conical Rollers... -
Page 4: Safety First
Safety First! Pay special attention to this symbol. It indicates important safety information for preventing serious injury or equipment damage. Always use proper safety procedures when working on this lift! WARNING: LOCK IT OFF BEFORE SERVICING! General: Use proper safety equipment at all times when installing and servicing this equipment. -
Page 5: Receiving The Lift
Spare Parts: The most valuable element of a Technician’s tool set is a spare parts kit. The GSL Artira Spare Parts Kit includes spares of all critical moving parts and common electrical components. All technicians should have one of these kits in their vehicle and bring it on site for any GSL Artira installation or service. -
Page 6: Before The Installation
If boxes are damaged, check for missing parts. Open the installation package, which is in the box of fasteners on GSL Artira lifts. Review the enclosed Installation Note(s), if supplied. Contact the facility and arrange a time for installation. Ensure that the new lift owner is aware of your plans and that the mains power will be supplied on time. -
Page 7: Beginning The Installation
Also, two people will complete the installation quicker and more efficiently than one. Allow two to three days for a GSL Artira. Find out about the optional equipment supplied with the lift, before you start the installation. -
Page 8: Locating The Tubes
Tube location: Check the tubes for fit, starting with the bottom section. Use a shim to achieve the correct elevation at the lower landing. Refer to the diagram below and the details on your lift layout drawing. Figure 2. A piece of wood of the appropriate thickness is... -
Page 9: Fitting Splices
Wall Mounted Unit : Place the tube sections on the stairway, using wooden posts to hold them in place. Take steps to ensure stairway pedestrians stay clear of the tubes while they have temporary supports. You may also use small woodscrews to temporarily support the lift while you assemble and position it in the stairway. -
Page 10: Positioning The Drive Box
Figure 5.3. The paint on this splice must be removed before assembly. Figure 6. The splices must be brought together evenly to prevent distortion. Figure 7.Here the splices are drawn together using vice clamps Figure 8. Attach the splices using the fasteners provided. - Page 11 within plus or minus 5mm of the clearance dimensions on the layout drawing. If they do not meet the required clearances, have the lift serial number on hand and call Garaventa. Figure 10. Confirm the vertical Figure 9. Check the landing clearances landing clearance point.
- Page 12 Remember : Landing clearances are measured from the centerline of the tube (dimple) to the stair nose. This represents the center of the lower carriage. Its location, relative to the stair nose, is given on the lift layout drawing a horizontal and vertical dimension.
-
Page 13: Anchoring The Lift
Do not anchor the Drive Cabinet in place yet. There are several ways to proceed with installation of the drive on GSL Artira lifts. This is because the drive box may be separated from the drive base. This is particularly useful if you prefer to anchor the base with the drive box out of the way. - Page 14 Note: If your lift has been supplied without mounting fasteners, refer to the fasteners reference guide in Appendix F at the back of this manual for recommended mounting hardware. Backing Plate Figure 15. Typical mounting ...
-
Page 15: Installing The Ropes (Standard Drive)
With the system in place, check that all struts and support towers are plumb. When a lift is supplied with wall spacers that must be located in core-drilled holes, it will be necessary to mark the holes and remove the tubes for core drilling at this stage of the installation. - Page 16 Connect the splice in the rope between the Drive Cabinet and the upper end of the tubes. Using a screwdriver, push the C-ring into place. The diagram below shows the splice connection inside the tube. Retaining ring Figure 17. The rope splice is shown as it sits inside the tube. Notice the position of the retaining ring at the extreme right side of the upper rope crimp inside the splice body.
-
Page 17: Installing The Ropes (Compact Drive)
Figure 18. The rope levers are shown in position to be connected to the upper carriage (superimposed in dotted lines). Notice the sliding contact between the rope levers. Upper carriage Positive (Power) connection Bosses Negative (ground) connection connected to the carriage. To achieve this, move the drive motor and gearbox assembly closer to the tube entry side of the drive box by adjusting the rope tensioning system using a 3/8”... - Page 18 rope to go into the tube until there is approximately 1.5 meters of the lower rope protruding out of the lower tube. After putting in the ropes, remove the Drive cog cover from the Drive assembly. Use an 8mm X 20mm (or longer) screw and thread it into the hole in the center of the cover after removing the plastic plug.
- Page 19 Loop the rope around the cog. Mount the cog cover in place and secure using the screws provided. The two counter M8 counter-sunk screws provide additional support to the Drive/Tube brackets. Make sure that the wiring is not in the way when the cover is secured.
-
Page 20: Wiring The System
You will need to cut holes in the controller box and the Motor cover for the conduit. The holes must be sized ¾ inch conduit. Avoid cutting the holes in the top or sides of the control box and the Motor cover in outdoor applications. Do not allow metal fragments onto any part of the controller components under any circumstances. - Page 21 Use minimum 20AWG (0.5mm ) stranded conductors to wire in the lifts safety circuits and call stations. Use color or numbered wires and run a few spares if possible. Wire the mains and call stations in accordance with all local and federal building and fire codes.
-
Page 22: Mounting The Conveyance
Mounting the Conveyance onto the tubes: When you have the tube system securely in place and the ropes installed, it is time to mount the conveyance on the tubes. The rope levers must be positioned slightly above the lower landing limit plate before you proceed. Then, complete the following steps: Bring the conveyance to the bottom of the tube system, unwrap it and rest it on some wood. -
Page 23: Lower Conical Rollers
Figure 24. Conveyance PCB showing the main conveyance board indicators (Detailed). Installing the Lower Carriage Conical Rollers: Install the conical rollers on the lower carriage. Use a SMALL amount of removable thread locking compound on the threads of the shoulder bolts. Put some grease on the area of the shoulder bolt on which the conical rollers will rotate. - Page 24 Grease Thread lock Figures 25, 26, 27, & 28. Installation of the lower conical rollers. Figures 21 to 24 show the lower carriage arrangement on the lower tube. To install the lower conical rollers, 1 -lubricate the shaft of the shoulder-bolt, 2 –put the bolt through the roller, 3 -apply a small amount of thread-locking compound to the end of the shoulder-bolt threads, and 4 -install the roller.
- Page 25 If your lift has been supplied with a Platform Lock, you will se a small hole in the sensing Plate. Use a 2 mm Allen wrench to open the lock before unfolding the platform as shown below. Insert the Allen wrench….. …and move to the right to release the platform lock.
- Page 26 Use Serviceable Thread-locking compound to make sure it does not come undone during operation. Connect to the inside! Figure 29. Ramp linkage installed as viewed from the back of the platform. Improper connection of the ramp will cause damage to the linkage. Install the Arms onto their shafts using the fasteners provided in the installation kit.
- Page 27 Push the sliding contact wire into the conveyance. Connect the conveyance power wires to the rope and sliding contact connections. Connect the red wire from the rope to the red wire in the conveyance. Then connect the black sliding contact wire to the black wire in the conveyance.
-
Page 28: Installing The Call Stations
Installing the Call Stations: Mount the Call Stations, they can be installed in any order. When mounting the Call Station, remember to allow enough clearance for the conveyance at the lower landing. The height of each Call Station must be 1 m (3.1/4 ft), measured from the floor to the center of the Call Station. - Page 29 Figure 31. Call Station PCB showing the field terminal strip down the center. Notice the Board Rev number (arrowed) written in ink, this must be noted if you need to replace a PCB. Also shown are the Trouble-shooting indicators in detail. ...
-
Page 30: Turning On The Power
Installation of Audio Video (AV) Alarm: Care must be exercised in finding the best location for the Audio Visual Alarms. They must be placed where they will draw attention to the fact that the lift is in operation. The attention should be drawn TO the lift and not AWAY from it. This is especially important in school stairways were there are frequent high-traffic periods. - Page 31 be erased so that the lift can be set up for the site. Follow the Setup procedure to program the lift for it’s intended application. Do not operate the lift controls. Figure 32. The drive PCB showing the system at rest and ready to operate. If you encounter problems, refer to the appropriate trouble-shooting guide in this manual.
-
Page 32: Setup Procedure
Lift Setup Procedure During the Set-up procedure, the call stations will not provide the “Smart light” (operator assistance lights) feature, until the system is Set-up. In fact, as you will read, the Station lights behave very different from normal operation while the lift in is the Set-up process. While completing this procedure, you will notice that the “CALL COM FLT”... - Page 33 Note: * When the lift is powered on, the Station lights will flash in counter-clockwise rotation and the Conveyance lights flash for 20-30 seconds. The Drive PCB “TRANSFER” (Yellow) LED will flash. Do not operate any controls. This is the 1 transfer mode.
- Page 34 Make further adjustments to the cam to engage the correct pin on the back of the hanger. Move the conveyance back up if you have to. Once you are satisfied that the cam is in the right place, bring the conveyance down into the landing. It will stop close to the center point of the cam.
- Page 35 * Station direction buttons will stop flashing and instead will pulse on and off (the lights flash briefly once every second) and indicate that the fold command is now available. Do not fold the platform. * That Station is now assigned to the lower landing. * The lights on all other (unassigned) Stations will continue to flash rapidly.
- Page 36 * When all Stations and Landings are assigned, the Station lights will pulse. This is the end of the Learning and assigning stage. Final Transfer Stage: Go to the Drive PCB and press the Setup button briefly and release it to terminate the learning mode.
- Page 37 Follow the Setup procedure until the lower landing has been established and then remove the jumpers so that the various folding mechanisms can be operated. Fold and unfold the lift to re-synchronize the arms and ramps. Continue the Setup procedure to set all other landings and Stations. Once you have finished, check the lift to confirm that all sensing switches are working properly.
-
Page 38: Resetting Landings
The rapid flashing (about three times a second) on the unassigned Stations will only be visible while the conveyance is in a landing. Do not operate Stations while setting the lift up except to assign them to a landing. The lift may be Set-up using the Call Stations. If this is necessary, call Garaventa Technical Support for help. - Page 39 Figure 33. This shows the SETUP and LANDING RESET buttons on the Drive PCB. Do not confuse the two. Run the conveyance to the lower landing. CAUTION: DO NOT RUN THE LIFT INTO THE LOWER FLOOR. The lift will not stop on the lower limit cam by itself while it is in this mode.
-
Page 40: Checking The Loading Ramps
Checking the Loading Ramps: Check the platform, ramps, and arms power folding functions at each landing in the system. Run the lift both folded and unfolded and check that it slows in corners and stops at all landings while checking the conveyance travel clearances. Check the storage positions by carefully running the lift to those locations. -
Page 41: Lift Inspection
Refer to the Maintenance and repair section of this manual for full details of Overspeed Arrestor testing and tuning. Lift Inspection Basic inspection procedures range from load tests to motor stall tests. Before you begin a test, make sure that you fully understand the requirements. Also, make sure that you are completely familiar with the operational procedures for the lift you are testing. - Page 42 Installation is complete You may now take some satisfaction in the knowledge of a job well done. Whatever your plans, have a safe journey to your next assignment. A well-installed lift that looks good and operates properly speaks volumes about the professionalism of the dealership that sold and installed it. ...
-
Page 43: Tool List
Appendix A: Tools Flash Light Pliers – 12”, Channel Lock Utility Knife Pliers – 7”, Needle-Nose Garaventa Key Set Pliers – Locking, Needle-Nose Fused Jumper Wire Plumbob (1m or 3 ft long with 3 amp Fuse) Plumbob Line 20 Amp Digital Multimeter or Punches –3/32”... -
Page 44: Specifications
Appendix B: Specifications Platform: Large ADA compliant, mid-size, compact and residential sizes. Rated Load: 250 kg (550 lbs.)Speed: 6 m/min (20 ft/min), slowing prior to corners and when approaching or departing landings. Drive System: 1.5 H.P. Drive Box (Roped Sprocket Drive), located at the upper landing (can be remotely located). -
Page 45: Revision History
Appendix C: Revision History Initial Release Rev A, 1 November, 2002 Rev B, 1 January, 2003 Rev C, 1 May, 2003 Manual Rev D, 1 August, 2004. Covers Release of Rev “J” Software. ... -
Page 46: Drawing Conventions
Appendix D: Garaventa Conventions on Electrical Drawings About the conventions used on these schematics: A box with a number within it indicates a terminal. The letters beside it describe which terminal strip it is associated with. For example, indicates terminal TB 2 number two on the “TB”... -
Page 47: Operation Lights Explanation
Appendix E: Operation light explanation This document details the operation of the lamps on a Call Station. The Call Station has four buttons. Under each button a lamp may be turned on or off by the software, to inform the user of possible operations, to show errors or indicate miscellaneous call station states. - Page 48 If this was the first call station and the key is on (for keyed units), both direction lamps are ON, indicating the SEEK operation. SEEK refers to setting the lower landing. During SEEK, the conveyance may be driven by either this call station or the conveyance direction buttons.
- Page 49 When all call stations are assigned, the user must press the button (on the drive board) and finish learning. The drive will then start a new EE transfer, and all call lamps will rotate counterclockwise. When EE is transferred, the Call stations leave the learning mode and start operating normally.
- Page 50 LAMP OPERATIONS: When the conveyance is UNFOLDED, the lamps may operate in various modes: • Initialization (SEEK, Learning, Assignment and EE Transfer) • Normal (Run) • Errors 3.1 Initialization: During initialization, when both direction lights are flashing, an EE transfer occurs. On Flash: 3/sec After the first transfer, the system is in a SEEK mode.
- Page 51 A safety violation or E-Stop pressed, the lights are turned OFF. If a conveyance direction control button is pressed and its direction is not valid, the corresponding light flashes. Flash: 3/sec Flash: 3/sec The orange moulded lamps are flashing (once a second) when: •...
-
Page 52: Fasteners Reference Guide
Appendix F: Fasteners reference guide ...
Need help?
Do you have a question about the GSL Artira and is the answer not in the manual?
Questions and answers
Looking for information on how to do a cat one test inspection on a Garaventa stair lift model GSL – one/GSL – three