Table of Contents
Advertisement
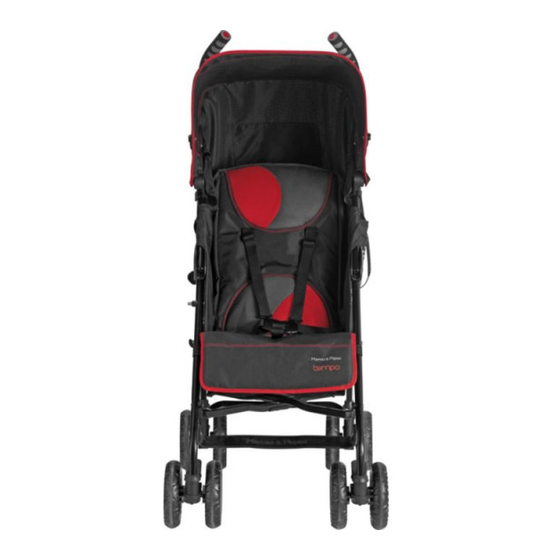
tempo pushchair
TDPC_0050_0611_V2
© Mamas & Papas (Holdings) Ltd. 2011
READ THESE INSTRUCTIONS CAREFULLY BEFORE USE AND KEEP
THEM FOR FUTURE REFERENCE. Your child's safety may be affected
if you do not follow these instructions.
Please note: Some of the illustrations in this booklet may
vary from the actual product, however, all operations
perform in the same way.
- 1 -
Advertisement
Table of Contents

Related Manuals for Mamas & Papas Tempo


Summary of Contents for Mamas & Papas Tempo
- Page 1 TDPC_0050_0611_V2 © Mamas & Papas (Holdings) Ltd. 2011 READ THESE INSTRUCTIONS CAREFULLY BEFORE USE AND KEEP THEM FOR FUTURE REFERENCE. Your child’s safety may be affected if you do not follow these instructions. Please note: Some of the illustrations in this booklet may vary from the actual product, however, all operations perform in the same way.
-
Page 2: Instructions For Safe Use
INSTRUCTIONS FOR SAFE USE • IMPORTANT KEEP FOR FUTURE REFERENCE. • WARNING: A CHILD’S SAFETY IS YOUR RESPONSIBILITY. Children should be harnessed in at all times and should never be left unattended. The child should be clear of moving parts while making adjustments. This vehicle requires regular maintenance by the user. Overloading, incorrect folding and the use of non- approved accessories may damage or break this vehicle. Read the instructions. • Always ensure that your pushchair is fully open and all locks are engaged. Take particular care if the raincover is fitted. Check that it is not entangled or preventing the locks from functioning correctly. -
Page 3: Care And Maintenance
CARE AND MAINTENANCE • Your pushchair deserves careful handling and requires regular maintenance. Regularly check that the safety harness is correctly fitted and that the webbing has not become frayed or damaged. If the harness is damaged, we recommend that a new one is fitted. •... -
Page 4: Opening The Pushchair
OPENING THE PUSHCHAIR Place the pushchair on the floor and stand to the side of it, see diagram. Pull the locking catch on the right outwards until it is clear of the locking stud. Place your foot on the back of the pushchair to prevent it rolling backwards. -
Page 5: Attaching The Basket
ATTACHING THE BASKET Slot the basket in between the sides and back of the pushchair’s frame. Attach the deepest end of the basket to the rear of the pushchair’s frame as shown in diagram. Attach the shallow end of the basket to the front legs of the pushchair’s frame as shown in the diagram. -
Page 6: Adjusting The Backrest
ADJUSTING THE BACKREST The backrest of the pushchair can be adjusted to one of five positions. Never adjust the backrest with the child’s weight against it. Raising the backrest: Grip the middle of the top of the backrest and lift upwards until the desired position is reached and the backrest locks into position. -
Page 7: Adjusting The Leg Rest
ADJUSTING THE LEG REST The angle of the seats legrest can be adjusted for the comfort of your child. Raising the legrest: Grip both sides of the legrest and lift upwards into the desired position. Lowering the legrest: Push both or the legrest adjustment buttons on the sides of the legrest inwards. -
Page 8: Fitting The Hood
FITTING THE HOOD Fitting the hood: Align the clips on the sides of the hood with the holes in the pushchair’s frame. Push the clips over the frames and then slide the studs on the inside of the clips into the holes in the frame. -
Page 9: Operating The Swivel Wheels
OPERATING THE SWIVEL WHEELS The front wheel of the pushchair can be used in either the swivel or locked mode. Swivel mode: Best on hard flat surfaces and tight spaces. Locked mode: Best on uneven ground and rough surfaces. Swivel mode: Using your toes push the lock on the front wheel housing downwards. -
Page 10: Operating The Brakes
OPERATING THE BRAKES Locking the brakes: Push down on both of the brake levers on either side of the pushchair with your toes. Checking the brakes: Always check that the brakes have correctly engaged before releasing the pushchairs handles by attempting to gently push it backwards and forwards. -
Page 11: Using The Safety Harness
USING THE SAFETY HARNESS Locking the harness: Push the two tongues on the ends of the waist straps into the buckle on the end of the crotch strap (1). The harness will automatically lock when the tongues have been fully inserted. The harness can be adjusted using the slide buckles on the harness. -
Page 12: Fitting The Raincover
FITTING THE RAINCOVER Fit and open the pushchair’s hood. Place the top of the raincover over the hood and pull the raincover down over the front of the pushchair, see diagram. Fasten the velcro straps on the sides of the raincover around the locations shown on the pushchair, see diagram. -
Page 13: Folding The Pushchair
FOLDING THE PUSHCHAIR IMPORTANT: Before folding ensure that the leg rest is in the horizontal position and if the hood is fitted, it is correctly folded with the hood tensioning bars released. Lift the primary lock in the middle back of the pushchairs frame upwards as far as it will go using your hand. Push down on the secondary lock on the right hand side of the pushchair with your toes. - Page 14 NOTES - 14 -...
- Page 15 NOTES - 15 -...
- Page 16 www.mamasandpapas.com Mamas & Papas Colne Bridge Road Huddersfield, HD5 0RH, UK customer care helpline: +44 (0)845 268 2000 customer care email: customer.care@mamasandpapas.com...
Need help?
Do you have a question about the Tempo and is the answer not in the manual?
Questions and answers