Table of Contents
Advertisement
Quick Links
Advertisement
Table of Contents

Summary of Contents for ProSun AquaFrixio
- Page 1 User's Manual 220v / 20amp 60hz MARK68AF1001 Rev 2...
- Page 2 Contact Information ® C O N G R A T U L A T I O N S on your ProSun purchase! Please make sure you read this manual carefully before using this equipment and specifically the maintenance schedule. If you have any questions please contact ProSun directly.
-
Page 3: Table Of Contents
Table of Contents Important Customer Information ................5 Who Should Use, Read, & Understand this Manual ........5 Intended Use ..…........….......... 5 Warning Signs & Symbols …................. 5 Preparing the Product For Use ................7 Export …....................... 7 Transportation …..................7 Delivery …..................... - Page 4 Normal Equipment Operation & Software …………………………………………… 22 Operating Modes ………………………………………………………………..22 Standby Mode ………………………………………………………...... 23 Massage Mode ………………………………………………………...... 24 Service Mode ………………………………………………………………………… 25 Storing the Device ...................... 26 Decommissioning Your Massage Unit ..............26 Storage ......................26 Disposal ......................26 Control Functions ......................
-
Page 5: Important Customer Information
A copy of the user manual should be readily available.This manual may include features that are not included for your bed. Any service work outside of the preventative care table in this manual should be done by a ProSun authorized technician. Intended use: A therapeutic massager intended for medical purposes such as to relieve minor aches and pains. - Page 6 Symbols found on equipment and packaging: Follow and read instructions thoroughly prior to using equipment. Keep equipment dry. Fragile. This way up. Use only long forks on the fork lift and only lift on the correct openings. Do not double stack. This symbol indicates that the items shall not be vertically stacked, either because of the nature of the transport packaging or because of the nature of the items Temperature limit indicates the maximum and minimum...
-
Page 7: Preparing The Product For Use
ProSun does not assume any liability if there is non-compliance outside of the intended sale territories of the United States or Canada. The exporter assumes their own risk by removing this equipment outside of the United States or Canada. -
Page 8: Delivery
Coordinate with ProSun installation department to set up delivery and installation details. In a commercial setting an external timer is suggested. ProSun recommends to use this accesory (T-Max Flushmount G2). - Page 9 The customer is responsible for all costs associated with the preparation of the installation of the equipment. This includes but is not limited to room preparation, costs, fees, permits, and inspections unless specified otherwise in the sales order for the equipment purchased. ProSun and all authorized parties shall reserve the right to refuse to install equipment into any room which has not been properly prepared in accordance with the electrical specification and room requirements.
-
Page 10: Comissioning Of The Massage Equipment
If you will be doing your own installation it is highly recommend that you contact ProSun and set a time for the installation. ProSun will provide a technician that will walk you through the process step by step. -
Page 11: General Safety Information
Contraindication: Acute or Unstable Injuries or Fractures such as broken bones. Contraindication: If you are or think you may be pregnant. If these conditions exist, please use caution when using the AquaFrixio and discon- tinue use if irritation, bleeding, bruising or pain occurs: •... -
Page 12: Limits Of Application
Always disconnect the unit from its power supply when servicing or repairing the unit. Never operated the heater without filling the tank with water to the designated fill level (see AquaFrixio setup). Failure to do so can result in permanent damage to the heater and tank and will void the warranty. Heating is normally set at a preferred temperature of 93 Degreed Faranheist. Higher settings represents higher temperatures. -
Page 13: Equipment Components & Description
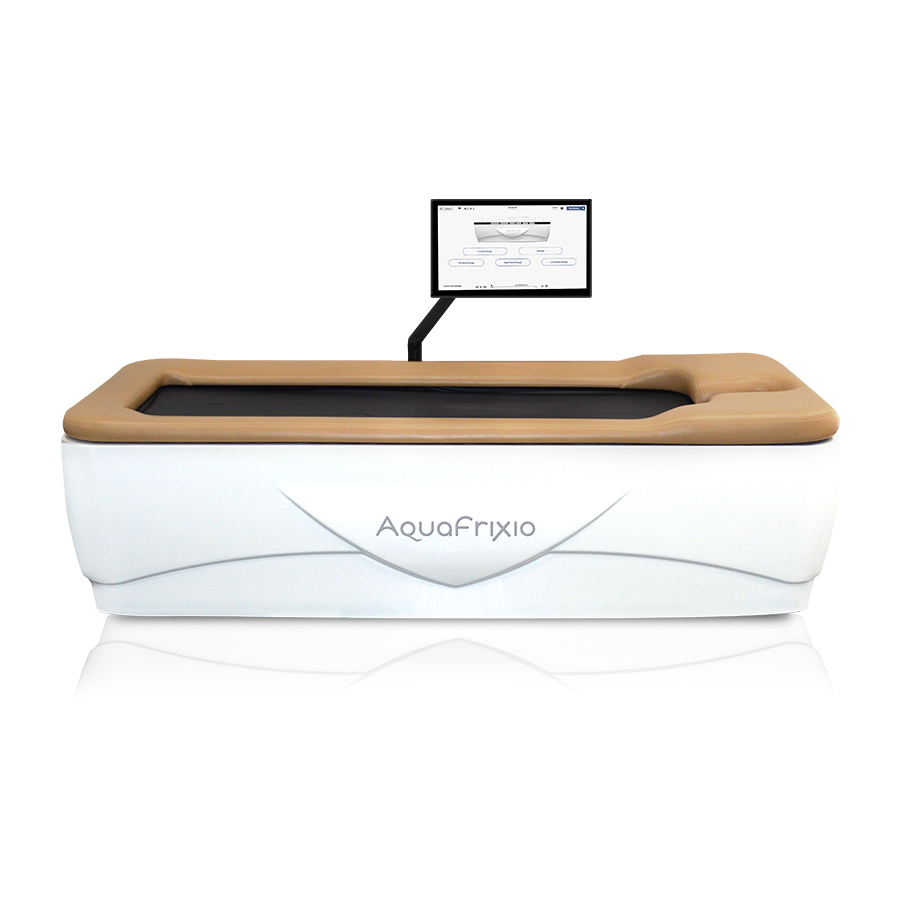
Device Description A) Detachable Head Rest The comfortable head rest may be removed in order for easy cleaning after the massage session. B) Marine Leather Cushion The elegant, marine leather cushion not only look beautiful, but is easy to clean in just seconds. C) Rip Stop Under Sheet The undersheet is made with a rip-stop material preventing items from damaging the unit. -
Page 14: Dimensions
Dimensions Product Specifications • 86” long (218 cm) • 40” wide (101 cm) • 25” high (63 cm) • 300 lbs empty (136 kg) • 600 lbs filled (272 kg) 86.00 in • Weight Capacity of 375 lbs (170 kg) 78.50in Recommended Room Size The below room size is a recommendation for optimal output. -
Page 15: Signs And Labels On Equipment
1. AquaFrixio Label The AquaFrixio label is attached to the front panel on the outside of the unit. This label is vertically placed on the front of the unit as shown below. Label on unit is in metallic Silver. - Page 16 2. Disconnect LED Label This label is attached to the LED connection on the bottom of the AquaFrixio. It advises to disconnect the LED connection prior to disassembly. 3. Serial Label The Serial label is located on the back of the touch screen.
-
Page 17: Technical Data
You will need a buck booster if voltage requirements are not met. Service personnel should be authorized by ProSun to perform work on equipment and should have knowledge of equipment and read the full manual. -
Page 18: Electrical Connections
• Never operate this appliance if it has a damaged cord or plug, if it is not working properly or if it has been dropped in water. Contact ProSun if any of these instances have occurred. • Do not carry/move this appliance by power cord or use cord as a handle. -
Page 19: Water Heating
• Do not modify the plug that comes with the AquaFrixio. Modifying this plug can result in electric shock and will void the warranty. If the plug does not fit the outlet, consult a quali- fied electrician and have a proper outlet installed. -
Page 20: Before Your Massage Session
Before your Massage session Check for any conditions mentioned in the manual that may prevent you from using the tanning equipment. • Remova all sharp objects from pockets. Items such as keys, jewelry and blunt objects from clothing should be removed. Pants with buttoned pockets may damage the water- proof barrier. -
Page 21: Operation Of The Equipment
Operation of Equipment Obligations of the business operator • As the business operator you are responsible for informing the user of the proper way to operate the equipment. • No safety devices( i.e. temperature sensors) may be removed, deactivated or otherwise bypassed from the equipment, as it can cause safety issues and impair the proper functioning of the equipment. -
Page 22: Normal Equipment Operation & Software
Equipment Operation and software Operating Modes: There are 4 different operating modes for this equipment. Standby Mode The Massage bed is in an idle state, it is connected to the power but is currently not in use. The pump is not turned on at this point. While in Standby mode you can change to Massage mode by starting a session or go into service mode by entering into the parameters. -
Page 23: Standby Mode
Standby Mode When the unit is in standby mode, you can change the settings and review equipment specficiations in the settings. When the unit is in standby mode the LED decorative lighting can be changes and customers can set up their massage session prior to starting the session. You can also enter into the settings when the unit is in Standby mode and go into Service Mode. -
Page 24: Massage Mode
Massage Mode The following description is for a unit that has all possible features, some of these features may not be available for your unit or market. Starting the Massage session The massage session time will automatically begin after the external timer delay time has expired. -
Page 25: Service Mode
Service Mode When the unit is in standby mode, you can enter into the service or maintenance parameters. To enter the settings click the top left button in the screen that says, "SETTINGS". Once in the Settings you can click on the tab you need to change your settings. •... -
Page 26: Storing The Device
Waste of electrical and electronic equipment must be disposed as unsorted municipal waste. It must be collected separately, and must be disposed as per local regulations. Contact ProSun International LLC or an authorized representative for information concerning the decommissioning of your equipment. -
Page 27: Control Functions
Control Functions G H I Function Description Additional Information Settings Use this button to enter into the you will need your PIN code to enter Settings settings if the unit requires a PIN Full Body Massage Select this button to select a full body massage Custom Massage Select this button to set up a... - Page 28 Operation Start Screen Massage Zones System Settings Massage Types Music Player Massages Pre-Programmed Massages Full-Body: Equal intervals all 6 zones Upper-Body: Equal intervals top 3 zones Lower-Body: Equal intervals lower 3 zones Select your massage type, press con- tinue. MARK68AF1001 Rev 2...
- Page 29 Massage Session Timer Adjusts the duration of the massage from 1-60 minutes Massage Pressure Duration per Zone Adjusts the pressure Controls how long the of the hydro jets. massage stays in each zone Press start to begin session. Note: Pressure and duration per zone can be adjusted during massage.
- Page 30 Select desired zones for the massage by tapping each zone individually Selecting ‘Per Zone’ allows user to customize the mas- sage pressure and duration for each individual zone. Selecting ‘All Zones’ keeps all zones at the same pres- sure and duration. Once switched to ‘Per Zone’, select zone by tap- ping yellow bar under the...
- Page 31 Click the Settings Button in the top left of your screen. Put in the Fac- tory Password of 0000. Stand-Alone Mode: uses the AquaFrixio’s internal timing system. Users will be able to continually use the unit for the amount shown in the default session time.
- Page 32 PIN will be 0000) then you will be prompted to enter and re-enter a new password. If pass- word is forgotten, contact ProSun to reset. Stand-Alone Commerical: Uses Aquafrixio’s internal timing system but allows you to set the massage time.
- Page 33 When turned on, the owner can automatically download updates. Media Owner can upload music to play through the AquaFrixio. ‘Wellness’ and ‘Studio’ have been pre-uploaded. To upload more music you can place your own music on an USB Stick and insert the card at the head of the bed.
- Page 34 Wi-Fi To connect the AquaFrixio to a Wireless network select Set-up network. Your AquaFrixio must be connected to Wifi to use the portal and receive automatic update infor- mation. Select desired network and then you will be prompted to enter the password. Enter your WiFi password...
- Page 35 Manual Mode Select components to individu- ally test if the parts are in working order. Manual mode is meant for testing/ troubleshooting purposes only. Tap the components individually to turn them on. If they are not functioning properly MARK68AF1001 Rev 2...
-
Page 36: Optional External Timer T-Max And Quick Start Connection
Ext. Start and J3- Contact connections on the back of the board. They will be in the outside corners as shown below. Step 2: remove the back panel of your Aquafrixio unit (Screen Side), you will find 2 connections for your T-max attached to the frame, a black and a grey cord, cut the zip tie and run de cables underneath the skirt/ panel. - Page 37 Step 3: Use 18 Gauge Stranded Wire to make the connections between the T-Max and The Aquafrixio as shown in the picture below. Note the Grey Cord with terminal block that connects to the EXT START is for the Quick Start function. This is a benefit for your customer so that they do not have to hit start on the Tmax display itself. This way they can bypass the delay time and start their session directly on the screen. We recommend using this function for your customer but it is not required.
-
Page 38: Error Messages
Error messages will show on your display when your equipment is in need of service. Critical Water Level Error: Unit will not operate until reservoir is filled to appropriate amount with 15 gallons of distilled water or until the correct level has been reached. See manual or contact ProSun for more information. Your unit will not turn on until distilled water has been added. Low Water Level Error: Please check water level and fill reservoir with 6 to 8 gallons of dstilled water or until the correct water level has been reached . -
Page 39: Care & Maintenance
The top barrier and netting are designed to withstand 375lbs of weight, but they are not designed for children to play on or for “jumping or falling” on. Please, never allow children to play or jump on the AquaFrixio and make sure all users sit on the edge and gently pivot onto the top surface. The equipment should be routinely serviced and maintenanced by a ProSun certified technician or someone who has performed maintenance by phone with a ProSun technician. -
Page 40: Maintenance Schedule
Do not place the unit near water where it could become immersed. If the touch screen is damaged and not working properly, contact the ProSun service center for repair or replacement. If any moisture is noticed under the bed contact ProSun. -
Page 41: Cleaning
For cleaning of the undersheet and pillow top we recommend only using approved cleaners that have been tested by the manufacturer. ProSun recommends our Lucas-Cide liquid cleaner or our Lucas Cleaner wipes. Each product can be used to clean and disinfect the exterior under sheet and pillow top of your unit. -
Page 42: Maintenance By Skilled Persons
The service of this equipment may only be done by an authorized technician or trained and qualified staff. Maintenance by skilled persons: ProSun recommends having an annual inspection by a certified technician to review connections, check for lose wiring, check the power cords and review all other high voltage components. At this time the certified technician can dust all electronic components. For more maintenance information please visit our website at: www.prosun.com/customer-service... -
Page 43: Troubleshooting Guide
Troubleshooting Guide PROBLEM PROBABLE CAUSE(S) POSSIBLE SOLUTION Jets making irregular noises After initial setup, replacing or will not function at all. water or any other mainte- nance air can get trapped in the plumbing and cause jets to malfunction. Remove foot skirt. Then go to page 15 of the manual for more information. - Page 44 • Incorrect voltage • Restart timer and try again. • Check that it is plugged in and contact ProSun customer service for replacement parts. • Get voltage reading from certified technician. Unit appears to be too hot • Fans are obstructed Ensure all fans are clear of •...
-
Page 45: Replacement Components
This unit has been manufactured in accordance with current safety regulations. The illustrations and specifications are subject to changes in order to improve the device. Unauthorized modifications and changes to the device and its controls are prohibited. ONLY USE ORIGINAL PARTS! Use of any other parts voids the warranty and ProSun will not be liable in any cases of damage or injury due to the use of these parts. Undersheet Removal Undersheet Removal Flip top padding over and peel off sheet attached by Velcro. -
Page 46: Net Tightening
Net Tightening Net Tightening 1. Remove plates holding net in place then flip over so the urethane is facing down. 2. Tighten bolts evenly surrounding the net to regain tension. Draining the Unit To drain To valve Drain Valve Drain Pump Instructions (Optional) 1. Remove end skirt on the head side of the bed and locate the small drain pump. -
Page 47: Assembly Introduction
Room should be between 74-78 degrees Fahrenheit • Free of excessive dust and lint • Stable Flooring - When filled the AquaFrixio weighs 600 lbs and meets most state residential and commercial codes for weight. However, always use discretion when choosing a location for your unit. •... -
Page 48: Included Parts
Included Parts Make Sure all parts are included before you begin. Bracket Screw x4 Padded Cover x1 ACCE6810140 M8 Bracket Washer x4 M10 Bracket Washer x4 Undersheet x2 ACCE6810135 Skirt Screw x8 LED Side Skirt x1 CVPL6601068 Skirt Caps x8 Slotted Side Skirt x1 Top Bracket x1 CVPL6601060... -
Page 49: Unboxing And Uncrating The Unit
Unboxing and Uncrating Your AquaFrixio will arrive with the unit crated and the accessories strapped in a box ontop of the crate. Ensure there is no damage to the items in the box or to the crate before the delivery driver leaves. - Page 50 You are now ready to move onto the AquaFrixio Manual. Please fol- low the steps in the Manual to finish setting up your unit! MARK68AF1001 Rev 2...
-
Page 51: Ipre-Installation
Pre Installation Steps or narrow doorways: Attach two wheeled brackets to the pump side of the frame in the positions shown. Fasten with bolt and nut. * Note - The bolts and Nuts are already attached to the bottom of the unit* Lift unit until it is on its sides with all four wheels of the moving tool in con- tact with the ground. -
Page 52: Installation
Installation Tools/Items Necessary: Gallons Distilled Water Water 3mm allen # 2 Phillips wrench Once the unit is in place, remove the fill cap then that is located at the head end of the unit.Then use the funnel to fill the unit with distilled water. After fill tube is attached, fill unit with 40 gallons of distilled water. Note: warranty is VOID if distilled water is not used. - Page 53 Position the Top Bracket, which is found on the opposite side of the unit from the CPU box, by locating the mounting bracket underneath the top rail of the frame and attach- ing to the top bracket. Locate holes on the side of the bottom rail of the frame below the top bracket and attach base bracket.
- Page 54 Feed wires through slotted side skirt. Attach slotted side skirt to the unit, fitting it over the base bracket and sliding the top bracket though the slot. Insert monitor stand through the top bracket and onto the peg of the base bracket. This will hold the side skirt into place At the bottom of the pole...
- Page 55 Slide monitor onto the pole. Slide off cover on the bottom of the lower section of the arm. Feed wires through the desig- nated areas shown and slide cover back on. USB and Power HDMI MARK68AF1001 Rev 2...
- Page 56 Remove the two side covers on the upper section of the monitor arm stand. Feed wires through the space shown to the right, make sure the wires are long enough to plug into monitor. Re- place the two covers once complete. Note- In the photo to the left make sure the air tube goes through the slot in the skirt and is placed into the pole of the...
- Page 57 Checking for air in the zones: Note: This must be done prior to attaching the remaining skirts and unit must be filled with water. Once the monitor set up is com- plete, plug in the unit and wait for the screen to read ‘Touch to Begin’.
- Page 58 Take the end skirt with the built in fan and place it close to the foot end of the unit where the pump is located. Take the cable that comes from the skirt and connect it to the terminal block located next to the radiator.
- Page 59 Before attaching the front skirt, connect the LED lights as shown. Make sure the arrows on both parts allign. These cables are located at the bottom head of the unit on the opposite side of the screen. *Further directions on exposing the LED remote sensor follows once skirt is assembled remote sensor...
- Page 60 The unit is now ready to be plugged in for use. Congratulations! The unit is now ready to be plugged in for use. Refer to the Operation section for a de- tailed explanation of the Aquafrixio software. MARK68AF1001 Rev 2...
-
Page 61: Warranty
LIMITED WARRANTY Revised June 2018 Warranty period: PROSUN warrants all equipment manufactured or imported by it, provided it is still owned and operated by the original owner, to be free from defects in material under normal use and service. Warranty Periods as specified below are from the date of delivery to the location. The warranty is non-transferable and is only valid for the original purchaser of the equipment. - Page 62 Exclusivity of Warranty: This warranty is the only warranty made by PROSUN and may only be modified or amended by a written instrument signed by a duly authorized officer of PROSUN. PROSUN’s sole and exclusive liability and Purchaser’s sole and exclusive remedy under this warranty shall be,...
- Page 63 WITH RESPECT TO THE PRODUCTS DELIVERED HEREUNDER OR SUBSEQUENT USE THEREOF. Limitation of Liability: PROSUN shall not be liable for any loss, damages, or penalty resulting from failure to perform any of its obligations under this Agreement due to major force or any cause beyond its reasonable control.
- Page 64 ProSun International, LLC 2442 23rd Street North St Petersburg, FL 33713 www.ProSun.com 800-874-2776...
Need help?
Do you have a question about the AquaFrixio and is the answer not in the manual?
Questions and answers