Table of Contents
Advertisement
Quick Links
Advertisement
Table of Contents

Related Manuals for AirSelfie Air Pix


Summary of Contents for AirSelfie Air Pix
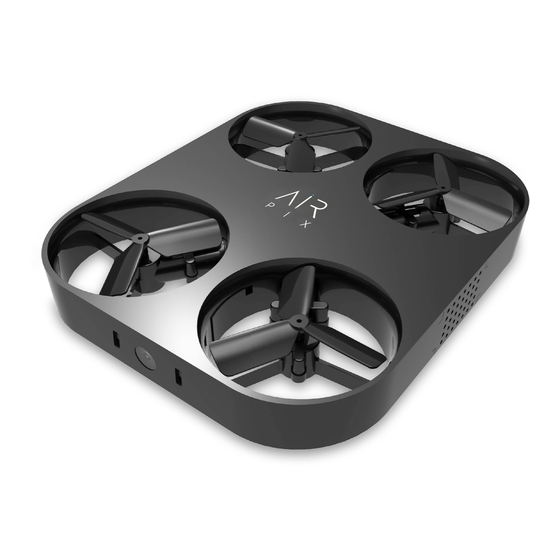
- Page 1 INSTRUCTION MANUAL...
-
Page 2: In The Box - Contents
In the Box - contents... -
Page 3: Led Legend
Getting to know your AirSelfie LED Legend Red Light Solid = Charging Red Light Off = Fully Charged Blue Light Solid Fly = Status Normal Blue Light Flash once = Take a picture Blue Light Flash slowly = Recording... - Page 4 Get the app The AirSelfie app is available for free download on both the App Store and Google Play. GOOGLE PLAY APPLE STORE The AirSelfie App supports all versions of Android 4.0 and above and all versions of iOS 8.0 and above.
- Page 5 General settings before your AirSelfie’s first flight Camera • Camera time delay function: 3sec / 5sec / 10sec Use this function to delay the shot by 5 or 10 seconds. This will allow you to put your smartphone away before posing for the picture.
-
Page 6: App Icons
App Icons Home Wi-Fi Connected Wi-Fi Signal Weak Wi-Fi Disconnected Remaining Memory Fully Charged Battery Low Start/Stop Recording Take a Picture Emergency/Power off... - Page 7 Photos and videos can be downloaded to your PC, Mac or smartphone using either the USB cable provided or a Wi-Fi connection. The USB port can be used for data transfer via a PC or a Mac only when the AirSelfie is switched on.
-
Page 8: Battery And Charging
Battery & Charging We highly recommend charging your AirSelfie using the power case or power bank chargers provided in the product kit. Power Case Specs USB 2.0 Adaptor LED Indicator USB Cable USB Port Capacity: 1800 mAh Charging: 5V/2A or 5V/1A Discharging: 5V/2.4A/12W... - Page 9 Solid light up: 100% capacity, battery fully Red LED: Discharging Attention Use 5V qualified charger charging Power Bank. Avoid use charger with nominal voltage above 5V. Duration charging AirSelfie or other electrical products, discharging LED quenching means Power Bank fully discharged, please charge Power Bank.
- Page 10 USB 2.0 end into a 5V plug. Your power bank is fully charged when the LED indicates a green light. Charging the AirSelfie Insert the AirSelfie into either the power case or power bank. A red LED light indicates that the device is charging. charghing port Charging your smartphone with the power case/bank Plug the adaptor onto the USB 2.0 port, inserting the...
- Page 11 Powering AirSelfie and/or off To power on or off, push the power button as shown in the figure below and hold for 1.5 seconds. A blue LED light and a beep sound will be played when the device is switched on.
-
Page 12: First Flight
First flight We highly recommend taking your first AirSelfie flight indoors, using the safety cover included in the product kit. Emergency stop In case of emergency, stop the AirSelfie even in mid- flight by pressing the button... - Page 13 Linking your smartphone to the AirSelfie Download the AirSelfie app from the App Store or Google Play onto your smartphone. Once the AirSelfie is on Proceed to the Wi-Fi menu in your smartphone’s settings Select the AirSelfie network which will appear on the screen as “AirSelfie_operating code number”.
- Page 14 Using the AirSelfie Control your AirSelfie’s flight through 3 different flight modes: 1) selfie mode “beginner”, 2) selfie motion control mode, 3) standard control mode. The TossFly & the TouchLand Make sure your AirSelfie has been successfully linked to the AirSelfie app before tossing the device into flight;...
- Page 15 “Slide to Take Off”. This should start the AirSelfie’s propellers, signaling that the device is ready for take-off. Gently push the AirSelfie upwards into the air for it to take flight. Concluding a flight: the TouchLand While the AirSelfie is in mid-hover, place your palm beneath it.
-
Page 16: Operation Sequence
Slide to take off Do the TossFly (pg 14) Tapping on any command icon will have the smartphone take control of the AirSelfie (notifying you with a vibration) Use the following commands to move the drone in the desired position Commands •... - Page 17 Type of controlling VIRTUAL JOYSTICK • slide virtual joystick to move AirSelfie (smartphone position must be levelled)
-
Page 18: Tilt Mode
TILT MODE Tap in the center and tilt the smartphone: • to the left to move AirSelfie to the left. (1) • to the right to move AirSelfie to the right. (2) • away from yourself to move AirSelfie away from you. - Page 19 TO RECORD A VIDEO CLICK ON THE ICON CLICK TO STOP RECORDING Use the commands to return the AirSelfie to you Do the TOUCHLAND Go to Home (click on the icon) to DOWNLOAD PHOTOS & VIDEOS...
- Page 20 Use the following commands to move the drone in the desired position Commands • Tap the screen (live view area) to take a picture • Tap the varying directions to move the device accordingly. • Tap on up arrow or down arrow to move AirSelfie up or...
- Page 21 • Tap circle arrow to steer Airselfie . • Tap to the left to move AirSelfie to the left. • Tap to the right to move AirSelfie to the right. Taking a photo or video TO TAKE A PICTURE TAP ON THE SCREEN...
- Page 22 Slide to take off Do the TOSSFLY (pg 14) Tapping on any command icon will have the smartphone take control of the AirSelfie (notifying you with a vibration). • B mode commands Left • Holding the up arrow button will cause the device to ascend until released.
- Page 23 Right • Holding the “forward” arrow button makes the device move forward. • Holding the “right” arrow button moves the device move to the right. • Holding the “back” arrow button moves the device backwards. • Holding the “left” arrow makes the device move left.
-
Page 24: To Stop Recording
• Pressing anywhere on the right side of the screen and tilting the smartphone backwards will move the device backwards. • Pressing anywhere on the right side of the screen and tilting the smartphone to the right will move the device to the right. •... - Page 25 Use the commands to return the AirSelfie to you Do the TOUCHLAND Go to Home (click on the icon) and DOWNLOAD PHOTOS & VIDEOS (pg 26) FOR EMERGENCY STOP PRESS...
- Page 26 Download photos & videos You can see all the photos/ videos in the memory card Click to view photo or video...
- Page 27 Click on the download Choose which app you icon to save the photo want to share the onto your smartphone photo/video on share on an app Choose the Deleting photos photo/video that you want to delete and click DELETE Click SELECT...
-
Page 28: General Information
GENERAL INFORMATION Safety precautions and maintenance This product is designed for recreational and leisure purposes. The pilot must always maintain direct visual contact with the product and monitor its trajectory. The product must be used in accordance with the civil aviation regulations in your country. - Page 29 Read these instructions before use, follow them and keep them for reference. All fixing elements in the pack must be removed by a competent adult. The product is equipped with a circuit powered by 1 rechargeable battery 7,4 V 240 mAh (included).
- Page 30 AirSelfie’s after-sales service. After inspection of the product, AirSelfie will, at its sole discretion, either repair or replace the defective part or product, excluding any other indemnification of any nature.
- Page 31 Internet. Do not share any degrading images or sounds which could undermine the reputation or dignity of an individual. The use of the AirSelfie for surveillance or espionage is strictly forbidden and could result in your prosecution under the law...
- Page 32 AirSelfie reserves the right to amend or improve the product design or user guide without any restrictions and without any obligation to notify users.
-
Page 33: Fcc Compliance Statement
FCC COMPLIANCE STATEMENT Maintain a safe distance of at least 20cm between yourself and the product while the product is in operation. Note that this is the minimum safe distance for operation. This device complies with Part 15 of the FCC Rules. Its operation is subject to the following two conditions: (1) This device may not cause harmful interference.
Need help?
Do you have a question about the Air Pix and is the answer not in the manual?
Questions and answers