Advertisement
Quick Links
Step 1:Slide one Spinner(B) onto end of the
T-bar(A), with the solar panel facing out.
Add Tubular Spacer(D) and thread on Nut(E),
Then tighten Nut with Wrench(L). Add Flat
Spacer(F) and Lock Washer (N),thread on Cap
Nut(G),and tighten with Wrench.
Slide second Spinner(C) onto other the end of
the T-bar(A), with the solar panel facing out.
Add Tubular Spacer(D), thread on Nut(E),
tighten with Wrench, add Flat Spacer(F)
and Lock Washer(N),thread on Cap Nut(G),
and tighten with Wrench.
7
201 Made in China exclusively for Plow & Hearth, Madison, VA 22727 plowandhearth.com 800-494-7544
Item #: 53563
Name: Solar Flower Spinner
USE AND CARE INSTRUCTIONS
Please read these instructions and keep them for future reference
Setup time approximately 20 minutes
Before use, remove the solar panel'sprotective clear plastic film.
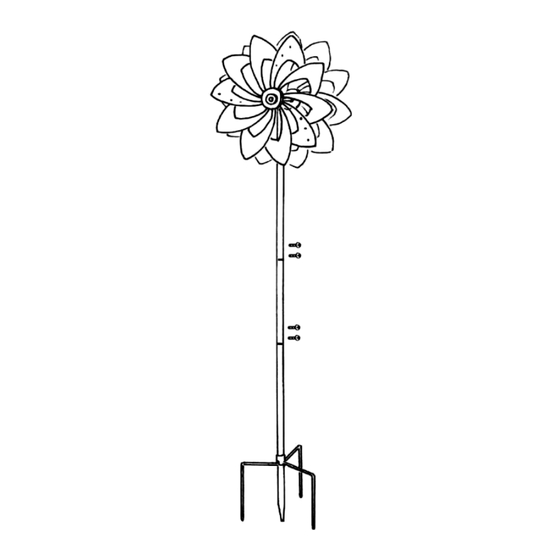
Step 2:To assemble the
pole, slide Double Prong(I)
onto the Ground
Stake(H) and thread
on Extension(J).Align
holes on Extension and
Ground Stake and
install 2 Screws(M).
Next, thread on Spinner
Mount(K) onto Extension(J).
Align holes on Extension and
Spinner Mount and install
2 Screw(M).
Step 3:Choose appropriate place for your spinner.Push assembled
pole and ground Stake in ground,keeping pole straight.Place
assembled spinner from Step 1 onto Spinner Mount and enjoy.
Tool required
for pole
assembly:
Phillips Head
Screwdriver
NOTE: If you are expecting unusually
strong, sustained winds, take down
the spinner head to prevent damage
Advertisement

Related Manuals for Plow & Hearth 53563


Summary of Contents for Plow & Hearth 53563
- Page 1 NOTE: If you are expecting unusually strong, sustained winds, take down the spinner head to prevent damage Item #: 53563 Name: Solar Flower Spinner USE AND CARE INSTRUCTIONS Please read these instructions and keep them for future reference Setup time approximately 20 minutes Before use, remove the solar panel'sprotective clear plastic film.
- Page 2 Page 2 Item #: 53563 Name: Solar Flower Spinner Place your solar spinner where it will receive the most direct sunlight during the day and where it will not be affected by ar�ficial lights at night. Ensure that the switch on the back side of each spinner solar panel is in the “ON” posi�on, and allow charging for a full day.
Need help?
Do you have a question about the 53563 and is the answer not in the manual?
Questions and answers