Canon imageFORMULA DR-C125 Service Manual
Hide thumbs
Also See for imageFORMULA DR-C125:
- Reference manual (68 pages) ,
- User manual (68 pages) ,
- Service manual (120 pages)

Related Manuals for Canon imageFORMULA DR-C125


Summary of Contents for Canon imageFORMULA DR-C125
- Page 1 DR-C125 SERVICE MANUAL June 1, 2011 Rev. 0 COPYRIGHT © 2011 CANON INC. CANON imageFORMULA DR-C125 Rev. 0 PRINTED IN U.S.A.
- Page 2 COPYRIGHT © CANON ELECTRONICS INC. 2011 Use of this manual should be strictly supervised to avoid disclosure confidential information.
- Page 3 Bulletins to gain a correct and deeper understanding of the machine. This is one way of fostering response for ensuring prolonged quality and function, and for investigating the cause of trouble during troubleshooting. Quality Assurance Center Canon Electronics Inc. COPYRIGHT © CANON ELECTRONICS INC. 2011 CANON DR-C125 FIRST EDITION...
-
Page 4: Table Of Contents
VII. PARTS LAYOUT ON EACH PCB ..2-19 3. Removing the Packing Material ..4-2 1. Control PCB ........2-19 4. Installing the Software......4-2 2. Front Unit PCB........2-20 5. Connecting to a Computer ....4-3 COPYRIGHT © CANON ELECTRONICS INC. 2011 CANON DR-C125 FIRST EDITION... - Page 5 2. No Scanner is Found......5-26 3. Scanning Does Not Start ....5-26 4. Scanner Does Not Feed Properly ..5-27 5. Scanning Speed is Slow....5-28 6. The Eject Location is Incorrect ..5-28 COPYRIGHT © CANON ELECTRONICS INC. 2011 CANON DR-C125 FIRST EDITION...
-
Page 7: General Description
CHAPTER 1 GENERAL DESCRIPTION PRODUCT OUTLINE......1-1 III. USER OPERATION ........ 1-7 I I. NAME OF PARTS ........1-6 COPYRIGHT © CANON ELECTRONICS INC. 2011 CANON DR-C125 FIRST EDITION... -
Page 9: Product Outline
“Windows” is a trademark of Microsoft Corporation in the U.S. and other countries. Other company names and product names mentioned in this document are registered trademarks or trademarks of the respective companies. COPYRIGHT © CANON ELECTRONICS INC. 2011 CANON DR-C125 FIRST EDITION... -
Page 10: Main Specifications
Image data memory SDRAM 16MB *Used for the working memory together. Output data to computer 1) Type: 8bit gray or 24bit color (non-compression) 2) Resolution: 600x600dpi, 600x400dpi, 300x300dpi, 300x200dpi, 300x150dpi Table 1-101a COPYRIGHT © CANON ELECTRONICS INC. 2011 CANON DR-C125 FIRST EDITION... - Page 11 *Including curls. Special document have special conditions. Eject for straight path is 1 sheet only. Double feed detection 1) Length detection by registration sensor 2) Double feed detection by ultrasonic sensor Table 1-101b COPYRIGHT © CANON ELECTRONICS INC. 2011 CANON DR-C125 FIRST EDITION...
- Page 12 CHAPTER 1 GENERAL DESCRIPTION Item Specifications Operation/Indication 1) Power button (with LED) 2) Start button 3) Eject selection lever 4) Feed selection lever 5) OPEN button Table 1-101c External dimensions (mm) Figure 1-101 COPYRIGHT © CANON ELECTRONICS INC. 2011 CANON DR-C125 FIRST EDITION...
-
Page 13: Precautions
This machine must not arbitrarily be modified or remade. If it is, use may be forcibly suspended. change specifications disassemble reassemble this machine, follow instructions described in this manual and the service information. COPYRIGHT © CANON ELECTRONICS INC. 2011 CANON DR-C125 FIRST EDITION... -
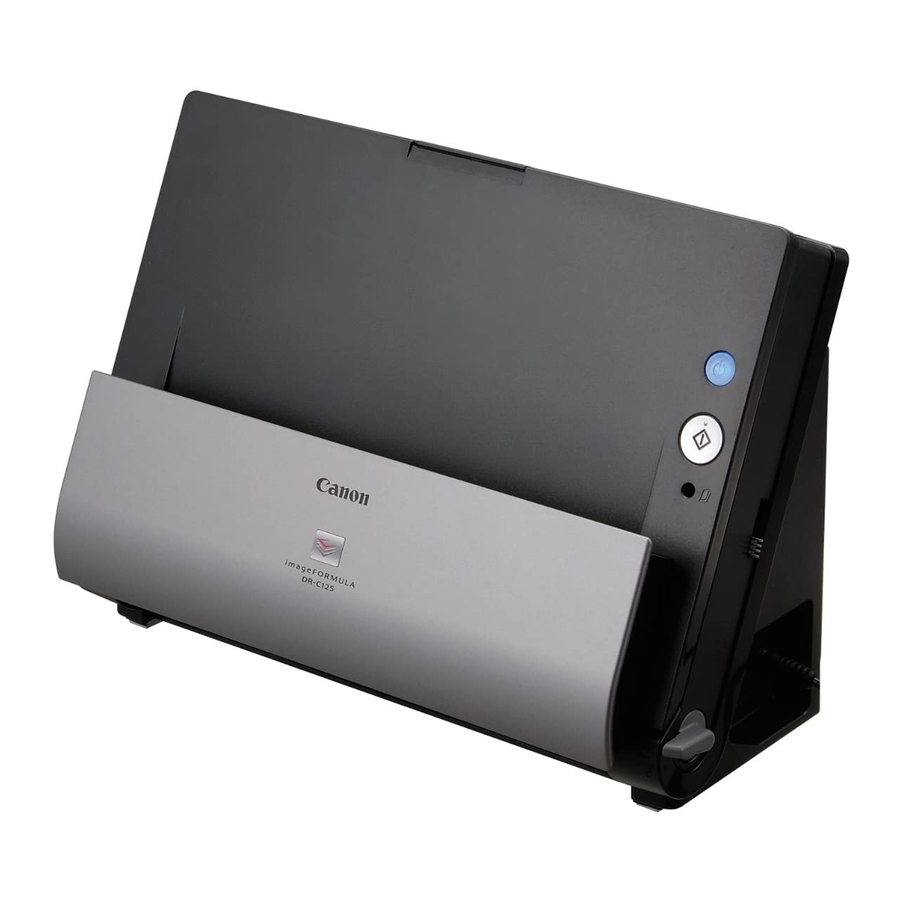
Page 14: Name Of Parts
Start button Document feed tray Feed selection indicator Connectors Feed selection lever Eject selection lever Connectors Rear View Figure 1-203 Figure 1-204 Power connector OPEN button USB connector Kensington slot COPYRIGHT © CANON ELECTRONICS INC. 2011 CANON DR-C125 FIRST EDITION... -
Page 15: User Operation
1. Placing Documents 1) Open the document feed tray and extend Figure 1-303 the feed extension plates and eject support to suit the document. Figure 1-301 Figure 1-304 Figure 1-302 COPYRIGHT © CANON ELECTRONICS INC. 2011 CANON DR-C125 FIRST EDITION... - Page 16 U-turn eject. Note: In this example, the document is placed with the writing facing you and the top of the document at the top. Figure 1-305 Figure 1-307 Figure 1-306 COPYRIGHT © CANON ELECTRONICS INC. 2011 CANON DR-C125 FIRST EDITION...
-
Page 17: Scanning
4) Click the Start button to start the scan. 2) When the main screen is displayed, click [Scan First]. Note: Since [Scan First] is enabled by default, this operation is not required. Figure 1-311 Figure 1-309 COPYRIGHT © CANON ELECTRONICS INC. 2011 CANON DR-C125 FIRST EDITION... - Page 18 Figure 1-315 Note: The button names vary depending on the output method. Figure 1-316 Figure 1-313 7) When the output is complete, the finished screen is displayed. Figure 1-314 1-10 COPYRIGHT © CANON ELECTRONICS INC. 2011 CANON DR-C125 FIRST EDITION...
-
Page 19: Clearing Paper Jams
Remove any jammed documents. Figure 1-317 2) Press the OPEN button and open the front unit out towards you. Remove any jammed documents. Figure 1-320 Figure 1-318 Figure 1-321 1-11 COPYRIGHT © CANON ELECTRONICS INC. 2011 CANON DR-C125 FIRST EDITION... -
Page 21: Functions & Operation
POWER SUPPLY........2-17 READING SYSTEM ........ 2-6 VI. LAYOUT OF ELECTRICAL COMPONENTS ... 2-18 III. FEED SYSTEM ........2-8 VII. PARTS LAYOUT ON EACH PCB..2-19 I V. CONTROL SYSTEM ......2-13 COPYRIGHT © CANON ELECTRONICS INC. 2011 CANON DR-C125 FIRST EDITION... -
Page 23: Outline
This system is comprised of an image converted from AC power with the AC processing section and a feed control adapter, to the control PCB of this section. machine. COPYRIGHT © CANON ELECTRONICS INC. 2011 CANON DR-C125 FIRST EDITION... -
Page 24: Feed Path
U-turn eject roller (drive) Retard roller U-turn eject roller (follower) Registration roller (drive) Document pressure plate Registration roller (follower) Flapper Eject roller (drive) Reading unit (front) Eject roller (follower) Reading unit (rear) COPYRIGHT © CANON ELECTRONICS INC. 2011 CANON DR-C125 FIRST EDITION... -
Page 25: Motor Drive
Control PCB Torque limiter Feed motor Feed selection (lever) Retard roller One-way clutch Feed roller Main motor Registration roller Eject roller U-turn eject roller Figure 2-103 COPYRIGHT © CANON ELECTRONICS INC. 2011 CANON DR-C125 FIRST EDITION... -
Page 26: Electrical Circuits
Reading unit (front) Reading unit (rear) Front unit PCB Sensor Switch Main motor Control PCB Sensor Feed motor Flapper switch AC adapter Figure 2-104 COPYRIGHT © CANON ELECTRONICS INC. 2011 CANON DR-C125 FIRST EDITION... -
Page 27: Timing Chart
Start Document sensor Registration sensor Feed motor Main motor Reading front side Reading rear side Note: indicates the feeding state at the maximum speed. Figure 2-105 COPYRIGHT © CANON ELECTRONICS INC. 2011 CANON DR-C125 FIRST EDITION... -
Page 28: Reading System
The reading unit consists of CIS unit, holder, and case. The CIS unit consists of CIS PCB, lens array, LED (R/G/B), light guide, and case. COPYRIGHT © CANON ELECTRONICS INC. 2011 CANON DR-C125 FIRST EDITION... -
Page 29: Shading
PCB recording document does not cause dirt on it. Note the shading correction value. that executing shading while the reading COPYRIGHT © CANON ELECTRONICS INC. 2011 CANON DR-C125 FIRST EDITION... -
Page 30: Feed System
Registration roller (follower) Reading unit (front) Eject roller (drive) Reading unit (rear) Eject roller (follower) Document sensor detection point U-turn eject roller (drive) Ultrasonic sensor detection point Registration sensor detection point COPYRIGHT © CANON ELECTRONICS INC. 2011 CANON DR-C125 FIRST EDITION... - Page 31 The feed motor drives the feed roller and the retard roller, and the main motor drives the registration roller, eject roller, Retard roller and U-turn eject roller. The scanning condition determines each drive speed. Figure 2-303 COPYRIGHT © CANON ELECTRONICS INC. 2011 CANON DR-C125 FIRST EDITION...
- Page 32 This would also prevent the document damage when the user pull the jammed document out. 2-10 COPYRIGHT © CANON ELECTRONICS INC. 2011 CANON DR-C125 FIRST EDITION...
-
Page 33: Feed Error Detection
The ultrasonic sensor for double feed inside this machine. detection is mounted in front of the registration roller. 2-11 COPYRIGHT © CANON ELECTRONICS INC. 2011 CANON DR-C125 FIRST EDITION... - Page 34 As a result, if the overlap between sheets is less than 50 mm when a document is being fed, it might not be judged as a "double feed" because the detection time is short. 2-12 COPYRIGHT © CANON ELECTRONICS INC. 2011 CANON DR-C125 FIRST EDITION...
-
Page 35: Control System
Registration Ultrasonic control sensor microcontroller Document sensor Ultrasonic (receiver) sensor (receiver) Front unit Switch Ultrasonic sensor (power) (transmitter) Switch Document sensor (scan) (transmitter) Power LED Door sensor Figure 2-401 2-13 COPYRIGHT © CANON ELECTRONICS INC. 2011 CANON DR-C125 FIRST EDITION... - Page 36 Motor driver Drives the main motor IC20 Motor driver Drives the feed motor IC23 Ultrasonic Control Controls transmission and reception of ultrasonic waves Microcontroller and double feed detection Table 2-401 2-14 COPYRIGHT © CANON ELECTRONICS INC. 2011 CANON DR-C125 FIRST EDITION...
-
Page 37: Image Processing
One-dimensional gamma correction detection • Deskew Edge enhancement • Image rotation • Skip blanks • File creation Binarization • Other Color Grayscale Binary Data after image processing Figure 2-402 2-15 COPYRIGHT © CANON ELECTRONICS INC. 2011 CANON DR-C125 FIRST EDITION... - Page 38 USB interface. The computer performs the shading correction image processing according to the user settings. Since this machine white background, black frame removal and punch hole removal are not necessary. 2-16 COPYRIGHT © CANON ELECTRONICS INC. 2011 CANON DR-C125 FIRST EDITION...
-
Page 39: Power Supply
(4 hours). When no documents have been fed or Power switch Control PCB AC adapter DC/DC Each DC converter voltage Figure 2-501 2-17 COPYRIGHT © CANON ELECTRONICS INC. 2011 CANON DR-C125 FIRST EDITION... -
Page 40: Layout Of Electrical Components
Front unit PCB SR800 Door sensor Front unit PCB PS801 Flapper switch Base unit (right) SW301 Monitor Feed motor Base unit (left) M301 Main motor Base unit (right) M302 Table 2-601 2-18 COPYRIGHT © CANON ELECTRONICS INC. 2011 CANON DR-C125 FIRST EDITION... -
Page 41: Parts Layout On Each Pcb
J306 – USB interface Q301 Document sensor (receiver) J309 Feed motor Ultrasonic sensor (receiver) J310 Main motor J601 CIS PCB (front) Table 2-702 J602 CIS PCB (rear) Table 2-701 2-19 COPYRIGHT © CANON ELECTRONICS INC. 2011 CANON DR-C125 FIRST EDITION... -
Page 42: Front Unit Pcb
Control PCB LED800 Front: Power indicator LED803 Rear: Document Sensor Table 2-703 (transmitter) PS801 Rear: Door Sensor SR800 Rear: Ultrasonic sensor (transmitter) SW800 Power switch SW801 Start switch Table 2-704 2-20 COPYRIGHT © CANON ELECTRONICS INC. 2011 CANON DR-C125 FIRST EDITION... -
Page 43: Disassembly & Reassembly
The machine shown in the photographs of the figures in this chapter may be different from some mass-produced machines. EXTERNAL PARTS......... 3-1 III. BASE UNIT ..........3-8 I I. FRONT UNIT........... 3-5 READING UNIT........3-13 COPYRIGHT © CANON ELECTRONICS INC. 2011 CANON DR-C125 FIRST EDITION... -
Page 45: External Parts
Then insert the cable through the cut-out in the left cover and attach the cover. There should not be any gaps. Figure 3-101 Figure 3-103 COPYRIGHT © CANON ELECTRONICS INC. 2011 CANON DR-C125 FIRST EDITION... -
Page 46: Right Cover
(straight or U-turn). There should not be any gaps. After assembling, check that the door sensor lever and the eject selection lever operate correctly. Figure 3-104 COPYRIGHT © CANON ELECTRONICS INC. 2011 CANON DR-C125 FIRST EDITION... -
Page 47: Rear Cover
Figure 3-109 Notes on assembling Ensure that the document feed tray (with Figure 3-107 document guides) is attached in a correct way. COPYRIGHT © CANON ELECTRONICS INC. 2011 CANON DR-C125 FIRST EDITION... - Page 48 4) Open the front unit , remove the shaft from the left side, then unhook the fitting part to pull the shaft out from the opposite side and remove the front unit. Figure 3-111 COPYRIGHT © CANON ELECTRONICS INC. 2011 CANON DR-C125 FIRST EDITION...
-
Page 49: Front Unit
Figure 3-202 Note: Once you have removed the front cover, button eject support can be removed. Take care to avoid accidentally dropping or damaging it. COPYRIGHT © CANON ELECTRONICS INC. 2011 CANON DR-C125 FIRST EDITION... -
Page 50: Front Unit Pcb
When attaching the open/close shaft, insert both ends of the shaft into the holes on the base and then attach the coil spring. COPYRIGHT © CANON ELECTRONICS INC. 2011 CANON DR-C125 FIRST EDITION... -
Page 51: Feed Roller Drive Shaft
Note: In the below figure, the roller in the registration side is removed. Figure 3-205 Figure 3-206 COPYRIGHT © CANON ELECTRONICS INC. 2011 CANON DR-C125 FIRST EDITION... -
Page 52: Base Unit
Since there are protrusions on the screw unit marked A in the above diagram for determining the position, place it into the Figure 3-302 holes on the PCB. Do not forget to tighten screws connector. COPYRIGHT © CANON ELECTRONICS INC. 2011 CANON DR-C125 FIRST EDITION... -
Page 53: Main Motor
(for the document sensor). Note: Once you have removed the mounting Figure 3-303 plate, light guide (for registration sensor) on the base side can also be removed. COPYRIGHT © CANON ELECTRONICS INC. 2011 CANON DR-C125 FIRST EDITION... - Page 54 Also, feed the cable for the rear reading unit (FFC) through the hole in the mounting plate. Figure 3-306 3-10 COPYRIGHT © CANON ELECTRONICS INC. 2011 CANON DR-C125 FIRST EDITION...
-
Page 55: Retard Roller Drive Shaft
The shape of the opposite end of the link shaft should be aligned with the retaining shaft in the same way. The link shaft is left-right symmetrical. Figure 3-309 3-11 COPYRIGHT © CANON ELECTRONICS INC. 2011 CANON DR-C125 FIRST EDITION... -
Page 56: Flapper
Figure 3-310 Figure 3-312 Notes on assembling Insert the fitting parts on the stop plate are securely into the holes in the base. 3-12 COPYRIGHT © CANON ELECTRONICS INC. 2011 CANON DR-C125 FIRST EDITION... -
Page 57: Reading Unit
(front) out. Note: Do not pull it excessively because the cable is connected to it. Figure 3-401 2) Remove the cable (FFC) from the connector. Figure 3-402 3-13 COPYRIGHT © CANON ELECTRONICS INC. 2011 CANON DR-C125 FIRST EDITION... -
Page 58: Reading Holder (Front)
Push until all of the fitting parts are unit out towards you. securely fastened. There should not be Note: Do not pull it excessively because the any raised parts and gaps. cable is connected to it. 3-14 COPYRIGHT © CANON ELECTRONICS INC. 2011 CANON DR-C125 FIRST EDITION... -
Page 59: Reading Holder (Rear)
Figure 3-408 Notes on assembling Push until all of the fitting parts are securely fastened. There should not be any raised parts and gaps. 3-15 COPYRIGHT © CANON ELECTRONICS INC. 2011 CANON DR-C125 FIRST EDITION... -
Page 61: Installation & Maintenance
CHAPTER 4 INSTALLATION & MAINTENANCE INSTALLATION ........4-1 III. MAINTENANCE ........4-6 I I. PARTS TO BE REPLACED ....4-4 COPYRIGHT © CANON ELECTRONICS INC. 2011 CANON DR-C125 FIRST EDITION... -
Page 63: Installation
Microsoft Windows XP x64 Edition Microsoft Windows Vista (32/64 bit edition) Microsoft Windows 7 (32/64 bit edition) Mac OS X Note: For details on each version, refer to the user manual. COPYRIGHT © CANON ELECTRONICS INC. 2011 CANON DR-C125 FIRST EDITION... -
Page 64: Removing The Packing Material
3) Load the setup disk into the DVD drive of the computer. 4) The setup menu starts automatically. 5) Click [Typical Installation]. Figure 4-102 Figure 4-103 Finish the installation by following the on-screen messages. COPYRIGHT © CANON ELECTRONICS INC. 2011 CANON DR-C125 FIRST EDITION... -
Page 65: Connecting To A Computer
Refer to the “User Manual” for the details. Figure 4-104 Note: To turn the power OFF, hold down the power button until the light goes off. COPYRIGHT © CANON ELECTRONICS INC. 2011 CANON DR-C125 FIRST EDITION... -
Page 66: Parts To Be Replaced
Note: The items above are assigned as service parts and an exchange roller kit is assigned as commercially available products for a set. Table 4-201 2) Replaced by service technicians None COPYRIGHT © CANON ELECTRONICS INC. 2011 CANON DR-C125 FIRST EDITION... -
Page 67: Major Parts List
A reading glass attached Reading Holder (rear) MF1-4714-000 A reading glass attached Feed motor MG1-4639-000 Main motor MG1-4586-000 AC adapter MG1-4578-000 Outside of China AC adapter (China) MG1-4579-000 China only Table 4-202 COPYRIGHT © CANON ELECTRONICS INC. 2011 CANON DR-C125 FIRST EDITION... -
Page 68: Maintenance
Use such as air blowers to remove any dust and paper particles that have accumulated on the feed path. Table 4-301 2) Locations to be cleaned • • Main body Inside eject pocket Figure 4-302 Figure 4-301 COPYRIGHT © CANON ELECTRONICS INC. 2011 CANON DR-C125 FIRST EDITION... - Page 69 Programs], [Canon DR-C125], and [Canon imageFORMULA Utility] in Figure 4-304 order. • “The Canon imageFORMULA Utility” starts, and the screen is displayed. • Select [Canon DR-C125 USB] and then click [Properties]. Figure 4-305 COPYRIGHT © CANON ELECTRONICS INC. 2011 CANON DR-C125 FIRST EDITION...
-
Page 70: Service Maintenance
Furthermore, remove the cover, check that there is no paper dust or other foreign matter inside the main body, and then perform cleaning. Figure 4-309 • Click [OK] then close property. COPYRIGHT © CANON ELECTRONICS INC. 2011 CANON DR-C125 FIRST EDITION... -
Page 71: Troubleshooting
CHAPTER 5 TROUBLESHOOTING ERROR DISPLAY ........5-1 OPERATION TROUBLESHOOTING ..5-25 SERVICE MODE........5-2 IMAGE TROUBLESHOOTING....5-29 III. LIST OF FAILURES ......5-24 VI. AFTER REPLACING PARTS ....5-34 COPYRIGHT © CANON ELECTRONICS INC. 2011 CANON DR-C125 FIRST EDITION... -
Page 73: Error Display
Users should resolve problems according to the error messages. The following shows an example of an error message when using CaptureOnTouch Power button (Windows). Figure 5-101 Figure 5-102 COPYRIGHT © CANON ELECTRONICS INC. 2011 CANON DR-C125 FIRST EDITION... -
Page 74: Service Mode
Displays the internal version of the device. Reset the serial number. Manual Adjust Manually adjusts the scale and registration of images. Counter Displays and updates the counters. Table 5-201 Figure 5-201 COPYRIGHT © CANON ELECTRONICS INC. 2011 CANON DR-C125 FIRST EDITION... -
Page 75: How To Install
Note: Keep the name of the folder and the 5) Password dialogue box appears, and password confidential from the user. enter six characters as “market” and select [OK]. Figure 5-203 6) Service screen appears. COPYRIGHT © CANON ELECTRONICS INC. 2011 CANON DR-C125 FIRST EDITION... -
Page 76: Registration Adjustment
Note: If the shading sheet is used, it can be shared with “Light Adjustment”. 2) To have the black leading edge and the white trailing edge, whose width is 2 mm or more. COPYRIGHT © CANON ELECTRONICS INC. 2011 CANON DR-C125 FIRST EDITION... - Page 77 A4 size or LTR size paper due to the computer specifications, set to half the size. Note that you should cut that paper perfectly straight without any slant. Figure 5-206 COPYRIGHT © CANON ELECTRONICS INC. 2011 CANON DR-C125 FIRST EDITION...
-
Page 78: Light Adjustment
Note: Shading sheets with a black line for “Registration Adjustment” can also be used. Operation Procedure 1) Clean feed path, roller, and reading glass. COPYRIGHT © CANON ELECTRONICS INC. 2011 CANON DR-C125 FIRST EDITION... - Page 79 3) On the service screen, select [Light or perform any operations until the Adjustment]. warning screen disappears. Figure 5-211 6) After the adjustment is complete, the warning screen disappears. Figure 5-209 COPYRIGHT © CANON ELECTRONICS INC. 2011 CANON DR-C125 FIRST EDITION...
- Page 80 “All Adjustment” item. Operation Procedure 1) Clean the window for the document sensor. Note: Do not set the document. 2) On the service screen, select [Document Sensor Adjustment]. Figure 5-212 COPYRIGHT © CANON ELECTRONICS INC. 2011 CANON DR-C125 FIRST EDITION...
-
Page 81: Document Sensor Adjustment
Insert them properly not to cause skew. Note: Do not place extra sheets. Figure 5-215 Figure 5-213 COPYRIGHT © CANON ELECTRONICS INC. 2011 CANON DR-C125 FIRST EDITION... -
Page 82: Dcon Check
Click [OK]. Figure 5-218 2) The [DCON Check] screen is displayed. Figure 5-217 Select a menu to execute on this screen. Figure 5-219 5-10 COPYRIGHT © CANON ELECTRONICS INC. 2011 CANON DR-C125 FIRST EDITION... - Page 83 Table 5-202 Note: The registration sensor document sensor icons light even if the front unit is open. The document sensor is indicated here by “Feed”. 5-11 COPYRIGHT © CANON ELECTRONICS INC. 2011 CANON DR-C125 FIRST EDITION...
- Page 84 If you have changed this value by mistake, execute [Document Sensor Adjustment] again. Double Feed Lamps Document Figure 5-224 Lamp 5-12 COPYRIGHT © CANON ELECTRONICS INC. 2011 CANON DR-C125 FIRST EDITION...
-
Page 85: Check Device
PCB. If this PCB is replaced, enter the serial number shown on the rating label at the main body and select “Set” on the right side. Figure 5-227 5-13 COPYRIGHT © CANON ELECTRONICS INC. 2011 CANON DR-C125 FIRST EDITION... - Page 86 Note: In this machine, only “On” is used for adjustment. And more than 2 mm in the minus direction for “On” is invalid. 5-14 COPYRIGHT © CANON ELECTRONICS INC. 2011 CANON DR-C125 FIRST EDITION...
- Page 87 5) Use [Zoom] to enlarge the leading edge After you have set the value, click the of the image and ensure that the position [Set] button. of the leading edge is correct. (Refer to Figure 5-232) 5-15 COPYRIGHT © CANON ELECTRONICS INC. 2011 CANON DR-C125 FIRST EDITION...
- Page 88 The set values are then displayed. Figure 5-232 7) Place the adjustment sheet and scan again. Check the displayed image. Figure 5-234 Note: Repeat the procedure again if the adjustments were corrected properly. 5-16 COPYRIGHT © CANON ELECTRONICS INC. 2011 CANON DR-C125 FIRST EDITION...
- Page 89 Note: If you cannot set the slide bar to entering the value into the data box or by exactly “0.00”, select the slide bar using the scroll arrows. using the mouse pointer and then 5-17 COPYRIGHT © CANON ELECTRONICS INC. 2011 CANON DR-C125 FIRST EDITION...
- Page 90 [Factory Scale Parameter] alone. In this case, you should also [User Scale Parameter], or replace the roller. Figure 5-238 Figure 5-237 5-18 COPYRIGHT © CANON ELECTRONICS INC. 2011 CANON DR-C125 FIRST EDITION...
-
Page 91: Firm Load
Check the trailing edge image of sheets displayed at the bottom of the service screen is “0: zero”. Set [Factory Scale Parameter] Run scanning again Figure 5-241 Check the final image Figure 5-239 5-19 COPYRIGHT © CANON ELECTRONICS INC. 2011 CANON DR-C125 FIRST EDITION... - Page 92 Check the bottom side of the screen. [+] direction increases the length. Select the “Set” button after setting. Set [Factory Scale Parameter] Run scanning again Check the final image 5-19a COPYRIGHT © CANON ELECTRONICS INC. 2011 CANON DR-C125 FIRST EDITION...
-
Page 94: About
Note: Do not turn the power OFF including the USB cable is removed during loading. If the power is turned OFF, it returns to its original state when restarted, but this is not guaranteed. 5-20 COPYRIGHT © CANON ELECTRONICS INC. 2011 CANON DR-C125 FIRST EDITION... -
Page 95: Counter
[Current Roller] may take on an invalid value, you should check the counter for the [Current Roller] after exiting service mode and reset it if necessary. Figure 5-244 5-21 COPYRIGHT © CANON ELECTRONICS INC. 2011 CANON DR-C125 FIRST EDITION... -
Page 96: Machanical Feed Mode
If you need the [Full] information, set to [Full] and click the [OK] button. Then, perform the steps to reproduce the problem and perform the recovery 5-22 COPYRIGHT © CANON ELECTRONICS INC. 2011 CANON DR-C125 FIRST EDITION... - Page 97 Although the content of the log files cannot be interpreted by generic software, it can be displayed in text format by using a dedicated application. Here is an example: Figure 5-246 Figure 5-245 5-23 COPYRIGHT © CANON ELECTRONICS INC. 2011 CANON DR-C125 FIRST EDITION...
-
Page 98: List Of Failures
All black/all white/all streaked. Too dark/too light. Streaks in image. Image slanted. Wrong image size. Text cannot be seen. Moire in image. Top/bottom of image incorrect. Table 5-302 5-24 COPYRIGHT © CANON ELECTRONICS INC. 2011 CANON DR-C125 FIRST EDITION... -
Page 99: Operation Troubleshooting
Front unit PCB Is the cable connected? Connect cable correctly. Replace the front unit PCB. Control PCB Does replacing the control Done. PCB fix the problem? Table 5-401 5-25 COPYRIGHT © CANON ELECTRONICS INC. 2011 CANON DR-C125 FIRST EDITION... -
Page 100: No Scanner Is Found
Front unit PCB Does replacing the front unit Done. PCB fix the problem? Control PCB Does replacing the control Done. PCB fix the problem? Table 5-403 5-26 COPYRIGHT © CANON ELECTRONICS INC. 2011 CANON DR-C125 FIRST EDITION... -
Page 101: Scanner Does Not Feed Properly
Front unit PCB Does replacing the front unit Done. PCB fix the problem? Control PCB Does replacing the control Done. PCB fix the problem? Table 5-404 5-27 COPYRIGHT © CANON ELECTRONICS INC. 2011 CANON DR-C125 FIRST EDITION... -
Page 102: Scanning Speed Is Slow
This machine is equipped with both a U-turn eject and a straight eject. Cause/Faulty Step Check Item Result Action Locations Eject selection lever Is the position of the eject Set the eject selection selection lever correct? lever correct position. Table 5-406 5-28 COPYRIGHT © CANON ELECTRONICS INC. 2011 CANON DR-C125 FIRST EDITION... -
Page 103: Image Troubleshooting
Streaks 1 Streaks 2 Streaks 3 Slanting Skew correction Wrong size Auto size Has shadows Original Missing leading Margin at leading Stretched Compressed document (B) edge edge Table 5-501 5-29 COPYRIGHT © CANON ELECTRONICS INC. 2011 CANON DR-C125 FIRST EDITION... -
Page 104: All Black/All White/All Streaked
Change the setup. Normally middle value is fine, but this may need to be changed, depending on the document. Setup of “Contrast” “Contrast” setup properly? Change the setup. Table 5-503 5-30 COPYRIGHT © CANON ELECTRONICS INC. 2011 CANON DR-C125 FIRST EDITION... -
Page 105: Streaks In Image
You can correct the slant of an image using image processing. Feeding documents Are documents fed straight? Perform the checks in “IV. RESOLVING MALFUNCTIONS, 4.The Document Does Not Feed Properly”. Table 5-505 5-31 COPYRIGHT © CANON ELECTRONICS INC. 2011 CANON DR-C125 FIRST EDITION... -
Page 106: Wrong Image Size
Was the problem solved by Done. setting to a special mode such [Advanced Text Enhancement] etc.? Setup of “Brightness” Was the problem solved by Done. changing setup “Brightness”? Table 5-507 5-32 COPYRIGHT © CANON ELECTRONICS INC. 2011 CANON DR-C125 FIRST EDITION... -
Page 107: Moire In Image
This machine is equipped with a “Face-up feeding” function that is enabled by default. Cause/Faulty Step Check Item Result Action Locations [Orientation] setting Is the [Orientation] setting For [Face-up feeding], correct? disable [Upside-Down Feeding], otherwise enable it. Table 5-509 5-33 COPYRIGHT © CANON ELECTRONICS INC. 2011 CANON DR-C125 FIRST EDITION... -
Page 108: After Replacing Parts
If problems occur in the leading edge or trailing edge positions of images scanned after replacing reassembling registration related parts such as the registration sensor (control PCB), execute [Registration Adjustment] in service mode. 5-34 COPYRIGHT © CANON ELECTRONICS INC. 2011 CANON DR-C125 FIRST EDITION... -
Page 109: Appendix
APPENDIX GENERAL CIRCUIT DIAGRAM ....A-1 LIST OF SPECIAL EQUIPMENT .... A-2 COPYRIGHT © CANON ELECTRONICS INC. 2011 CANON DR-C125 FIRST EDITION... -
Page 111: General Circuit Diagram
Reading unit (rear) Door sensor Document sensor (LED) Ultrasonic sensor (transmitter) Main motor Control PCB Registration sensor (LED/Q) Document sensor (Q) Feed motor Ultrasonic sensor (receiver) AC cable AC adapter Flapper switch COPYRIGHT © CANON ELECTRONICS INC. 2011 CANON DR-C125 FIRST EDITION... -
Page 113: List Of Special Equipment
Note: Rank notation: A: Equipment that each service technician must carry. B: Equipment that can be shared among a group of 5 service technicians. C: Equipment that each workshop needs to have. COPYRIGHT © CANON ELECTRONICS INC. 2011 CANON DR-C125 FIRST EDITION... - Page 115 Prepared by Quality Assurance Center Canon Electronics Inc. 3-5-10 Shibakoen, Minato-ku Tokyo 105-0011, Japan FIRST EDITION: JUNE 2011 (63999)
- Page 116 0611SZ...
Need help?
Do you have a question about the imageFORMULA DR-C125 and is the answer not in the manual?
Questions and answers