
Related Manuals for kb!ce KBFM1JA01

Summary of Contents for kb!ce KBFM1JA01
-
Page 1: Table Of Contents
Table of Contents: Safety Instructions Features & Specifications Use Of Dispenser Dispenser Care Installation Instructions Troubleshootings Service & Important Notice Portable Nugget Ice Dispenser User Instructions Model: KBFM1JA01... -
Page 2: Safety Instructions
THANK YOU FOR GENERAL OPERATING YOUR PURCHASE INSTRUCTION Thank you for purchasing the Portable Nugget Ice Read these instructions before use and save them Dispenser. Enjoy ice nuggets anywhere. for future reference. Let the unit rest and remain unplugged for 24 hours before use. CONTACT US •... - Page 3 Child Safety CIRCUIT GROUNDING • Exercise caution and use reasonable CONDUCTOR supervision when appliance is used near PROPERLY CONNECTED children. Never allow children to operate the unit. Keep packing materials away from children. • Keep fingers out of dispense point area. Cleaning GROUNDING PRONG DANGER...
-
Page 4: Features & Specifications
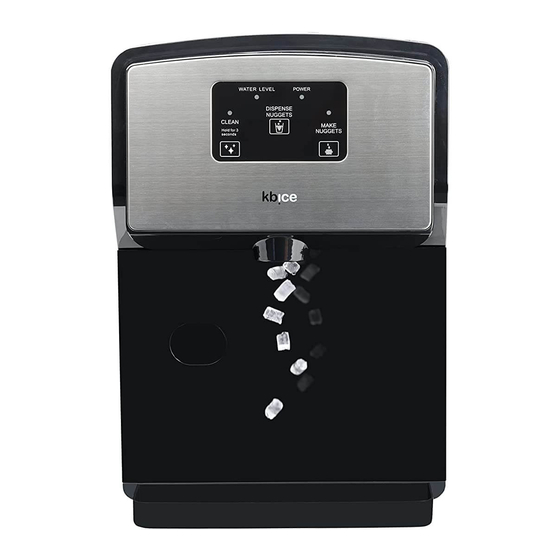
FEATURES & SPECIFICATIONS Overview This compact automatic ice dispenser allows you to enjoy nugget ice with the touch of a button. Water fill through push-to-open or removable door makes it portable and easy to use. Features and Parts 1. Display Panel •... - Page 5 Specifications Product Portable Nugget Ice Dispenser Model No FDFM1JA01 Ice Type Chewable Nugget Ice Ice Production Capacity (75°F Air) 26 lb / 24 h Ice Storage Capacity 2 lb Water Reservoir Capacity 100 fl oz Ice Dispensing Actuation Touch Button Drip Tray Magnetically Detachable Drain Plumbing...
-
Page 6: Use Of Dispenser
USE OF DISPENSER CLEANING NOTE NOTE Clean the unit once a week to prevent high Use potable water only. water TDS and hardness. Water TDS level must be 5~400 mg/L or PPM. Descale the unit with citric acid once a month Water Hardness must be no greater than 10 to prevent sediment building up. - Page 7 MAKING ICE Use Of Dispenser (continued) MAKE NUGGETS Make Nuggets Button can be used WATER LEVEL POWER LED illuminates when the unit is WATER LEVEL POWER when the unit is not in the Cleaning plugged into power. mode. CLEANING MAKING ICE CLEANING •...
- Page 8 1. Filling the water reservoir for the first time use FIRST TIME USE • Remove the reservoir cover by simultaneously pulling from the left and right side towards you For the first time use flush the unit following (See illustration 1). instructions below.
- Page 9 Dispensing Ice 3. Making ice for the first time use • Add water to the MAX WATER FILL. NOTE WATER LEVEL POWER • Plug the unit into power. • Press Make Nuggets button once and wait The unit does not dispense ice while Cleaning CLEANING MAKING ICE for the Making Ice LED to flash slowly which...
-
Page 10: Dispenser Care
DISPENSER CARE 3. If the Water Level red LED flashes and the unit stops making ice • Fill the water reservoir with clean potable water. CAUTION 4. If the Water Level red LED illuminates but Use food grade citric acid powder and the water reservoir is full chlorine bleach only. - Page 11 6. If the Making Ice green LED illuminates but 8. How to flush the unit once a week to the unit has dispensed all ice prevent high water TDS and hardness • First, press and hold Make Nuggets button for •...
- Page 12 9. How to descale the unit with citric acid once 10. How to sanitize the unit with chlorine a month to prevent sediment building up bleach once a month to prevent bacteria growing • Unplug unit • Empty the ice bin and water reservoir following •...
- Page 13 11. If you are away on holidays or vacations • Empty the ice bin and water reservoir following instructions in Section 2. 12. You may hear the following normal operating sounds • You may hear a boiling, rattling or gurgling sound produced by flow of refrigerant through the evaporator.
-
Page 14: Installation Instructions
INSTALLATION Clearance INSTRUCTIONS CAUTION Location This unit is designed for countertop CAUTION installation only. • Do not block the air vent on left side. This unit is designed for indoor use only. • Allow for minimum 12 inches of clearance on the left side. -
Page 15: Troubleshootings
TROUBLESHOOTING DANGER POSSIBLE CAUSES RESPONSE Unit does not work and a. The outlet is not receiving a. Check for outlet and breaker/fuse. the Power LED is not lit any power. b. Plug in the power cord. b. Power cord is unplugged. c. -
Page 16: Service & Important Notice
SERVICE & IMPORTANT NOTICE The manufacturer has a policy of continuous improvement on its products and reserves the right to change materials and specifications without notice. All products, features, and services are subject to change without notice. We cannot guarantee the accuracy of the contents of this document. We disclaim liability for errors, omissions, or future changes.
Need help?
Do you have a question about the KBFM1JA01 and is the answer not in the manual?
Questions and answers