Table of Contents
Advertisement
Quick Links
Advertisement
Table of Contents

Related Manuals for HP ac100


Summary of Contents for HP ac100
- Page 1 Action Camcorder User Manual...
- Page 2 This manual is designed to demonstrate the features of your HP Action Camcorder AC150. All information presented is as accurate as possible but is subject to change without notice. HP shall not be liable for technical or editorial errors or omissions contained herein. For the latest reversion, visit www.hp.com/support.
- Page 3 Modifications: The FCC requires the user to be notified that any changes or modifications made to this device that are not expressly approved by HP may void the user's authority to operate the equipment. Trademark Recognition Windows XP/Vista/Windows 7/Windows 8 are registered trademarks of Microsoft Corporation in the United States and/or other countries.
- Page 4 Functions Thank you for purchasing ! The ac100 can produce high-definition videos with excellent the HP Action Cam ac100 continuity of dynamic images. The unique ultraportable design is adopted for this and it is Action Cam applicable in various fields to enable your daily life convenient, fun and colorful. Make sure to read this manual carefully and keep for reference in the future.
- Page 5 Important Information Do not store the product in dusty, dirty, or sandy areas, as its components may be damaged. Do not store the product in a hot environment. High temperatures can shorten the life of electronic devices, damage batteries and warp or melt certain plastics. ...
-
Page 6: Product Introduction
The micro-SD memory card is made of precision electronic components. The following situations may cause loss or damage of your data: 1. Improper use of the memory card 2. The memory card is bent, dropped or collided. 3. Placement under high temperature or moist environment or expose to sunshine directly. 4. -
Page 7: Minimum System Requirements
Support high-speed USB2.0 It supports a mirco-SD card with a capacity expansion up to 32G Please use class 6 or faster speed rated memory cards. This Action Cam supports HDMI video output and live playback functions. Videos can be output to high-definition TVs for playing clear and sharp pictures. -
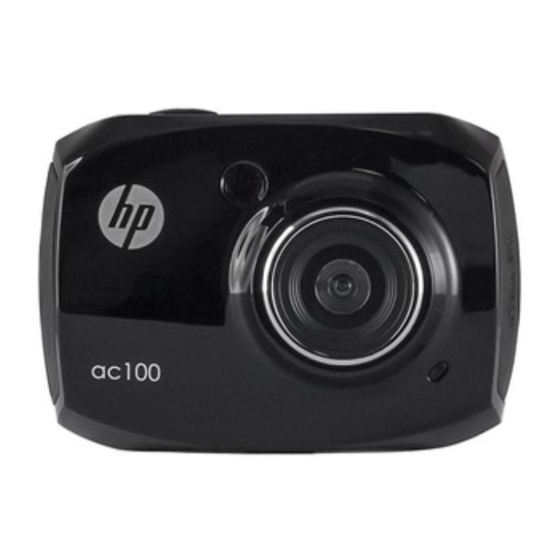
Page 8: Introduction To Appearance And Keypad
Introduction to Appearance and Keypad Infrared light a lens TFT Touch LCD... - Page 9 USB interface Reset...
-
Page 10: Charge The Battery
1. Charge the battery Indicator Light for charging is To charge the Action Cam, connect it to a computer/laptop or many standard USB AC power adapters using the USB cable included with the package. The charge indicator light (red) will be on. After the is fully Action Cam charged, the charge indicator light will turn off. - Page 11 2. Use of Memory Card 1. Push the Micro-SD card into the card slot until it “clicks”/locks into position. 2. To remove the Micro-SD card, gently press the end of the memory card inward until a click is heard, release pressure and remove. Warning: Do not remove the micro-SD card while data is being recorded or the Action Cam is powered on.
- Page 12 3. Startup/Shutdown Startup: Press and hold the POWER button for 2 seconds. The screen of the display is activated and the camera is turned on. 3.2 Shut down: Press the POWER button and hold, until the Action Cam powers down. 3.3 Auto Screen-off: When the Action Cam is idle for about a minute, the screen will automatically power off to conserve battery power.
-
Page 13: Indicator Light
4. Swithing Function Modes The Action Cam has 4 modes: video recording mode, Vehicle recording mode, photo mode and playback mode. These modes can be switched by touching the icon in the upper left corner of the LCD display (lower right for playback) after startup. - Page 14 6. Video recording mode When the Action Cam is powered up, it will be in video recording mode. Begin recording video by pressing the shutter button or touching the focus brackets on the LCD in the live view state. To stop video recording, just press this shutter button or touch the focus brackets.
-
Page 15: Photo Mode
7. Digital zoom magnification level: up to 4x zoom. 8. Digital zoom-out icon: touch to digitally zoom out on the subject. 9. Playback icon: touch to display the Playback content icons. 10. Playback content icons: these icons will be displayed after touch the Playback icon. Touch the video icon to playback recorded video. - Page 16 7. Digital zoom-in icon: touch to digitally zoom in on the subject. 8. Digital zoom magnification level: up to 4x zoom. 9. Digital zoom-out icon: touch to digitally zoom out on the subject. 10. Playback icon: touch to display the Playback content icons.
-
Page 17: Vehicle Mode
8. Vehicle mode: 1. Mode icon: currently indicating in vehicle mode. 2. Video resolution and speed: Options are FHD (1080p @30fps) / HD (720p @60fps) / HD (720p @30 fps). Touch to adjust to the desired resolution. 3. Recording time: indicating the length of remaining time to be recorded. -
Page 18: Playback Mode
9. Playback mode: 9.1 After powering on the camera touch the Playback icon ( ) in the lower right corner of the LCD display to activate the menu ( ). Click the to switch to the file list mode. Then playback video clips by touching a file name in the list. - Page 19 9.2 Playback video clips: In the playback mode, press to pause. Touch the fast forward icon to forward quickly and touch the fast rewind icon to reverse quickly. Press STOP to exit the playback mode to return to the list options. 9.3 Playback photos: After powering on the camera and enabling the Preview state, touch the Playback icon ( ) in the lower...
- Page 20 9.4 File deletion: After touching the Delete File icon , the screen will appear as shown below: Touch the YES option to delete the current file immediately, or click NO to cancel the deletion operation.
- Page 21 Connecting the camera to a high-definition TV: Connect the camera to a high-definition TV with a HD cable (as shown below , not included). In a few seconds, the playback UI will be displayed on the TV. Use the Action Cam to select the recorded video or photos to playback on the TV.
-
Page 22: Application On The Personal Computer
Application on the personal computer Connect the Action Cam to the PC or laptop using the supplied USB. to a PC The Action Cam is provided with the plug and play function . Connect the Action Cam to the computer with USB line under turning-on state, then it will be switched into the movable hard disk mode. - Page 23 2 Use of the remote control: Using the remote control will help you with video recording, taking photos and shutting down without operating the Action Cam directly. While using the remote control, face the signal transmitter port toward the infrared signal receiver of the Action Cam as shown below. Record videos, take photos or shut down the camera by pressing the corresponding buttons on the remote control.
-
Page 24: Waterproof Case Using Notice
Waterproof Case Using Notice Before closing the waterproof case, keep the housing’s rubber seal clean and free of debris to reduce the risk of a leak. Test the waterproof case by closing the case without inserting the Action Cam. Submerse the case completely in water for about a minute. -
Page 25: Technical Parameters
Technical parameters Image sensor 5M pixels (CMOS) Function modes Video recording, photo, removable disk Camera lens F3.1 f=2.9mm Digital zooming Shutter Electronic shutter LCD display screen 2.4-inch touch screen Image resolution 12M (4000 × 3000), 10M (3648x2736), 8 M (3264x2448), 5M (2560×1920) HD: 1280x720 (60 frames/sec.) HD: 1280x720 (30 frames/sec), FHD: 1920x1080 Video resolution (30 frames/sec) -
Page 26: Standard Packaging
Standard packaging...