Table of Contents
Advertisement
Quick Links
Advertisement
Table of Contents

Related Manuals for VistaQuest VQ-DV7


Summary of Contents for VistaQuest VQ-DV7
- Page 1 User’s Manual...
- Page 2 For customers in North and South America For customers in USA This device complies with Part 15 of the FCC rules. Operation is subject to the following two conditions: For customers in Canada This Class B digital apparatus meets all requirements of the Canadian Interference-Causing Equipment Regulations.
-
Page 3: Table Of Contents
Table of Contents 1. System Requirements 2. Package Contents 3. Name of Parts ------------------------------------------------------------------------------- 4. Display Information 5. Getting Started ------------------------------------------------------------------------------ • Installing DV Batteries • Inserting SD/MMC Card 6. Taking Pictures ------------------------------------------------------------------------------- • Taking a Picture • Taking a Video •... -
Page 4: System Requirements
1. System Requirements • Personal computer, laptop, desktop, or IBM compatible with Pentium 166 MHz minimum, and with an active USB (Universal Serial Bus) port. • Windows 2000 / XP / Vista, CD ROM drive, color monitor, mouse and keyboard. •... -
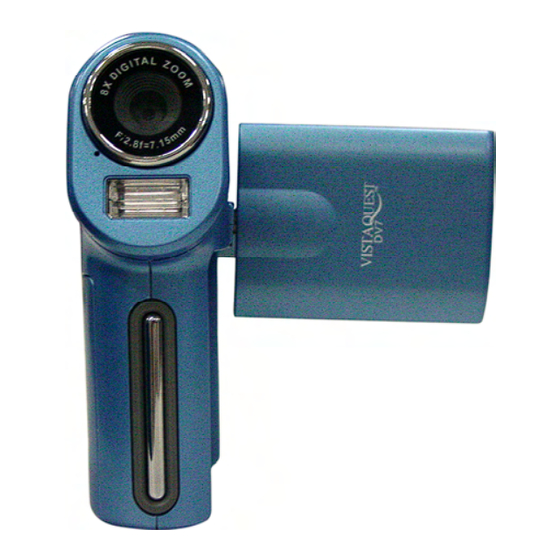
Page 5: Name Of Parts
3. Name of parts 1.FOCUS SWITH Macro Normal Landscape 2.POWER (ON/OFF) BUTTON 3.STRAP EYELET 4.POWER CHARGE LAMP 5.POWER LAMP /INDICATOR LAMP 6. SPEAKER 7.SHUTTER/SNAP BUTTON 8.ZOOM OUT ( - ); ZOOM IN ( + ) 9.ARROW OK BUTTON; LEFT BUTTON; RIGHT BUTTON;... -
Page 6: Display Information
4. Display Information - 3 -... - Page 7 - 4 -...
- Page 8 - 5 -...
-
Page 9: Getting Started
5. Getting Started Please install the DV7 driver before using your DV7 with a PC. The best way to transfer picture to the PC is using the Mass Storage mode to copy all your pictures. • Installing DV Batteries: 1.Slide open the battery compartment cover by pressing the place as shown on the right side. -
Page 10: Taking Pictures
6. Taking Pictures • Taking a Video 1.Turn on the DV by pressing the power button and then start screen appears. 2.The TFT screen will display 3.View the subject through the TFT screen. 4.Press the shutter button to take a video; Press the shutter button again to stop recording. Note: 1.Use to change the video size;... -
Page 11: Listening Music
3.All white balance options will turn back default settings when the DV is turned off. • listening Music 1.Press the mode button twice and you will see the icon 2.Press the ok button to play/pause the music; press zoom in or zoom out button to adjust volume. -
Page 12: Reviewing Pictures And Videos
7. Reviewing videos/photos/voice Press the ok button to enter playback mode and you will see the videos/photos/voice in thumbnail mode. When you use next page)to select the file, the file type will shows on the left-up corner. Just press the ok button to view the file in the whole TFT screen, at this time you can use the ok button again to return to thumbnail mode. -
Page 13: Customizing Your Dv Settings
8. Customizing Your Camera Settings * Capture Status Menu [MENU BUTTON] When user in video/photo mode. Press the Menu button can turn ON/OFF function menu. Use buttons to select items, press the ok button or select the item, press the setting. - Page 14 Auto Daylight Cloudy Tungsten Fluorescent [Photo mode] [ Size] You can change the video size (excluding videos) settings to suit your purpose. 3072x2304 7M (Large) pixels 2592x1944 5M (Large) pixels 2048x1536 3M (Medium) pixels 1600x1200 2M (Small) pixels [Quality] Normal Setting the photo quality to normal. (Small file size) Fine Setting the photo quality to standard.
- Page 15 [Camera mode] Single Taking one photo at one time. Continue Taking three photos at one time. Self – 3S Setting the timer in self-timer mode to 3 seconds. Self – 5S Setting the timer in self-timer mode to 5 seconds. Self –...
- Page 16 [Date Stamp] Printing the date on the photo. Do not print the date on the photo. [Color Mode] Normal Setting the photo color mode to normal. (*) Black&White Setting the photo color mode to black&white. Classic Setting the photo color mode to classic. [Setup] Settings When user in video/photo mode.
- Page 17 [Time] buttons to adjust the time; Use [Video Out] NTSC Setting the TV Output to NTSC. Setting the TV Output to PAL. [Format] To format the flash memory or SD card. [Reset] [Frequency] 50HZ Setting the flicker frequency to 50 Hz. 60HZ Setting the flicker frequency to 60 Hz.
-
Page 18: Playback Status Menu
[Language] ENGLISH Setting the language to English. (*) HollÀNDISCH Setting the language to Dutch. FRANÇAIS Setting the language to French. ITALIANO Setting the language to Italian. ESPA OL Setting the language to Spanish. PORTUGUÊS Setting the language to Portuguese. Setting the language to Korean. Setting the language to Japanese. - Page 19 [Erase] Delete item allow user to erase current or all the stored images from the memory. Erase One to erase current file. Erase All to erase all files. [Slide Show] Cancel to cancel the slide show. 2 SEC To set 2 seconds slide show. 5 SEC To set 5 seconds slide show.
-
Page 20: Installing The Software
9. Installing Your Software • Installing Software 1.Insert installation CD into the CD-ROM drive and the installation CD menu should appear. 2.When you see the following screen, choose “ArcSoft Software Suite” to install the software. 3.Follow the instructions on screen. 4.Installed software will automatically create “VideoImpression 2”... -
Page 21: Downing Images To Your Computer
11. Downloading Images to Your Computer 1.Turn the DV and computer on, then connect the DV to the computer with the included USB cable. 2.“USB Mass Storage drive” appears on the computer screen. For Windows XP / Vista: A dialogue box with options appears as shown on the right side. -
Page 22: Arcsoft Photoimpression
12. ArcSoft PhotoImpression 5 Click “Start” “Program” PhotoImpression 5 or double click PhotoImpression 5 icon on the desktop and you will see a window as the screenshot above. Select the picture source. For example: Click “Folder” computer. Select the file path. You can start editing them. 1.Get Photo –... -
Page 23: Arcsoft Videoimpression
13. ArcSoft VideoImpression 2 Click “Start” “Program” VideoImpression 2 or double click VideoImpression 2 icon on the desktop and you will see a window as the screenshot above. Open a Project – Let you browse the project files in the VideoImpression system folder. - Page 24 Select the item you desire and the picture and videos you need then you will enter the editing interface as below. You can use the six steps in the Function Menu to create video clips and slide shows. 1. Media - Select the videos and images that will comprise your final movie or slide show. 2.
-
Page 25: Appendix
Appendix: Camera Mode Image Sensor Lens Module Focus range MPEG 4 White Balance EV compensation Preview digital zoom Still Image Resolution Image Quality Burst mode Self-timer delay Picture Effects White Balance EV compensation Still image format MP3 play Voice recorder Image Play (playback mode) DPOF (Digital Print Order Format) - Page 26 Delete Playback digital zoom ISO Speed Shutter Speed Color LCD Display Storage system Mass Storage Anti-Flicker Flash mode Flash distance Flash Charging Time Microphone Speaker PC Interface TV out Audio out Power LED Indicator Language Specifications One / All / Select Auto Electronic : 1/8-1/4000 sec TOPPLY 2.0 "...
-
Page 27: Faq
Q1: I have noticed that the pictures I have taken are all very dark. How can I make these pictures lighter? Should I use the flash often? A1: Avoid taking pictures in places with little lighting. When it is cloudy, please use other means to create more light before taking pictures. -
Page 28: Troubleshooting
Problem Source The DV is not The power is not on running The batteries were not inserted properly Batteries are depleted The battery cover is not closed properly The DV is not The DV is in the Playback taking pictures. Function status The flash is charging The SD card or internal... - Page 29 Problem Source Picture is not The lens is dirty clear The pictures are Hands were not steady blurred when taking the picture The picture subject was not in the focus range of the DV The flash The flash mode is set to doesn' t fire The computer DV power is off...
-
Page 30: Safety Precaution
Precautions for The DV Do not shoot while driving or walking, otherwise it may cause traffic accident. Do not trigger the flash in close proximity to human or animal eyes. Expose to the intense light produced by the flash may damage eyesight, especially for young children, please shoot at least one meter (39 inches) away when using the flash. - Page 31 Do not operate this DV with wet hands. This could pose a risk of electronic shock. Under the environment with electrostatic discharge, the DV may malfunction and require the user to reset the DV. Under the environment with electrical fast transient (EFT), the DV may lose function and require user to reset the DV.
Need help?
Do you have a question about the VQ-DV7 and is the answer not in the manual?
Questions and answers