Table of Contents
Advertisement
Quick Links
Advertisement
Table of Contents

Summary of Contents for Virgin Musical Instruments Artesia DP-2
- Page 1 DP-2 Owner s Manual irgin usical nstruments...
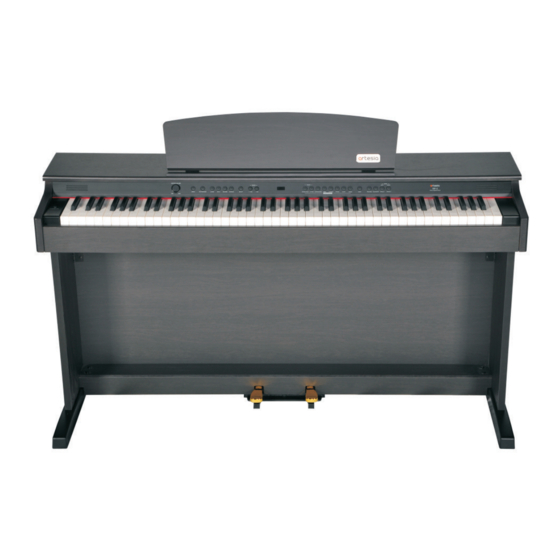
- Page 4 Thank you for choosing the Artesia DP-2 Digital Piano Your digital piano is a high quality digital piano featuring an 88 note hammer action, touch sensitive keyboard and the most advanced PCM tone generation technology that combined will provide you with a rich performing and playing experience.
-
Page 5: Table Of Contents
Panel Control ···· ····································································································· ························································································································· Setup Basic Operation ···································································································· Standby/On ············································································································ Auto Standby ········································································································· Deactivate Auto Standby Function ··································································· Adjusting Volume & Start Playing ····································································· Piano Pedals ··········································································································· Playing Demo Songs ····························································································· [+/YES] & [-/NO] ·································································································· Rear Panel Jack ···································································································· Headphones ···········································································································... -
Page 6: Panel Control
Panel Control... - Page 7 Front Panel 1. STANDBY /ON button 2. VOLUME Data Control knob 3. DEMO button 4. METRONOME button 5. LAYER button 6. SPLIT button 7. REVERB button 8. CHORUS button 9. SETUP button 10. +/YES button 11. -/NO button 12. LED display 13.
-
Page 8: Setup
Setup You are no doubt eager to play your new piano instrument, but first please make sure you have completed the following setup steps: 1) Follow the assembly instructions as outlined on page 28. 2) Once the piano is securely assembled, connect the plug of the foot pedal unit into the pedal jack located on the rear panel. -
Page 9: Basic Operation
Basic Operation Standby/On Press the [STANDBY/ON] button to turn on the power and the LCD display will illuminate. POWER/ STANDBY Auto Standby Your piano will switch off automatically after 30 minutes of inactivity. In this case, press the [STANDBY/ON] button to turn on the power. Deactivate Auto Standby Function To deactivate the Auto Standby Function: hold the first white key and first black key from the left... -
Page 10: Playing Demo Songs
Playing Demo Songs There are 8 demo songs for you to play individually. Here's how to select and play the demo songs. ■ Listen to Demo Songs Press the [DEMO] button to enter Demo Mode. DEMO The display will show “ ,”... -
Page 11: Rear Panel Jack
Rear Panel Jack Headphones This piano is equipped with two sets of standard stereo headphone jacks to accommodate private practice or late-night playing. The internal speaker system is automatically shut off when a pair of headphones is plugged into the Headphone jacks. -
Page 12: Line In
Line In The audio output from other sound system connected to the LINE IN jack on the bottom panel can be mixed with the sound of the unit. This function is convenient when you want to play along with a favorite song. LINE IN Line Out The piano's stereo RCA line output can be used to deliver the output of the... -
Page 13: Voice/Effect
Voice/Effect This piano has 8 instrument voices and a variation of each voice pattern to choose from. See page 25 for a complete list of all voices. Selecting a Voice Select the desired voice by pressing the appropriate VOICE button. TOUCH GRAND PIANO E.PIANO HARPSICHORD VIBES... -
Page 14: Split Button
Split Button Press the [SPLIT] button to activate split mode, your keyboard will be split into two sections that play different voices on the left and right sides of the keyboard. To activate Split mode: press the [SPLIT] button, then when the Split indicator is flashing press a voice select button to select the left voice SPLIT... -
Page 15: Chorus
Chorus Shimmering, broadening effect that is added to your selected instrument voice. Press the [CHORUS] button to turn on or turn off the chorus effect.(Default:00) When the chorus mode is turned on, you can press the [+/YES] and [-/NO] buttons to select chorus type. CHORUS The chorus types in the list below can be selected from the chorus display. -
Page 16: Metronome
Metronome Metronome is a convenient feature for practice. Press the [ METRONOME ] button to turn the metronome off or on. ● Adjusting the Metronome Tempo When the metronome mode is on. Use the + / YES] / [- / NO] button to change the tempo value range from 20 to280 BPM (beats per minute). -
Page 17: Setup
Setup Press the [SETUP] button repeatedly to select the function, see the table below: Function LCD Display Range Default 00-127 Main Voice Volume 00-127 Split Voice Volume 00-127 Layer Voice Volume 00-127 Metronome Voice Volume Reverb Type 00-08 Reverb Level 00-63 Chorus Type 00-08... - Page 18 Main Voice Volume ● In this function you can set the Main Instrument Voice Volume. Press the [SETUP] button repeatedly to select“F01”, then press the [+/Yes] button to confirm the selection, then use the [+/Yes] and[-/No] buttons increase or decrease the value. Range: 00 ~ 127.
- Page 19 Metronome Volume ● In this function you can set the Metronome Volume. Press the [SETUP] button repeatedly to select“F04”, then press the [+/Yes] button to confirm the selection, then use the [+/Yes] and[-/No] buttons increase or decrease the value. Range: 00 ~ 127. Press the [+/Yes] and[-/No] buttons at the same times to r estore the default value...
- Page 20 Chorus Type ● Press the [SETUP] button repeatedly to select F07 , then press the [+/Yes] button to confirm the selection, then use the [+/Yes] and[-/No] buttons to select the desired Chorus Type . Range: 00 Press the [+/Yes] and[-/No] buttons at the same times to r estore the default value : 00...
- Page 21 ● Transpose The Transpose function allows you to change the pitch of the piano in semitone steps, up to a maximum setting of 12 semitones (one octave). Press the [SETUP] button repeatedly to select F10 , then press the [+/Yes] button to confirm the selection, then use the [+/Yes] and[-/No] buttons to adjust the value.
- Page 22 ● EQ Bass This function allows you to set the EQ Bass for the voice. Press the [SETUP] button repeatedly to select F12 , then press the [+/Yes] button to confirm the selection, then use the [+/Yes] and[-/No] buttons to adjust the value.
- Page 23 Reset ● Press the [SETUP] button repeatedly to select F15, then press the [+/Yes] button to confirm and then the piano will reset. TEMPO SETUP + / YES - / NO...
-
Page 24: Song Recording
Song Recording The recording function lets you record your performances using up to two independent tracks. The recorded data will not be lost when you turn off the piano. Start Recording Hold down the [RECORD] button, and then press [TRACK-1] or [TRACK-2] button to enter recording mode, the [RECORD] button indicator will light up, and [TRACK-1] or [TRACK-2] button indicator will flash. -
Page 25: Listen To Your Recording
Listen to Your Recording To play your recorded song from the beginning, simply press the [PLAY/STOP] button.Playback stops when the [PLAY/STOP] button is pressed again. SONG LEFT RIGHT RECORD PLAY/STOP TRACK 1 TRACK 2 Track Clear Hold down the [RECORD] button and then press [PLAY/STOP] button to clear all recorded data. -
Page 26: Learning Function
Learning Function There are 8 songs built into this Piano for your musical enjoyment. These songs have separate left and right-hand parts that can be turned on and off as required so you can practice the corresponding part on the piano. Selecting A Song Turn on the song mode by pressing both the [TRACK 1] and [TRACK 2] buttons simultaneously. -
Page 27: Practicing The Right Hand Of The Selected Song
Practicing The Right Hand Of The Selected Song 1). Press the [RIGHT] button to mute the right hand part of the song. SONG LEFT RIGHT RECORD PLAY/STOP TRACK 1 TRACK 2 2). Press the [PLAY/STOP] button to start the song without the right hand part. SONG LEFT RIGHT... -
Page 28: Midi Function
MIDI Function If you are an advanced MIDI user, this section will help you to access the MIDI controller capabilities of the piano. If you already know that you need this specialized functionality, then this section is for you. However, this information is not necessary in order to enjoy playing the piano. -
Page 29: Appendix
Appendix MIDI Implementation Chart F u n c t i o n T r a n s m i t t e d R e c o g n i z e d R e m a r k s Basic Default 1-16... -
Page 30: Voice List
Voice List Voice Name GRAND PIANO E.PIANO HARPSICHORD VIBES C.ORGAN STRINGS CHOIR A.BASS... -
Page 31: Factory Reset
Factory Reset Press the [SETUP] button r epeatedly to select“F15”, then use the [+/Yes] buttons to confirm and then your piano will be reset. TEMPO SETUP + / YES - / NO 2. Press the [+/YES] and [-/NO] button and hold down the [STANDBY/ON] button to turn on the piano, then your piano will be set back to factory defaults. -
Page 32: Specifications
Specifications Keyboard: Midi: 88 Notes Graded Hammer Action Transmit Settings Local Control Display: Connectors: LED Display MIDI Out, Pedal, Line In, Line Out, Voice: Phones1, Phones2, USB to Host Speaker: Polyphony: YD166-5-6F80C-R Dimensions(W ×D ×H) 53.5 X 15.1 X 30.5 Voice Control: Layer, Split, Touch, Duet, Transpose, Tune... -
Page 33: Assembly Instructions
Assembly Instructions M6X 1 6 M 6X2 0 X4 M 4 X16 X 6 D =4 M 4X1 0 X 4 M 6 X55... - Page 34 FCC STATEMENT 1. This device complies with Part 15 of the FCC Rules. Operation is subject to the following two conditions: (1) This device may not cause harmful interference. (2) This device must accept any interference received, including interference that may cause undesired operation.
- Page 36 Virgin Musical Instrument Company INC P O Box 2908 La Mesa, CA 91943 888-998-9848 E-mail: info@virginmusicalinstruments.com Virginmusicalinstrumentscompany.com...
Need help?
Do you have a question about the Artesia DP-2 and is the answer not in the manual?
Questions and answers