
Related Manuals for Motorola Halo+


Summary of Contents for Motorola Halo+
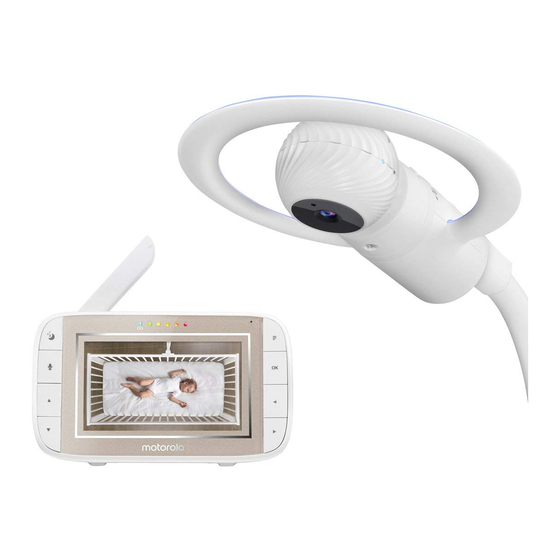
- Page 1 Motorola Halo+ Over-the- Wi-Fi® monitor and sleep companion Model: MBP944CONNECT Model: MBP994CONNECT The features described in this User’s Guide are subject to modifications without prior notice.
- Page 2 Welcome... to your new Motorola Halo+! Inside the Box...
- Page 3 Overview of Crib Mounting Kit and Baby Unit Crib Mounting Kit Baby Unit...
- Page 4 Overview of the Parent Unit UP button + Move Up menu options. MENU < >...
- Page 5 Parent Unit menu icons > < > <...
-
Page 6: Table Of Contents
Table of contents Safety Instructions ................8 2. Getting Started ..................11 3. Using the Motorola Halo+ ..............17 4. Parent Unit Menu Options ..............19 5. Wi-Fi® Internet Viewing ..............26... - Page 7 6. Disposal of the Device (Environment) ........... 41 7. Cleaning ....................42 8. Help ......................43 9. General Information ................51 10. Technical Specifications ..............55...
-
Page 8: Safety Instructions
1. Safety Instructions WARNING Strangulation Hazard: Children have STRANGLED in cords. Keep this cord out of the reach of children (more than 1m (3ft) away). Never use extension cords with AC Adapters. Only use the AC Adapters provided. Stop using the mount when baby begins to push up on hands and knees. - Page 9 WARNING This digital video Baby Monitor is compliant with all relevant standards regarding electromagnetic fields and is, when handled as described in the User's Guide, safe to use. Therefore, always read the instructions in this User's Guide carefully before using the device.
- Page 10 CAUTION The Parent Unit includes a built-in, lithium-ion rechargeable battery pack, which is not a user-accessible item. If you think the battery needs replacing, please contact the helpline. Do not try to replace it yourself. Risk of explosion if battery is replaced by an unapproved battery type.
-
Page 11: Getting Started
2. Getting Started Setting up the Baby Unit with Mount Kit Step 1 Step 2 Step 3... - Page 12 Step 4 Note Step 5 Step 6 Note...
- Page 13 Step 7 Step 8 Note Step 9...
- Page 14 Setting Up Baby Unit For Desk Mode NOTE Only use the enclosed Power Adapter (5V DC / 1500mA).
- Page 15 Parent Unit Power Supply NOTE A rechargeable battery (Lithium ion battery 2000mAh) inside the Parent Unit allows you to move it without losing the link and picture from the Baby Unit. The battery gives up to 5 hours operation for the Parent Unit. We recommend you charge it for at least 16 hours before first use, or when the Parent Unit indicates the battery is low.
- Page 16 Registration (Pairing) < > del/ add/ view/ scan "press PAIR on cam" Note: If a camera is currently paired with the Parent Unit, its camera location (with a * against it) cannot be selected for a new registration. PAIR PAIR NOTE If a particular Baby Unit was registered previously, registering this current Baby Unit again will cancel its old registration.
-
Page 17: Using The Motorola Halo
3. Using the Motorola Halo+ Set Night Light Set Lightshow Projector Night Vision Mode Talk Mode Adjust Parent Unit volume < > Video ON/OFF... - Page 18 Sleep activity monitor Temperature Display (HH °C / °F or LL °C / °F)
-
Page 19: Parent Unit Menu Options
4. Parent Unit Menu Options Set Night Light 4.1.1 Night Light Brightness control 4.1.2 Night Light Color control Note: The Night Light function is not available when the Baby Unit is in Desk mode. Zoom... - Page 20 LCD Display Brightness < > Audio Playlist 4.4.1 Lullaby/Soothing Sounds Playback 4.4.2 Audio Book (English only) Playback...
- Page 21 4.4.3 Stop Playback Press OK to stop playing Alarm < > 6h 4h 2h...
- Page 22 Camera Control 4.6.1 Add (pair) a camera < > del/ add/ view/ scan Note: If a camera is currently paired with the Parent Unit, its camera location (with a * against it) cannot be selected for a new registration PAIR PAIR NOTE A camera can only be registered to one Parent Unit at any one...
- Page 23 4.6.2 View a camera < > del/ add/ view/ scan view Note: Only camera locations with a * can be selected. Quick Method to View Cameras instead of entering into the menu bar. Directly press the O button repeatedly to select the available Camera options from 4.6.3 Delete a camera <...
- Page 24 4.6.4 Scan cameras < > del/ add/ view/ scan scan Quick Method to View Cameras instead of entering into the menu bar. Directly press the O button repeatedly to select the available Camera options from Temperature format < > °C °F Power Saving Mode <...
- Page 25 View multiple cameras on screen < > < > Note: When in multi-screen mode the TALK button operates with the selected camera. If you want to play a lullaby sound through a camera, you must set this before selecting the multi-screen mode.
-
Page 26: Wi-Fi Internet Viewing
® 5. Wi-Fi Internet Viewing Minimum System Requirements Web Portal Android™ System ® ® iPhone /iPad ® High Speed (Wi-Fi ) Internet... - Page 27 Getting Started - Connecting Devices How does it work? Wi-Fi Router MBP944CONNECT Camera Hubble Service 5.2.1 Setup Behavior of the status Indicator LED: Pairing and setting up Flashes slowly in red and blue Unconnected Flashes slowly in blue Connected Lights up in blue Ready for connection Flashes slowly in blue Note...
- Page 28 User Account and Camera Setup on Android™ Devices What you need 5.3.1 Download Hubble for Motorola Monitors App...
- Page 29 5.3.2 Create a new Hubble for Motorola Monitors account SIGNUP Note: If you already have an account, please tap LOGIN to go to the next step.
- Page 30 5.3.3 Add the Camera to your account Halo Camera...
- Page 31 PAIR PAIR PAIR PAIR...
- Page 32 Continue NEXT Search...
- Page 33 Note...
- Page 34 ® ® User Account and Camera Setup on iPhone /iPad What you need 5.4.1 Download Hubble for Motorola Monitors App...
- Page 35 5.4.2 Create a new Hubble for Motorola Monitors account SIGNUP NOTE: LOGIN...
- Page 36 5.4.3 Add the Camera to your account Halo Camera...
- Page 37 PAIR PAIR PAIR PAIR...
- Page 38 Continue NEXT...
- Page 39 NOTE:...
- Page 40 Procedure for Resetting the Camera Note: If your Camera is moved from one router (e.g. home) to another (e.g. office) or you have Camera setup issues, then the Camera must be reset. Please reset the Camera with the following procedures: ON/OFF PAIR PAIR...
-
Page 41: Disposal Of The Device (Environment)
6. Disposal of the Device (Environment) -
Page 42: Cleaning
7. Cleaning Cleaning and care IMPORTANT Always switch off and disconnect the power adapter before cleaning your Digital Video Baby Monitor. -
Page 43: Help
8. Help Display No display Registration If the Baby Unit has lost its link with the Parent Unit Interference Noise interference on your Parent Unit... - Page 44 Noise interference on your device Lost connection If you forgot your password Forgot Password...
- Page 45 ® Troubleshooting for Wi-Fi Internet Viewing Category Problem Solution Description / Error Create Account...
- Page 46 Reload...
- Page 49 Android™: Google Play Store Search "Hubble for Motorola Monitors" iOS Device: Search "Hubble for Motorola Monitors"...
-
Page 51: General Information
9. General Information If your product is not working properly... Consumer Products and Accessories Limited Warranty ("Warranty") What Does this Warranty Cover? - Page 52 Who is covered? What will BINATONE do? What Other Limitations Are There?
- Page 53 One (1) year Ninety (90) days The balance of the original warranty or for ninety (90) days Exclusions Normal Wear and Tear. Batteries. Abuse & Misuse. Use of Non-Motorola branded Products and Accessories. Unauthorised Service or Modification.
- Page 54 Altered Products. Communication Services. How to Obtain Warranty Service or Other Information?
-
Page 55: Technical Specifications
10. Technical Specifications BABY UNIT WARNING Use only with supplied power supply. - Page 56 PARENT UNIT WARNING Use only with provided power supply. WARNING...