Table of Contents
Advertisement
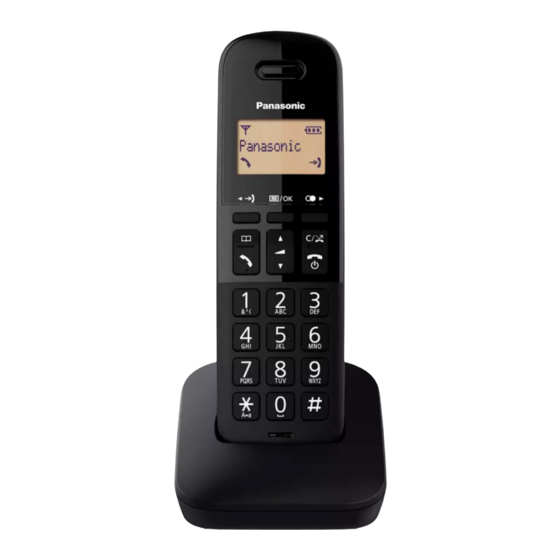
Model shown is KX-TGB610.
Before initial use, see "Getting Started"
on page 10.
Thank you for purchasing a Panasonic product.
Please read these operating instructions before using the unit and save them for
future reference.
Operating Instructions
Digital Cordless Phone
Model No.
KX-TGB610E
KX-TGB612E
KX-TGB613E
Advertisement
Table of Contents

Related Manuals for Panasonic KX-TGB610E


Summary of Contents for Panasonic KX-TGB610E
- Page 1 Model No. KX-TGB610E KX-TGB612E KX-TGB613E Model shown is KX-TGB610. Before initial use, see “Getting Started” on page 10. Thank you for purchasing a Panasonic product. Please read these operating instructions before using the unit and save them for future reference.
-
Page 2: Table Of Contents
Table of Contents Introduction Conditions of guarantee ......33 Model composition ........3 Index Accessory information ........3 Index............34 General information ........4 Graphical symbols for use on equipment and their descriptions ..........5 Important Information For your safety ..........6 Important safety instructions ......7 For best performance ........7 Other information .........8 Specifications ..........9 Getting Started... -
Page 3: Introduction
Handset cover Charger/PNLC1092ZB – See page 3 for replacement battery information. The handset cover comes attached to the handset. Additional/replacement accessories Please contact your nearest Panasonic dealer for sales information. Accessory item Model number/Specifications Rechargeable Battery type: batteries – Nickel metal hydride (Ni-MH) –... -
Page 4: General Information
R In the event of problems, you should contact your equipment supplier in the first instance. Declaration of Conformity: R Panasonic Corporation declares that the radio equipment type (KX-TGB610 series: page 3) is in compliance with Directive 2014/53/EU. The full text of the EU declaration of conformity is available at the following internet address: https://www.ptc.panasonic.eu/compliance-documents... -
Page 5: Graphical Symbols For Use On Equipment And Their Descriptions
Introduction Graphical symbols for use on equipment and their descriptions Symbol Explanation Symbol Explanation Alternating current (A.C.) Class P equipment (equipment in which protection against electric shock relies on Double Insulation or Reinforced Insulation) Direct current (D.C.) “ON” (power) Protective earth “OFF”... -
Page 6: Important Information
Important Information R Do not allow the AC adaptor or telephone line cord to be excessively pulled, bent or For your safety placed under heavy objects. To prevent severe injury and loss of life/ property, read this section carefully before Operating safeguards using the product to ensure proper and safe R Unplug the product from power outlets... -
Page 7: Important Safety Instructions
R Do not open or mutilate the batteries. Base unit location/avoiding noise Released electrolyte from the batteries is The base unit and other compatible Panasonic corrosive and may cause burns or injury to units use radio waves to communicate with the eyes or skin. -
Page 8: Other Information
Important Information appliances, etc. It should not be placed in These symbols (A, B) on the products, rooms where the temperature is less than packaging, and/or accompanying documents 0 °C or greater than 40 °C. Damp mean that used electrical and electronic basements should also be avoided. -
Page 9: Specifications
Important Information Specifications R Standard: DECT (Digital Enhanced Cordless Telecommunications), GAP (Generic Access Profile) R Frequency range: 1.88 GHz to 1.90 GHz R RF transmission power: Approx. 10 mW (average power per channel) 250 mW (max.) R Power source: 100–240 V AC, 50/60 Hz R Rechargeable battery: AAA (R03) Ni-MH battery (1.2 V, 550 mAh) R Power consumption:... -
Page 10: Getting Started
Connect the AC adaptor to the power outlet. n Base unit Note: Connect the AC adaptor to the unit by R Use only the supplied Panasonic AC pressing the plug firmly. adaptor PNLV226E. Fasten the cord by hooking it. Connect the AC adaptor to the power outlet. - Page 11 AC adaptor to your telephone line. Note for battery installation R Use the supplied rechargeable batteries. For replacement, we recommend using the Panasonic rechargeable batteries noted on page 3, 7. Battery charging Note for battery charging Charge for about 7 hours.
-
Page 12: Controls
Getting Started Ringer Ni-MH battery performance (supplied MWN (Phonebook) batteries) N (Talk) Dial keypad Operation Operating time Microphone Receiver In continuous use 18 hours max. Display Not in use (standby) 200 hours max. N (Menu/OK) N (Clear/Call block) Note: R You can return to the previous screen R Actual battery performance depends on or outside call by pressing MC/ usage and ambient environment. -
Page 13: Display Icons
Getting Started Display icons Language setting Handset display items Display language Item Meaning N#110 Within range of the base unit MbN: Select your desired language. a R When flashing: N a M Handset is searching for the base unit. (page 30) The line is in use. -
Page 14: Making/Answering Calls
Making/Answering Calls Note: Making calls R A 3 second pause is inserted each time MDN (Pause) is pressed. Lift the handset and then dial the phone number. R To correct a digit, press MC/ Answering calls Press M N to make the call. Lift the handset and press M N when When you finish talking, press M... - Page 15 Making/Answering Calls To join the conversation, press M N when Recall/flash the other handset is on an outside call. Recall/flash allows you to use the special Note: features of your host PBX such as transferring R To prevent other users from joining your an extension call, or accessing optional conversations with outside callers, turn the telephone services.
-
Page 16: Intercom
Making/Answering Calls Intercom Available for: KX-TGB612/KX-TGB613 Intercom calls can be made between handsets. Note: R When paging the handset, the paged handset beeps for 1 minute. R If you receive an outside call while talking on the intercom, the interrupt tone sounds. To finish intercom, press M N. -
Page 17: Nuisance Call Block
Nuisance call block Blocking unwanted callers: When a call is received, the unit does not ring Nuisance call block while the caller is being identified. If the caller’s phone number matches an entry You can press the MC/ N key in the following in the call block list, the unit emits no sound to situations to disconnect the current call and the caller, and disconnects the call. - Page 18 Nuisance call block MbN: “Withheld” a M MbN: Select the desired setting. a N a M Viewing/editing/erasing call block numbers MbN: “Single No.” or “Range of No.” a M MbN: Select the desired entry. R After viewing, press M N to exit. To edit a number: N a MbN: “Edit”...
-
Page 19: Phonebook
Phonebook To scroll through all entries Phonebook MbN: Select the desired entry. To search by first character You can add 50 names (16 characters max.) Press the dial key (0 to 9, or #) and phone numbers (24 digits max.) to the which contains the character you are phonebook. - Page 20 Phonebook Press M N to dial the number. Note: R When storing a calling card access number and your PIN in the phonebook as one phonebook entry, press MDN (Pause) to add pauses after the number and PIN as necessary (page 14). Helpline Tel.
-
Page 21: Programming
Programming Menu list To access the features, there are 2 methods. n Scrolling through the display menus Press MCN or MDN to select the desired main menu. a M Press MCN or MDN to select the desired item from the next sub-menus. a M Press MCN or MDN to select the desired setting. - Page 22 Programming Main menu: “Caller List” Operation Code Viewing the caller list. #213 Main menu: “InitialSetup” Sub-menu 1 Sub-menu 2 Settings Code – #217 Single No. Call Block (No.: number) Range of No. – Withheld #240 <Off> Display <On> #198 – Clock Disp.
-
Page 23: Alarm
Programming If you program these settings using one of the handsets, you do not need to program the same item using another handset. (KX-TGB612/KX-TGB613) This feature allows the unit to automatically adjust the date and time each time caller information including date and time is received. To turn this feature on, select “Caller ID”. -
Page 24: Caller Id Service
Caller ID Service Phonebook name display Using Caller ID service When caller information is received and it matches a phone number stored in the Important: phonebook, the stored name in the R This unit is Caller ID compatible. To use phonebook is displayed and logged in the Caller ID features, you must subscribe to a caller list. - Page 25 Caller ID Service Erasing caller information MFN ( ) MbN: Select the desired entry. a MbN: “Erase” or “Erase All” a N 2 times Helpline Tel. No.: U.K. 0344 844 3899 Ireland 01289 8333...
-
Page 26: Useful Information
Useful Information Voicemail service Voicemail is an answering service that may be offered by your phone service provider. This service can also record calls when you are unavailable to answer the phone or when your line is busy. Messages are recorded on the phone company system. When you have new messages, is displayed on the handset if message indication service is available. - Page 27 Useful Information Numeric entry table (0-9) Greek character table ( Extended 1 character table ( R The following are used for both uppercase and lowercase: Extended 2 character table ( R The following are used for both uppercase and lowercase: Helpline Tel.
-
Page 28: Error Messages
Useful Information Cyrillic character table ( Error messages Display message Cause/solution Base NoPower R Confirm the base unit’s AC adaptor is connected to the unit and the power outlet correctly. No Link R The handset has lost communication with the base unit. Move closer to the base unit and try again. - Page 29 Useful Information Problem Cause/solution The unit does not work. R Make sure the batteries are installed correctly (page 10). R Fully charge the batteries (page 11). R Check the connections (page 10). R Unplug the base unit’s AC adaptor to reset the unit and turn off the handset.
- Page 30 Useful Information Problem Cause/solution I fully charged the R Clean the battery ends ( ) and the charge contacts with batteries, but a dry cloth and charge again. – still flashes or R It is time to replace the batteries (page 10). –...
- Page 31 Useful Information Liquid damage Problem Cause/solution Liquid or other form of R Disconnect the AC adaptor and telephone line cord from the moisture has entered the base unit. Remove the batteries from the handset and leave to handset/base unit. dry for at least 3 days. After the handset/base unit are completely dry, reconnect the AC adaptor and telephone line cord.
-
Page 32: Wall Mounting
Useful Information Wall mounting Note: R Make sure that the wall and the fixing method are strong enough to support the weight of the unit. R Drive the screws (not supplied) into the wall (recommended heights £ 1.5 m). Screws 25 mm n Charger Caution:... -
Page 33: Conditions Of Guarantee
8. The guarantee period applicable to this product shall be 12 months. Please keep these operating instructions with your receipt. Panasonic U.K. a branch of Panasonic Marketing Europe GmbH Receipt No. Date of purchase Model No. -
Page 34: Index
Index Ringer (Handset): 14 Wall mounting: 32 Index Alarm: 23 Answering calls: 14 Auto talk: 14, 22 Battery: 10, 11 Call share: 15 Call waiting: 15 Call Waiting Caller ID: 15 Caller ID service: 24 Caller list: 24 Caller list edit: 24 Chain dial: 19 Character entry: 26 Conference calls: 15... - Page 35 Notes...
- Page 36 2 Check if telephone line cord is connected. 3 Use rechargeable Ni-MH batteries. (Alkaline/Manganese/Ni-Cd batteries CANNOT be used.) 4 Read troubleshooting page in the Operating Instructions. If you still have any problems, please call the Panasonic DECT Helpline 0344 844 3899 (U.K.) 01289 8333 (Ireland) or contact us through our website: www.panasonic.co.uk...