Table of Contents
Advertisement
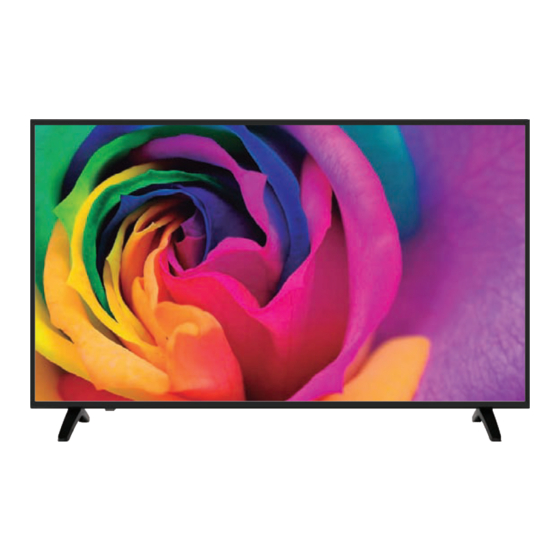
TELEVISOR LED 32"/40"/50"
MANUAL DEL USUARIO .................................................................1
ES
USER MANUAL ............................................................................ 43
EN
MANUEL UTILISATEUR ............................................................... 85
FR
BENUTZERHANDBUCH ..............................................................127
DE
MANUAL DO USUÁRIO ...............................................................169
PT
MANUALE DELL'UTENTE ...........................................................211
ITA
MANUAL DEL USUARIO
Lea atentamente este manual antes del uso y consérvelo
como referencia en el futuro.
www.tdsystems.es
K32DLM7H
K40DLM7F
K50DLM8F
Advertisement
Table of Contents

Related Manuals for TD Systems K32DLM7H


Summary of Contents for TD Systems K32DLM7H
- Page 1 TELEVISOR LED 32”/40“/50” K32DLM7H K40DLM7F K50DLM8F MANUAL DEL USUARIO ..............1 USER MANUAL ................43 MANUEL UTILISATEUR ............... 85 BENUTZERHANDBUCH ..............127 MANUAL DO USUÁRIO ...............169 MANUALE DELL'UTENTE ............211 MANUAL DEL USUARIO Lea atentamente este manual antes del uso y consérvelo como referencia en el futuro.
-
Page 2: Important Instructions
IMPORTANT INSTRUCTIONS SAFETY INSTRUCTIONS The exclamation The lightning flash and CAUTION: TO REDUCE THE RISK point within the arrow head within the triangle is a warning OF ELECTRIC SHOCK. DO NOT triangle is a warning sign alerting you of REMOVE COVER (OR BACK). important sign alerting you of NO USER SERVICEABLE PARTS... -
Page 3: Battery Handling And Usage
- If the product does not operate when used according to the operating instructions. choice for any servicing or repair. CAUTION- TO REDUCE THE RISK OR PERSONAL INJURY OR PRODUCT/PROPERTY DAMAGE: as a television. Do not use this product for any other purpose. periods of direct sunlight. - Page 4 DISPOSAL OF OLD ELECTRICAL APPLIANCES separately in order to optimize the recovery and recycling of the materials they Consumers should contact their local authority or retailer for information concerning the correct disposal of their old appliance. for long periods of time. ACCESSORIES IMPORTANT INSTRUCTIONS……………………………………………………………………43 BATTERY HANDLING AND USAGE……….……………….……………………………………44...
-
Page 5: Table Of Contents
TABLE OF CONTENTS Connecting to External Devices..................53 COAXIAL CONNECTION.....................59 USB CONNECTION......................59 INSERT A CI CARD .......................59 EARPHONE CONNECTION ....................59 FIRST TIME INSTALLATION ....................PICTURE MENU ........................PICTURE MODE......................ASPECT RATIO....................CHANNEL..........................AUTO SEARCH TO SEARCH....................DIGITAL MANUAL SEARCH……..………………….…………………………………….... FEATURE MENU ........................LOCK CHANNEL ......................... -
Page 6: Features
/40“ FEATURES 32”/40”/50” LED Display This unit has a built-in LED display window to provide clear vision and low radiation. With Hotel Lock Support Auto TV Scanning Support Digital Broadcasting Reception Support TV Guide Function Support TELETEXT (Europe) Function Support USB Multimedia Playback Support Multi-languages On Screen Display Support Full Function Remote Control Support HDMI, YPBPR AV, VG , PC AUDIO and CI Input... - Page 7 What is Included/TV Placement Setup Unit and Accessories AUDIO Stand Support TELEVISOR LED 32”/40“/50” K32DLM7H K40DLM7F K50DLM8F TEXT INFO ENTRADA MENU SALIR IMAGEN SONIDO TAMAÑO GUÍA Base Stand DETENER GRABAR INSTRUCTION MANUAL LIST Please carefully read the instructions efore use and eep them appropriately www.tdsystems.es...
-
Page 8: Getting Started
10/20mm; damage will occur to the internal components. Caution: Your new TV is heavy; please consult with a professional wall mount installer to perform this installation. Getting Started Front/Back View K32DLM7H VOL+ VOL- MENÚ ENTRADA Button Functions : Turn on TV/Standby ENTRADA: Audio/Video input source selection MENÚ: Open settings menu... - Page 9 Button Functions POWER LED:llluminates green when the TV is turned on.llluminates red when the TV is in standby mode.The LED will alternate between red and green when the RVR timer programming has started in the standby mode. IR(Infrared Receiver):Receives IR signals from the remote control. Do not put anything near the sensor,as its function may be affected.
- Page 10 HDMI1 PC AUDIO VIDEO AUDIO ANTENA (ARC) 1. VGA 2. PC AUDIO IN device connected to VGA port. 3 & 4 VIDEO AND L&R The colour of connectors are as follows: Yellow Video Audio Right channel...
- Page 11 5. ANTENA 6. HDMI 7. S.SONIDO DIGITAL the tv to external amplifier. The sound from all the sources of the tv will pass through Your amplifier must have the DIGITAL IN coaxial port. 8. YPbPr mini component video signal. The colour of connectors are as follows: Green Y Luma+sync 9.
-
Page 12: Connecting To External Devices
Connecting to External Devices Connecting external devices to your LED TV HDMI1 PC AUDIO VIDEO AUDIO ANTENA (ARC) Audio cable cable HDMI cable VHF/UHF antenna RF Coaxial cable Composite cable cable TV cable receiver/satellite box Component company cable... - Page 13 AUDIO 2. AUDIO Switch the audio channel when DVD or multimedia playing. :Auto Power Off Timer. 4. SUB 5. FAV Show the list of favourite channels. 6. 0-9 Change the channel directly. 7. DTV/RADIO TEXT :Return to the previous channel tuned. INFO ENTRADA Mute or restore the sound.
- Page 14 19. SONIDO AUDIO Reveals hidden information such as the answers to a quiz in TELETEXT mode. 20. GUÍA Show the Electronic Program Guide. Freeze a multi-page changing on Teletext mode. 21. TAMAÑO Press to select the different picture size. 22. TS delay.
- Page 15 Settings Initial Setup NOTE: The picture is for reference only. CONNECT EXTERNAL ANTENNA TO UNIT Install external antenna into antenna jack for best picture. Antenna Outdoor antenna amplifier Indoor antenna amplifier 75 OHM Power plug antenn of antenna plug amplifier...
- Page 16 HDMI CONNECTION Ybpbr(mini) HDMI2 HDMI3 S.SONIDO DIGITAL multimedia signal PC/VGA CONNECTION PC AUDIO VIDEO AUDIO use this product as a monitor.
- Page 17 AV (COMPOSITE VIDEO) CONNECTION PC AUDIO VIDEO AUDIO YPBPR CONNECTION Ybpbr(mini) HDMI2 HDMI3 S.SONIDO DIGITAL use this product as a monitor.
-
Page 18: Coaxial Connection
COAXIAL CONNECTION Ybpbr(mini) HDMI2 HDMI3 S.SONIDO DIGITAL or other audio decoding devices for coaxial audio signal output. USB CONNECTION Auriculares 5Vdc 0.5A USB Memory Device INSERT A CI CARD Ybpbr(mini) Auriculares 5Vdc 0.5A Insert your CI card (Conditional Access Module) to watch special digital channels in your area. -
Page 19: First Time Installation
Select Input Source Press FUENTE to display the input source list. Press ▼/▲ to highlight the input source and press OK to confirm. Press EXIT to hide the On-Screen menu. (The way to set the disappered time: MENÚ-TIME Menu-OSD Timer) First Time Installation Connect to power source and turn on this TV, the first time below installation menu... - Page 20 Setup 3 Press navigation button to select desired menu language. ▼/▲ Press OK button to confirm selection and turn to next page. Setup 4 Press navigation button to select desired auto power off time. ▼/▲ Press OK button to confirm selection and turn to next page. Setup 5 Press navigation button to select desired connection type.
-
Page 21: Picture Menu
Picture MENÚ This chapter will describe the function of Picture in mainmenu. It will open the mainmenu by pressing ▼ the button “MENÚ” on the remote. The focus will move to the sub items in the Picture menu by pressing down the button “... -
Page 22: Aspect Ratio
Colour Temperature Colour temperature adjusting. There are three choices:standard、warm、cool. Aspect Ratio Aspect Ratio – Auto,4:3,16:9,Zoom1,Zoom2 or Panorama is the same as the function when pressing button TAMAÑO on the remote. Noise Reduction Noise reduction of the picture. To reduce noise and improve the appearance of the picture. - Page 23 Sound Menu Sound Menu It will open the mainmenu by pressing down the button “MENÚ” and then press the button “▼” on the remote. The focus will move to the sub items in the Sound menu by pressing down the button “ ” and thenfunctions in the Sound can be set. The Sound menu is shown as follows: Sound Mode Selecting Sound Mode - Standard, Movie,...
- Page 24 SPDIF Switch for SPDIF function Audio Description This is to facilitate for the disabilities whose eyes are not good. TV Channel...
- Page 25 There are following functions in this page: Channel Management: To manage (Delete/Rename/Swap/Lock/Skip) all channels; Favorite Management: To manage (Add/Delete) Favorite channels; Country: To select country. TV connection:To select the DTV signal mode(Air/Cable) Auto Search: To select auto search mode (All/Digital/Analogue); Digital Manual Search: To search digital channel by entering parameters manually(only for Air/Cable);...
-
Page 26: Channel
Channel Channel Management Press ▼/▲ navigation button to select this it em and press OK or navigation button to enter submenu. - Page 27 Press ▼/▲navigation to select preferred program. a)Press RED button on remote control and use number buttons to input the password. Then press RED button to add/remove a delete mark on highlighted program. After that,press OK button to enter a dialogue box. Select OK to delete it; select Cancel to cancel this operatlon.
-
Page 28: Auto Search To Search
Auto Search TO SEARCH Select “Auto Search” item to enter auto search user operation interface as following: Digital Manual Search Select “Digital Manual Search” item to enter air channel manual search in DTV source and the user operation interface as following: Analog Manual Search Select “Analogue Manual Search”... -
Page 29: Feature Menu
Feature Menu Country Select the country. This chapter will describe the function of Feature in mainmenu. Press MENÚ to display the main menu, and press ▼/▲ to select the Feature Menu. Lock The Lock sub page includes three parts:Lock Channel,Parental Lock,Change Pin Code as shown in the following picture. -
Page 30: Lock Channel
Lock Channel This item is used to turn on/off Lock Channel function. Parental Guidance Press OK or navigation button to enter subm enu and press ▼/▲ navigation button to select preferred option. Available options: Off, 3 to 18. Hotel Mode Press OK or navigation tton to enter su menu. - Page 31 Language System language setting, includes OSD Language, Preferred Subtitle, Preferred Audio, Digital Teletext Language, Anglog Teletext Language. Clock It is used to check out the current system time and set time zone/DST. Sleep Timer When your TV is Running,start sleep function by setting Sleep Timer in any case. This function allows you to power off the TV within a period of time.
- Page 32 Sleep Timer This item is used to set the automatic sleep time in standby mode. Available options: Off, 10 Mins, 20 Mins, 30 Mins, 60 Mins, 90 Mins, 120 Mins, 180 Mins, 240 ins. Auto Power Off This item is used to set the Auto Power Off time. Available options: Off, 1 Hour, 2 Hours, 4 Hours.
- Page 33 PVR/Timeshift Press OK or navigation button to enter submenu. Press ▼/▲ navigation button to select preferred inem. Partition Select Press OK or navigation button to enter subm - Press RED button to enter a dialog box and then s format your USB memory device. - Press GREEN button to set default partition.
- Page 34 Timer Press OK or navigation button to enter submenu. Press RED button on remote control to delete highlighted option, Press GREEN button on remote control to delete all. Press BLUE button on remote control to enter Edit page. Press YELLOW button on remote control to enter Add page. Recorder: Turn on/off Recorder.
- Page 35 To change the numerical display of above items, press OK button to enter NOTE: it and hen use navigation button to move the cursor; use number buttons to input your desired value and press OK button to confirm your setting. Setup Menu This chapter will describe the function of Setup in mainmenu.
-
Page 36: Osd Timer
OSD Timer Set up OSD Timer which means how long the menus will exist. The optional periods are 5, 10, 15, 20, 25,30 Seconds. PC Setup It is only available in PC source. - Page 37 Blue Screen It is not available in PC, DTV source or when it is not movie mode in multimedia source. In TV source, if there is no signal and Blue Screen is Off, it will show snow ; if there is no signal and Blue Screen is On, it will show blue screen. Home Mode Set up mode of Home Mode which can control the backlight.
- Page 38 Software Upgrade Software upgrade by bin code. Put The bin code into the root directory of the media and media plugged into the TV ‘s USB interface, press OK key to upgrade. Don’t power off during the upgrading process. The system will restarts when the upgrading process is done.
- Page 39 Music Highlight the “MUSIC” item in multimedia mainmenu by press “ ” key, then press “OK” key enter music page, as follow: Same as "PLAY" key on remote, to start playing file, or resume the paused file. Same as "PAUSE" key on remote, to pause the playing file Same as "STOP"...
- Page 40 Same as "PLAY" key on remote, to start playing file, or resume the paused file. Same as "PAUSE" key on remote, to pause the playing file Same as "STOP" key on remote, to stop the playing file, and return to the file browser interface.
-
Page 41: Usb Format Mode
USB FORMAT MODE File Codec Media Remark Extension Video Audio Xvid,MPEG-4,H.264, .avi WMV9/VC-1 WMA* .mp4 MPEG-2,MPEG-4,H.264 Max Resolution And .mpg MPEG-1,MPEG-2 Frame Rate:1280X720@30fps .mkv MPEG-1/2/4,H.264 MOVIE .mov .dat MPEG-1 .vob MPEG-2 MP1/MP2/MP3,PCM Resolution: RV30,RV40 AAC,COOK 800x600(RV30) .rmvb 1280x720(Rv40) Bit Rate: 32K~320Kbps Channel: Mono/Stereo MUSIC .m4a... -
Page 42: Specifications
SPECIFICATIONS MODEL K32DLM7H K40DLM7F K50DLM8F Panel size 32” Panel LED Brightness Static Contrast PC AUDIO Conectividade I / O HDMI Headphone COAXIAL 732*83*434mm Measurements Stand weight gross weight VESA Weight 959mm two feets Power Source Power Consumption Specifications are subject to change without notice! - Page 43 TEST PARAMETERS FOR TESTING K32DLM8HS K40DLM8FS K50DLM8FS MODEL The measurement method used ℃) 27.5℃ Test voltage in V and FREQUENCY IN HZ Total harmonic distortion(THD) of the electricity supply system Input terminal for the audio and video test signals Test Equipments List Equipment Name Manufacturer Model #...
Need help?
Do you have a question about the K32DLM7H and is the answer not in the manual?
Questions and answers